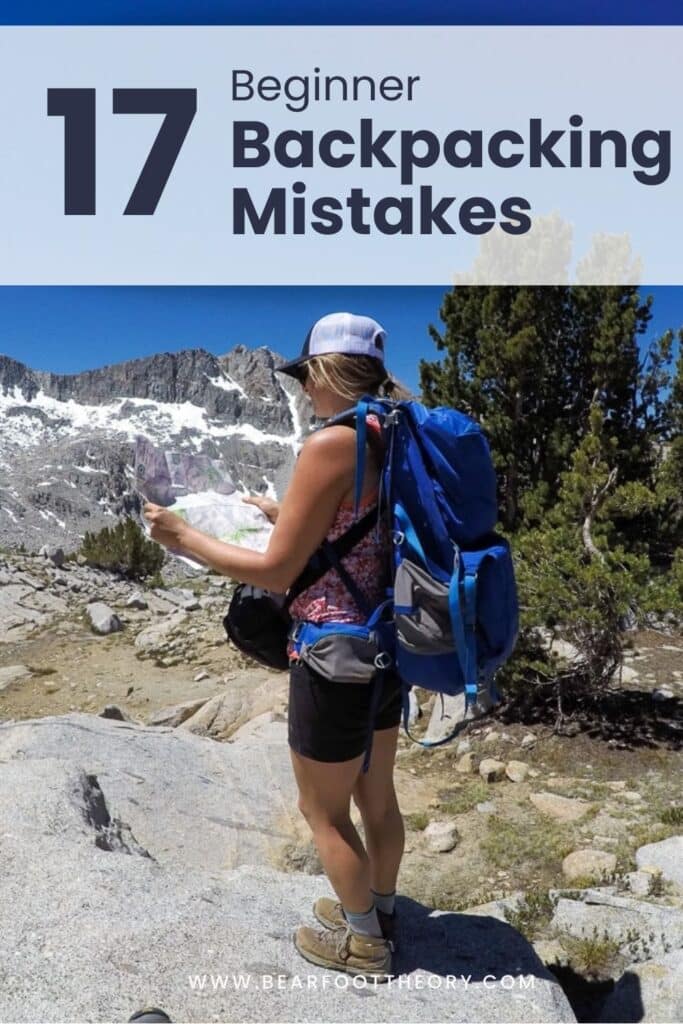
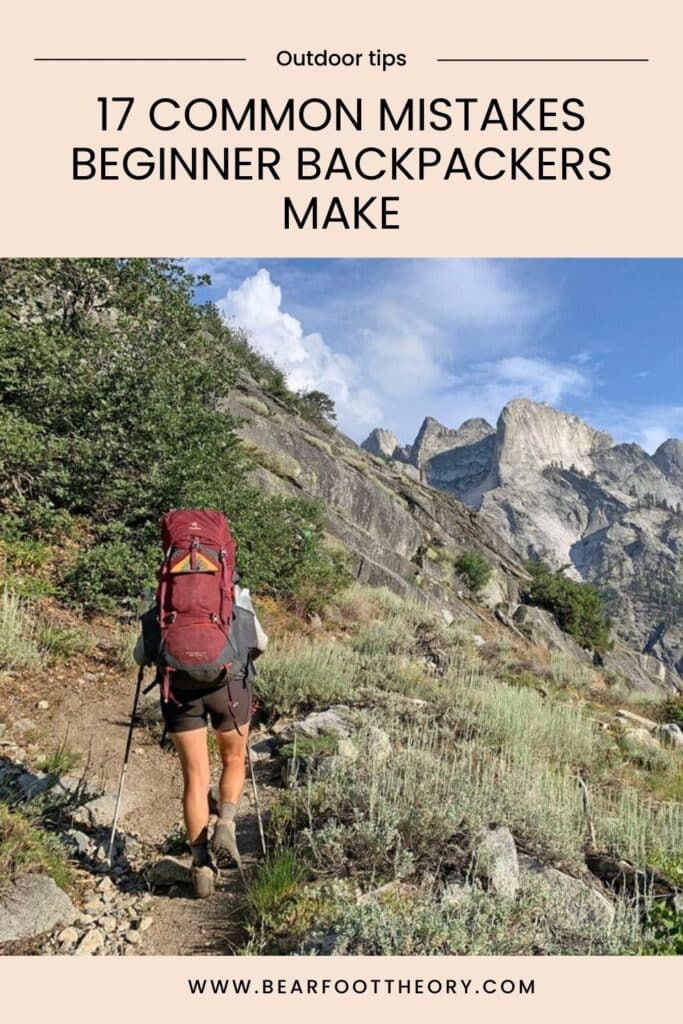
17 Beginner Backpacking Mistakes to Avoid
When I started backpacking 20 years ago, I made so many mistakes – heavy gear, getting lost, overpacking, and more. If you’re new to backpacking, in this post, you’ll learn the 17 most common mistakes that beginner backpackers make and how to avoid them.

Embarking on your first backpacking trip can be an empowering, fun, and adventurous experience, however, the path to becoming a seasoned backpacker is often paved with a few avoidable missteps.
I started backpacking in 2005, and my first few backpacking trips did not go smoothly. My first time was near Mt. Rainier in Washington, and when we got to the trailhead, I realized I forgot my hiking boots. Not wanting to drive all the way home, I ended up hiking in Chacos the entire time. Needless to say, my feet were a bloody mess by the end of the trip. We also didn’t pack enough food, and I was starving the whole time.
Another time in 2007, my friends and I took an early season trip in California’s Emigrant Wilderness. A couple miles in, we found the trail covered in snow, with all of the trail signs being broken in half. Despite not having a map or GPS, we haphazardly decided to carry on. We got completely off track and had no idea where we were. Twenty-four hours later after camping near some unknown lake, we were post-holing our way up a snowy hillside when we randomly stumbled back on the trail.

The mistakes I made on these early backpacking trips taught me a lot of valuable lessons to how to be safe and have a more enjoyable time on future trips, including the 22 nights I spent on the John Muir Trail.
Below I share the most common beginner backpacking mistakes so you can hit the trail feeling confident – and ensure you don’t make the same rookie errors as I did!
This post may contain affiliate links.
1. Overpacking
Overpacking is a common beginner backpacking mistake that can – quite literally – weigh you down and make you miserable. You’ll likely be carrying 20-30+ pounds on your back, which is tough enough without adding unnecessary gear.
Here I list some of the items beginner backpackers bring that you don’t need:
- Physical books: While packing a physical book might be appealing, they add extra weight and bulk. If you want to read, alternatives like e-readers or a book on your smartphone are more efficient.
- Speaker: Leave the speaker at home. The speaker itself adds extra weight and then you also have to carry a battery pack to charge it
- Excessive, full-sized toiletries: Backpacking is an opportunity to skip the deodorant, hair brush, razer, makeup, and other stuff that adds unnecessary weight to your pack. All you really need is travel-sized biodegradable soap or hand sanitizer, bug spray, toothpaste, lip balm, and sunscreen.
- Extra Clothes: When it comes to what to wear backpacking, it’s easy to fall into the trap of packing too many clothes. Two shirts, one pair of shorts, one pair of pants that you can also sleep in, warm layers, rain gear, two pairs of socks, and a few pairs of underwear is enough. You and your clothes will get dirty, but that’s ok!
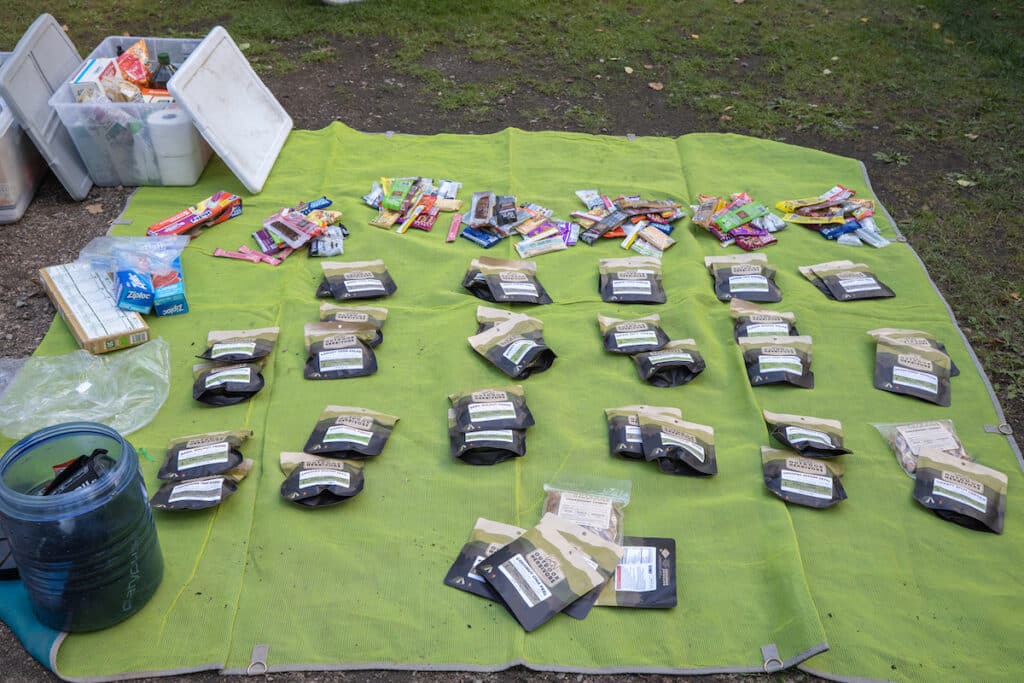
- Excessive food: Food is a huge contributor to the overall weight of your pack. Instead of just filling your bear canister to the brim, lay out your food for each day and see if you’re bringing too much. It’s good to slightly overestimate your needs so you have a little extra, but you also don’t want to finish your trip carrying three extra days of food. You should also choose foods that offer the most calories in the lightest package.
For a list of what you should bring, check out my 3-day backpacking packing checklist.
Packing Tip
When packing for a backpacking trip, lay everything out including all your clothes, gear, and food and see if there’s anything you can leave behind.
Save this post!
Enter your email & I'll send this post to your inbox! You'll also receive my weekly newsletter full of helpful advice for planning your adventures.
2. Wearing Impractical Clothing
Backpacking isn’t the time to worry about what your clothes look like. You should choose function over fashion and wear clothing that’s going to wick sweat and protect you from the sun and other elements.
Here are some tips for choosing the right backpacking clothing:
- Avoid cotton which traps moisture and doesn’t dry out quickly. Look for synthetic fabrics, which dry quickly, or wool, which is naturally moisture-wicking.
- Don’t wear tank tops because bare shoulders + heavy pack = uncomfortable rubbing & chafing. My favorite shirt for backpacking is the Patagonia Capilene Cool Daily Long Sleeve Shirt, so my arms are protected from the sun and I don’t have to worry about sunscreen.
- Pick versatile, quick-drying clothes that can be worn in various combinations or layered as necessary.
- Bring lightweight, packable layers for warmth like an insulated jacket and a lightweight rain jacket. (Check out a review of my new favorite rain jacket here).
- Pack a pair of camp sandals. When you’re at camp, it’s nice to have a lightweight pair of sandals so your feet can air out at the end of the day. Rather than flip flops, choose a sandal that you can wear socks with when it gets cold at night and that you feel comfortable hiking around in.
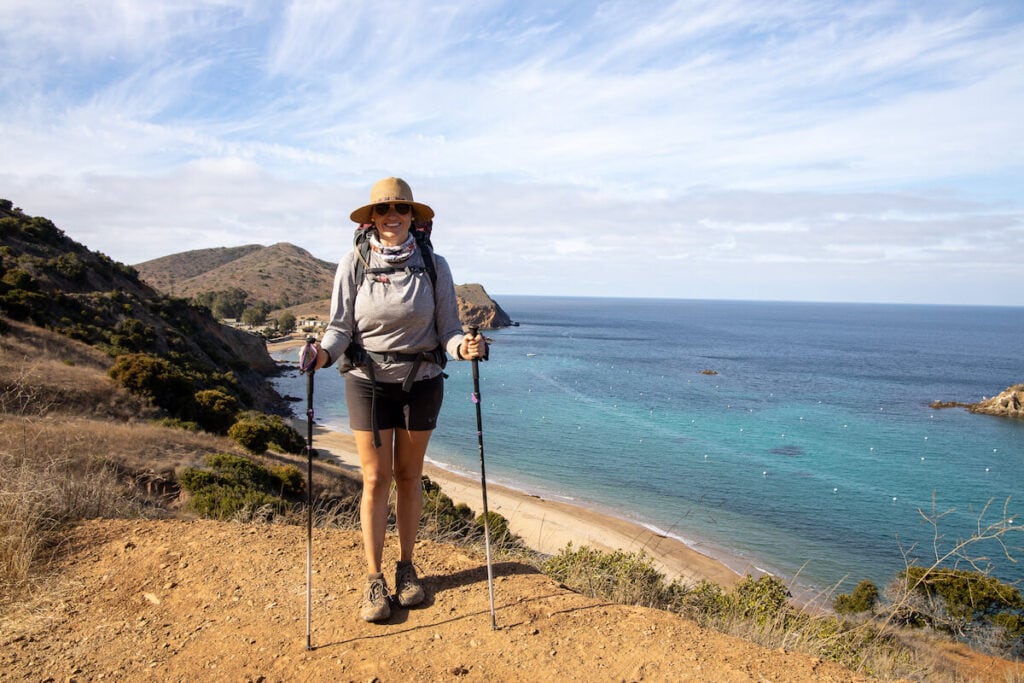
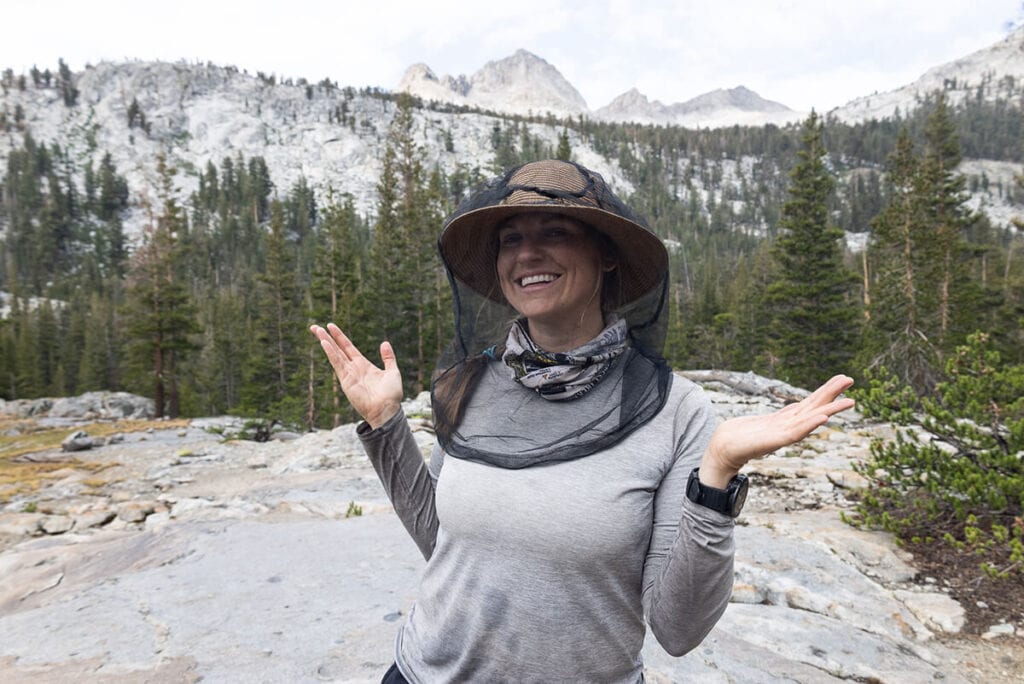
- Pack a hat that provides adequate sun protection. I always like to wear a wide-brimmed hat that shades my entire face and neck. Just make sure that the brim is flexible so it’s not annoying when it’s up against your backpack.
For more tips specifically for women, read my post on What to Wear Hiking.
3. Packing Heavy Car Camping Gear
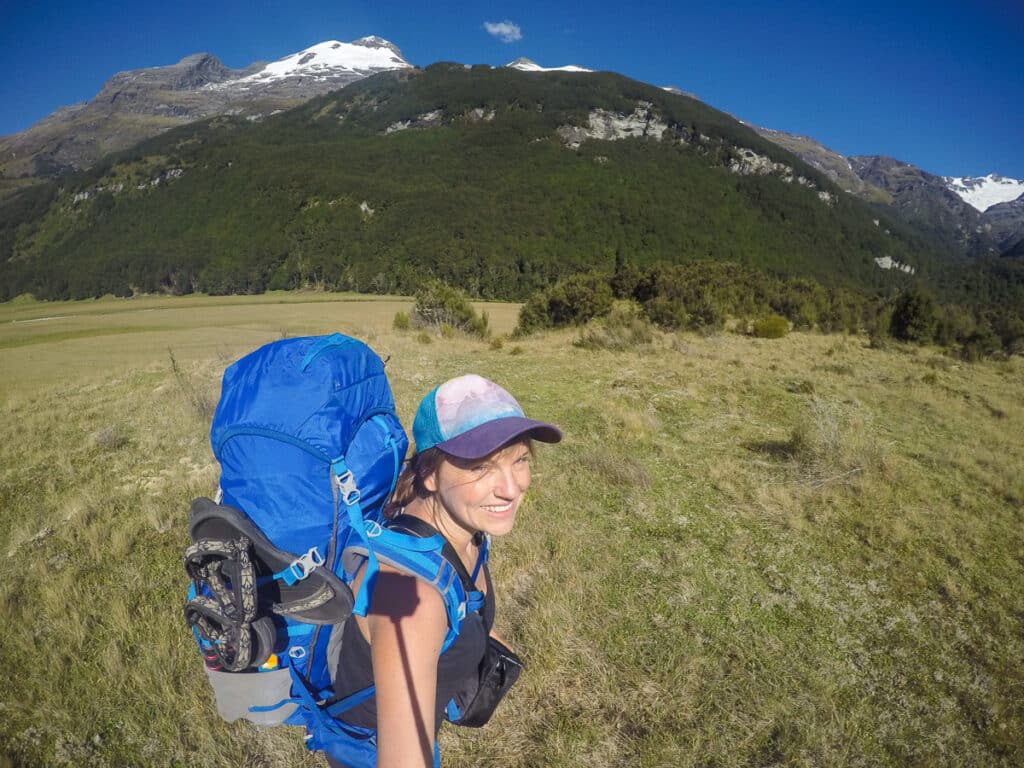
While car camping gear can be luxuriously comfortable, it’s not designed for carrying over long distances. I learned this the hard way on a solo backpacking trip in 2016 in New Zealand where I backpacked with my ultra-heavy car camping cookware – since it was all I had with me. The weight and bulk of these items drastically impacted my ability to move quickly and comfortably on the trail.
Investing in backpacking-specific gear can greatly reduce your pack weight and increase your enjoyment on the trail. Key gear pieces to focus on are your tent, sleeping bag, backpacking pack, sleeping pad, and cookware which contribute the most to your overall weight.
While these big gear items can be pricey, it’s worth investing in quality gear that’s lightweight and durable. High-quality gear will last for years and will make your time on the trail much more pleasant.
Here are my lightweight backpacking gear recommendations. With these suggestions, your big ticket items could weigh as little as 8 lbs 2 oz. If you’re backpacking with another person, you could split some of these items up to reduce your load even further.
- Sleeping Pad: The NEMO Tensor All-Season Ultralight Insulated Sleeping Pad is 3.5 inches thick and comes in four different sizes. The Regular size weighs exactly 1 lb, while the long-wide size is only 1 lb 4 oz. It’s very comfortable compared to a lot other sleeping pads I’ve tried.
- Tent: For a 2-person tent, I like the NEMO Hornet OSMO. This ultralight tent has a package weight of 2 lbs 8 oz. It’s not the roomiest tent, but it’s one of the lighter semi-freestanding tents available that has two doors, which I consider a must when you’re sharing with another person.
- Sleeping Bag: If you’re counting ounces, the Sea to Summit Spark 15-degree sleeping bag has one of the best warmth-to-weight ratios. The regular size weighs 1 lb 10 oz. Alternatively, for $120 less, you can get the REI Magma 15-degree bag where the comparable medium size weighs 2 lbs 3.6 oz.
- Backpacking Pack: While I’m a big fan of Deuter backpacks in terms of comfort, they aren’t the lightest out there. REI Flash Backpacking Packs weigh 1.5-2 pounds less than the Deuter and have a lot of the same features. The women’s 55 liter weighs 2 lbs 11 oz.
- Cookware: Do not bring heavy stainless steel cookware. Instead, the Jetboil Flash includes the stove and the integrated pot and weighs 13.1 oz (not including fuel). It’s perfect if all you want to do is boil water. For a slightly lighter setup, go with the MSR Pocket Rocket and the TOAKS Titanium Pot for a total weight of 6.2 oz.
4. Not Bringing a Pee Rag
This tip is specific to women. When I hiked the John Muir Trail back in 2014, I didn’t know about pee rags. Instead for 22 days, I dripped dry, and even with all of the swimming I did, I felt pretty disgusting.
After that trip I discovered the utility of a pee rag. You can use any quick dry towel to wipe after peeing, but I recommend buying a Kula Cloth, which is the most popular brand of pee rag. It has a “clean” side that you hold on to and a “dirty” side that you wipe with. The dirty side is ultra-absorbent and made with an antimicrobial fabric. After you’re done, you can rinse it off, fold it in half with the button, and clip it to the outside of your pack.
See my full Kula Cloth review for more on why I love the Kula Cloth!
Bringing a Kula Cloth backpacking not only helps women maintain good hygiene in the backcountry, it also reduces the need for toilet paper which you have to pack out. Once you try a pee rag, I promise you’ll never go back.
5. Not Testing Your Gear Before Your Trip
Familiarizing yourself with your backpacking gear before you hit the trail allows you to understand how each piece functions, troubleshoot potential issues, and ensure that everything is in working order.
Imagine reaching your first campsite only to realize you’re unsure how to assemble your tent, or worse, discovering a malfunction in your backpacking stove when you’re ready to prepare a much-needed meal.
These situations can be easily avoided by taking the time to set up your tent in your backyard, testing your stove to make sure it works properly, or practicing using your water filter to ensure you know how it works.
Read More
Backpacking Gear Guides
6. Not Packing Enough Food
On my first backpacking trip, my hiking partner was responsible for planning and packing our food, and he grossly underestimated our appetites. We shared a small portion of pasta for dinner and went to bed with grumbling tummies.
When backpacking, you’re burning a significant amount of calories each day – much more than during your regular day-to-day activities or even day hiking. It’s important to look up the estimated calorie requirements for backpacking, which can range from 2,500 to 4,500 calories per day depending on factors like your weight, the difficulty of the trail, and the weather conditions.
To meet these high caloric needs without adding unnecessary weight to your pack, you should ensure your food is calorie-dense. Pack a variety of snacks (check out our favorite hiking snacks here!) because trust me – you’ll get tired of eating the same protein bar day after day.
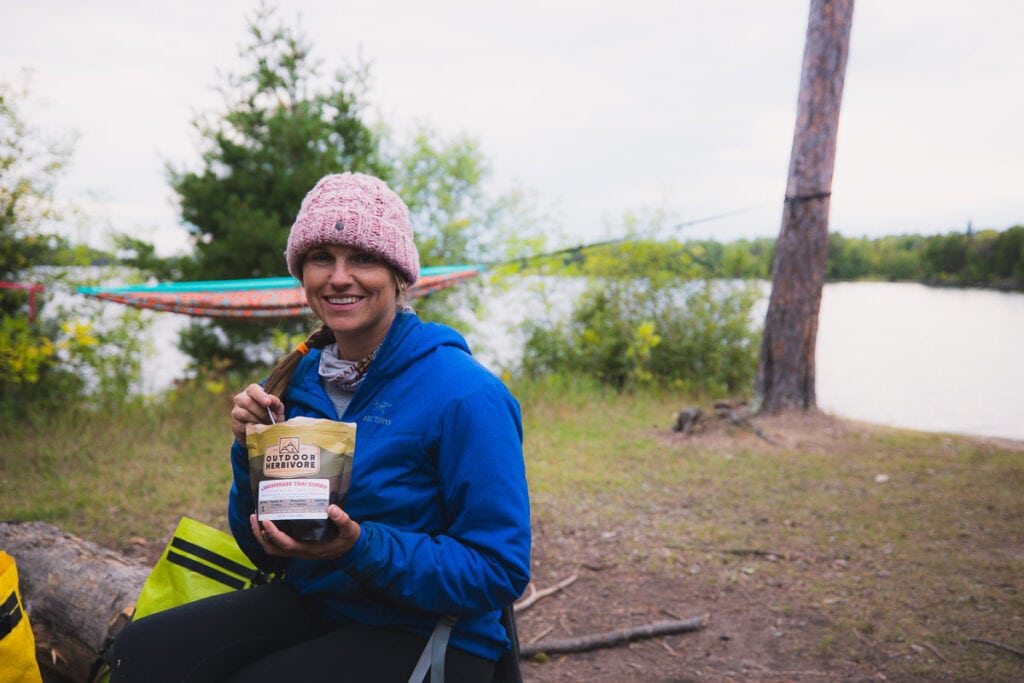
As a beginner backpacker, sticking to pre-made backpacker meals is an easy way to portion out your food – bring one backpacker meal per person per dinner. Don’t be fooled by the “2 person” label found on most backpacker meal packages – I can easily eat a two-person backpacker meal by myself after a long day of hiking.
For recommendations on tasty backpacking food, check out my post on my favorite lightweight, plant-based backpacking meals.
It’s equally important not to overpack food, as this adds extra weight to your pack (food is one of the heaviest things you’ll carry!) and can make your journey more strenuous. Before you leave on your trip, lay out your meals and snacks to get an idea of how much food you’re bringing.
7. Not Checking The Weather Forecast
Failing to check the weather can lead to a totally miserable experience at best, or at worst, a potentially dangerous one. Always check the weather forecast before heading out on the trail, or better yet, call the closest ranger station to get the most up-to-date information.
- If there’s a chance of rain, having a lightweight rain jacket and rain pants is crucial to keep you dry and prevent hypothermia. With the weather being unpredictable, I’d say packing these items is a must for trips in the mountains.
- For sunny, hot climates, sun protection while hiking is key: consider a sun hat (with neck coverage), sunglasses, and sunscreen, along with lightweight, breathable clothing that covers your skin.
- If cold weather is anticipated, packing warm base layers, a synthetic down jacket, and a high-quality, properly-rated sleeping bag will help you maintain body heat.
- In areas where mosquitos are prevalent, bug repellent, a long-sleeved shirt, long pants, and a head net can be invaluable.
It’s important to research your destination thoroughly and understand what weather and conditions you may encounter to ensure you pack appropriately and are prepared for a safe and enjoyable adventure.
Read More
Tips For Backpacking In The Elements
8. Wearing Improper Footwear
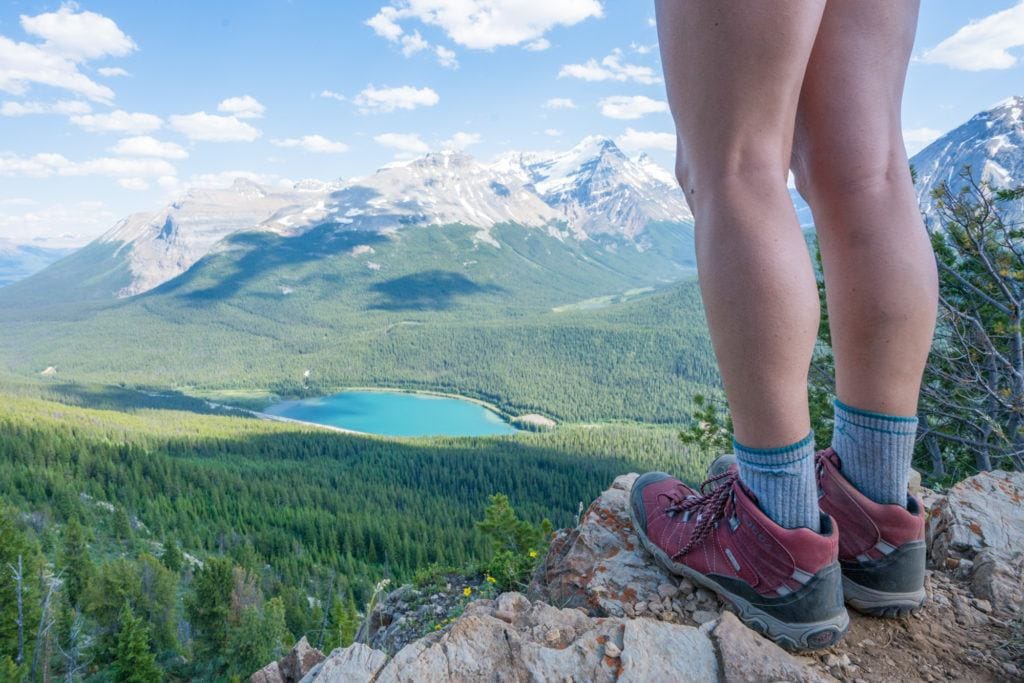
Nothing can cut a trip short faster than painful, blistered feet. Wearing brand-new hiking boots on your trip without breaking them in first can lead to discomfort and blisters, so it’s essential to wear them on some hikes ahead of your trip.
During the break-in period, pay attention to any “hot spots” where your boot may be rubbing as this is where blisters are likely to form. Make sure to wear thick hiking socks (I’m partial to Darn Tough) and bring along some bandaids or moleskin to address these hot spots before they become an issue.
Read next: How To Prevent Blisters While Hiking
Wearing hiking boots or shoes that are too small is also a common beginner hiking mistake. Your feet swell when hiking, especially in warm weather, so you’ll want to make sure you have a little bit of extra space in those boots without having so much space that you slide around. I recommend trying on your hiking boots with the socks you plan to hike in and make sure they don’t feel tight when you walk around.
I have been wearing Oboz hiking boots for years and they have never let me down – my favorite pair for backpacking are the Oboz Bridger B Dry Hiking Boots. They’re comfortable, supportive, and waterproof so I feel confident hiking in any terrain.
You should also opt for wool or synthetic hiking socks, instead of cotton, as they wick away moisture and help prevent blisters.
After a long day of hiking, you’ll want to give your feet a break by switching to lightweight camp shoes like the Teva Trail Universal Sandal (which are also great for water crossings!). But avoid heavy sandals or shoes which add unnecessary weight to your pack.
9. Not Carrying Enough Water
A critical beginner backpacker mistake is not carrying sufficient water. Learning how to prevent dehydration while hiking is essential since dehydration can lead to decreased energy, headaches, or in severe cases, heatstroke.
As a general guideline, I recommend carrying at least 2 liters of water. If you know you’ll be surrounded by water sources (and don’t mind stopping to fill up often), you can get away with less. If you’re backpacking in hot weather or climates where water isn’t easily accessible, plan to carry 3-4 liters.
I carry 2-3 of these lightweight 1L water bottles when backpacking. They’re perfect for carrying extra water for longer, drier stretches of the trail. When you’re not using these water bottles, they easily roll up and take up almost no room in your pack.
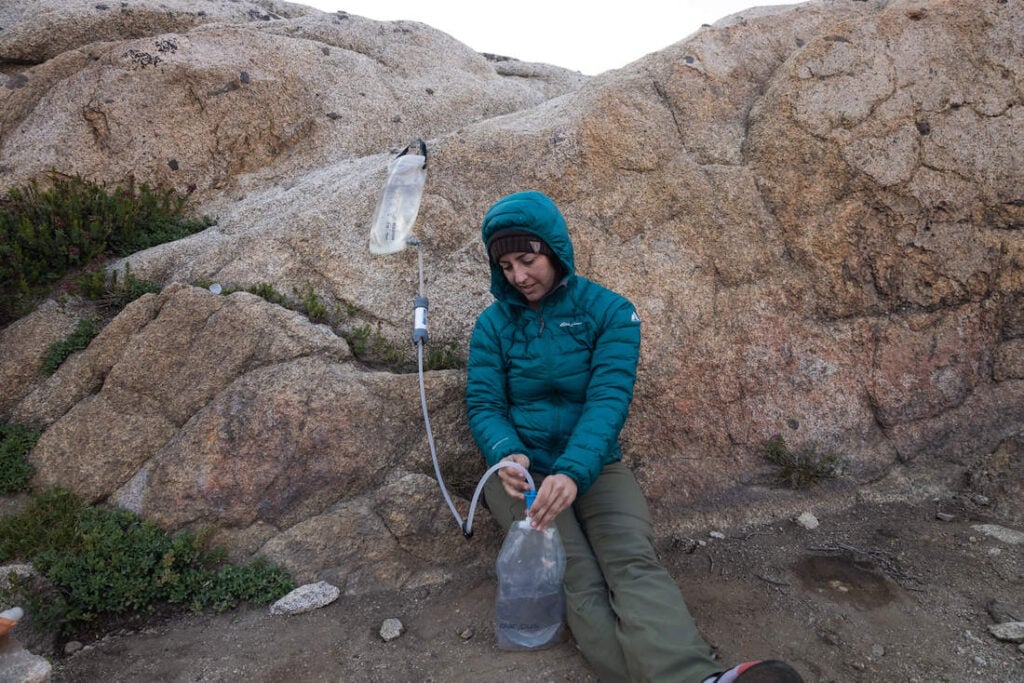
You’ll also need a reliable method of water purification, and when possible, pick campsites that have a water source nearby so you can easily filter water for cooking too.
My favorite water filter is the Platypus GravityWorks Water Filter System because it’s so easy to use. Rather than pumping water and getting a bicep workout, you can sit back and relax, letting gravity do the work.

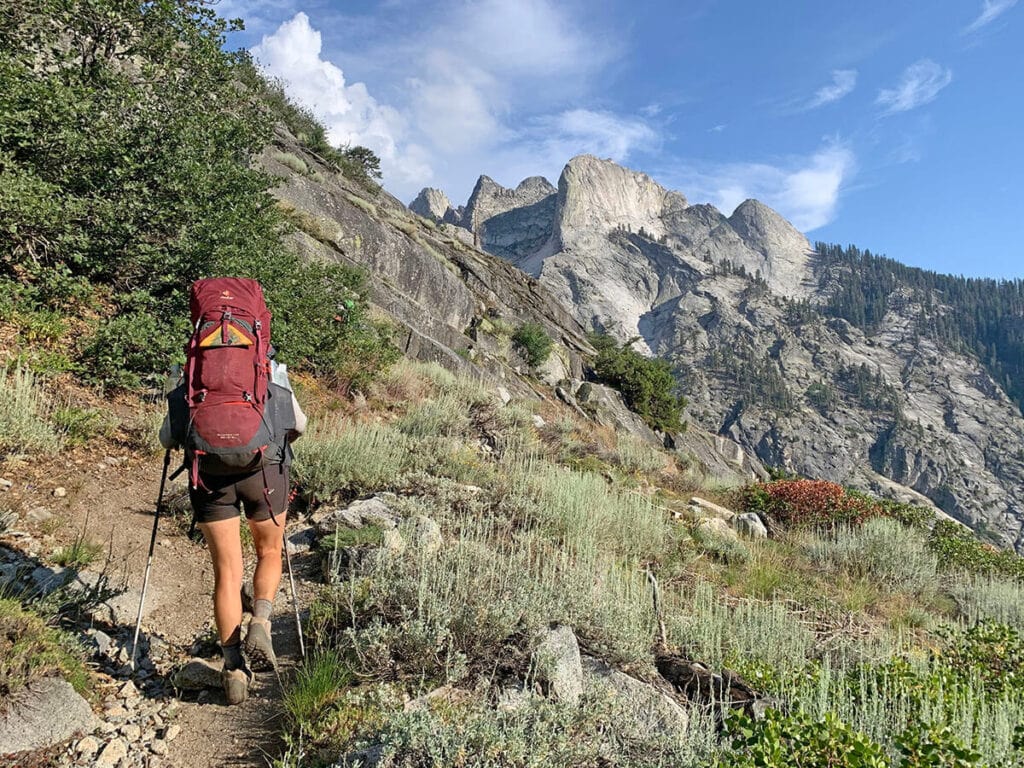
10. Not Using Trekking Poles
Trekking poles might seem unnecessary or even nerdy at first glance, but trekking poles have so many benefits! They reduce the impact on your knees and help evenly distribute your weight, especially during descents, which can help reduce the impact on your joints and prevent injuries.
They also provide stability on the trail when crossing uneven terrain or navigating stream crossings, especially since you’re carrying a heavy load on your back that can easily knock you off balance. Once you try backpacking with trekking poles, you’ll never go back.
If you’re looking for a pair, these Black Diamond Trail Back trekking poles are a great pick – they’re lightweight, pack down small, and are adjustable so they’ll fit nearly any size, plus they’re budget-friendly to boot.
11. Not Doing Enough Research & Planning
Thoroughly understanding the trail you are about to tackle is an essential part of safe and successful backpacking – and one that is often overlooked by beginner backpackers.
First, be sure to look up permit requirements and any regulations for the area – many popular backpacking trails require permits that go on sale up to a year in advance. You’d hate to plan your trip and show up at the trailhead only to realize you need a permit! Learn more about how to plan a backpacking trip here.
Next, be sure to read up on current trail conditions and potential obstacles to ensure a safe backpacking trip. For example, there may still be snow on the trail (as I described in my story earlier) or hazards like fallen trees. To do this, look up trail info on the corresponding state or national park website and look for recent reviews on a hiking app. If there’s any uncertainty, call the local ranger station to get the most up-to-date information on trail status and safety concerns.
12. Not Bringing Maps & Preparing to be Without Service
Knowing how to avoid getting lost is the most important safety tip for any backpacker. You should:
- Always download an offline map of the trail using your favorite hiking app
- Carry a paper map as a backup in case your phone dies (which it will if you are on a multi-day trip). Make sure you understand how to read a topo map too!
- Consider investing in a navigation/communication device like a Garmin InReach Mini, especially if you’re heading into a remote area without cell service.

13. Not Charging Your Electronics
Imagine setting up camp the first night and realizing you forgot to charge your headlamp or swap out the batteries. Or hitting the trail and realizing you didn’t fully charge your phone or GPS device that you plan on using for navigation.
Make sure you charge all of your electronics including your headlamp, phone, GPS device (like the Garmin inReach Mini I use), camera, and any other devices you need to bring along.
If you think you’ll need more power, bring a small portable battery pack like this BioLite Charge Power Bank.
14. Planning an Overambitious Route
Effective trip planning involves being realistic about your hiking abilities. Overestimating how far you can hike each day can lead to exhaustion, injury, or running out of food and water.
It’s better to plan for a low-mileage, beginner-friendly trail for your first backpacking trip and treat it as a “shakedown” trip to get prepared and psyched for harder and longer-mileage trips.
For your first trip, I suggest a one-night trip. It will allow you to gauge your comfort level and abilities and test your gear without over-committing to a longer stint in the wilderness.
It also provides a manageable introduction to carrying your gear, setting up camp, and cooking outdoors without overwhelming you with too many logistics.
Looking for a beginner-friendly trail? Browse all of the backpacking trips I’ve written about for inspiration.
15. Not Researching Wildlife Ahead of Time
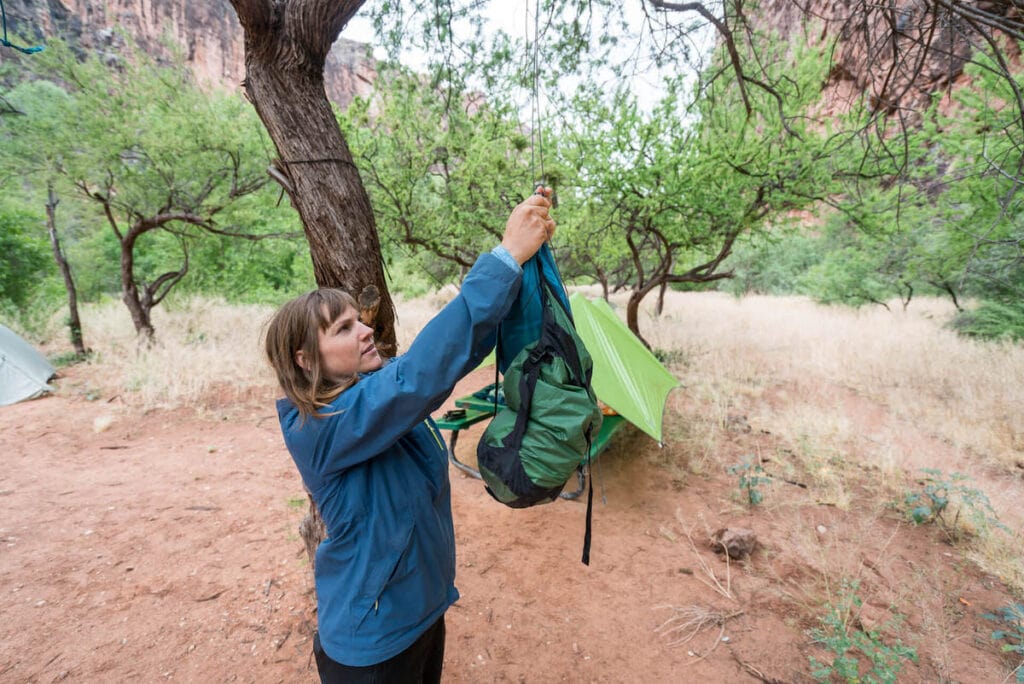
When it comes to backpacking, one common beginner backpacking mistake is failing to be properly bear and wildlife aware. Knowing the local wildlife is not only crucial for your own safety but also for the well-being of the animals you may encounter along the way. There may also be regulations regarding food storage that you need to follow.
In bear country, it’s essential to know the proper techniques for storing food. Most places require you to use a bear canister or bear bags to secure your food.
Here are some other tips for backpacking in bear country:
- Keep a clean camp. Don’t leave food, toiletries, or trash out.
- Thoroughly clean all cooking pots and utensils immediately after use.
- Don’t bury or burn food waste. Bears will dig it up (plus burying is not Leave No Trace friendly)
- Do not cook, eat, or store any food in your tent. Ideally, you should cook 100 feet downwind of where you’re sleeping.
- Treat all toiletries as food and store them in your bear canister. Anything smelly could attract bears!
- Pack all of your trash into your bear canister.
- If there are grizzlies, carry your bear spray with you at all times.
However, bears aren’t the only wildlife you should be aware of. Depending on the region you’re backpacking in, you may encounter other animals like rattlesnakes, marmots, or other critters.
It’s crucial to educate yourself about these local inhabitants and learn how to interact with them safely. For example, at Havasu Falls, a bear canister or hanging your food is now required because squirrels and other critters will chew through your tent and backpack to access food. That actually happened to us the first time we went to Havasu Falls. We put our packs down to go for a swim, only to come back to find a rodent had gotten into our lunch.
16. Not Following Leave No Trace Principles
It’s important for ALL backpackers (not just beginners!) to brush up on the 7 Leave No Trace Principles before heading into the backcountry. These principles are a set of guidelines that encourage sustainable and respectful outdoor practices designed to minimize human impact on the natural environment.
They cover everything from properly pooping outdoors and respecting wildlife to how to choose a campsite. Ignorance or disregard of these principles can lead to littered trails, damaged vegetation, wildlife habituated to human food, and diminished experiences for future backpackers (or can even lead to trails getting shut down).

Not following Leave No Trace can cause significant harm to the beautiful landscapes we all enjoy. Therefore, it is crucial for all backpackers to familiarize themselves with and commit to LNT principles, to ensure that our wild places remain pristine for generations to come.
17. Forgetting Emergency Supplies & Safety Plans
In the midst of the excitement of planning your first backpacking trip, don’t overlook an important component of your planning: packing emergency supplies and creating a safety plan.
When it comes to backpacking, carrying essential emergency supplies can be the difference between a temporary setback and a dangerous situation. A well-stocked first aid kit should have a special place in your backpack that’s easy to access. Minor injuries can escalate quickly in the wilderness, and immediate care can prevent a manageable situation from turning into a complicated one.
You should also have some way to start a fire – either with a lighter or waterproof matches. Fire can serve multiple purposes on the trail, from providing warmth and cooking food to being a source of light and a signal for help.
Even in the era of GPS and smartphone apps, a traditional compass and physical map of your hiking area remain indispensable. They do not rely on battery life or signal strength and could be your lifeline if you get lost. It’s an old-school approach, yes, but one that has saved many seasoned hikers in unpredictable situations.

Finally, you should always leave your backpacking plans with a trusted friend or family member. Sharing details such as your intended route, potential campsites, and estimated return time can make a significant difference in ensuring your safety.
Don’t let these precautions daunt you, though! As you become more familiar with backpacking, you’ll find that these preparations become second nature. They will serve to enhance your experience, not detract from it.
Remember, the goal is to fully immerse yourself in the beauty of the outdoors, secure in the knowledge that you’re prepared for any eventuality. And trust me, with the right prep, you’re in for an unforgettable adventure!
More Backpacking Tips
Save this post to Pinterest

What beginner backpacking mistakes do you have questions about? Are there any others you can think of? Leave us a comment below!
Thanks for the informative, thorough and beautifully illustrated tip list. It was an excellent refresher. I look forward to reading more. Good luck to the entire team.
Thanks for the kind words, Michael!