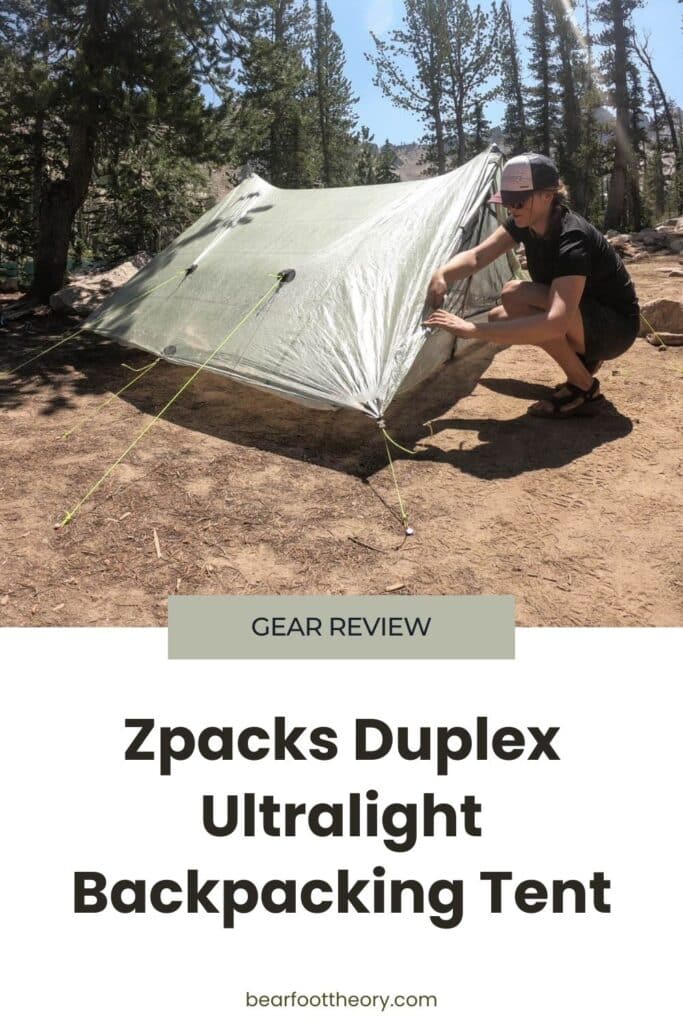
Zpacks Duplex Ultralight Tent Review
The Zpacks tent is my go-to for any backpacking trip where I’m trying to lighten my load. It’s incredibly light, spacious, and easy to set up
If you’re in the market for an ultralight backpacking tent, there’s no doubt you’ve seen the Zpacks Duplex pop up on lists of the best tents for backpacking, often being upheld as the gold standard of ultralight shelters.
And this reputation is no coincidence. The Zpacks Duplex tent has earned its place in the ultralight spotlight by consistently proving itself in the backcountry – it’s also a favorite of PCT and John Muir Trail thru-hikers who really put gear through the wringer.
When I hiked the JMT, my old tent weighed over 5 pounds (!!!) After seeing so many lightweight shelters on my trip, I swore to never carry such a heavy tent again. When I got home she purchased the Zpacks Triplex (3-person version), and it’s become my go-to tent for backpacking.
The Zpacks has since become a favorite of several BFT Contributors. BFT Contributor Courtney Stephenson typically backpacks solo and uses the Duplex (2-person version) for extra space.
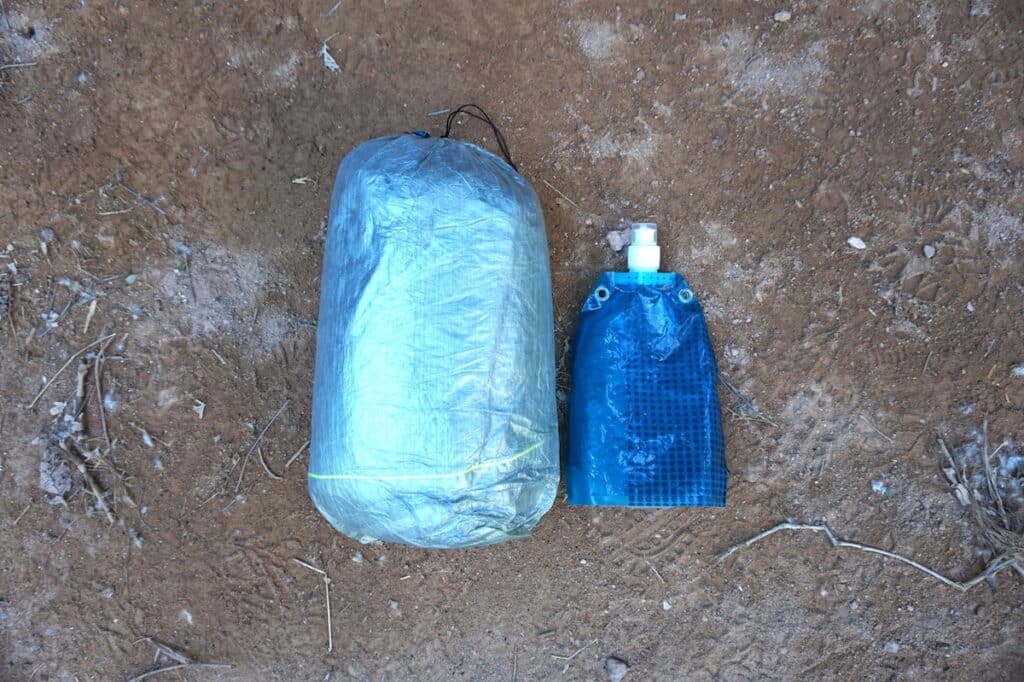
Weighing a mere 18.5 oz (excluding stakes) and packing down to about the size of a 20F sleeping bag, the Duplex is about a third of the weight of freestanding ultralight tents like the Big Agnes Copper Spur or NEMO Hornet.
Plus, if you’re like me and backpack with trekking poles, the Classic Zpacks Tents require no tent poles. Instead you use trekking poles, guy line tension, and stakes to set it up. Not having to carry tent poles frees up significant room and weight in your pack.
Ultralight backpacking gear often comes with the stigma of cramped spaces, delicate fabrics, and minimized comfort. But I’ve the Zpacks Duplex tent defies this stereotype, merging minimal weight with durability and generous space.
In this Zpacks tent review I share more about why I think this could be the ultimate addition to your backpacking gear list — stay tuned as I delve deeper into what makes the Zpacks Duplex a standout in the realm of ultralight backpacking gear.
This post may contain affiliate links.
ZPacks Duplex Tent Overview
Pros
Cons

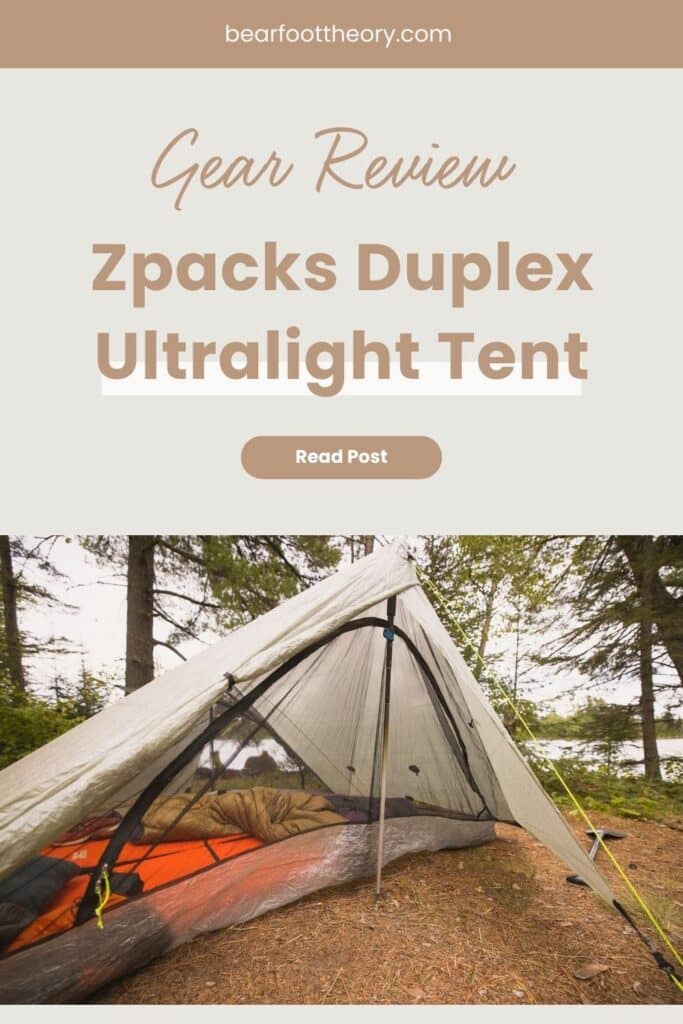
The Zpacks Duplex is a single-walled tent with a streamlined design that is well thought out and fine-tuned. There are two doors and two vestibules – which I consider a must for any backpacking tent, since it makes it easy to share this tent with another person.
A critical component of the Zpacks Duplex tent design is its 8-inch deep bathtub floor. Its primary purpose is to shield you from rainwater splashing into your tent. This comes in handy if you get caught in a rainstorm where water starts to pool up around your tent (more on weather performance below).
Above the bathtub floor is a section of fine mesh netting that connects to the walls of the tent. This serves a dual purpose: insect protection and airflow. The mesh doors also allow you to stargaze from bed at night if you have the vestibule doors rolled back.
As a single-walled tent, condensation can be an issue, which I experienced on an Olympic National Park backpacking trip. However, the design of the tent ensures that any water from condensation runs down the side of the walls and onto the ground rather than inside the tent.
While the Zpacks Duplex might be ultra-lightweight, it doesn’t compromise on providing full protection from the elements or ensuring a great night’s sleep in the backcountry. I’ll go more in-depth about each component of the design below.
Save this post!
Enter your email & I'll send this post to your inbox! You'll also receive my weekly newsletter full of helpful advice for planning your adventures.
Different Zpacks Tent Sizes
Zpacks has three sizes of ultralight shelters available – I typically use the Triplex (3P) which comfortably fits me and my partner Ryan, plus our dogs Charlie and Gumbo.
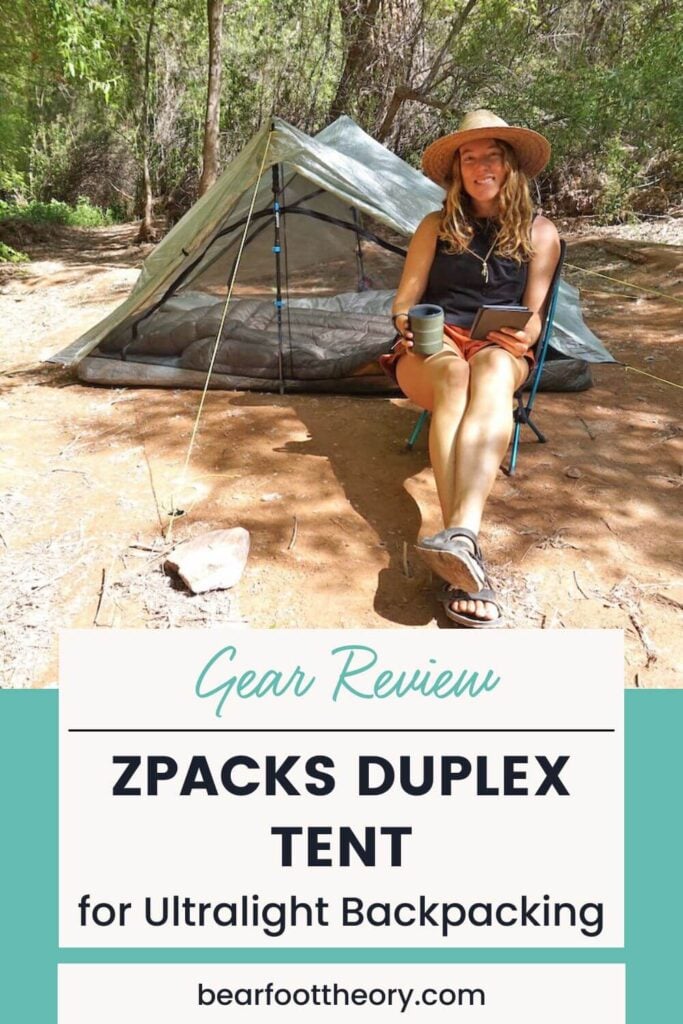
The Duplex (2P) is their most popular size which fits two people comfortably and feels like a palace if you’re sleeping solo.
The tents are exactly the same other than their floor size and weight.
Here’s how the 3 sizes compare:
Zpacks Plex
- Weight: 13.9 oz
- Floor size: 90×28 in.
- Floor area: 20.6 SF
- Trekking poled needed: 1
- Stakes needed: 6
- Price: $599
Zpacks Duplex
- Weight: 18.5 oz
- Floor size: 90×45 in.
- Floor area: 28 SF
- Trekking poles needed: 2
- Stakes needed: 8
- Price: $669
Zpacks Triplex
- Weight: 21.6 oz
- Floor size: 90×60 in.
- Floor area: 37.5 SF
- Trekking poles needed: 2
- Stakes needed: 8-12
- Price: $769
For simplicity, I’ll be referencing the Duplex specs for the rest of this blog post.
Weight and Packed Size
No doubt the standout feature of the Zpacks Duplex is the weight and size – immediately lightening your load vs. your traditional freestanding backpacking tents. This is especially true if you typically hike with trekking poles, since you use your trekking poles in place of traditional tent poles.
When you set your backpack down after a long day on the trail and pick up the Zpacks Duplex, you’ll immediately notice its feather-light weight, a mere 18.5 ounces (without stakes). This tent is designed with a meticulous focus on keeping your pack light without compromising the essential attributes of a reliable shelter.
The Duplex packs down to about the size of a football or a 20F sleeping bag, and it easily shaved 2lbs off my base weight compared to my previous freestanding backpacking tent. The stuff sack is intentionally oversized, which makes it really easy to fit the tent back into the sack when you’re packing up camp.
Materials and Durability
In the world of ultralight gear, durability is often a valid concern, and the Zpacks Duplex doesn’t disappoint in this respect. The Zpacks Duplex tent is constructed almost entirely from Dyneema Composite Fabric (DCF), which is renowned for its high strength-to-weight ratio, making it an excellent choice for ultralight outdoor gear.
This makes the Zpacks tents extremely resilient to the wear and tear of rugged outdoor adventures, from sharp rocks and sticks on the ground to harsh weather conditions and dogs’ nails. In fact, I’ve found the Zpacks to be more durable than popular, yet heavier freestanding tents.
The floor of the tent is extra thick, and I’ve never needed a ground sheet. I’ve used the Zpacks tent in the High Sierra where the terrain is very rocky. With that said, for longevity’s sake, be sure to clear the area of sticks, rocks, and other things that could puncture the tent.

The zippers and mesh in the Duplex are made of durable yet light materials, ensuring that the tent’s weight remains minimal without sacrificing necessary functionality. Now because the mesh is so light, you’ll want to be cautious when zipping and unzipping the tent to prevent any snags.
The material is also naturally waterproof, meaning the Duplex doesn’t require any additional coating or seam tape to shield you from the elements. You also don’t need an additional rain fly! This contributes further to the overall lightweight nature of the tent.
The one downside of Dyneema fabric is that it’s a bit transparent. It’s not completely see through, but you can see the outline of people inside. If I’m set up on a popular trail, this is a minor annoyance if I’m trying to change my clothes, but otherwise, it isn’t a big deal for me.
If this is a concern for you, the Burnt Orange, Dirt, or Spruce Green colors are made of a slightly heavier Dyneema fabric, so they are less see-through and offer more privacy.

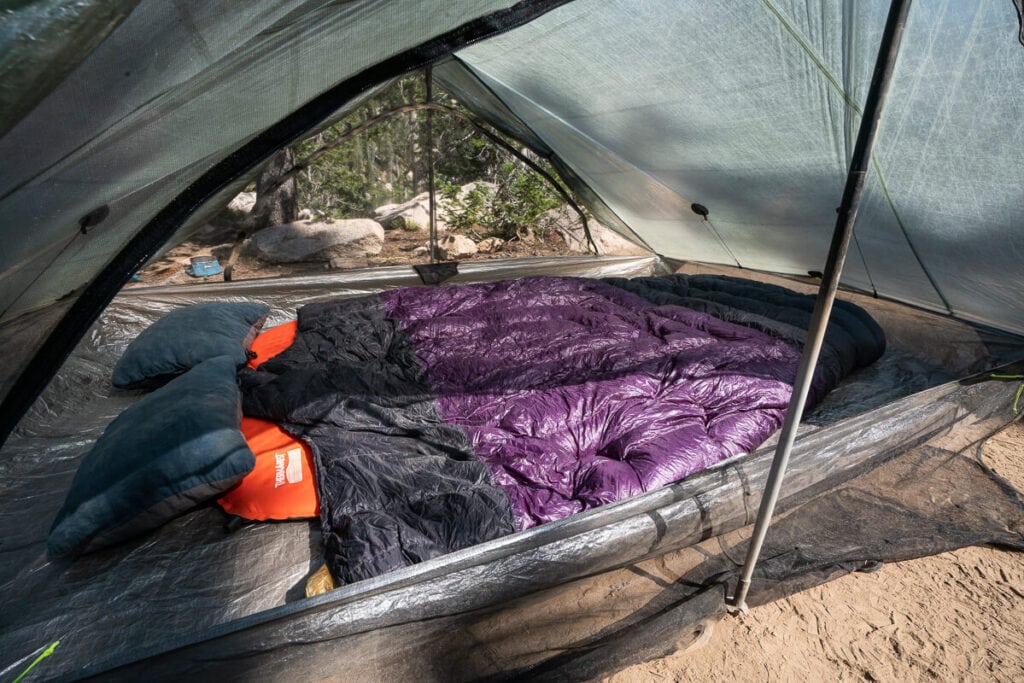
Interior Space and Height
Ultralight tents have gained a reputation for being cramped, often feeling more like 1.5-person shelters rather than a true two-person setup. The Duplex, however, bucks this trend.
The Duplex floor measures 90 x 45 inches and unlike many tents that narrow at the foot box, the Duplex maintains a rectangular shape.

BFT Contributor Courtney and her mom shared the Duplex on their backpacking trip to Havasu Falls. She said, “I was surprised how roomy it felt inside. We easily fit two sleeping pads with plenty of room to spare. It never once felt cramped inside and we had no issues bumping into each other.”
Additionally, the Duplex has a peak height of 48 inches. This added headroom makes a significant difference in overall comfort, enabling you to sit up fully without brushing against the tent ceiling. For reference, my partner Ryan is 6’0″ tall and feels he has plenty of headroom when he’s hanging out in the Zpacks tent.
Note: If you’re extra tall, the Zpacks DupleXL offers 96 x 44 inches of floor space. With an 8 ft. floor length, it’s perfect for hikers up to 7’0″.
Because since the weight of the Duplex is comparable to many single-person free standing tents (or in many cases, weighs even less), I’d recommend it even as a solo backpacker so you can really spread out and also keep your gear inside the tent instead of in the vestibule.

While the Duplex is more roomy than many other 2-person tents, Ryan and I usually prefer to take the Zpack Triplex over the Duplex when we go backpacking. We have two dogs, and the 3-person gives us an additional 15″ across to spread out.
Interior Pockets
There are two interior mesh pockets in the Duplex, one below the middle of each door. One pocket has extra repair tape for the shelter, which I recommend leaving in for emergency repair. I like keeping my phone and headlamp in this pocket so they’re easier to keep track of at night.
The location of the pockets are ok. I’d prefer the pocket to be closer to my head, and I also wish there were 4 total pockets instead of two. One pocket per person is enough for the small essentials, but I find the lack of additional pockets makes it harder to keep things organized in the tent.
Doors
My previous ultralight backpacking tent only had one door at the head of the tent. It was so hard to quietly get in and out of at night, especially if I was sharing the tent with another person. I love that Zpacks Duplex and the Triplex tents have two big mesh doors on each side. Ryan and I each have our own entry and exit, as well as a vestibule for keeping our gear separate.
The zippered door is a half-moon/rainbow shape. While the door completely unzips on both sides, it can feel like a tight squeeze to get in/out of the tent due to the trekking pole in the center. If you’re someone with limited mobility, this could be especially challenging as you have to crouch pretty low to get into the tent.

Also, when fully unzipped, the mesh spills onto the floor of the tent or the outside, where it’s easy for the door to get dirty or accidentally stepped on. I’d say that the mesh is the most delicate part of this (and most other) tents, so you want to be careful not to snag it when going in and out.
Vestibules
The Zpacks Duplex tent comes equipped with two vestibules, located on either side of the tent. The vestibule (storm) doors connect with a metal hook to the main guy line that runs from the peaks of the tent, providing extra storage space while maintaining a streamlined, secure design.
The vestibules are 24″ deep, so they aren’t huge, but they are big enough to store your backpack with gear you aren’t using and your hiking boots inside.
A unique aspect of these vestibules is that each one is split down the middle, effectively creating two storm doors on each side of the Duplex. This design not only enhances accessibility but also contributes to effective ventilation within the tent.

The storms doors don’t have zippers. Instead the two sides hold together with a toggle and a metal hook at the bottom which is secured in place with stakes and guylines. Compared to a zipper, it takes a little getting used to when getting in and out of the tent in the middle of the night, but once you get the hang of it, it’s very easy.

Additionally, the vestibules feature a toggle situated about halfway up the tent walls to secure the doors in the open position and prevent them from flapping in the wind. Either or both doors can be conveniently rolled up and secured to the tent with the toggles, allowing you to enjoy an open-air experience while still being sheltered from the elements. This is awesome for stargazing, afternoon naps, or watching the sun come up in the morning.

To reduce condensation, it’s best to sleep with one or both of the vestibule doors pulled back if the weather allows. This also creates an easier exit if you need to use the bathroom at night.
Prefer vestibules with a zippered opening?
Not a fan of the metal hook closure? In 2023, Zpacks released the Duplex Zip tent with zippered vestibule doors, peak vents, and magnetic door toggles.
Wind and Weather Protection
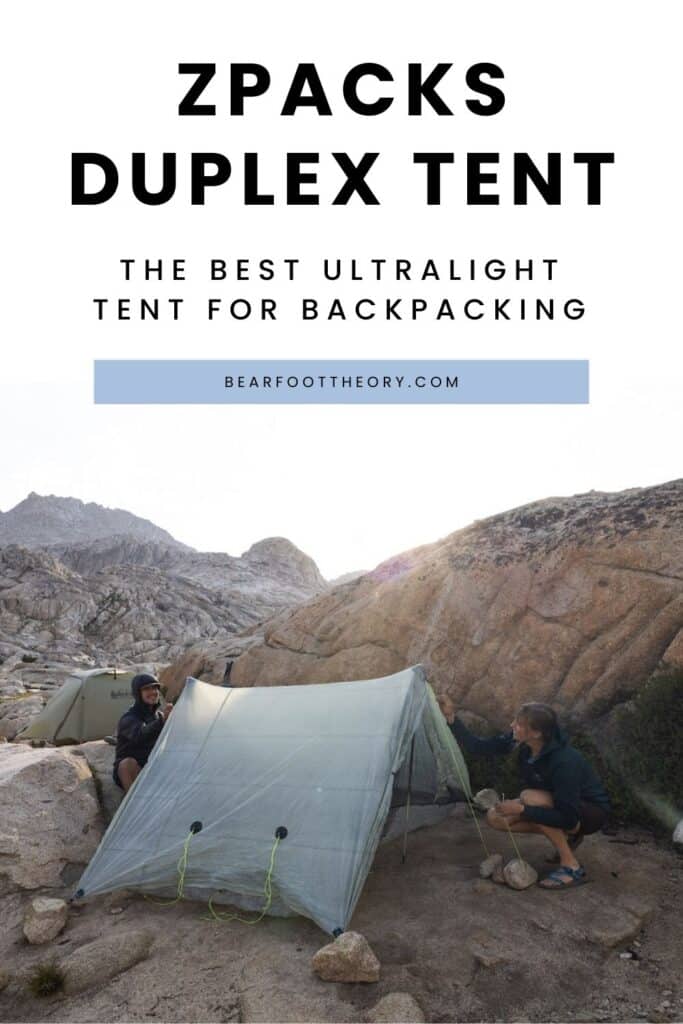
As long as you set it up properly, the Zpacks tent holds up exceptionally well in bad weather. I got caught in a three-day torrential downpour in the Boundary Waters and couldn’t believe that we stayed dry.
I was also shocked at how sturdy the tent was when the wind really started to howl. Because there are no tent poles, there’s nothing that can really buckle under intense wind.

The tent’s design incorporates strategically placed guy-out points and a sturdy ridgeline that enhances its wind resistance, allowing it to hold up remarkably well in windy conditions. In windy conditions, you’ll want to make sure all of your guylines are staked securely into the ground, as that is what creates the structure for the tent.
The Dyneema fabric used in its construction is inherently waterproof, providing excellent protection against rain. The 8-inch deep bathtub floor further ensures that no groundwater seeps into the tent, keeping you dry even in heavy rain.
Additionally, the vestibules on either side of the tent offer an extra layer of protection, shielding the interior from wind and rain, while also providing space to stow gear out of the elements.
In the Boundary Waters, we stored our packs in the vestibules and everything stayed dry there as well.
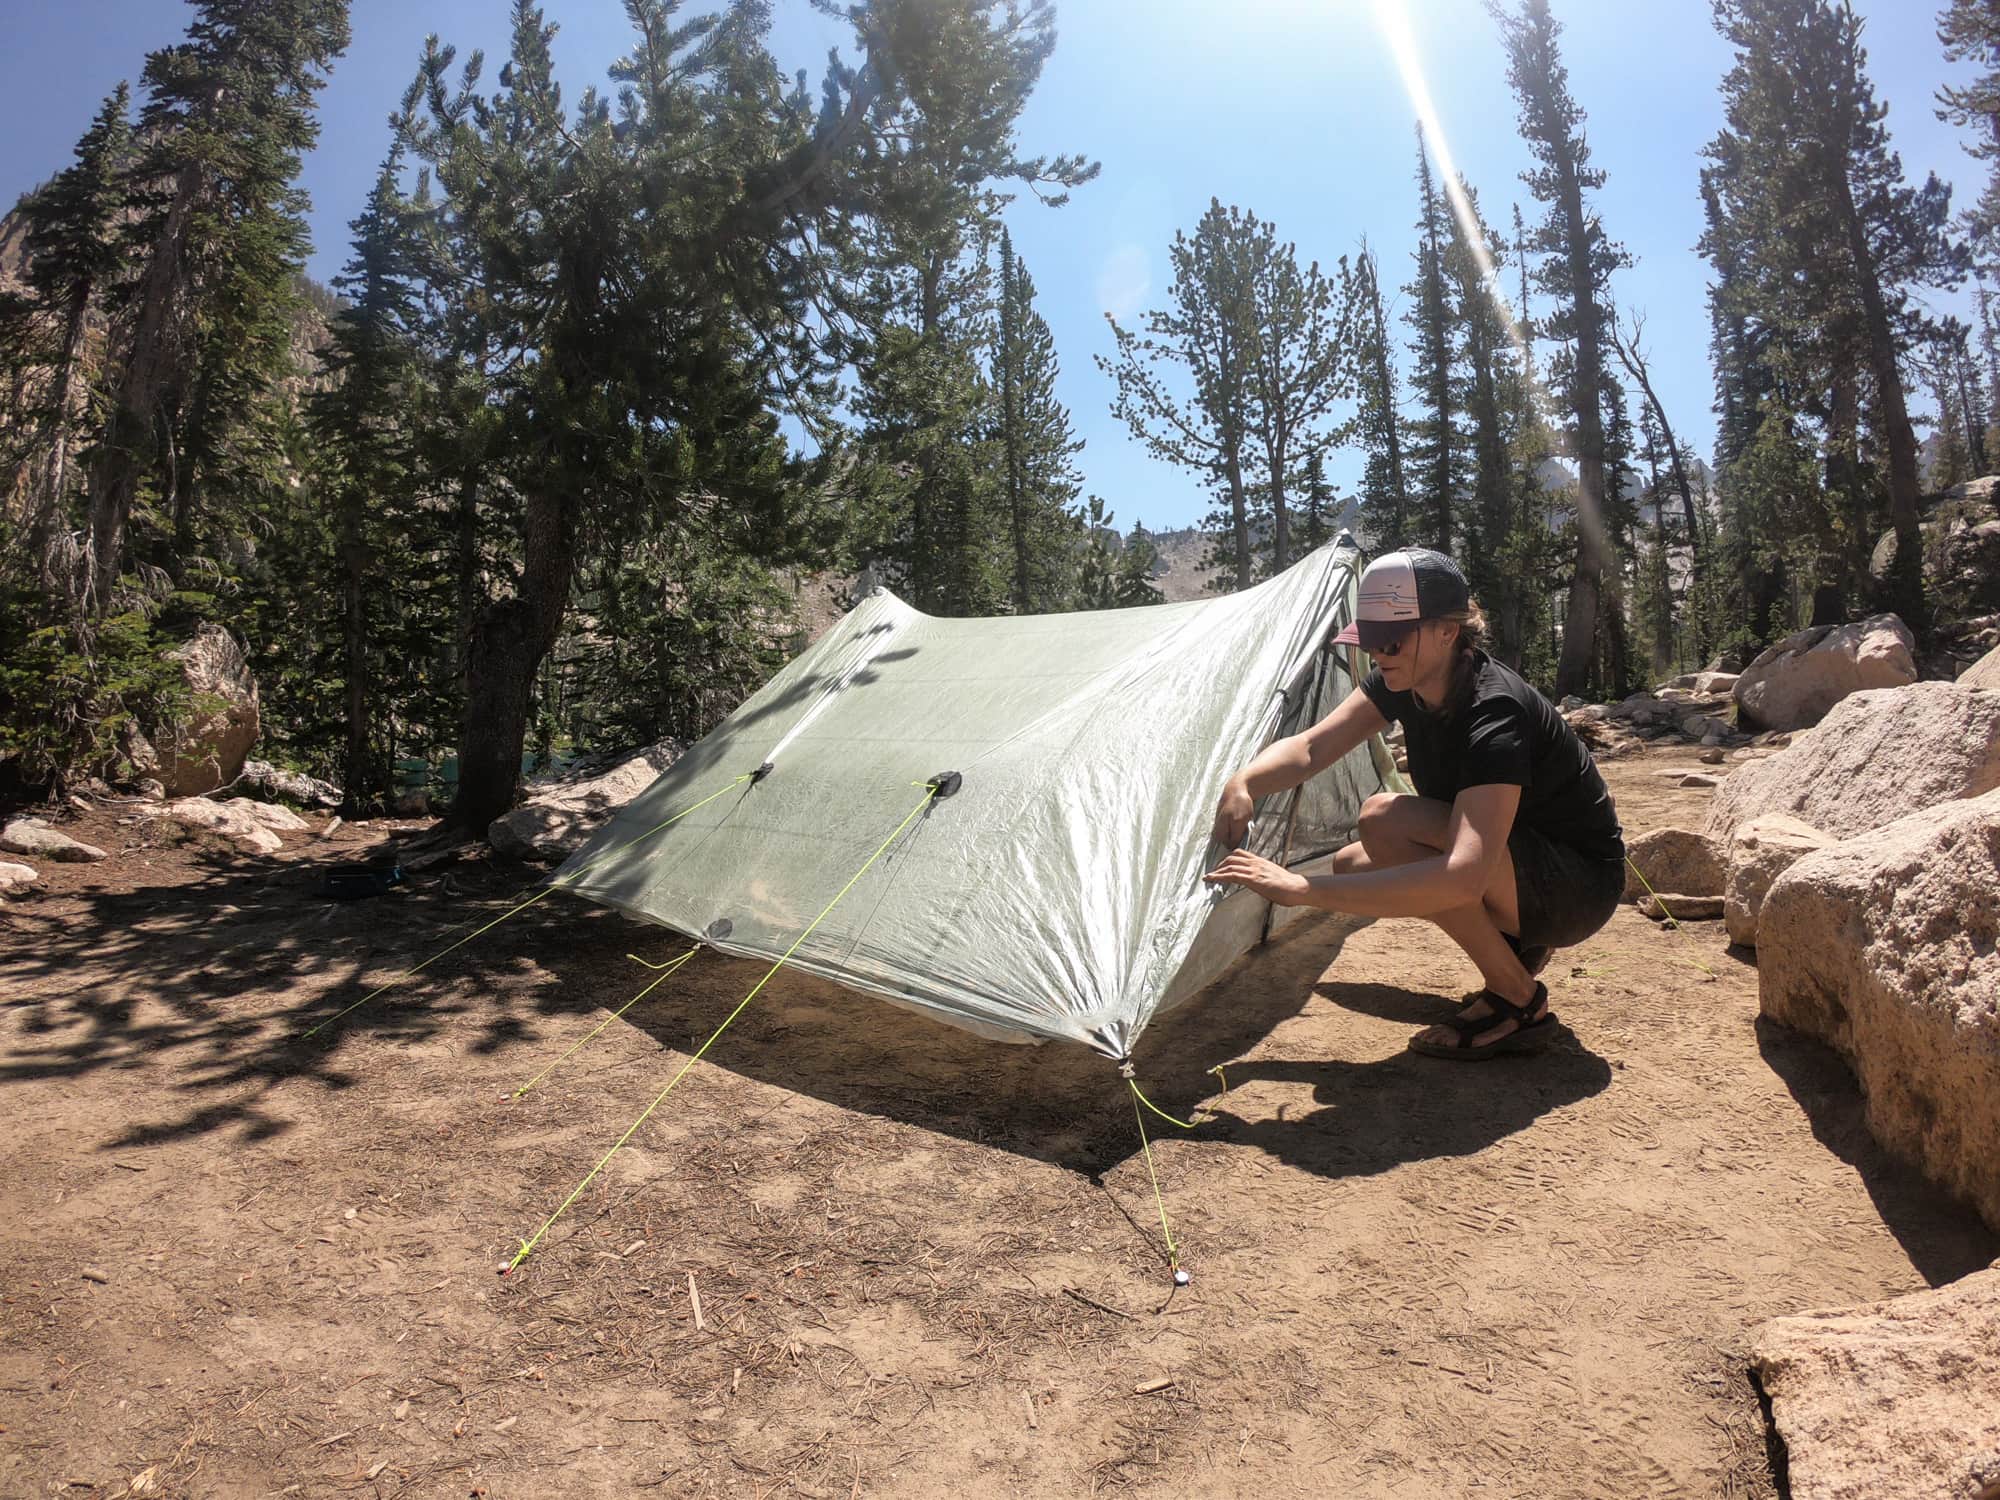
How To Set Up the Zpacks Duplex
Setting up the Zpacks Duplex tent may seem a little daunting at first due to its non-freestanding design, but once you get the hang of it, it’s actually quite straightforward. I highly recommend watching some videos and setting it up at home before you take it out on the trail so you’re familiar with the process.
Here’s step-by-step instructions for setting up your Zpacks tent:
1. Select Your Site
Choose an existing campsite in a flat, debris-free area to set up your tent. This will not only give you a comfortable sleeping surface but also protect the Dyneema fabric from potential damage.
In windy conditions, orient the end of your tent with the overlapping storm doors upwind. The Zpacks labels at the corners indicate the upwind end of the tent.
Note: While I’ve never experienced this, splash-up can occur when camped on hard-packed surfaces during heavy rain. The tall “bathtub” floor and overhanging tent walls help to keep mud and water from splashing up into your tent, but for best results in extra rainy conditions, try to choose a camp spot on leaves or pine needles. For more tips, read my post on how to select a campsite.
2. Lay Out the Tent
Unpack the tent and spread it out on your chosen site. Make sure the doors are zipped closed.
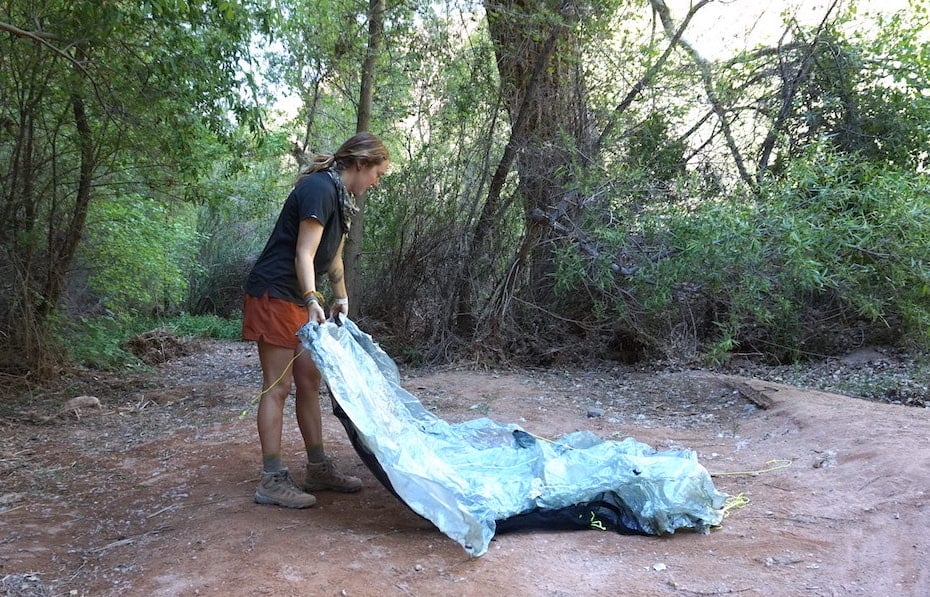
Tip: If it’s windy and you’re setting up the Duplex solo, I recommend putting your backpack in the middle of the tent to hold the tent in place while you stake out the corners.
3. Stake the Corners
Begin by staking out the four corners of the tent at about a 45-degree angle (straight out). It’s important to get the right tension – not too tight, not too loose. The material should be taught, but with enough give to allow for the insertion of the trekking poles.
*In this photo, BFT Contributor Courney could have shortened the guylines, creating less of a tripping hazard and adding extra stability.

4. Insert Trekking Poles
The Duplex uses your trekking poles (any adjustable height trekking poles work) for support instead of traditional tent poles. Adjust your trekking poles to around 48 inches (122 cm) and insert them into the pockets located at the peak of each door. You’ll want to angle the poles so they are bracing against the tension of the tent.

5. Stake Out the Doors
Once the trekking poles are securely in place, pull the doors out and stake them. The tent should now be standing on its own.
If the ground is really rocky, you may not be able to drive the stakes in the ground. This can make setting up the tent tricky. Instead, you have to wrap your guy lines around big rocks or trees to create enough tension to get the tent to stand properly and be stable.

Note: The corners of the tent should be about 6-8 inches (18cm) off the ground when the tent is set up. I know it looks odd, but it’ll be the correct height when you get your stuff set up inside.
6. Adjust As Needed
Walk around the tent to ensure it’s set up correctly. The Dyneema fabric should be tight, and the tent should have a nice, streamlined shape. Adjust and tighten up the guylines as needed to achieve this.

7. Set Up the Vestibules
Lastly, stake out the two vestibules and close or roll up the doors.
Remember, practice makes perfect! Try setting up the Zpacks Duplex at home a few times before you head out on your adventure. This way, you’ll be a pro by the time you need to set it up on the trail.

If you’re intimidated by the idea of a non-freestanding tent, Zpacks also sells a Duplex Freestanding Flex Kit which transform the DUplex into a a freestanding tent with tent poles.
Zpacks Duplex – Final Thoughts
No matter where I’m backpacking the Zpacks is now my tent of choice. It’s very light, impressively sturdy, and more spacious than comparable freestanding tents.
If your’e serious about cutting weight from your backpacking pack, the Zpacks Duplex can reduce your load more than 2 pounds depending on what tent you are currently using. It also frees up space in your pack since the tent is so compact when stored. This might even allow you to use a smaller backpack.
The Duplex has ample room for 2 people, and it doesn’t feel cramped (as long as you don’t have dogs). If you’re a solo backpacker, the Duplex will feel like a palace while still weighing less than the majority of 1P tents!
If you have dogs or you are 2 people who enjoy spreading out more, than the Triplex is the right choice. It only weighs 3 ounces more than the Duplex for a lot of additional space.
You can check out the full lineup of Zpacks tents and accessories on the Zpacks website.
More Backpacking Gear Posts
Save this post to Pinterest
Have any questions about our Zpacks Duplex Review? Leave a comment below!