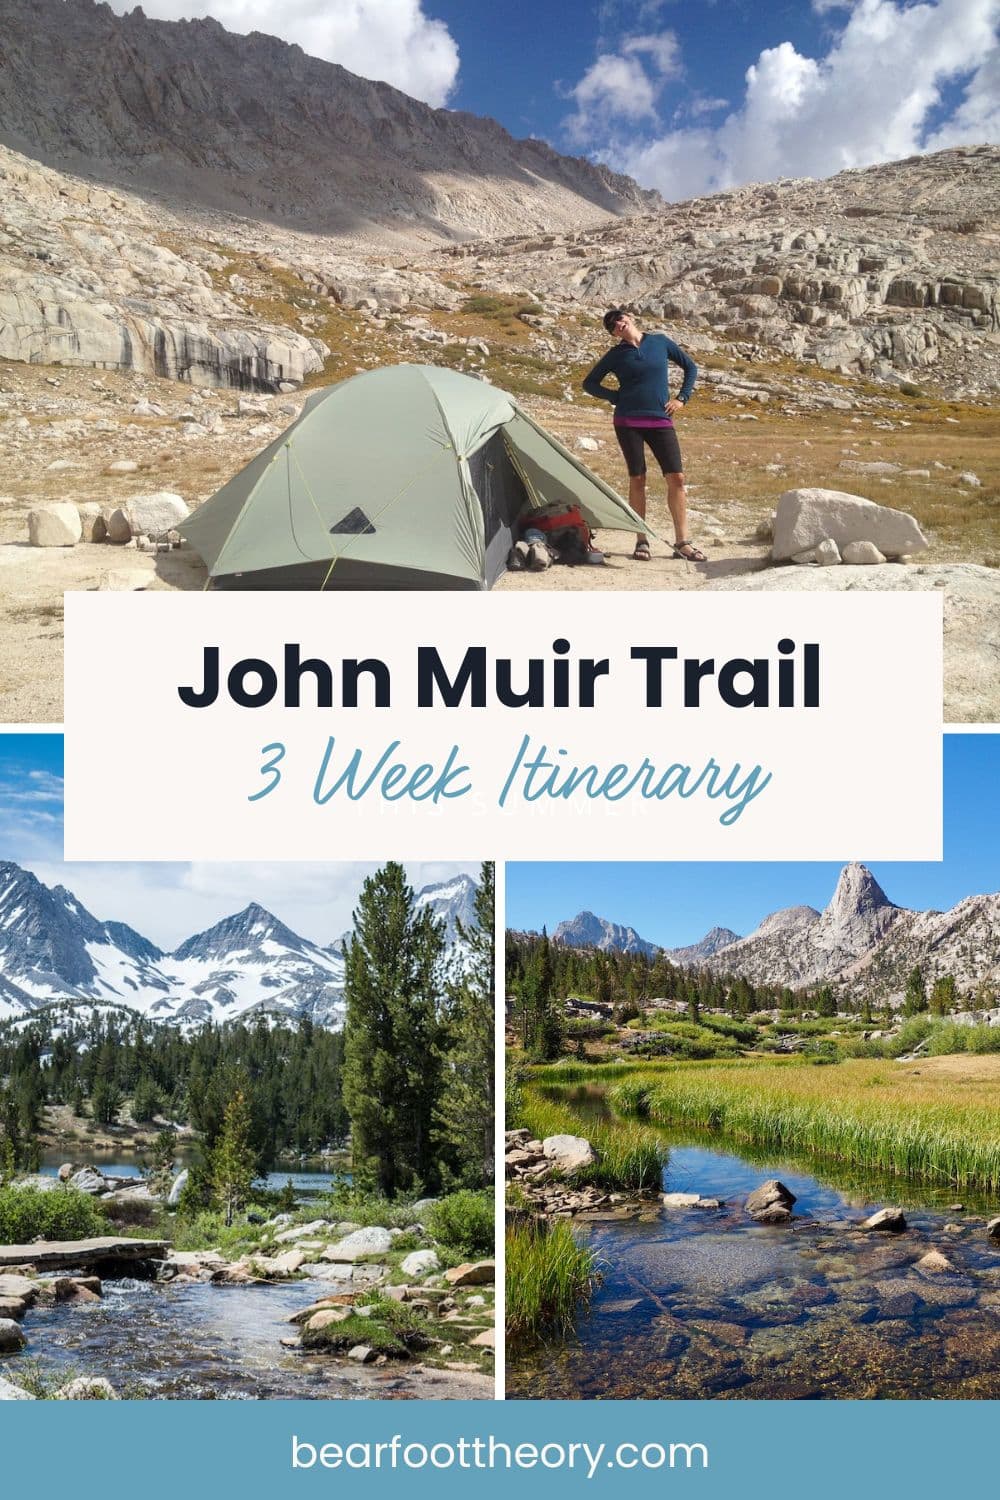
3 Week John Muir Trail Itinerary
Plan your epic John Muir Trail thru-hike using our 3-week JMT itinerary highlighting the best viewpoints, campsites, swimming holes, and more
Hiking the John Muir Trail is a life-changing experience. Once you’ve followed the crest of the Sierra from Yosemite to Mount Whitney (or visa-versa if you’re hiking Northbound), you’ll forever be returning to those memories of hiking across one of the most scenic mountain ranges on Earth.
I hiked the JMT Southbound back in 2014 over 22 days and kept a day-by-day log of my journey. Below, I share my 3-week JMT itinerary, broken up into sections by resupply points, to highlight some of my favorite viewpoints, campsites, swimming holes, and lunch spots.
In 2023, BFT contributor Mary of The Blonde Coyote added some additional tips and insight from her 2020 JMT Northbound thru-hike. We hope these first-hand accounts give you a glimpse of what life on the JMT is like – happy trails!
This post may contain affiliate links.
Section 1: Yosemite National Park to Red’s Meadow
Day 1 – Yosemite Valley (Mile 0) to Little Yosemite Valley Backpackers Camp (Mile 4.8)
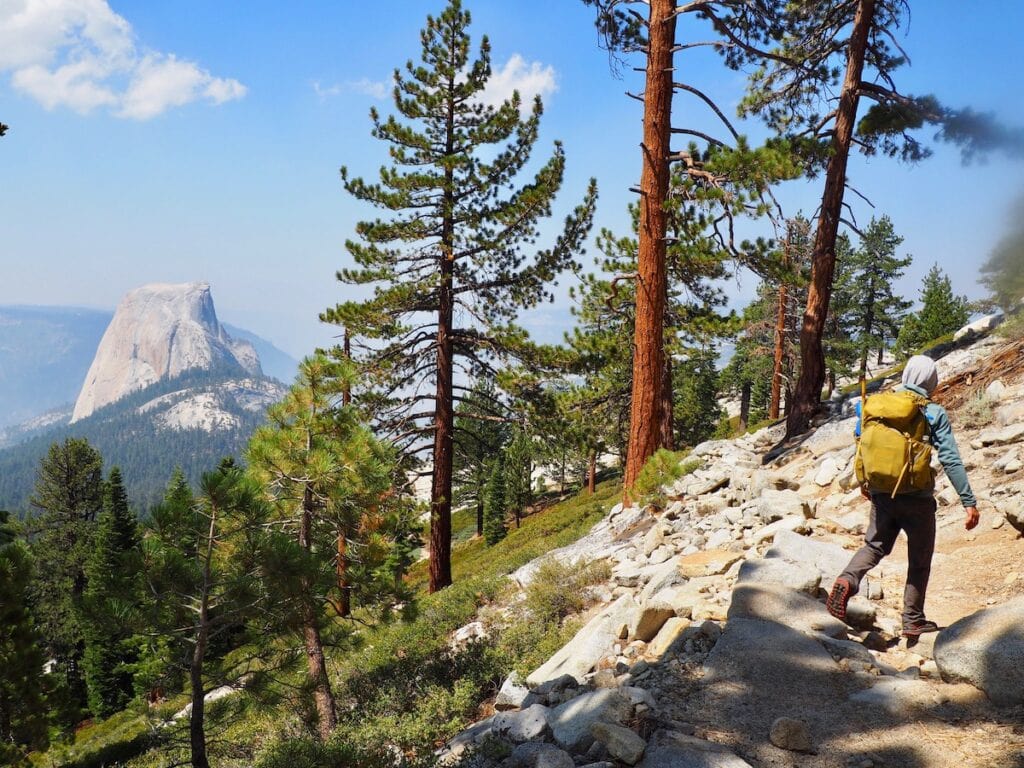
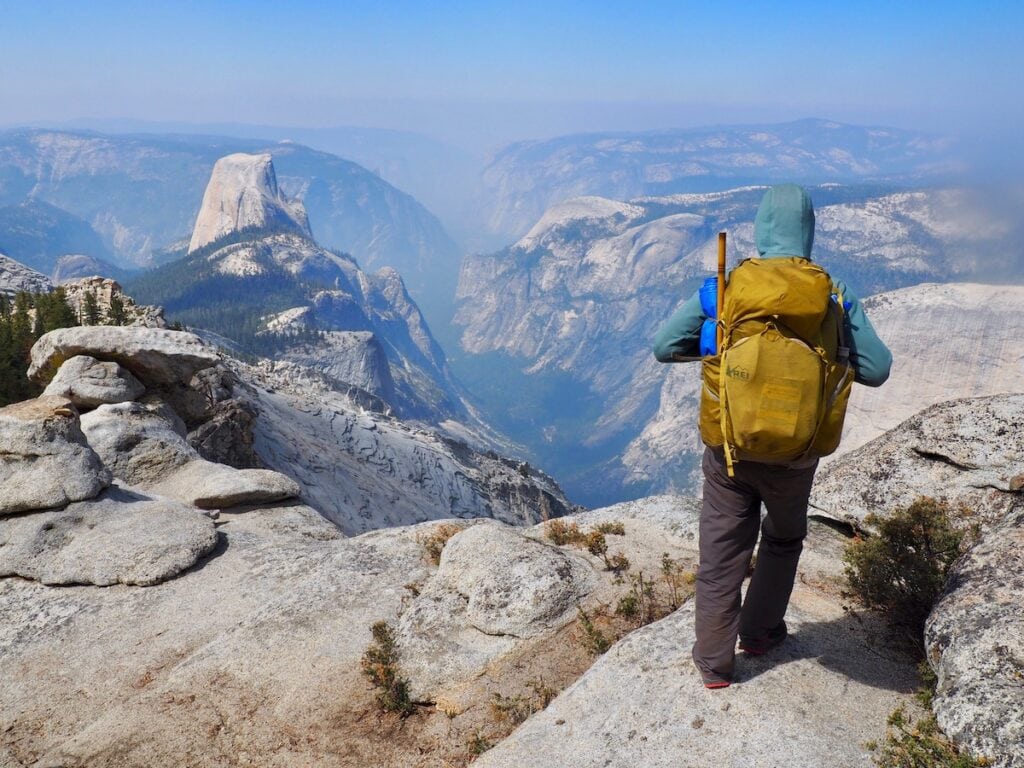
The John Muir Trail traditionally begins at the Happy Isles Trailhead in Yosemite Valley and quickly gains 2,000 vertical feet over the first 4 miles, passing several epic waterfalls and vistas. With a heavy bag and leaden legs, this is a tough climb even though the mileage is low.
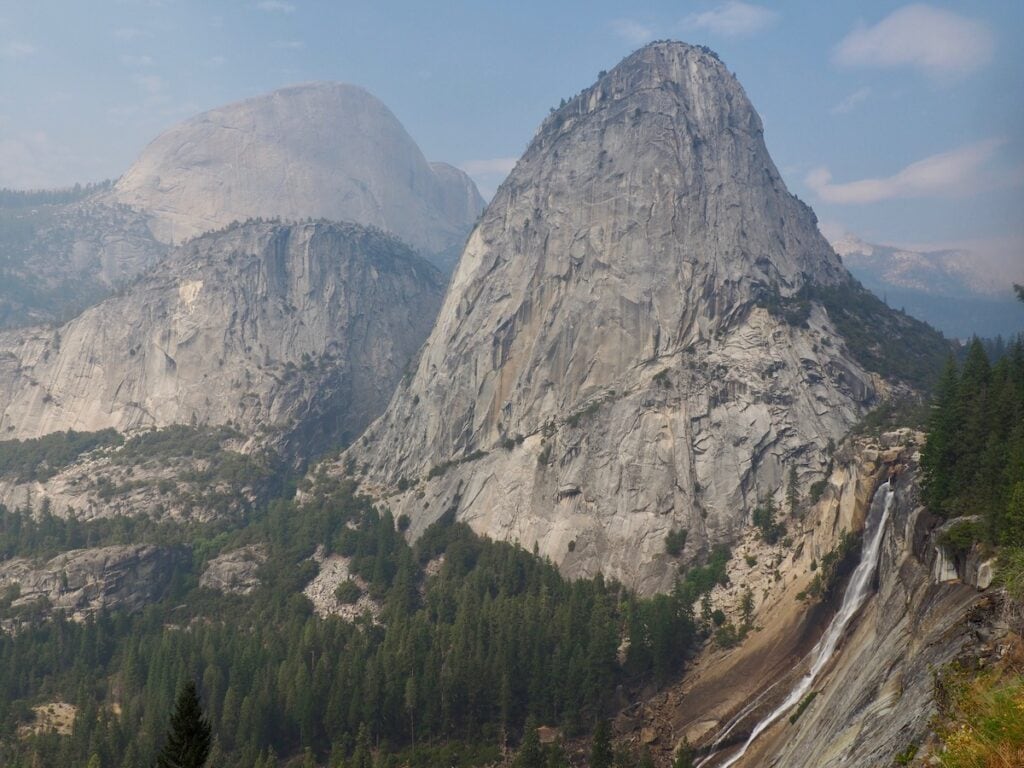
Around 5 miles in, you reach the junction of Half Dome, a Yosemite icon. If you’re especially fit and ambitious, you could try to secure a separate permit to summit Half Dome, an epic kick-off to a JMT adventure. Hiking Half Dome will tack on an additional 7.2 miles from Little Yosemite Valley and another 2,700 ft of elevation gain.
Looking for JMT permit info? Check out our complete guide to scoring John Muir Trail permits.
Day 2 – Little Yosemite Valley (Mile 4.8) to Lower Cathedral Lake (Mile 17.7)
After a light-mileage first day, Day 2 feels like the first official day on the John Muir Trail. There’s an optional detour on this section: at Sunrise Lakes, you can do a 10-mile round-trip day hike up to Clouds Rest, arguably the best vantage point in all of Yosemite. Mary camped at Sunrise Lakes and hiked Cloud’s Rest at the end of her NOBO trip in 2020 and highly recommends this detour.
If you’re skipping Clouds Rest, head onward to Cathedral Lakes on Day 2.
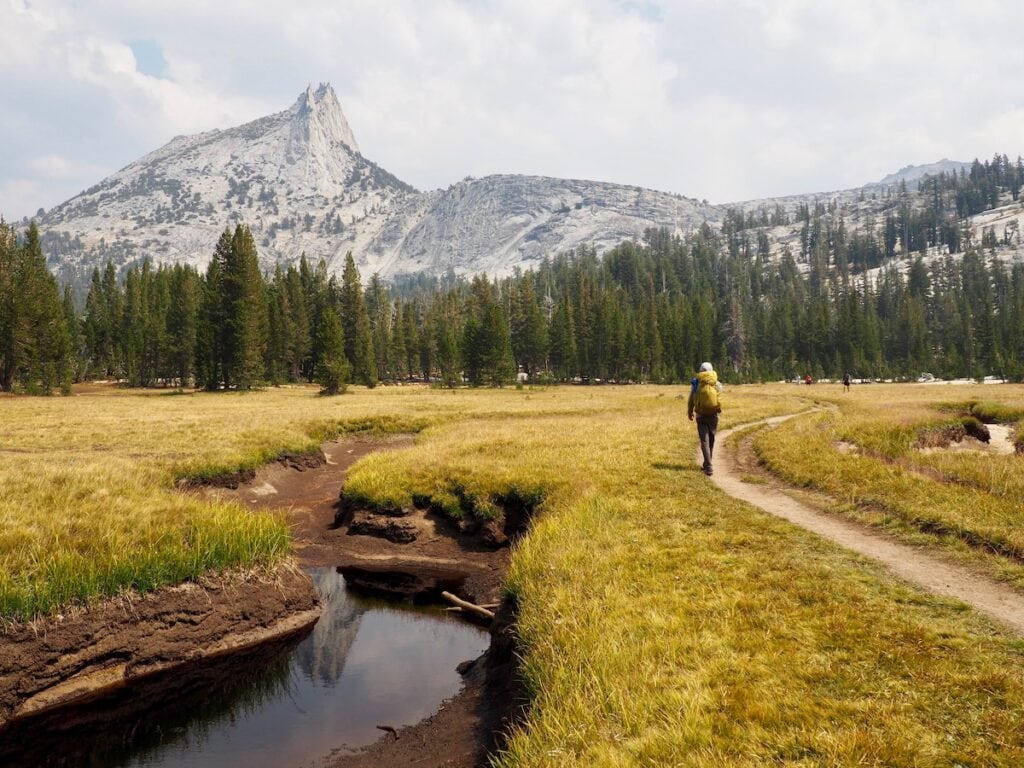
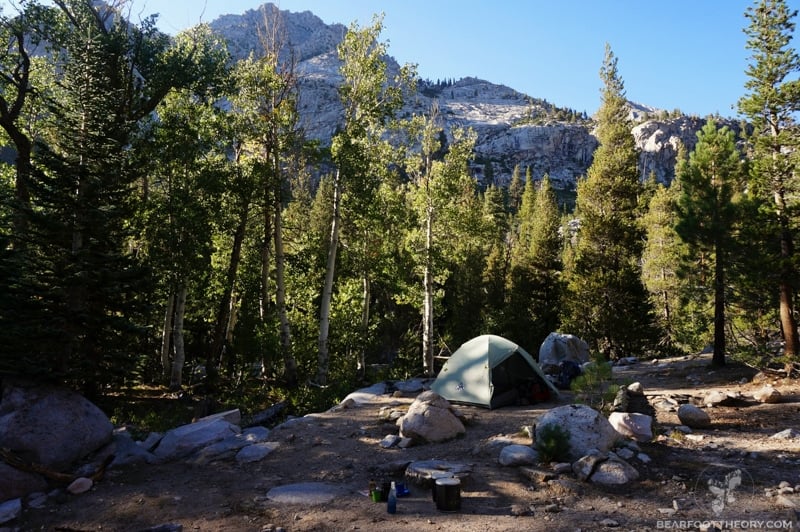
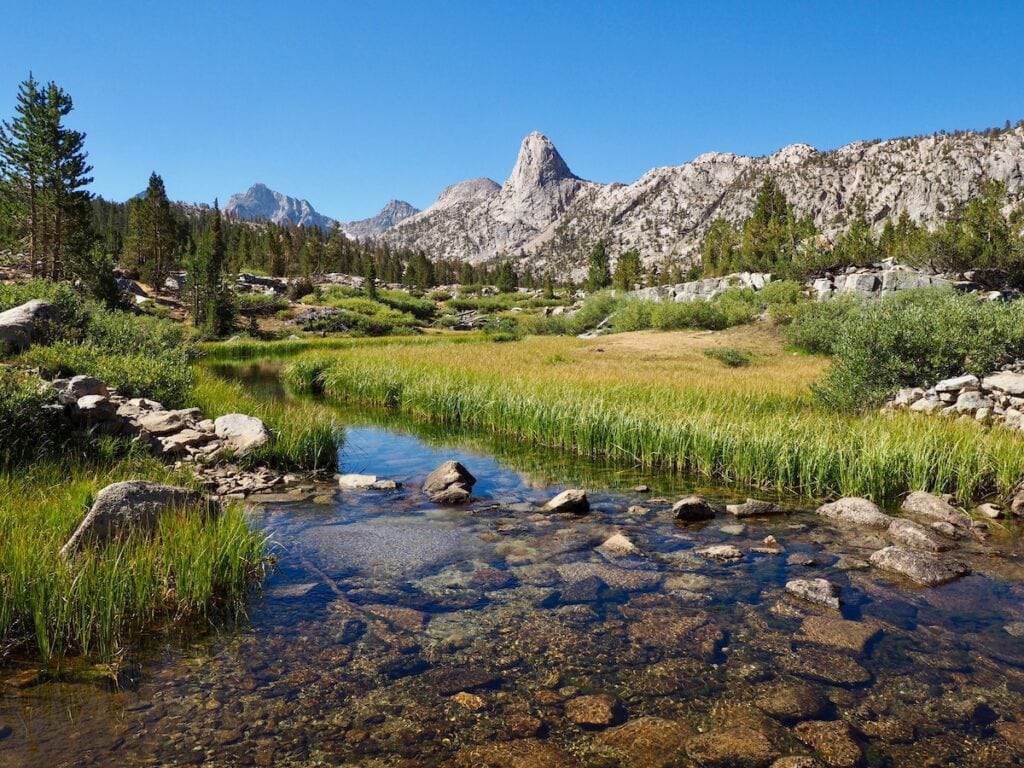
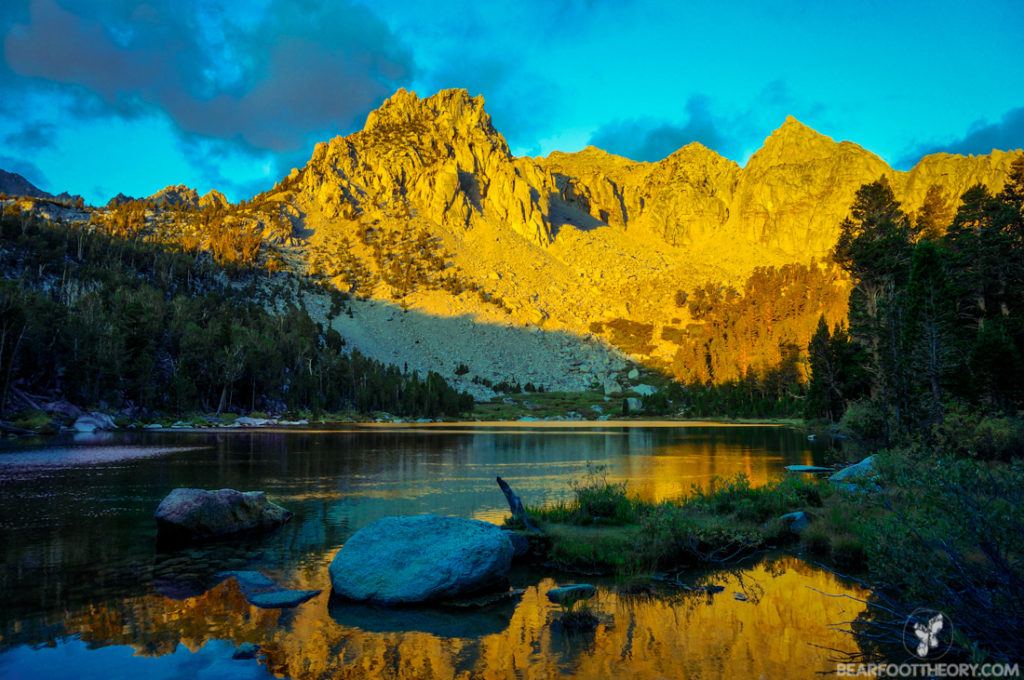
First, we checked out Upper Cathedral Lake which is right on the trail. It’s a gorgeous spot, but we couldn’t find a suitable campsite. So we kept going and took the 0.75 mile detour off the trail at mile 17.1 to get to Lower Cathedral Lake. This ended up being the BEST decision, and we found an amazing campsite on a point on the north side of the lake.
While still populated, Lower Cathedral Lake was a little quieter and, in our opinion, superior to Upper Cathedral Lake. Right at our campsite there was a beach for sun tanning and a rock in the middle of the lake that wasn’t too far to swim to. Also, as the sun set, Cathedral Peak formed a stunning reflection in the water, and we had the best viewpoint of the entire lake.
Another tip – if you have extra time, walk out to the northwest edge of the lake where you’ll find a a wide-open view of Tenaya Lake.
Read next: Complete JMT Gear List for Your Thru-Hike
Day 3 – Lower Cathedral Lake (Mile 17.7) to Lyell Canyon (Mile 31)
Waking up to a gorgeous sunrise, the morning reflection of Cathedral Peak was even more perfect than the sunset the night before, confirming Upper Cathedral Lake as one of my favorite spots during our first week on the JMT.
After packing up, we made our way to Tuolumne Meadows. There is a General Store and restaurant where you can buy food and supplies and also grab a meal if you are so inclined. This is also the last place that there is any cell service until Red’s Meadows in case you need to phone home.
*Note that in 2023 the Tuolumne Meadows Campground will be closed and services in 2023 may be limited. Double check on the Yosemite National Park website so you know what to expect there.
While the scenery is a little monotonous compared to the previous day, it’s one of the flattest days on the trail, so you can really pack in some miles.
There are tons of camping options along the Lyell Fork of the Tuolumne River, many with beautiful swimming holes. Since we would be tackling Donahue Pass the next day, we hiked as far as we could and then set up shop at a nice secluded spot on the river.
JMT Tip: Plan on climbing passes in the morning when the storm threat is low and your legs are fresh.
Day 4 – Lyell Canyon (Mile 31) to Davis Lake (Mile 40.2)
Donahue Pass is the first pass on the John Muir Trail with an elevation of 11,060 feet at the top with views of the permanent snowfield on Mt. Lyell and icy blue rivers below. If you time it right, there were some amazing, but windy, campsites at the Upper Lyell Base Camp (mile 34.4).
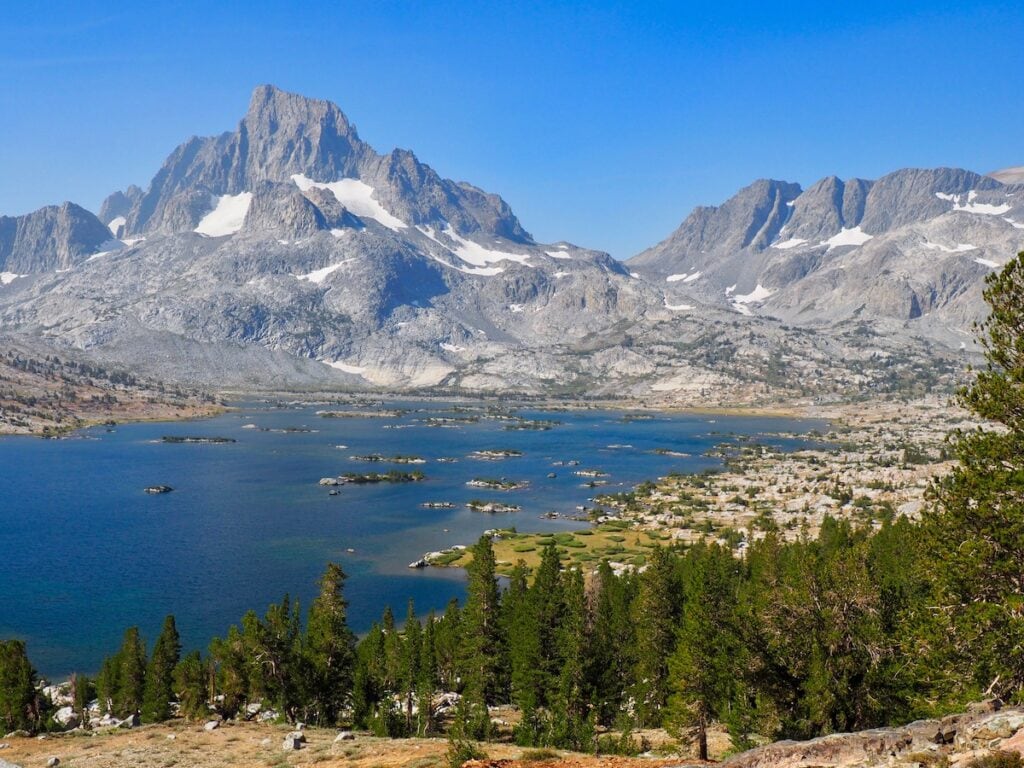
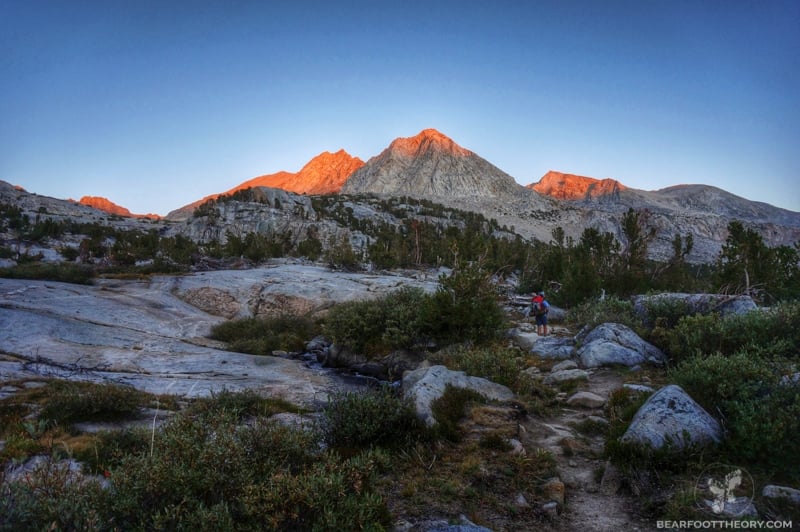
After Donahue Pass, many people try to make it to Thousand Island Lake or Garnett Lake to camp for the night. These impressive lakes were some of Ansel Adam’s favorites, and for that reason, they can draw crowds. After 4 days of busy trails in Yosemite, we were looking for some solitude, so at mile 40.2, we took a mile-long detour to Davis Lake. We found a beautiful secluded lake, made of a series of islands and were treated to a colorfully pink sunset.
Camping Tip: If you decide to head to Davis Lake, stick to the outer edge when looking for a campsite. Despite being small, the maze of islands is easy to get lost in. In the morning it took us 45 minutes of rock hopping just to get back to the trailhead. It was not the best way to start the day.
Day 5 – Davis Lake (Mile 40.2) to Lake Ediza Junction (Mile 48.4)
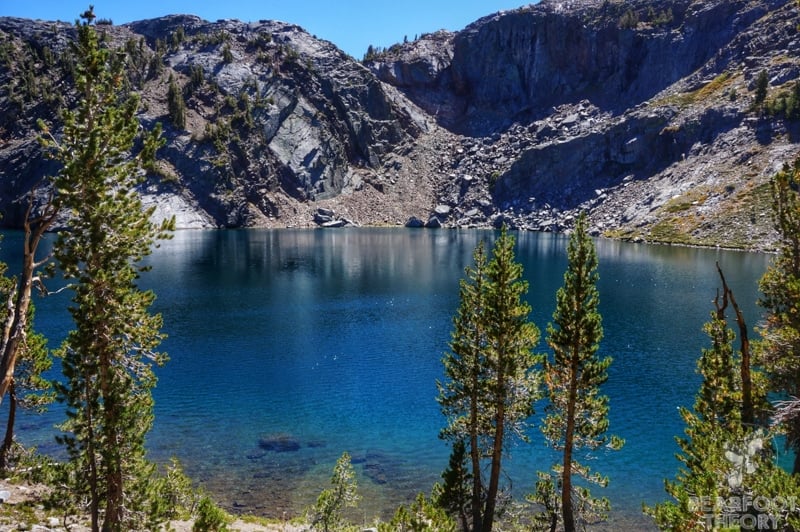
Day 5 was packed with gorgeous lakes and countless places to swim. We planned to stop at Thousand Island Lake for lunch, but when we arrived, it seemed that many other hikers had the same idea. Alternatively, we took a swim/lunch break at Emerald Lake, which was just 1.5 miles up the trail. While not as spectacular as Thousand Island, we had the lake all to ourselves.
Shortly thereafter, we stumbled upon Ruby Lake, which had two campsites on the east side of the lake right along the trail. With the contrast of the blue water against the red mountains, Ruby Lake would have been a lovely place to swim or camp.
Garnet Lake was also beautiful, but busy, with views of both Banner and Ritter Peaks. A beach on the southeast side allowed for an easy approach for swimmers and provided a perfect spot to sun afterward.
After you leave these lakes, you climb a series of switchbacks and then drop back down to the Ediza Lake Junction. We found a sunny spot all to ourselves to set up camp on the south tip of the trail right along Shadow Creek. Late in the afternoon, this is the last place on the trail where you will see any sun, and in my opinion, sun is a critical component of any good camp.
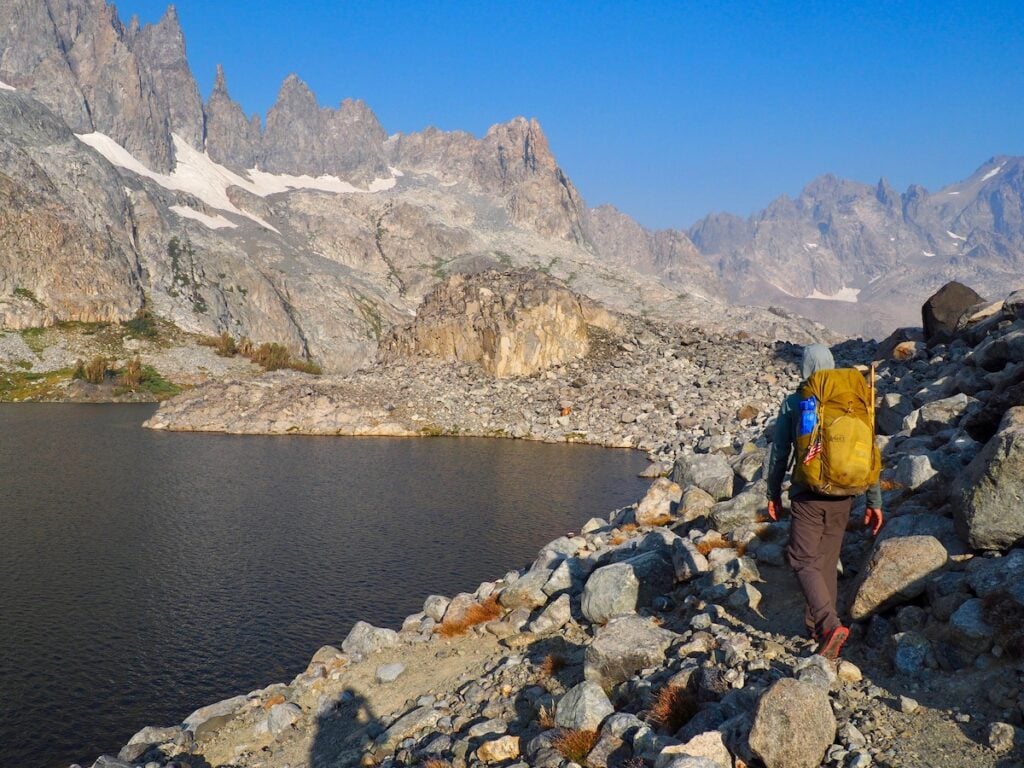
When Mary hiked the JMT in 2020, she took the Minaret Lake Loop, leaving the JMT at Johnston Meadow and rejoining it at Ediza Lake Junction. This detour off the JMT doesn’t add significant mileage and brings you right to the base of the iconic spikey skyline of the Minarets, passing several gorgeous lakes with great campsites along the way.
Day 6 – Lake Ediza Junction (Mile 48.4) to Read’s Meadow (Mile 59.9)
Shortly past the Lake Ediza Junction, you come across Shadow Lake. We were lucky to hit it at just the right time in the morning when the mountains reflected off the water.
My favorite spot of the day was Rosalie Lake. Right below the trail, we found some big flat rocks where we stopped for snacks and photos. This is the last nice place that you will come across before Red’s Meadow, so make sure to soak it all in.
The only other suitable spot for lunch is Trinity Lakes at mile 52.7, but don’t expect to swim here because it’s very marshy and buggy.
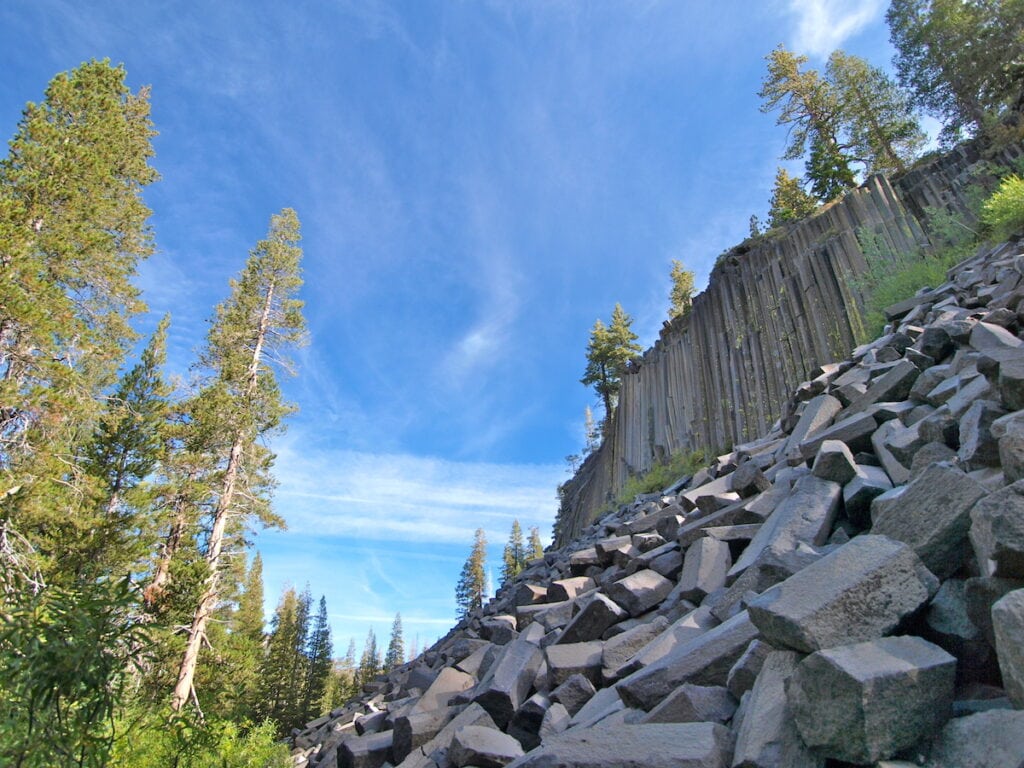
The remaining portion of the trail leading to Devil’s Postpile is all downhill and travels through a large forest full of dead trees. It’s rather unpleasant compared to the scenery over the past 6 days, so we booked it to Devil’s Postpile National Monument.
Once you get to Devil’s Postpile, you will start to see signs of civilization, including cars and roads. It will feel strange, but it’s worth a quick stop to see the monument itself.
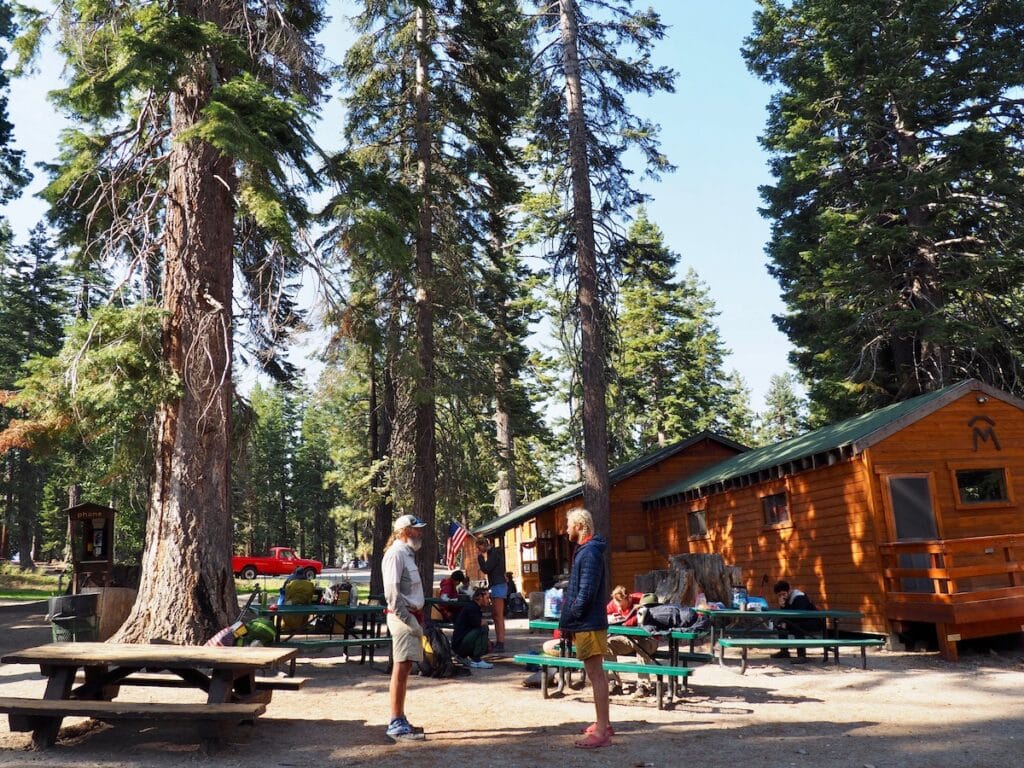
The only place to camp in the area is at the established Reds Meadow Forest Service campground. It costs $22 a night for a site, however, it is super convenient to the “Resort” where you will pick up your resupply box, and you can also buy an ice-cold beverage. There are bear lockers in the campground, which is helpful after the resupply since your bear box will likely be quite full that night. There’s also a concrete-enclosed hot spring in the campground. It’s small and you may need to wait your turn but feels amazing on tired muscles and sore feet.
The scenery up until this point on the JMT was magnificent, but it was also the most crowded. As we continued south, the crowds thinned out and it began to feel like true wilderness.
Save this post!
Enter your email & I'll send this post to your inbox! You'll also receive my weekly newsletter full of helpful advice for planning your adventures.
Section 2: Red’s Meadow to Muir Trail Ranch
Day 7 – Red’s Meadow (Mile 60) to Duck Pass Junction (Mile 70.5)
Not to start on a low note, but I want to mentally prepare you for this day. There’s no good way of putting it… this stretch between Reds Meadow and Duck Pass Junction was just awful. Everyone we met on the trail agreed. First, your pack is about 10 pounds heavier than the day before thanks to your resupply at Reds Meadow. But what’s worse is that after leaving Reds Meadow, you begin the day by traversing through a burn area where the trees are dead and there is absolutely no shade. I’d recommend getting an early start so you can avoid getting stuck in the blazing sun (another reason why camping at Reds Meadow the night before is a good idea).
We originally talked about camping at Deer Creek, but when we arrived, the stream was nothing more than a trickle, and it was still early in the afternoon. Hence, we kept trucking.
There are very few stretches along the JMT where there is no water and the 4.5-mile section between Deer Creek and the Duck Pass Junction is one of them, so make sure to fill up before continuing uphill.
As we got closer to our destination, we were treated to occasional views of the Silver Divide. It’s the only thing that kept me going with the enduring twinge I was feeling in between my shoulder blades.
When we finally arrived at the creek at Duck Pass Junction, we found a nice place to set up our tent just below the trail on the west side of the creek.

Day 8 – Duck Pass Junction (Mile 70.5) to Fish Creek (Mile 77.5)
After the previous day, we needed a little pick-me-up. We had read in our guidebook that Lake Virginia, 4 miles up the trail, was heavenly. So we hit the trail, first coming to Purple Lake. For those who have some stamina left in them the day before, Purple Lake appeared to have some pretty nice campsites. Mary camped at Purple Lake in 2020 and was treated to one of the best sunsets of her trip.
We arrived at Lake Virginia around lunchtime. We decided to follow a side trail that veered off to the west side of the lake and found a perfect spot to set up shop for a few hours.
We hung out for a couple of hours, and around 2:30 we agreed it was time to move on. As we descended the switchbacks down into Tully Hole, I began to think that we made a big mistake not camping at Lake Virginia. Even though it was pretty, all of the campsites we passed on Fish Creek were shady and cold. Eventually, we spotted some sun on the other side of the creek and found a safe place to cross. After mulling about for a while, we settled on a campsite. It was nice, but it was no Lake Virginia.
Day 9 – Fish Creek (Mile 77.5) to Quail Meadows (Mile 88)
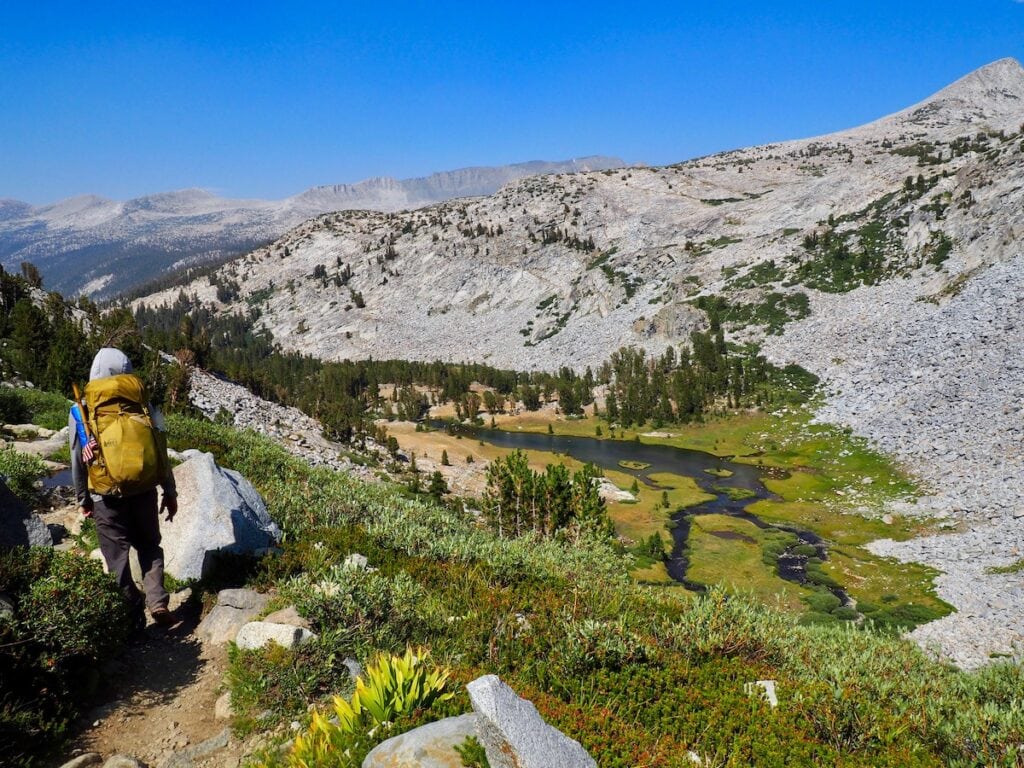
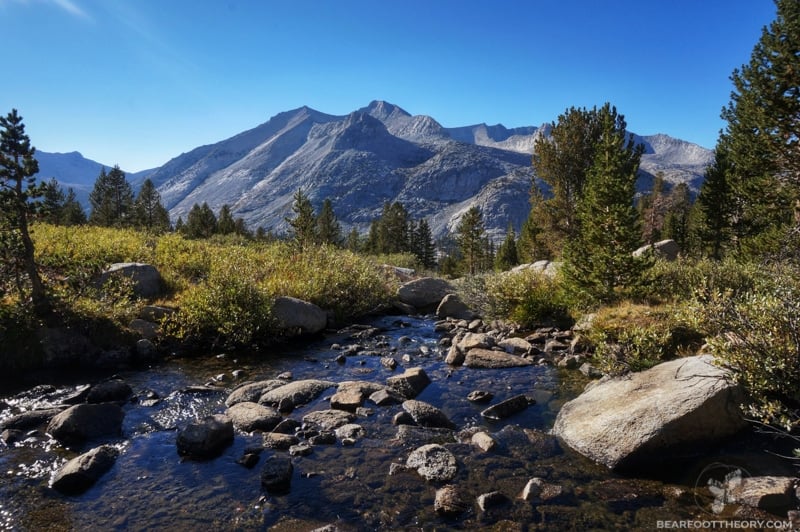
Today we tackled Silver Pass. The climb to the top was quite easy compared to some of the other passes on the trail. But take your time getting there, as there are several beautiful lakes on the way.
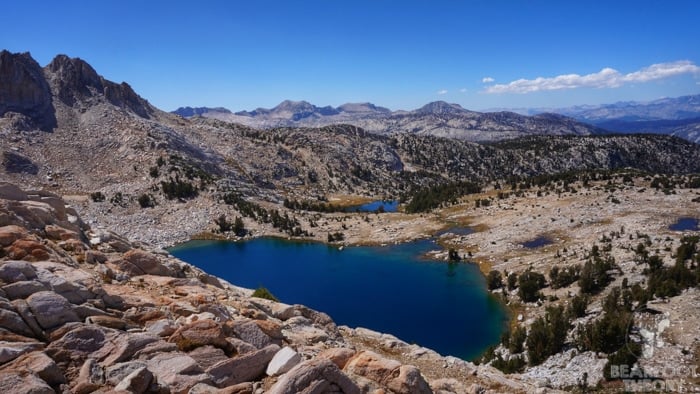
My favorite lake of Day 9 was Chief Lake which is right at the timberline below Silver Pass. The dramatic views and aquamarine water made it a great place to stop for lunch before making the last uphill push.
Between Chief Lake and Silver Pass, you will be completely above the treeline. As you ascend the barren landscape, you’ll get sweeping views of the lakes below and the mountains where you spent the last several days.
Traveling south from Silver Pass, you head down along the North Fork of Mono Creek. There are many shady campsites along the way. Our goal was to make it close to Quail Meadows since we wanted to take on the upcoming 2,000 foot climb to Bear Ridge first thing the next morning when our legs were fresh.
Quail Meadows is located at the Lake Edison Junction which is the trail you would take if you were planning to stop and resupply at Vermillion Valley Resort (VVR). We skipped VVR because it required a bit of maneuvering to get there – a combination of hiking, a ferry, and/or a jeep ride. Plus, we were all fueled up with our supplies from our visit to Reds Meadow a few days prior.
Read next: How to Resupply On The JMT
Because of its close proximity to VVR, Quail Meadows was a popular camp spot for JMT hikers. To avoid the crowds, we settled on a site just north of Quail Meadows that was reminiscent of an old cowboy camp and had easy access to some nice hang-out spots on the creek. To find this huge campsite, veer left off the trail just above the intersection of the North Fork with Mono Creek.
Day 10 – Quail Meadow (Mile 88) to Bear Creek (Mile 96.3)
Our day started with a 4 mile gentle climb up a series of switchbacks to the top of Bear Ridge. If you are tired when you get to the top, stop for snacks, but don’t be tempted to take your lunch break here. Some of the best swimming holes on the trail are just a short way ahead.
After reaching the top, you will drop down to the Bear Creek Junction, where the trail begins to run parallel to Bear Creek for the next two miles.
While our lunch spot was lovely, we found that the further we got along Bear Creek, the better the swimming opportunities. When we turned a corner around mile 95, we stopped dead in our tracks when we came across a long straightaway in the river with a cascading waterfall full of calm, clear, and deep swimming holes.
About a mile later, we stumbled upon another idyllic series of pools. Could we pass these ones up too? Neither of us took much convincing. We immediately threw our bags down, where we would later set up camp. This spot in the river had some huge flat boulders forming a series of waterfalls. Since the water was low, you could walk right out onto the granite and sit in the middle of the waterfalls. It was heavenly. We were grateful to say goodbye to our earlier guilt and spent the rest of the afternoon basking in the glistening sun. This was 100% my favorite camp from the second section of the JMT.
Read next: Best Campsites on the John Muir Trail

Day 11 – Bear Creek (Mile 96.3) to Muir Trail Ranch (Mile 108)
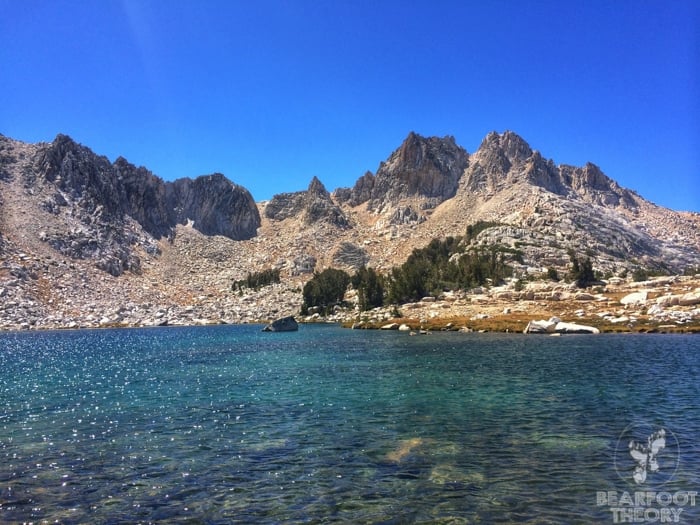
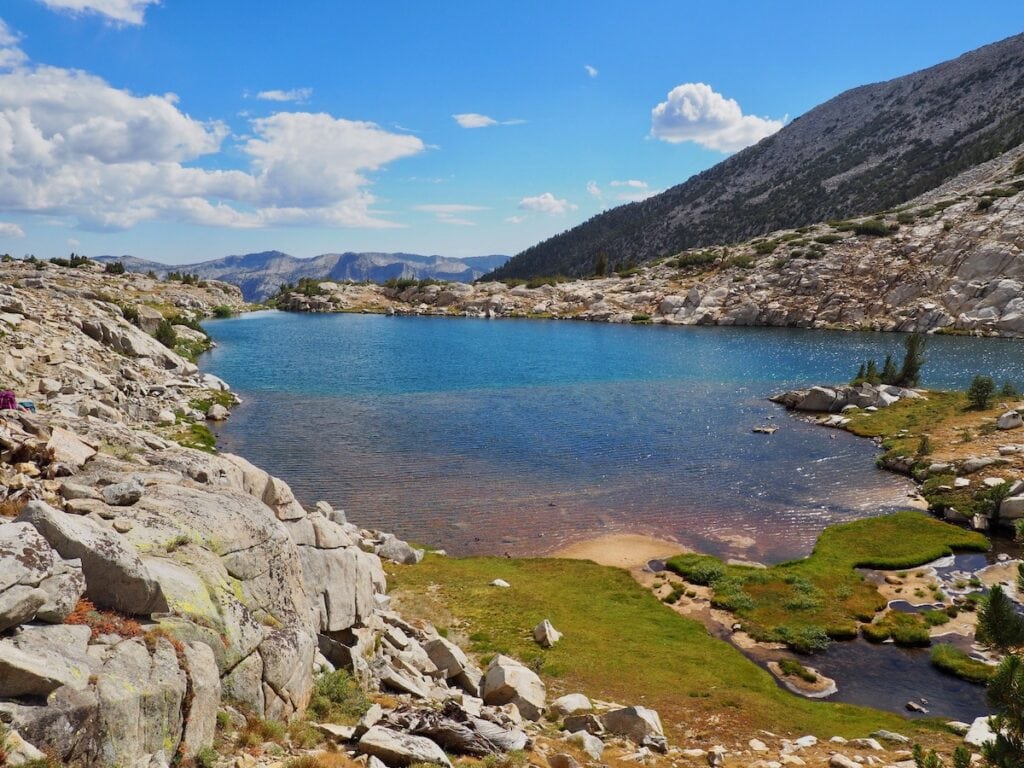
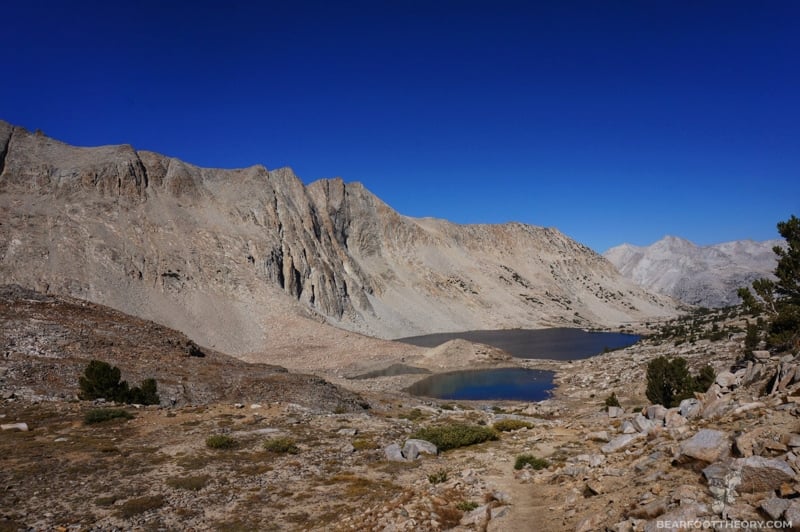
Marie Lake is dotted with granite islands and offers superb views of the surrounding mountains. Sitting at 10,500 feet, there are several small, sandy, and exposed campsites along the trail. It was windy when we came through, but I imagine on a calm night, this would be an amazing spot to camp.
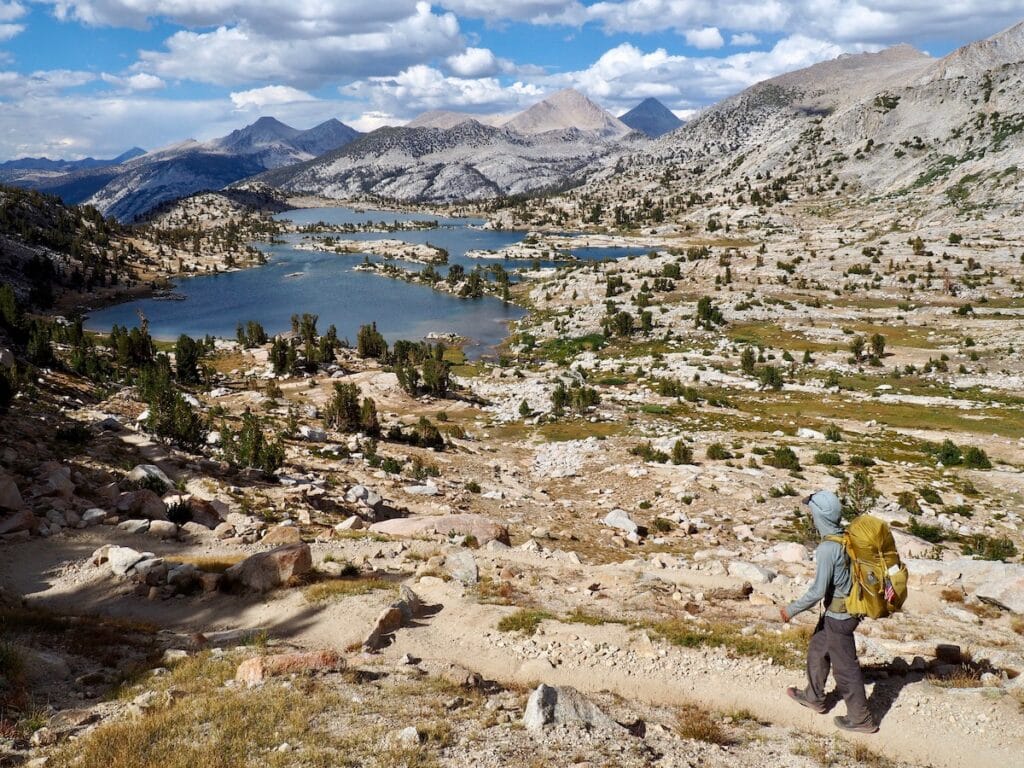
Next up was Seldon Pass, which was only 500 more feet above Marie Lake. Make sure to enjoy the wide-open views of Marie Lake and Silver Pass as you climb.
Once you are over Seldon, you first drop down to Heart Lake and then Sallie Keyes Lakes. We stopped for lunch at the north end of Sallie Keys. However, if it is a warm day, I recommend heading to the southern edge of the lake where there appeared to be good swimming with easy access.
Our original plan was to stop at Sallie Keys and camp for the night, but it was a windy day and since we made such good time, we set off for Muir Trail Ranch, our second resupply point.
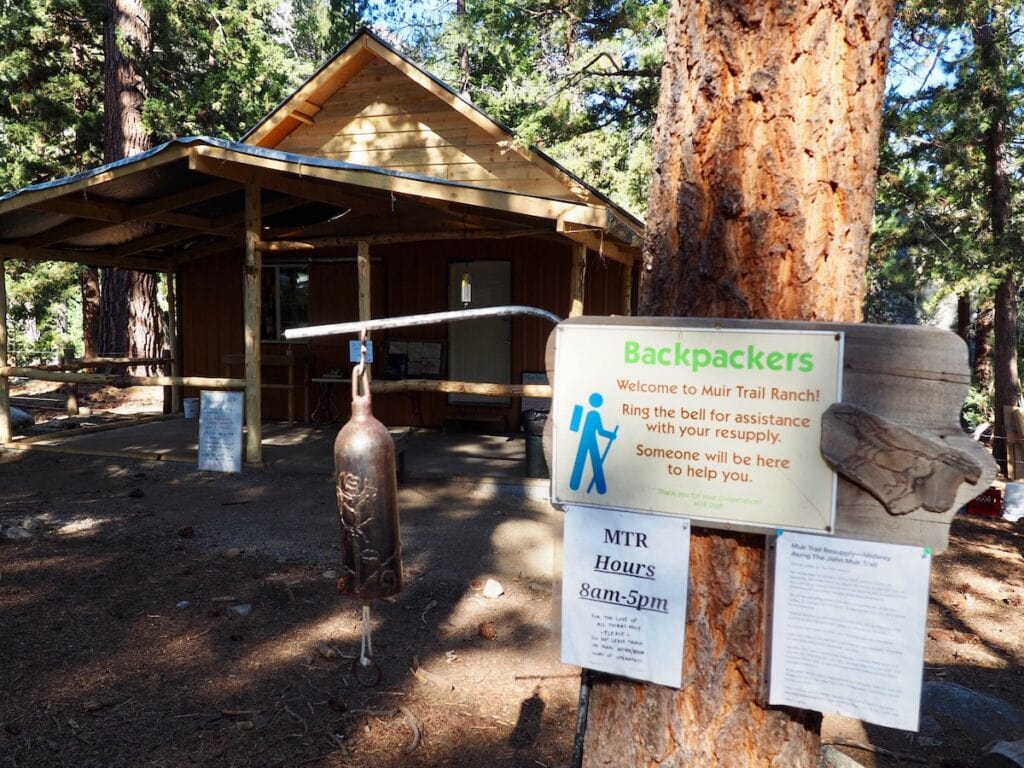
The trail between Sallie Keys and Muir Trail Ranch ends with a long section of downhill switchbacks into a beautiful river canyon. There is no suitable camping along this stretch. At mile 108, you reach the northern cutoff to Muir Trail Ranch (MTR), where you will undoubtedly stop, as it is the last place directly on the JMT to resupply. Follow the signs which lead you down a dry, dusty trail to the camp.
Be prepared to camp with a bunch of other thru-hikers on your night at MTR. Sites are spaced close together and there is little privacy. There are also no bathrooms, so finding a hidden place to go was a bit of a challenge.
Also, definitely don’t miss taking a soak in Blaney Hot Springs across the river. From the MTR campsites, carefully cross the river, and then follow the trail downstream for about five minutes until you reach a series of natural hot pools. They are small and a bit murky, but the hot water will do wonders for your sore muscles. This alone made staying at MTR worth it.
At this point, we are just about at the halfway point on the JMT. And I have to say that from here on out, the scenery just gets better, bigger, and more dramatic.
Section 3: Muir Trail Ranch to Lake Marjorie
Day 12 – Muir Trail Ranch (Mile 108) to McClure Meadow (Mile 119.3)
Two hours after getting our resupply at MTR, we reached the official border of Kings Canyon National Park. For the next 3.5 miles, the trail followed the South Fork of the San Joaquin River. Despite being flat, these were sun-exposed miles. So be prepared and consider getting an earlier start from Muir Trail Ranch.
We stopped for lunch at the Goddard Canyon Junction, where there are a few tent sites, and afterward immediately began the steep climb to Evolution Meadow.
As we neared the top of the switchbacks, we could hear some turbulent waters running to our left. We veered off the trail to catch a glimpse. Here Evolution Creek tumbled down the cliff, forming a series of deep holes as it cascaded into the San Joaquin River below.
As we made our way further into Evolution Meadow, the terrain transformed from dry, exposed slopes to flat green pastures with Evolution Creek slowly snaking through.
At some point, you have to cross Evolution Creek. In high water years, continue walking up the right side of the creek until it’s safe to cross.
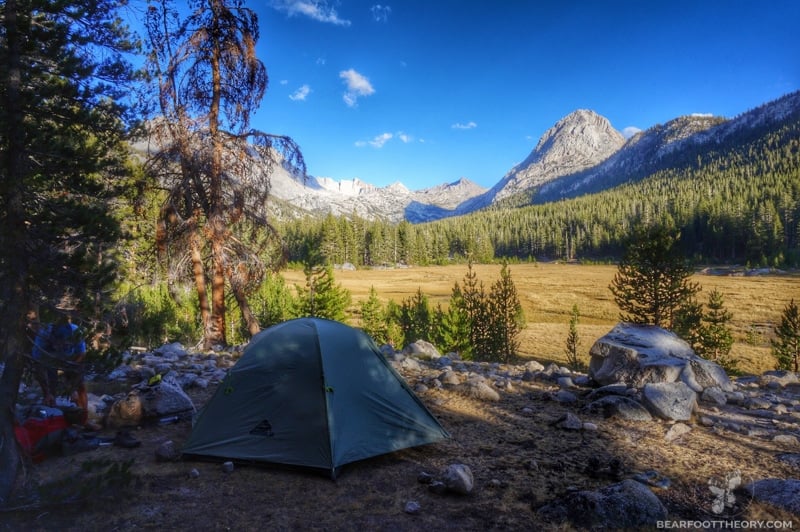
In the late afternoon, we finally arrived at McClure Meadow and began searching for a spot to set up for the night. About 5 minutes past the ranger station, we spotted a small bench on the right with an expansive view of the eastern skyline, including the peaks towering over Evolution Basin where we would be headed the next day.
Day 13 – McClure Meadow (Mile 119) to Big Pete’s Meadow (Mile 135)
After a night of rain, we hiked through Evolution Valley and began to ascend to Evolution Lake. The sky remained dark, but there were no signs of thunder, so we kept trucking along. Right as we caught our first sighting of Evolution Lake, I felt a raindrop.
Literally within three seconds, the Sierras unleashed their wrath and the sky was dumping buckets. We kept hiking, but now at a much faster pace. Soon, we reached the northern tip of Evolution Lake. We were now above the treeline, completely exposed. And…it started to hail. Frozen sideways hail. Then thunder. At first, I felt adventurous, but then I just got scared. We still had 5 miles and 1,000 feet of elevation to gain before the top of Muir Pass and now there was nowhere to hide.
Fortuitously, the distant thunder and lightning were kept at bay, but the rain and wind sustained. We hiked and hiked and hiked. Not stopping for water. Not stopping for food. Not even the bathroom. We knew that in a split second, the conditions could change and we could be caught in a dangerous situation.
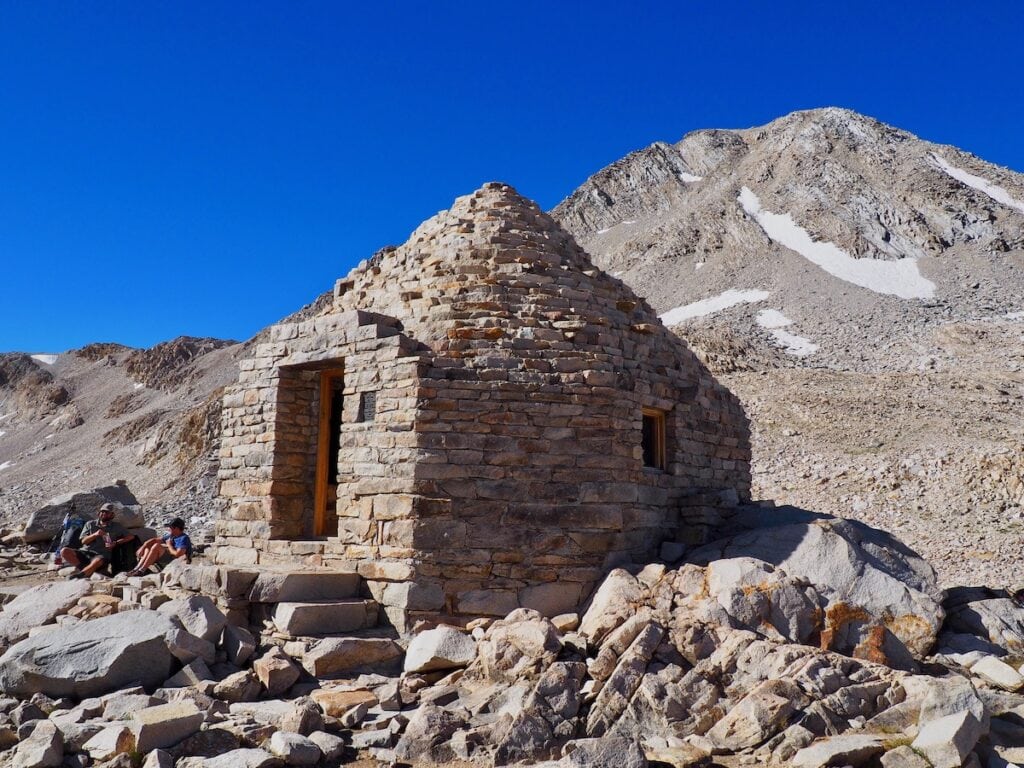
Finally, I could see Muir Hut at the top of the pass. We were unsure if we were going to be able to get into Muir Hut, a shelter that was built in 1930 by the Sierra Club. So we were relieved when we reached the top of the pass and were able to seek refuge inside.
An hour later, the rain appeared to be on its way out, and we even caught a few glimpses of blue sky in the late afternoon on the hike down.
There weren’t a lot of campsites on the way down from Muir Pass, so keep that in mind when planning out your day. We finally found a spot just before Big Pete’s Meadow, and in total ended up hiking 16 miles that day.
In contrast to Kristen’s harrowing trip over Muir Pass, Mary on her NOBO hike enjoyed a bluebird day in Evolution Basin in 2020. After summiting Muir Pass in the morning, they descended down through the basin, stopping to swim and fish in several of the lakes (fun fact: Lakes Wanda and Helen are named after Charles Darwin’s daughters). After setting up camp near Evolution Lake, they hiked up to Darwin Bench, a short side trip that takes you to an overlook of the Basin, at the head of Darwin Canyon. This was one of Mary’s favorite days of the whole JMT.
Day 14 – Big Pete Meadow (Mile 135) to Upper Palisade Lake (Mile 148)
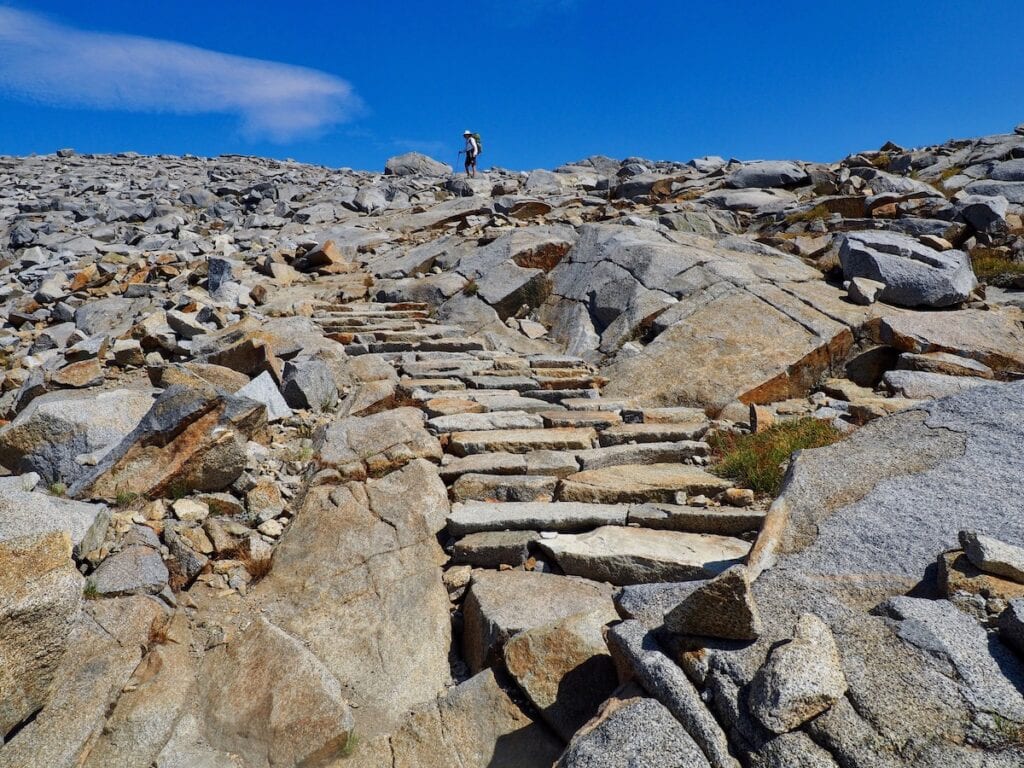
The first half of the day was pretty uneventful. Little Pete and Grouse Meadows are both beautiful places to stop and take a break, but we pushed through because we had a big climb up ahead: the dreaded Golden Staircase.
The Golden Staircase is a steep 1,500-foot ascent up 50 or so odd switchbacks. It’s a marvel of trail-building engineering and was the last section of the JMT to be completed. But like most tough spots on the trail, it wasn’t as bad as I expected. Just think of a never-ending Stairmaster at the gym, but with a far superior view.
We had planned on camping at Lower Palisade Lake, but when we got there, there were quite a few tents already set up. And being above the tree line, there was really no privacy so we decided to keep going. We figured we’d find a spot with some solitude at Upper Palisades Lake.
Well, as it turns out, the distance between the Lower and Upper lake is further than it looks on the map. And the trail is quite a bit higher than the lake itself, so we were having trouble finding a tent site with easy access to water. Eventually, we crossed a small creek and decided to veer left off the trail in search of a flat spot near this water source.
By the time we got our tent set up, the sun was going down quickly. We hustled to filter our water and cook and eat dinner. In less than 45 minutes, we were tucked away in our sleeping bags and ready for shuteye.
Hiking Recommendation: The Golden Staircase is tough, but don’t be tempted to leave it till the next morning. If you go that route, it means you will have to climb the Golden Staircase and immediately follow it with Mather Pass, for a total of 3,500 feet in one day. Mather Pass is also one of the toughest passes on the trail in my opinion, so you’ll want a pair of fresh legs when you tackle it.
Day 15 – Upper Palisade Lake (Mile 158.5) to Crossing Below Lake Marjorie (Mile 158.8)
As soon as we started hiking on Day 15, we were going uphill on our way to the top of Mather Pass. Now I was happy that we continued on to Upper Palisade Lake the night before.
The ascent to Mather Pass is kind of a beast. Most of the passes on the trail are well-graded switchbacks. They might be long, but there are few with big rock steps like Mather. That said, it still ended up being one of my favorite passes. The view as you climb is just spectacular. The barren landscape is speckled with sapphire-colored lakes and surrounded by six peaks that exceed 14,000 feet.
Once you get to the top, make sure to take some time and relax. The views to the south of Mather are equally awesome. On our descent, looking back at Mather Pass, it was hard to believe we came from all the way up there. What took us 2 hours to climb only took 30 minutes to hike down.

As you get farther away from Mather Pass, the mountains transform from light-colored granite to a colorful, red metamorphic rock. About two miles past Mather Pass, you’ll run into the South Fork of the Kings River, which you then follow for another 4 miles. Anywhere along here is a great place to stop for lunch and a swim.
Once you complete the main South Forks Crossing, it’s back uphill again on a dry dusty slope. Up down up down. That’s the name of the game on the JMT. But not to fret, this uphill section is short, and once you reach the top, you have your choice of lakes to camp on.
Since we were pretty exhausted by this point, we stopped at an unnamed lake on the right just past the Bench Lake Ranger Station. We traveled a bit off of the trail on the north side of the lake and found a perfect spot for our tent.
Then as the sun started to go down, we headed north of the lake to get an even better sunset view. What was really cool is we could see all the way back to Mather Pass where we came from. It makes you feel pretty proud when you realize how far you walked that day.
This secluded campsite ended up being another of my favorites on the JMT.
Day 16 – Pinchot Pass (Mile 161) to Woods Creek Junction (Mile 168.4)
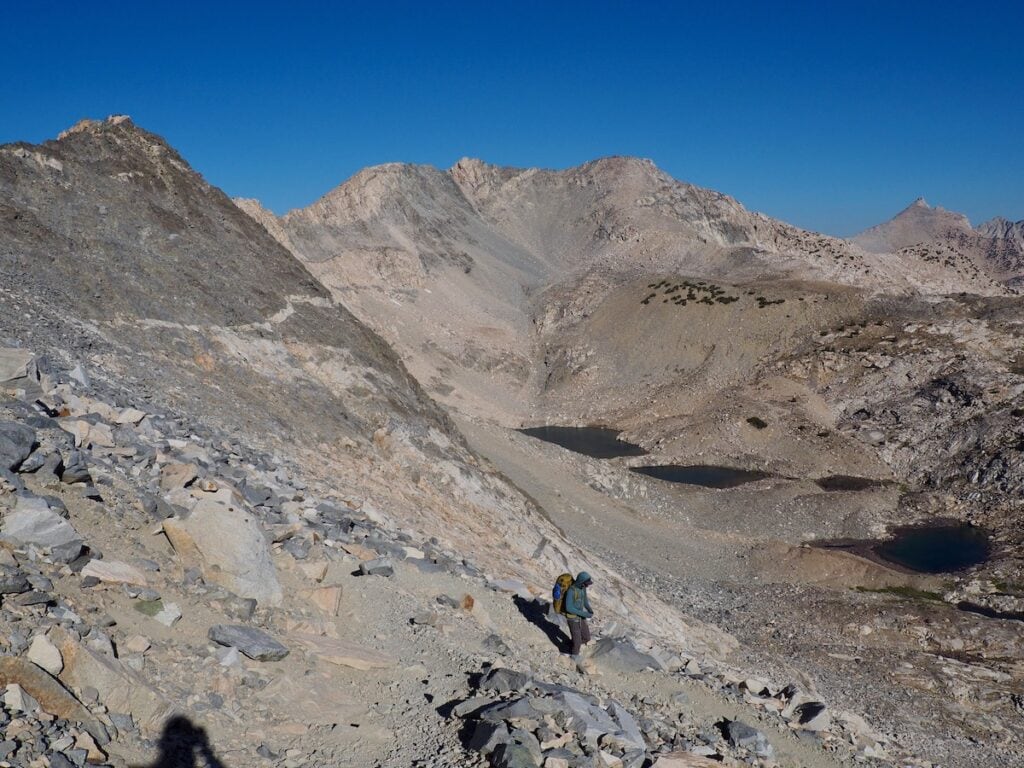
Our day started with an immediate climb to the top of Pinchot Pass. The 1,000-foot ascent was one of the easier passes on the trail, consisting of some mild switchbacks and really nice views of Lake Marjorie below. The geology also became noticeably different as we ascended, with vivid red hues becoming more dominant in the rock faces.
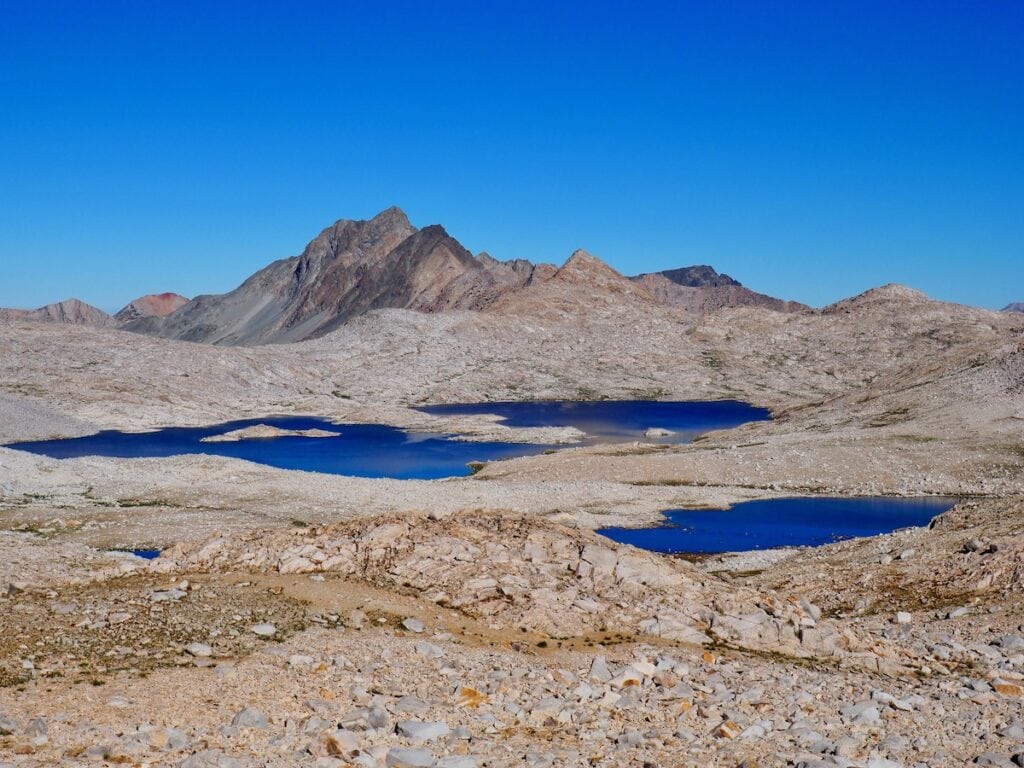
The view from the top of Pinchot Pass revealed an exposed and barren landscape speckled with several shallow lakes. From here, the rest of the day was all downhill. We would be losing about 3,500 feet in elevation between here and the day’s destination.
There were some appealing campsites at Twin Lakes and this unnamed lake on the west side of the trail. These were the last attractive spots to camp that we noticed between here and the Woods Creek Junction.
Soon after Twin Lakes, we passed the Sawmill Pass Junction and met up with Woods Creek. For the rest of the afternoon, the trail hugged the creek with little shade. When we were about a mile from the Woods Creek Junction where we would be camping that night, we spotted an awesome swimming hole down below the trail. While we were eager to get to camp, we were hot and dusty and agreed a little dip would lift our spirits.
A quick 30 minutes after our swim, we reached the Woods Creek Junction. Here the trail turns left, crossing Woods Creek on this old rickety suspension bridge. Once we crossed the bridge, we found at least a dozen campsites and set up camp for the night.
Day 17 – Woods Creek Junction (Mile 168.4) to Middle Rae Lake (Mile 175)
I was looking forward to camping at Rae Lake and we had a super short (6.5 mile) day, so we decided to bust it out as quickly as possible so we could get to camp and hang out all afternoon.
Even though we were in a hurry, we decided to take a quick break at Dollar Lake. The tall round mountain in the background is appropriately called Fin Dome. As we left Dollar Lake, we entered this beautiful meadow with clearer views of Fin Dome.
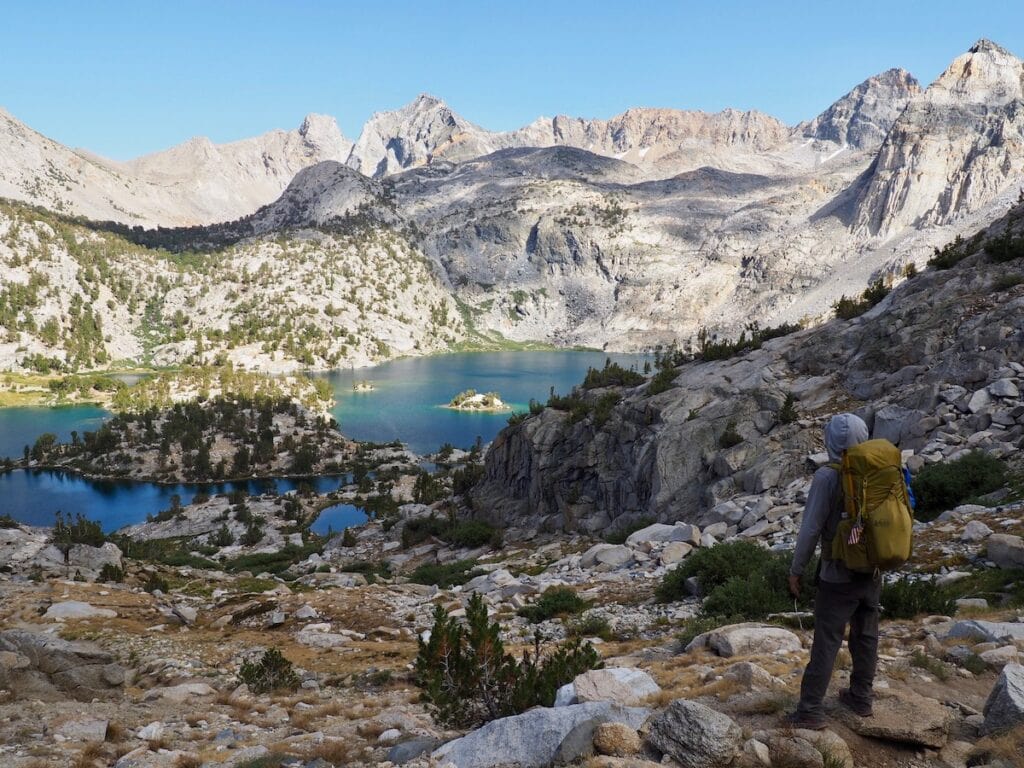
We also contemplated stopping at Arrowhead Lake, but we were so close to Rae Lakes that we kept on trucking. We finally arrived at Middle Rae Lake. The trail hugged the edge, and we began to scout for a campsite.
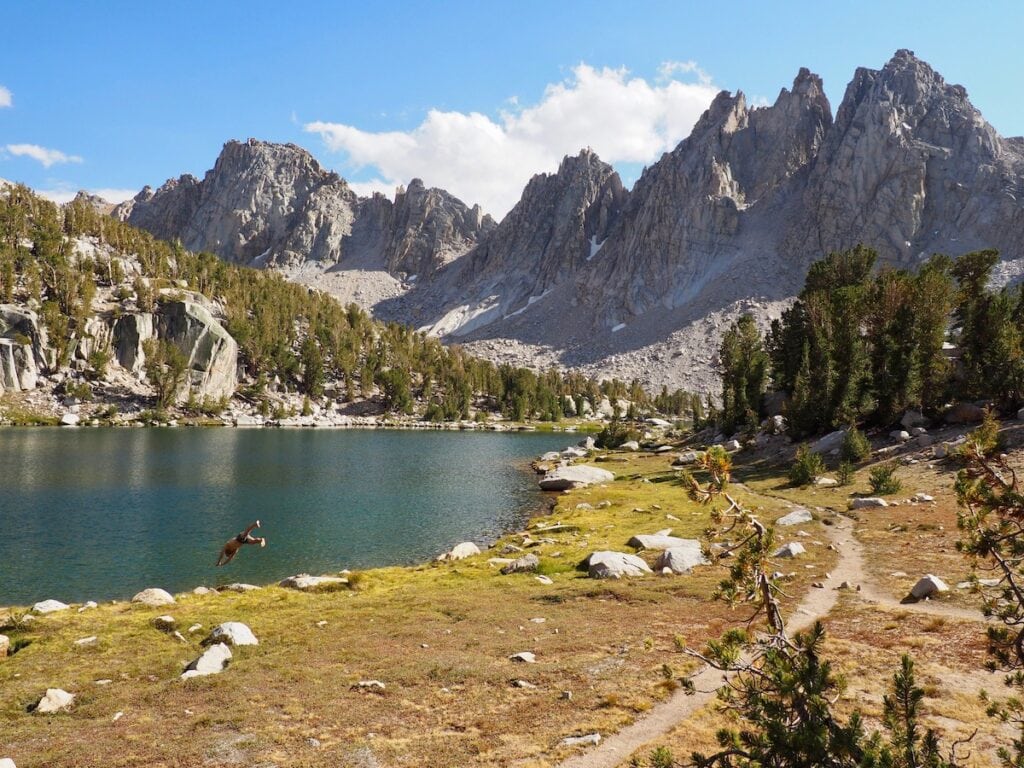
There are a ton of sites spread out all around the east edge of Middle Rae Lake, including a bunch of sites near the Ranger station with a bear locker. While we normally went for the off-the-beaten-path sites, this time we chose a site that was a little closer to other groups. We just couldn’t resist this view.
By 1:30pm, we had already eaten lunch and gotten our tent set up. Record speed, and we couldn’t have been happier. We headed down to the beach in front of camp where there was a sandy entrance to the lake. We dove in and had the rest of the day to swim (Rae Lake surprisingly wasn’t as cold as some of the other lakes on JMT) and sunbathe. As the sun went down, we cooked dinner and enjoyed the evening light over Glen Pass and the Painted Lady where we would be headed the next day.
Read next: John Muir Trail Food Shopping List
If you have some extra energy in your legs, consider taking a side hike up to the Sixty Lakes basin. You can either set up camp at Rae Lakes and hike with just a light day pack or if the Rae Lakes are too crowded, take your backpack; you’ll likely have the entire Sixty Lake basins to yourself. As you ascend the 2.3-mile long trail, the views back over the Rae Lakes and the Painted Lady are astounding. This was one of Mary’s favorite detours off the JMT.
Day 18 – Middle Rae Lake (Mile 175) to Flower Lake
Thanks to the spectacular skyline at sunrise, we had a lazy morning and got a late start out of camp. We finally hit the road and made our way by Upper Rae Lake and the Painted Lady.
Then we started to climb up Glen Pass. I think the views as you climb Glen Pass are some of the best on the trail, although it’s a challenging pass. The colors of the lakes below the Pass were mesmerizing.
Shortly after the pass, we came to the junction that led to Kearsarge Pass. This was the moment we had been dreading for days because we had to get off the JMT to go pick up our last resupply at Onion Valley. This was a 14-mile detour…and we were NOT happy about it. We were also not stoked to be heading toward our second pass of the day.
Frustrated, we hung a left up towards Kearsarge Pass and once again started to climb. As soon as we got these views of Bullfrog Lake below the trail, we decided that maybe it wasn’t so bad after all.
Next, we passed Kearsarge Lakes. We heard there were some nice spots to camp down there, although there had been reports of bear activity in the area.
After making it to the top, we were on the home stretch. Only 3.5 miles to our resupply box, which had been left for us by TK Company in a bear box at the trailhead*.
Mary also resupplied at Onion Valley and loved the hike over the pass. She camped at the far end of Kearsage Lakes, one of her favorite campsites of the trip.
*Important Note: Food caches are no longer allowed to be left in the bear boxes at the trailhead, but there are several options for resupplying at Onion Valley. For info, see our blog post How To Resupply on the John Muir Trail.
Section 4: Kearsarge Pass to Mt. Whitney
Day 19 – Flower Lake to Upper Vidette Meadow (Mile 182.4)
When we started out on Day 19, it looked like it was going to be another beautiful day in the Sierras, but the weather quickly turned as we made our way to the top of Kearsarge Pass. Something that we learned is that the weather can turn in an instant up there. While we were very lucky throughout our trip, it’s critical that you have easy access to whatever clothing you need to be comfortable. For me, that was my raincoat and sometimes rain pants.
We reconnected with the John Muir Trail at mile 179.4, and for the rest of the afternoon we experienced on-and-off rain as we descended down into Vidette Meadow.
During lunch, we got caught in a downpour and shortly after we decided to stop and set up shop. We were feeling wet and tired and with Forester Pass just ahead, we didn’t want to risk ascending in the storm. So we found a nice riverside spot for our tent in Upper Vidette Meadow and hid out for a couple of hours while the rain passed.
Note: This is a common predicament on the JMT: either hike in the rain or set up camp early. On a few occasions, Mary hid out in her tent for a few hours during the height of an afternoon rainstorm, and then once it cleared, she packed up and hiked a few more miles before nightfall. Which tactic you use will depend on the weather, the terrain (you’ll want to avoid gaining elevation during storms), and your overall ability to stay warm, dry, and positive in a downpour.
Day 20 – Upper Vidette Meadow (Mile 182.4) to Wright Creek (Mile 197.9)
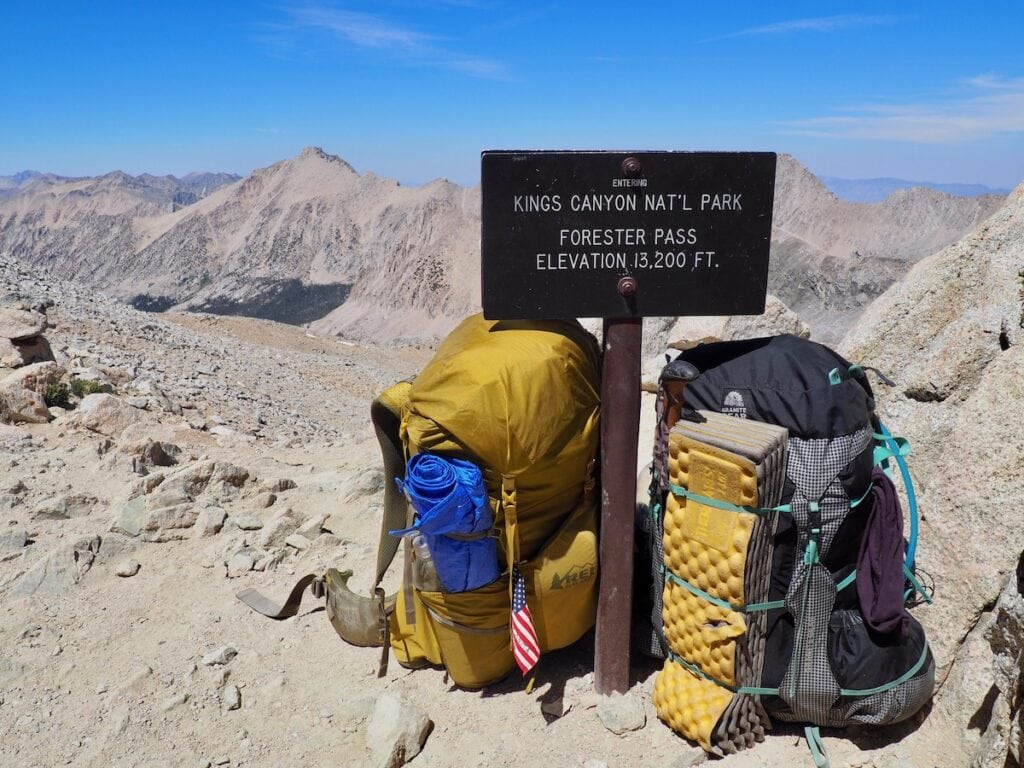
I had mixed feelings waking up on Day 20. That day we would be tackling Forester Pass. The biggest and baddest pass of them all…or at least that was the rumor on the trail. I was a little bit nervous, but waking up to those blue skies I had a feeling it was going to be a good day.
The top of Forester Pass sits at 13,110 feet and marks the official border between Kings Canyon National Park and Sequoia National Park. Quickly after leaving Upper Vidette Meadow, we emerged above the tree line and slowly made our way up the talus trail. We were surprised to find that yes, Forester Pass was long. But it really wasn’t any harder than any of the other passes we had encountered.
We hung out on the top and soaked it all in before going down the other side into Sequoia National Park. Once we descended, the trail zig-zagged down the barren terrain with expansive views of the Kaweah subrange off in the distance.
We remained above the treeline for several miles south of Forester Pass. Just before the junction with the Lake South America trail (Mary recommends this 6.2-mile round trip detour to the headwaters of the mighty Kern River!), we decided to break for lunch. Shortly after lunch, we found our first sign indicating the distance to Mt. Whitney. It started to seem very surreal that we only had 2 days left on our trip.
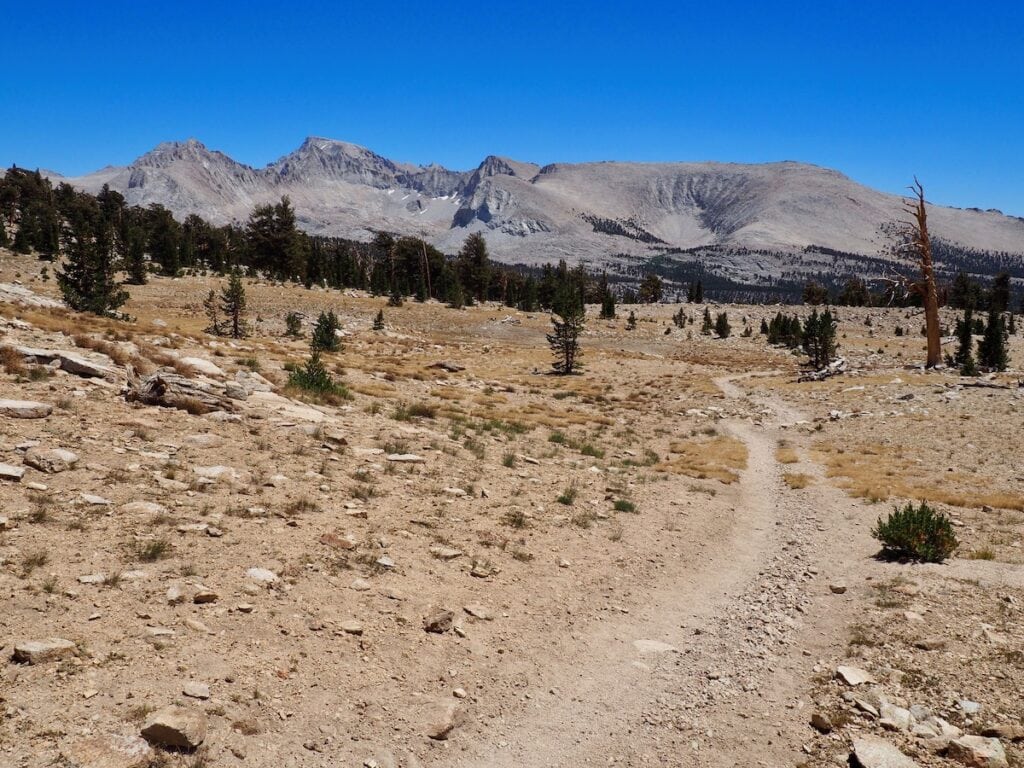
We didn’t have a real plan about where we wanted to camp that night, so we just kept trucking along. Next, we hit Bighorn Plateau, a flat sandy landscape at 11,430 feet. I would have loved to camp on the small pond that is up there, but the clouds looked a little unpredictable, and we agreed that staying up there wasn’t the best idea.
Bighorn Plateau is also where you catch your first glimpse of Mt. Whitney. It was hard to believe we’d soon be standing on top of it.
By the time we decided to stop for the day at Wright Creek, we’d hiked about 15.5 miles. It’s amazing how far we had come since day 1 in terms of our abilities. I remember struggling to make 8-10 miles a day during our first week in Yosemite. As you go, your muscles, endurance, and confidence grows, and I felt pretty excited about the transformation I was experiencing.
Day 21 – Wright Creek (Mile 197.9) to Guitar Lake (Mile 206)
After the long day prior, we were excited that we only had to cover 8 miles on Day 21. This was also going to be our last night on the trail, so we really wanted to have some time to relax at camp and enjoy it. So we got an early start and enjoyed another view of the Kaweahs, which seemed so much further away coming down from Forester Pass.
We arrived at Crabtree Junction around lunch. There is a ranger station there across the river, and we thought it would be a good idea to stop in and inquire about the weather forecast for that night and next day. We were pleased to hear that there was nothing but sun headed our way and that gave us some confidence for Whitney.
Soon we passed Timberline Lake and this meadow would be the last greenery we encountered until we came down from Whitney the next day.
We arrived at Guitar Lake in the mid-afternoon and found all of the campsites were already in the shade. We wanted the sun! According to everything I had read, Guitar Lake was the last source of water before Mt. Whitney, but the Ranger at Crabtree told me otherwise. He said there were a few ponds just up the hill from Guitar Lake where we could also camp, so we decided to keep going in search of those rays.
We found pretty much the most epic campsite on the JMT. There was one other group of two camped across the small pond, but there was plenty of room for two parties there.
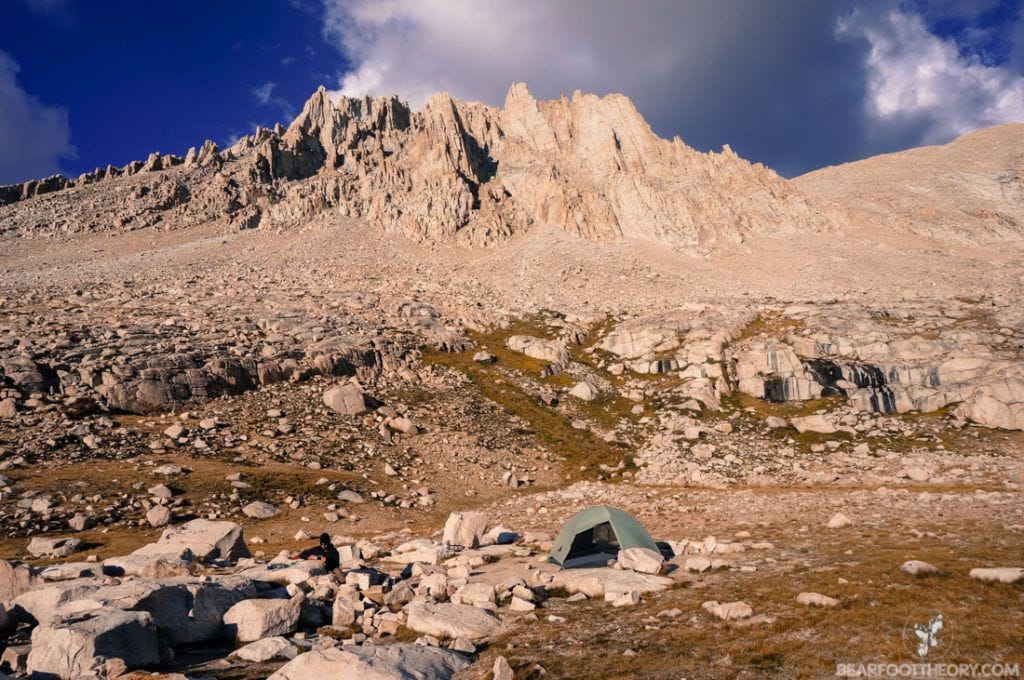
We had several hours of hot afternoon sun before it started to set. We were so happy that we continued on past Guitar Lake. Plus, we got to spend our last night watching an amazing sunset. While the evening sky was pretty throughout our whole trip, there weren’t many nights where we had a perfect view of the sun setting over the horizon. We couldn’t have been more thankful to end our last full day on the trail this way.
That night we went to bed early with the jitters, and I barely slept at all. In less than 12 hours we’d be standing on top of the tallest mountain in the lower 48 and soon after that, we’d be done with the JMT. It was a very strange feeling.
Day 22 – Guitar Lake (Mile 206) to Mt. Whitney (Mile 211)
We wanted to watch the sunrise from the top of Mt. Whitney. We had just over 3,000 feet to climb in about 4.5 miles, and we weren’t exactly sure how long that would take us. We also weren’t sure if we would be affected by the altitude. The ranger told us that 2:00 or 2:30am would be a good time to wake up, and sunrise would be about 6:30. To play it safe, we set our alarm for 2:00 and packed up in a hurry. And off we went in the dark, led only by our headlamps.
Hiking up those switchbacks in the dark was invigorating. We couldn’t tell how far we’d gone or how steep the cliffside was. The excitement and the brisk air kept us pushing ahead, while we carefully kept our eye on the time.
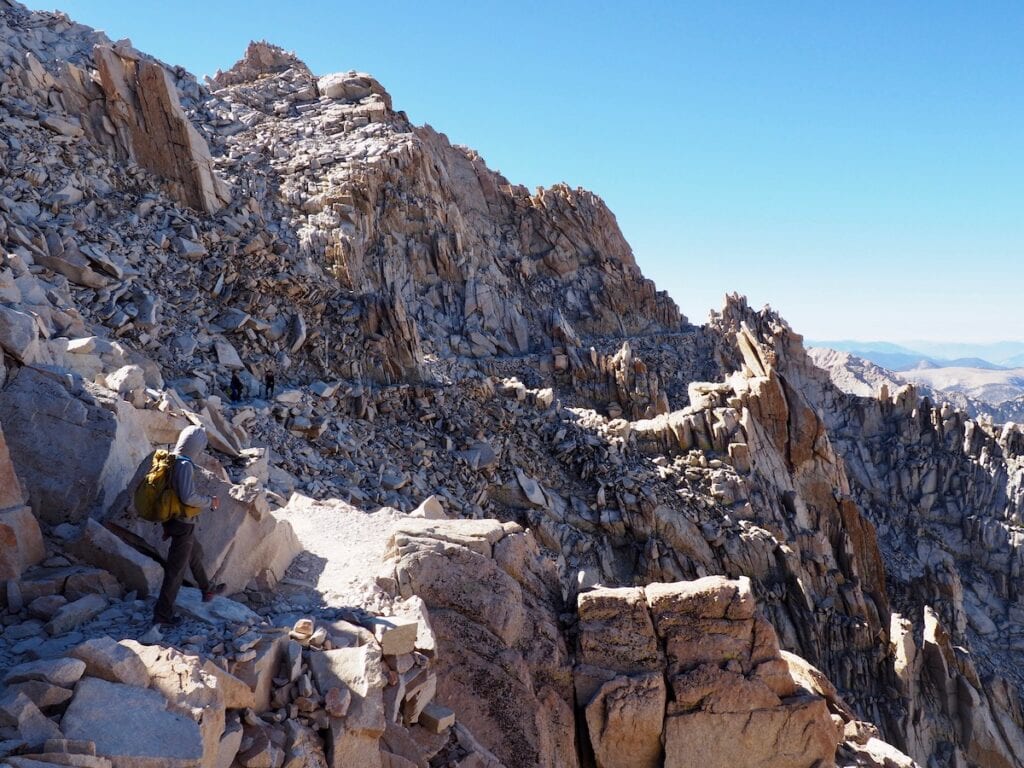
When we got to the Trail Crest, the side trail that leads to the summit, I think it was about 5:30am. We still had 2 miles and 1,000 feet to climb. We started to get nervous that we weren’t going to make it, so we decided to drop our packs at that junction since we would be passing by it again on the way down. I quickly grabbed my small daypack, some water, and an extra layer. Now running 30 pounds lighter, we were able to pick up our pace as we raced the sun to the top.
Note: Dropping packs at Trail Crest is common practice but keep in mind that the marmots are keen on digging through packs for snacks! Make sure you put all snacks and scented items in your bear canister and tightly close all zippers and buckles on your pack. There is a risk that a determined marmot will chew a hole through your pack!
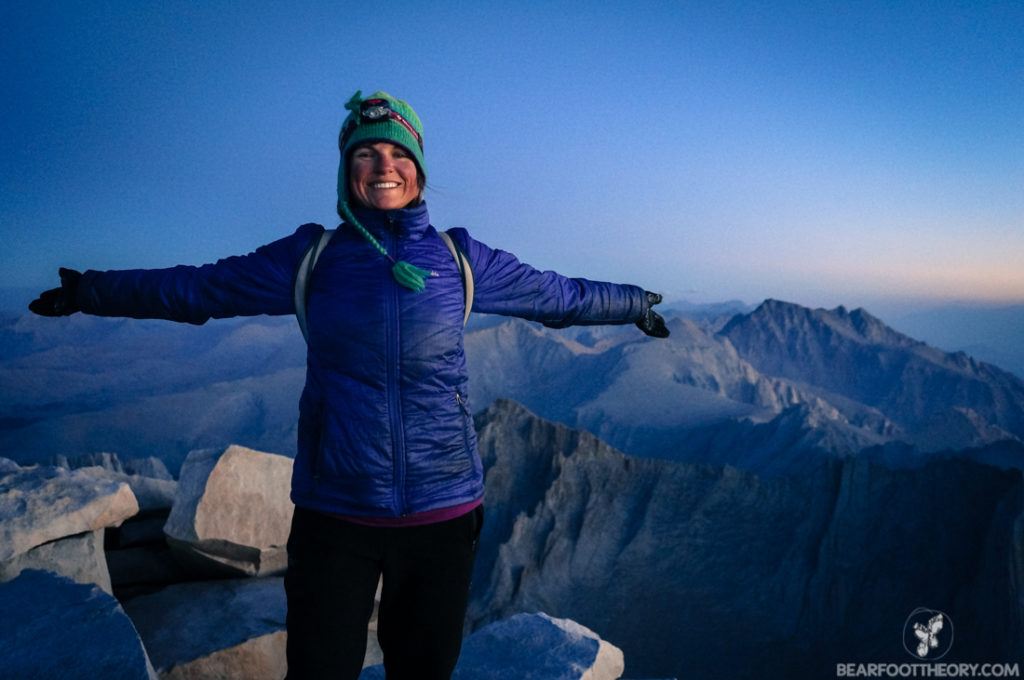
Dropping our packs ended up being an excellent decision. We arrived just before 6:30, just in time to witness the velvety blue sky light up as the sun rose in the east over Death Valley. It was FREEZING cold up there, but the sunrise was everything we wanted it to be. I even felt a little emotional up there. All that planning and all that hiking to get there. We did it. We were proud, excited, and sad. Lots of mixed emotions.
After the sun came up, we were so cold that we couldn’t really stay up there much longer. We tried to warm up in the hut but eventually decided to sign the register and head back down.
Mary also elected to wake up at 2 am to hike up Mount Whitney for sunrise. But since she was hiking Northbound, she left her tent set up at Crabtree Meadows and hiked Whitney out and back with a light pack. After climbing in the dark and summiting at dawn, she detoured to Hitchcock Lakes for a victory swim on the way down. Hitchcock Lakes, located just beyond Guitar Lake but slightly off trail, would be another excellent alternate camping option for a SOBO’ers last night on trail.

Overall, the hike down from Mt. Whitney to Whitney Portal was actually pretty difficult. You lose about 5,500 feet over 8 miles and it’s pretty tough on the knees. Make sure you have enough water and snacks to fuel you till the end. There are several spots to filter water on the way down. At the trailhead, you’ll find the Whitney Portal Store, which sells snacks, souvenirs, and legendarily huge victory pancakes.
In the end, I hiked about 240 miles over 22 days, and Mary hiked over 300 miles in 27 days, including multiple side trips off the JMT. It was one of the most transformative trips of my life. We hope this 3 week JMT itinerary inspires you to plan your own thru-hike of this iconic trail!
READ NEXT
Planning a JMT thru-hike? Here’s our top John Muir Trail posts:
Any questions about this 3-week John Muir Trail itinerary? Leave a comment below!