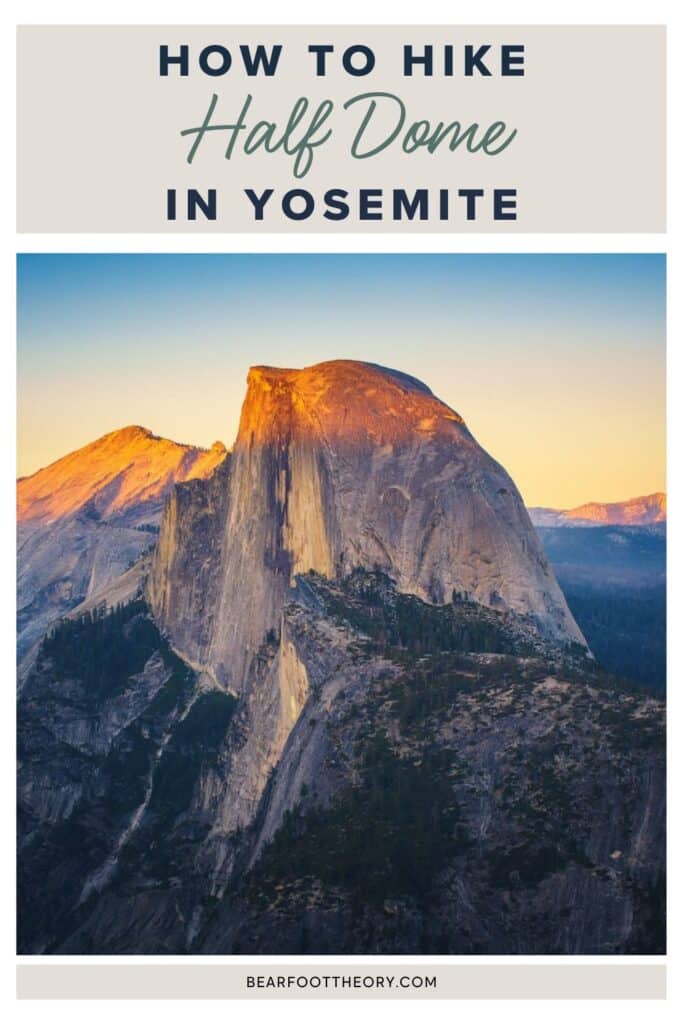
How to Hike Half Dome in Yosemite National Park
Half Dome is one of the most memorable hikes I’ve ever done. Learn how to hike Half Dome In Yosemite with this guide including when to go, how to get permits, what to bring, and tips on how to prepare.
I hiked Half Dome in 2019 along with my husband and a couple of friends. This trip holds a special memory for me because not only was I proud of myself for successfully finishing the tough climb, but my husband planned a surprise birthday celebration at the top of the dome for me!
Half Dome is considered one of the best hikes in Yosemite National Park. It also ranks among the most famous trails in the US.
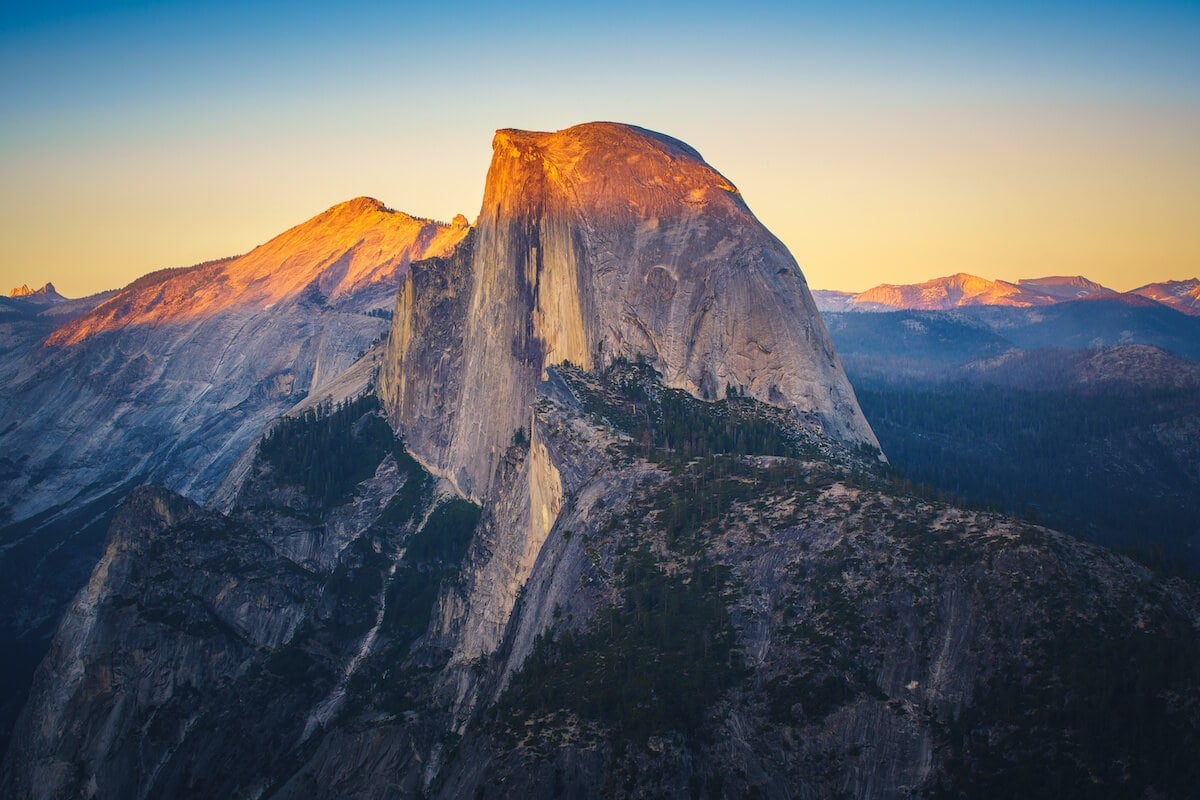
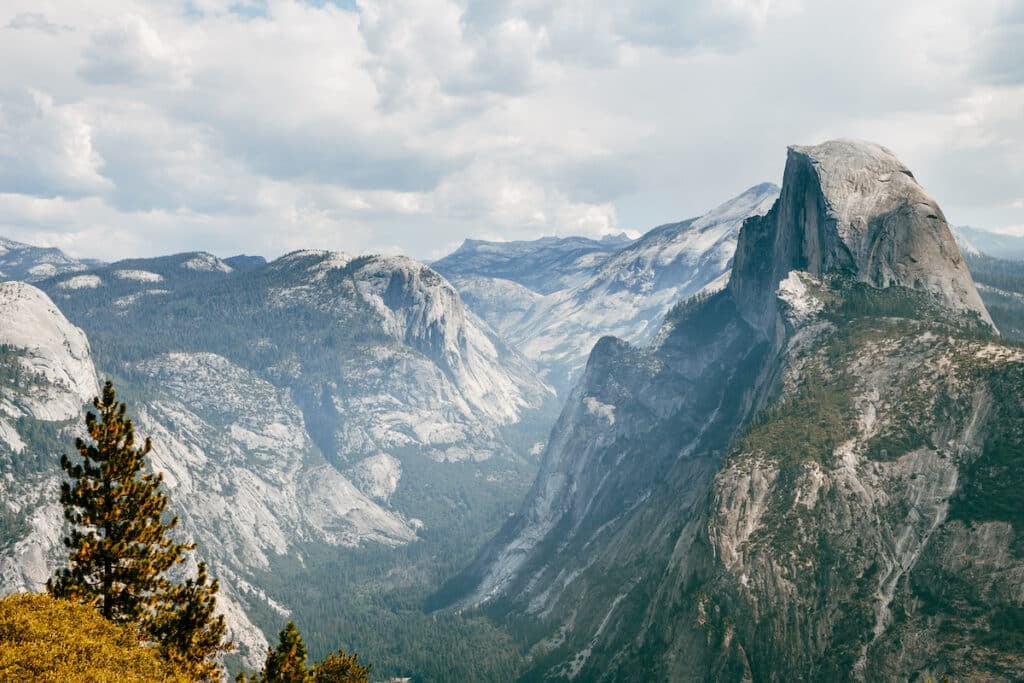
Etched into the stunning canvas of California’s Sierra Nevada mountains, Half Dome is recognized for its sheer granite face and the iconic (and nerve-wracking) steel cables you must climb to reach the summit.
Hiking Half Dome is not for the faint of heart – it’s an extremely strenuous day hike spanning 14+ miles with 5,300+ feet of elevation gain. But you’ll be rewarded with stunning waterfalls along the way and panoramic views of the entire Yosemite Valley and High Sierra from the 8,800-foot summit, so it’s worth the strenuous trek.
Keep reading for our complete guide on how to hike Half Dome including when to visit, what to pack, how to get Half Dome permits, and a detailed trip report.
This post may contain affiliate links.
Half Dome Overview & Trail Map
There are many routes for hiking to the top of the Half Dome. You could do it in a day or you could do a multi-day backpacking trip.
Most people (including us) choose the day hike which is totally doable with proper preparation and planning.
For the day hike, the hike to the top of Half Dome is a combination of two trails: the Mist Trail and the John Muir Trail.
These two trails start at the same trailhead (Happy Isles) and end at the Half Dome so have a lot of overlap (shown in red on the map). There is a section where these two trails split on the way. The blue section shows the John Muir Trail route and the yellow section shows the Mist Trail route.
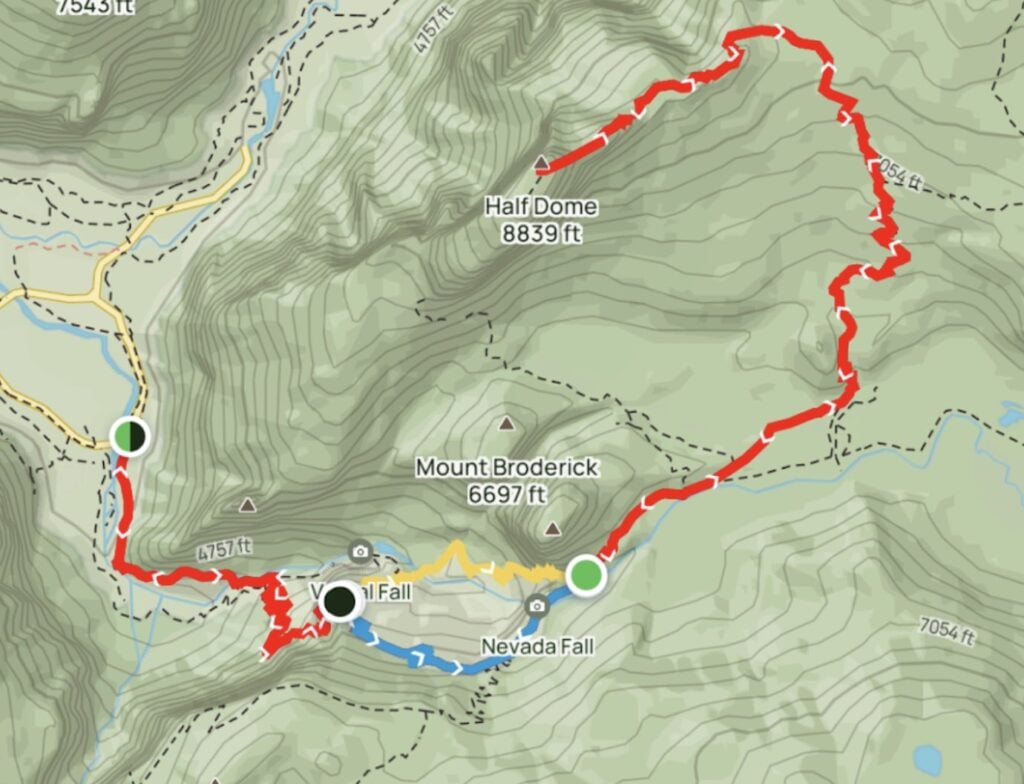
Based on which route you choose, the trail length and time may vary. Basically, you can pick between an extra 1.5 miles of easier terrain by taking the John Muir Trail, or a steep and shorter route by taking the Mist Trail, or you could do one trail on the way up and another on the way down.
Most people choose to hike the Mist Trail on the way up and the John Muir Trail on the way down.
This is the way we hiked the trail and would highly recommend it. The Mist Trail on the way up has great views of the Vernal & Nevada Falls and the John Muir Trail on the way down was much better for my knees after a very long day of hiking.
Trail Basics
Save this post!
Enter your email & I'll send this post to your inbox! You'll also receive my weekly newsletter full of helpful advice for planning your adventures.
How To Get a Half Dome Permit
Due to the popularity of hiking Half Dome, permits are required for every day that the cables are up. This permit system not only protects the landscape from overuse but also ensures the safety of the hikers by reducing the crowding on the cable section.
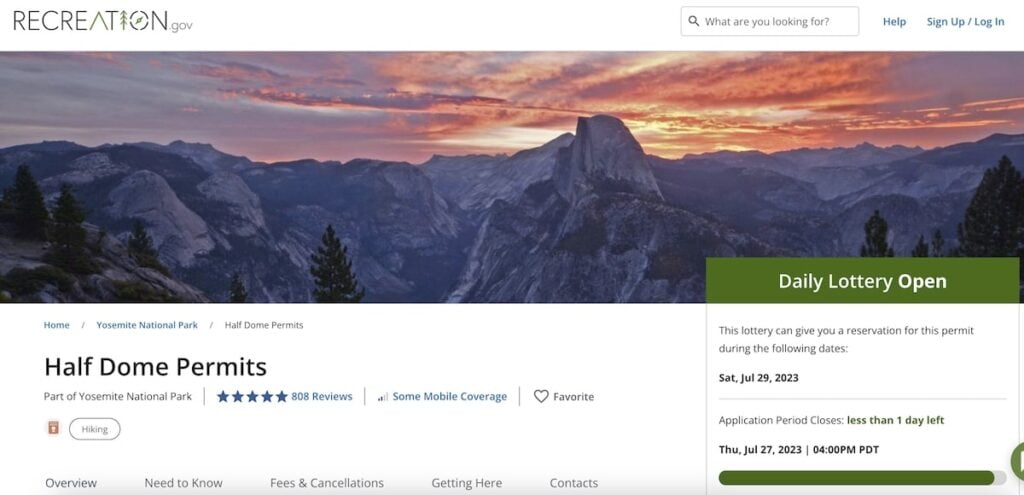
There are two ways for day hikers to secure a Half Dome permit – in the March preseason lottery or the daily lottery during the hiking season. All permits are reserved via Recreation.gov.
According to the Yosemite website, you have a higher chance of winning the lottery if you apply for a weekday permit when there is less demand. Saturday has the most lottery applicants, and is the most difficult day to get a permit.
Note – the two processes below are for day hikers. If you are backpacking in Yosemite or hiking the John Muir Trail, you should apply for a Half Dome permit as part of your wilderness permit application.
Also, if you get a Half Dome permit, you do NOT need a separate entrance reservation to enter the Park. Entrance reservations are only required on peak days for people who do not have a wilderness permit, Half Dome permit, or campsite or lodging reservations.
Pre-Season Lottery
To enter the preseason lottery, you must apply online anytime March 1-31 and results will be emailed out in mid-April. If you are successful in getting a permit, you’ll need to confirm your reservation and pay the permit fee.
There is a cap of 225 dayhikers per day, so if you do score a permit in the pre-season lottery, consider yourself lucky. We won the preseason lottery so we were able to plan our trip far in advance.
Daily Lottery
If you don’t get a permit in the pre-season lottery, there is a daily lottery that occurs two days before the day you’d hike Half Dome (ex. you’d apply on a Thursday to hike on a Saturday). The number of permits granted through the daily lottery is based on cancellations and the estimated rate of no-shows.
The results of the daily lottery are given the night of the lottery, so you have the entire next day to prepare.
What Happens If I Don’t Get a Half Dome Permit?
If you do NOT get a permit, you will only be allowed to go as far as the sub-dome (which is the base of the Half Dome below where the chains are attached to the mountain).
Rangers are typically stationed at the sub-dome to check for permits and it is a hefty fine of up to $5,000 if you are caught climbing Half Dome without a permit.
Please do not attempt the cables without a Half Dome permit.
Best Time to Hike Half Dome
The Half Dome cables usually go up the Friday before Memorial Day (conditions permitting) and come down the second Monday in October, so this narrows down the window if you want to reach the summit.
As history shows, the greatest number of permit requests are for mid-June to mid-September. So if you want your best chance of getting a permit, you should go in late-May through mid-June or between mid-September and when the cables are removed in October.
Some people climb Half Dome outside of when the cables are up (and permits are not required), but that’s highly unadvised.
We got our permit for August and during this time, the park seemed less crowded than our previous visits in May and July. The weather was pleasant for hiking and thankfully there were no wildfires nearby affecting air quality.
How Long Does it Take to Hike Half Dome?
Depending on whether you choose to do the John Muir Trail or the Mist Trail or a combination of both, the hiking time may vary. On average, it takes 10 – 14 hours to hike Half Dome with lots of breaks in between.
Since we were not staying at the park, our day started early around 4:30 am and we reached the parking lot around 5:45 am. There were ample parking spots at the Yosemite Valley trailhead parking so we parked our car and started the hike around 6:00 am.
Our pace was pretty good and we were able to finish the hike in 12.5 hrs around 6:30 pm, with plenty of time to enjoy the summit.
How To Train for Half Dome
As evident from the stats, Half Dome is an extremely strenuous hike in terms of length and elevation gain. Proper planning and training are critical to having a fantastic experience.
We trained for hiking Half Dome by going on hikes of various different lengths (6 miles to 10 miles) every other weekend to make sure we are in good shape and practice. I would highly recommend doing that if possible so that your body is used to the distance.
Planning Your Half Dome Hike
For the most pleasant experience, planning the whole Half Dome trip in advance is best. Obviously, if you apply for the Daily Lottery, that’s not possible, but here are a few key things to keep in mind:
Yosemite Entrance Fees
Since Half Dome is part of Yosemite National Park, you need to pay the per-vehicle entrance fee or use your America the Beautiful annual pass.
When To Start Hiking Half Dome
In order to do the day hike, you need to reach the trailhead pretty early in the morning at sunrise (or even earlier), and decide on a non-negotiable turn-around time (aka the time you will turn around if you have not yet reached the summit).
The parking lot can fill up quickly, so an early arrive is key for getting to park as close to the trailhead as possible.
Half Dome is quite exposed so if you’re hiking in the heat, it’s almost imperative to get an early start to try to beat the heat.
Accommodation
Staying in the park itself the night before your Half Dome hike will ensure reaching the trailhead early in the morning and is recommended if you can get camping or lodging reservations.
Unfortunately, we were not able to get accommodation in the park, but if we were able to get one close to Yosemite Valley we would have preferred that to avoid the 1+ hour drive at 4:30am.
Trail Report: Our Experience Hiking Half Dome
Starting the Hike
We reached the National Park around 5:30 am, and parked our car at the Yosemite Valley Trailhead Parking on the Happy Isle Loop Road. It is then a short 0.5 mile walk from Happy Isles Trailhead to the Half Dome Trailhead. We started around 6:00 am.
Vernal Falls
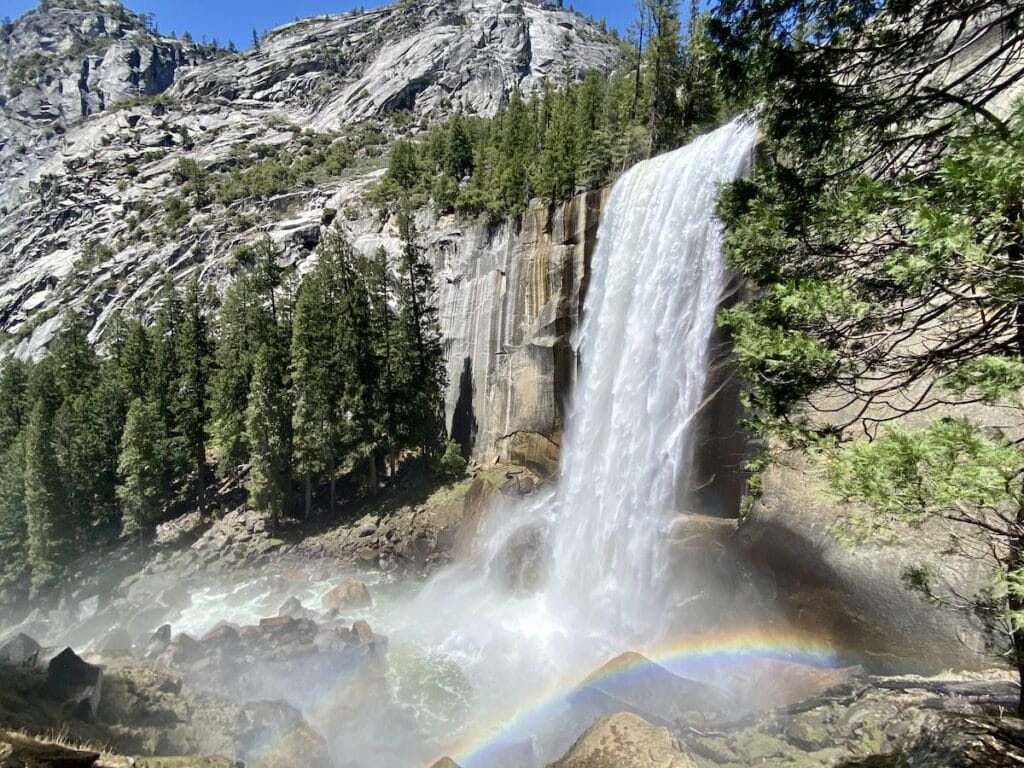
The first significant viewpoint from the trailhead is the Vernal Falls footbridge where you get a glimpse of Vernal Falls. It is about 1.5 miles from the trailhead, but the climb is pretty steep.
The waterfall is really pretty and this is a great spot for a photo op. Vernal Falls is also your last chance for flush toilets and a water fountain.
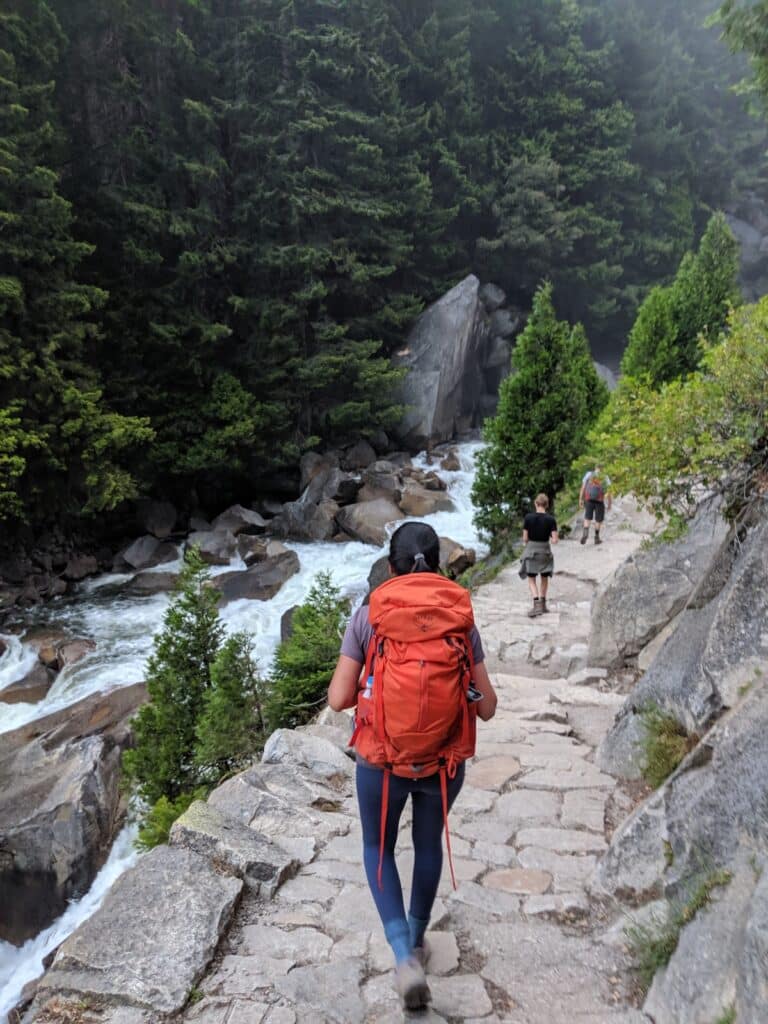
After the Vernal Falls footbridge, the path branches into two, where you can pick the Mist Trail or John Muir Trail.
We choose to do the Mist Trail on the way up as it provides a close-up view of the waterfalls. The Mist trail is quite steep and you eventually reach the top of Vernal Falls. Be prepared to get wet on this path as the mist from the waterfalls gets to you. I’d recommend wearing a rain jacket or poncho during this section!
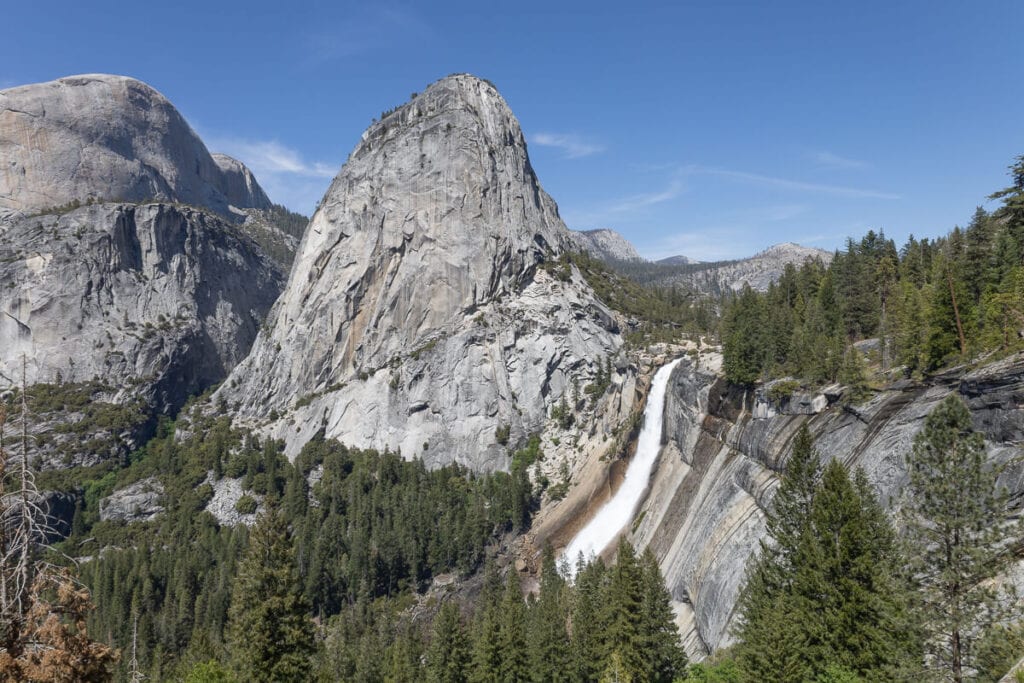
Nevada Falls
Climbing even further in around 2 miles you will eventually reach Nevada Falls. There is a small detour to view the top of Nevada Falls and take a short break. Hiking to the top of Vernal & Nevada Falls via Mist Trail is considered one of the best things to do in Yosemite National Park, so don’t expect solitude on this section of the hike.
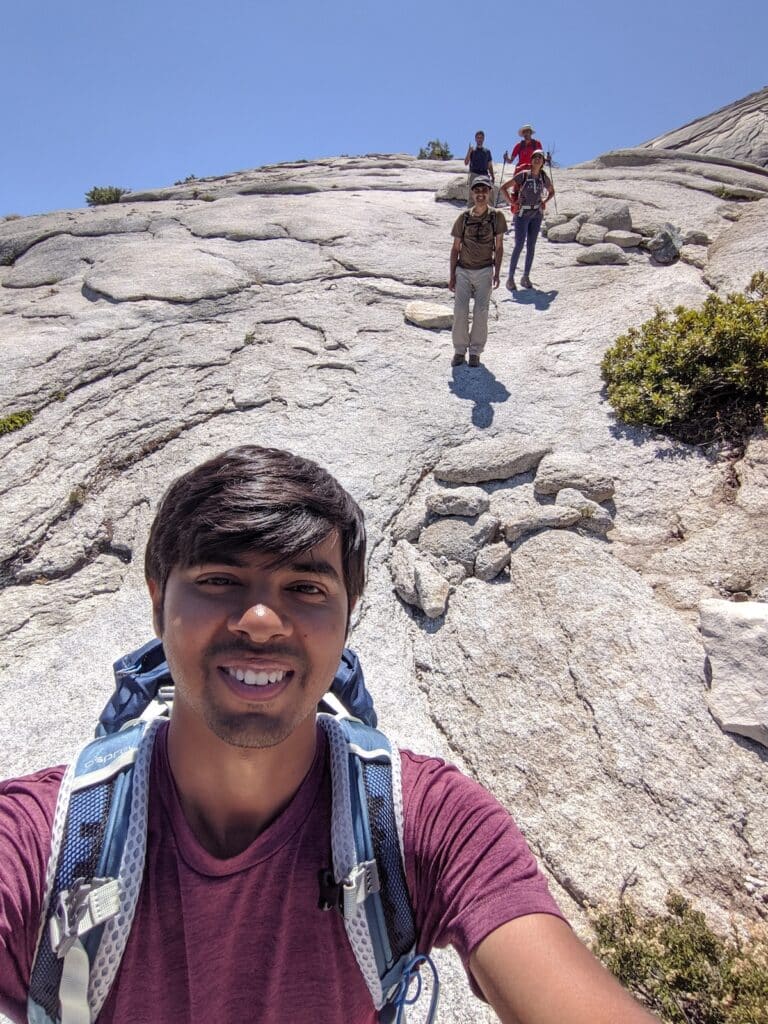
Subdome
About 3 miles after Vernal Falls, you will reach the subdome. To reach the subdome, you will have to climb the giant rock stairs. This is definitely one of the challenging parts of the hike!
After the climb, you will finally reach the top of the subdome. From the top of the subdome, you will see the famous Half Dome cables. This is a good spot to take a break and gear up before you eventually start the climb.
I was honestly a bit overwhelmed at this point. I do not have a fear of heights but for me, it was about taking a deep breath before the cables and gaining mental strength (Mind over matter).
There is sincerely no shame in getting to the cables and turning around. I would have done that if I didn’t feel confident. If you don’t feel so then it’s totally okay. If you attempt it without being comfortable you will not only put yourself but also others in danger.
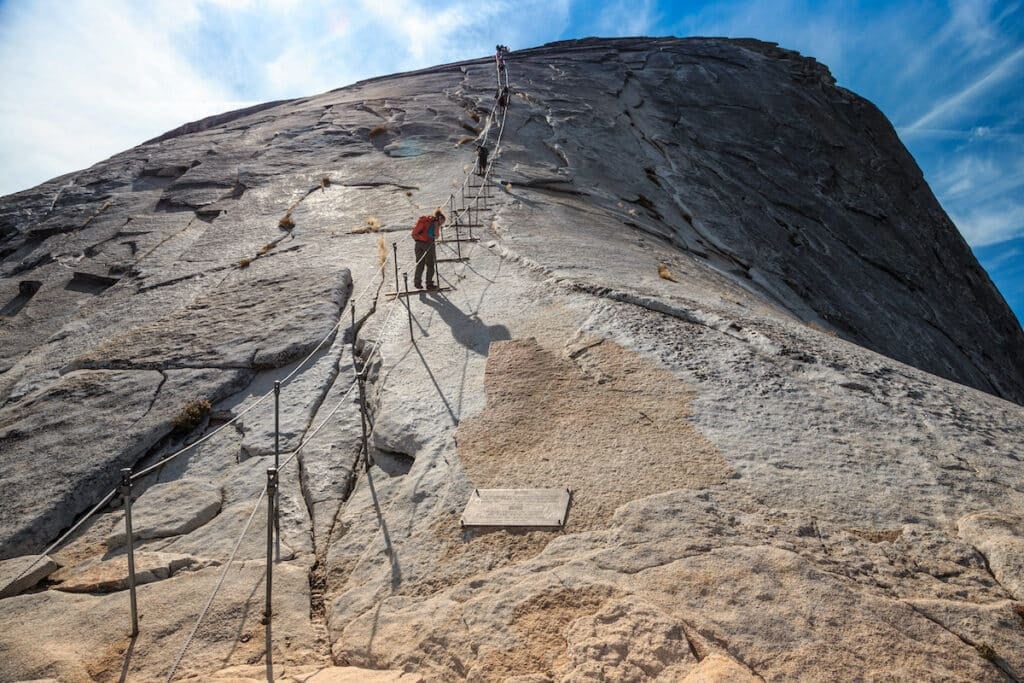
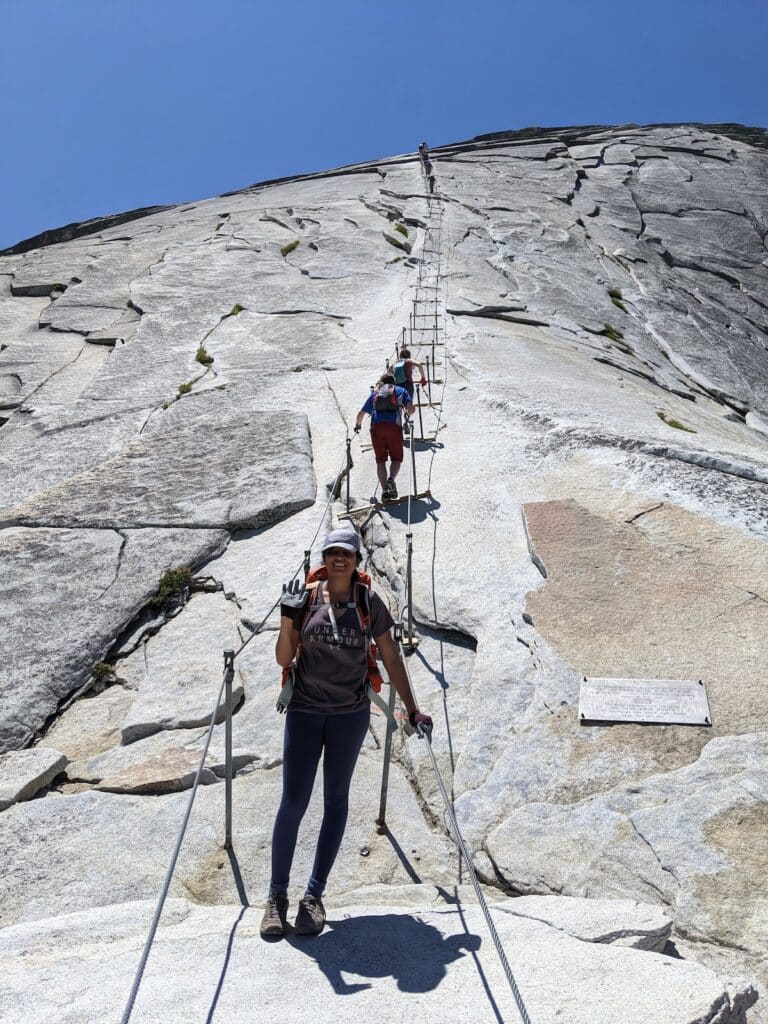
Climbing the Steel Cables
We reached the cables around 11:30 am. There was no ranger stationed at that time to check for permits, but always have your permit handy just in case.
There are two cables to climb the last 400 feet to the summit. Every 10-20 feet there are wooden planks to rest and maintain your balance. The cables are about a 45-55 degree grade, and you don’t need any rock climbing gear to climb them.
Before you start the climb, I recommend you put on full-fingered gloves. This will give you a more comfortable grip on the cables and help you avoid any blisters. Also be sure to secure any belongings (camera, phone, water bottle) so nothing falls out of your day pack during the climb!
I thought the metal cables would be daunting, but I climbed them slowly, one step at a time, and it wasn’t as scary as I expected.
It is the same path for hikers going up and coming down so being mindful is key.It is important to not only take your time but also be patient with other hikers. There were not many people on the cables during our climb. Remain on the inside of the cables while climbing for your own safety.
We reached the summit of Half Dome after 20 minutes of climbing up the cables.
If you are mindful and safe, this part is extremely thrilling and one of the highlights of the whole hike!
Safety Tip
Attempting the cables in stormy or wet conditions is unsafe! The cable section can get slippery and the entire area is completely exposed. You wouldn’t want to get caught at the top during a lightening event. In that case, you should use your best judgement and turn around at the top of the subdome.
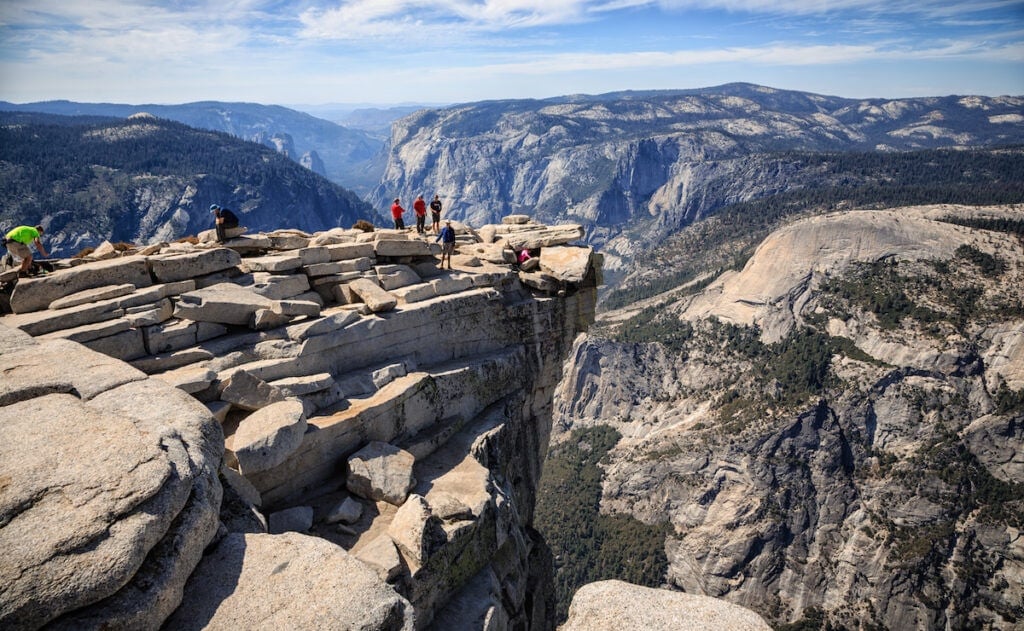
Summit of Half Dome
We finally reached the top of the Half Dome around noon and we were greeted with panoramic views of Yosemite Valley and the High Sierra.
After a few photo sessions, I was in for a surprise. My husband had carried a mini cake (Nothing Bundt cake — my favorite) to celebrate my birthday. We cut the cake and did a mini celebration before starting the return journey.
Hike Back to Happy Isles Trailhead
It took us almost twice as long to climb down the cables than to climb up them because there were a lot of hikers coming up. Following proper hiking etiquette, always yield to the uphill (or up-climbing) hikers.
Once I got down the cables, I couldn’t believe what I just did! The feeling was incredible. We were all excited to go back and enjoy a delicious meal so the return journey felt like it flew by.
At Nevada Falls, we chose to do the longer John Muir Trail as it was easier on the knees.
I hope this guide covers all the details that will help you plan your Half Dome hiking trip. As always, please follow the Leave No Trace principles, don’t forget to have fun, take lots of pictures, and have a safe, enjoyable hike!
Half Dome Packing List
In addition to the 10 day hiking essentials, there’s a few specifics you need for hiking Half Dome:
- Full-fingered grippy gloves (for the cable section)
- Rain jacket or poncho (you will get wet taking the Mist Trail!)
- Minimum 3L water + water filter
- Lots of hiking snacks
- Electrolytes
More Yosemite Tips
Save this post to Pinterest
Do you have any questions about hiking Half Dome? Leave them in the comments below!