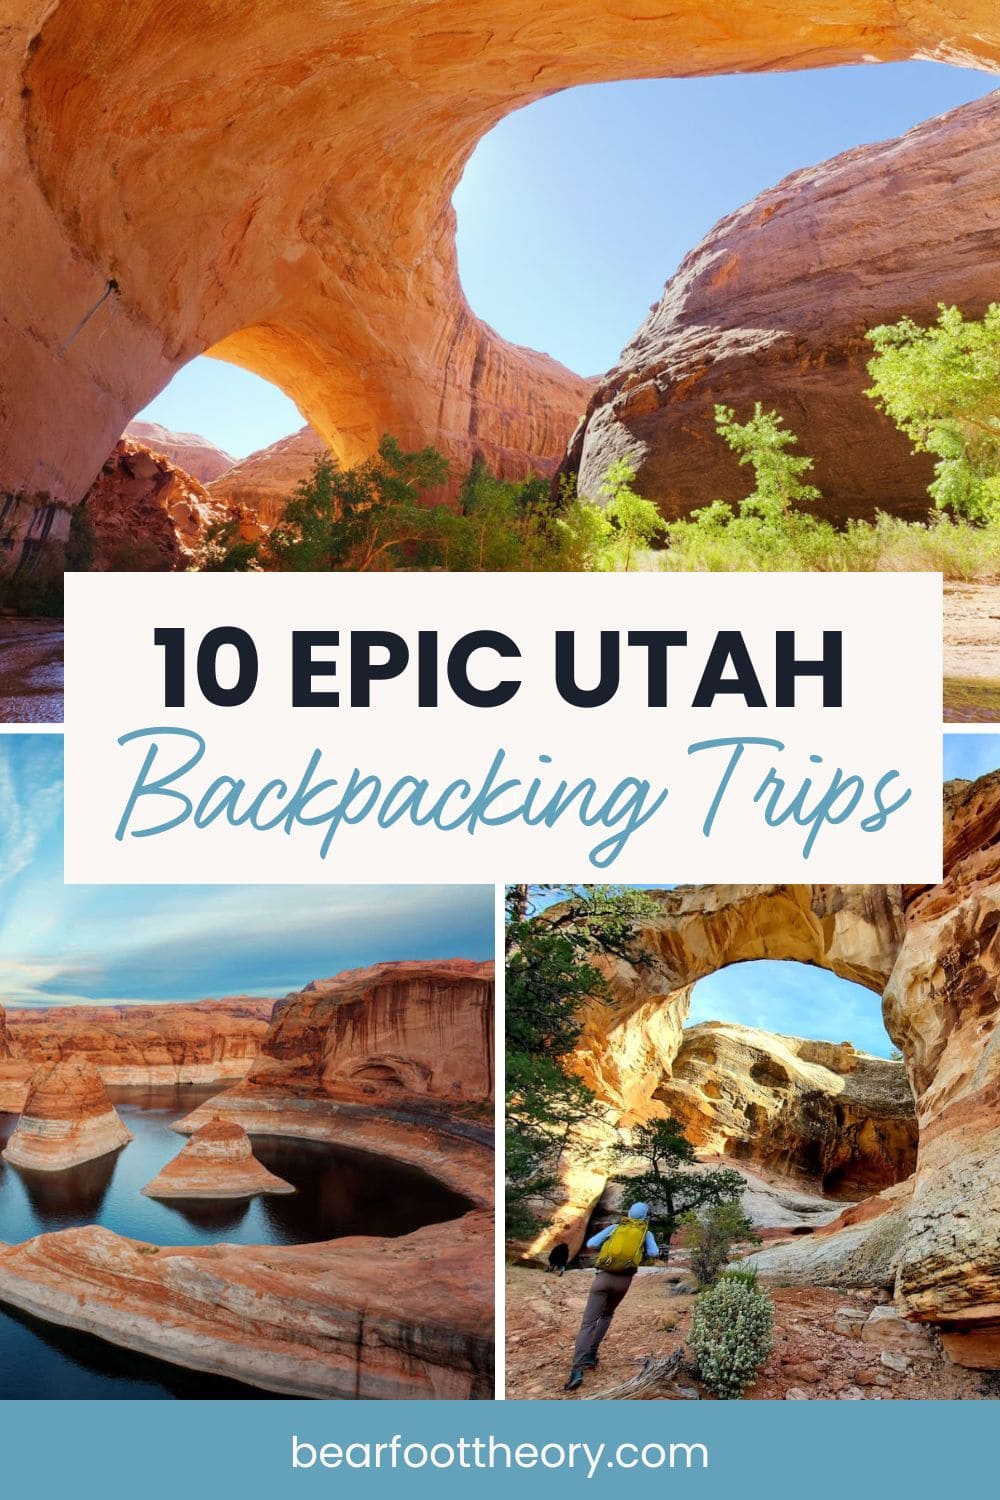
10 Best Utah Backpacking Trips
Discover the best Utah backpacking trips across the state from easy but scenic one-night trips to multi-day backcountry adventures.

Although Utah is most famous for its “Mighty Five” National Parks (Arches, Canyonlands, Capitol Reef, Bryce, and Zion), more than 70% of the state is classified as public land from national monuments to recreation areas to national forests to BLM areas, and the opportunities for outdoor recreation are expansive.
If you’re ready to stretch your legs on some longer multi-day hikes, here are 10 of the best backpacking trips in Utah, ranging from incredibly beautiful overnights to challenging week-long trips.
This post may contain affiliate links.
Best Utah Backpacking Trips – Mapped
Save this post!
Enter your email & I'll send this post to your inbox! You'll also receive my weekly newsletter full of helpful advice for planning your adventures.
1. Coyote Gulch Loop
- Location: Glen Canyon National Recreation Area
- Trail Type: Loop
- Distance: 10.6 miles
- Suggested Time: 2 days, 1 night
- Difficulty: Hard
- Permit needed? Yes
- Best Seasons: Spring and fall
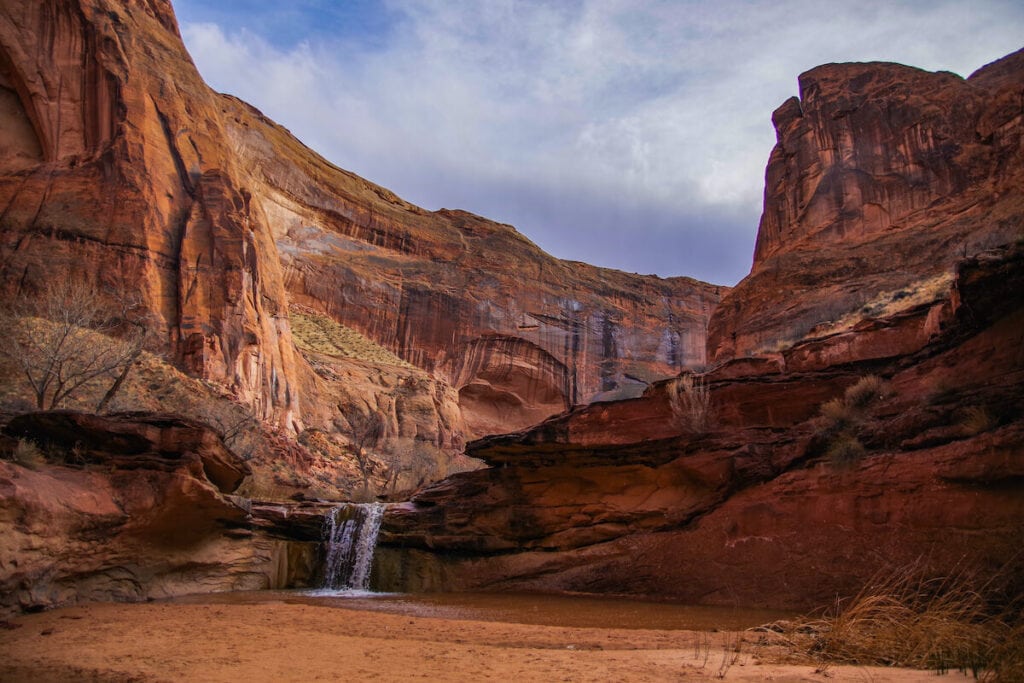
If you’re in the market for a relatively short but delectably sweet overnight hike, head to Coyote Gulch, which borders Glen Canyon National Recreation Area and Grand Staircase-Escalante National Monument.
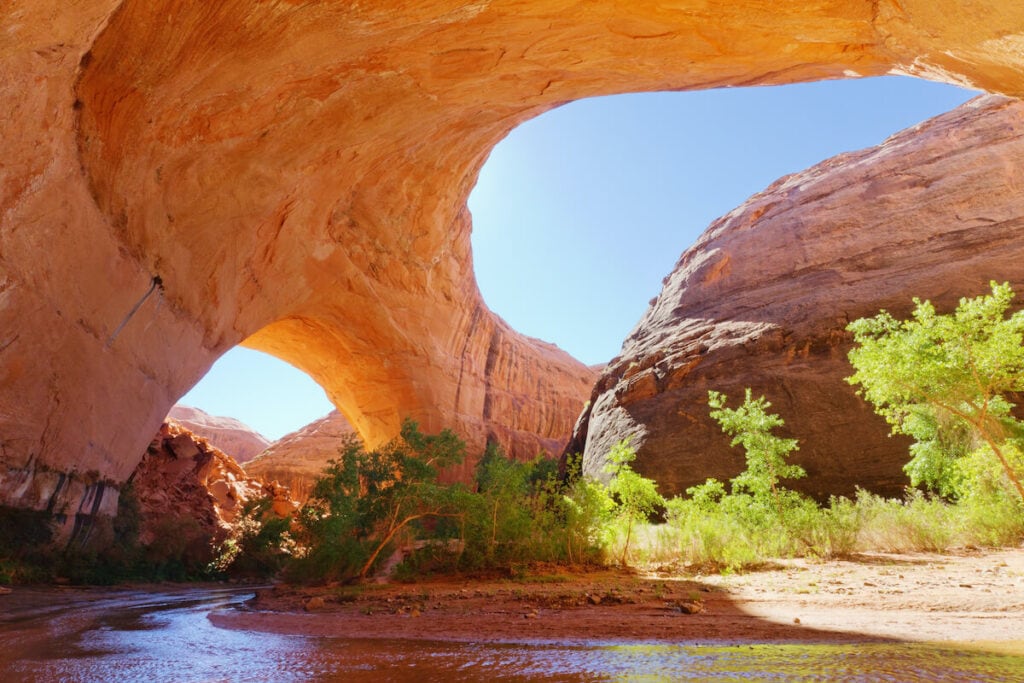
This hike can be done in several variations, up to 22 miles in length, but this 10.6-mile loop hits many of the area’s highlights including two arches, a natural bridge, and numerous waterfalls.
First, stop at the Escalante Interagency Visitor Center in the town of Escalante to pick up your permit, inquire about road conditions and get the latest weather report.
The 10.6-mile loop is accessed by driving the notoriously rutted Hole in the Rock Road to the infamously sandy 40 Mile Ridge Trailhead. Depending on the road conditions, which change from year to year and season to season, you will likely need 4WD, especially for the deep sand on the last two miles to the trailhead. If your vehicle isn’t 4WD, you may be able to start the loop from the Hurricane Wash trailhead, 33.8 miles down Hole in the Rock Road.
Coyote Gulch’s biggest draw is the miracle of water in the desert. You’ll likely get your feet wet on this hike as the route follows and continuously crosses a perennial stream to its confluence with the Escalante River. Beware of flash flood danger in late summer and avoid this hike if thunderstorms are in the forecast.
From the 40 Mile Ridge Trailhead, the first mile is a bit of a sandy slog but soon you’ll enter the Crack in the Wall, a tight 18-inch wide fissure that drops you off the edge of the mesa into the canyon.
Plan to bring a rope to lower your backpacks through this section. The best campsites are found between miles 4 and 5 and water is found throughout the canyon seeping from natural springs trickling out of the canyon walls.
To exit the canyon, you’ll need to tackle a short scramble up some ledges just past Jacob Hamblin Arch. Inexperienced hikers may find this section intimidating, but there are often fixed ropes here to help protect the climb but you may want to bring your own.
Read next: For a slightly longer one-way trail (vs. loop above), check out our Coyote Gulch Backpacking guide which covers the hike from Hurricane Wash to Crack in the Wall.
Planning information
2. Reflection Canyon
- Location: Glen Canyon National Recreation Area
- Trail Type: Out and Back
- Distance: 15.2 miles
- Suggested Time: 2 days, 1 night
- Difficulty: Moderate
- Permit needed? Yes
- Best Seasons: Spring and fall
This adventurous overnight hike ends at one of the best sunset/sunrise spots in southern Utah, overlooking a uniquely squiggly arm of Lake Powell. This view of bright blue goosenecked bays bordered by towering Navajo sandstone cliffs was made famous by National Geographic and then Apple computers, which used an image of this vantage point in advertisements for the 2012 MacBook Pro.

You’ll need a reliable 4WD vehicle to drive the 50 miles of ruts and bumps down the Hole in the Rock Road to the trailhead. From there, you’ll need a strong sense of direction and a lot of water. There are no sources of water on this trek so you’ll need to carry enough for two days of strenuous hiking and a night of camping and cooking.
Before leaving Escalante, be sure to have the route downloaded on your favorite hiking app. Most of the route runs over slickrock and there’s no defined trail. Aim to follow the long line of cliffs on your right (west) as you hike south. If you stray too far east away from the cliffs you’ll end up in a maze of often impassable slot canyons.
About five miles from the trailhead, you’ll turn southeast to head towards the overlook. From here, you’ll be treated to magnificent views from sunset to stars to sunrise.
Planning information
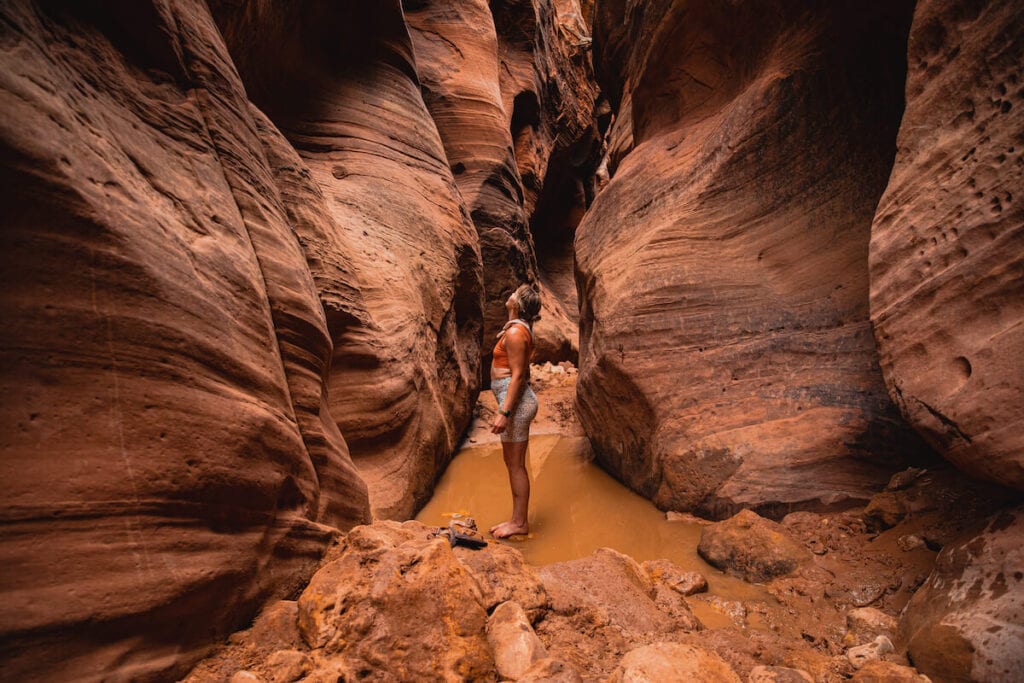
3. Lower Hackberry Canyon
- Location: Grand Staircase-Escalante National Monument
- Trail Type: Out and Back
- Distance: 12.4 miles
- Suggested Time: 2 days, 1 night
- Difficulty: Moderate
- Permit needed? Yes
- Best Seasons: Spring and fall
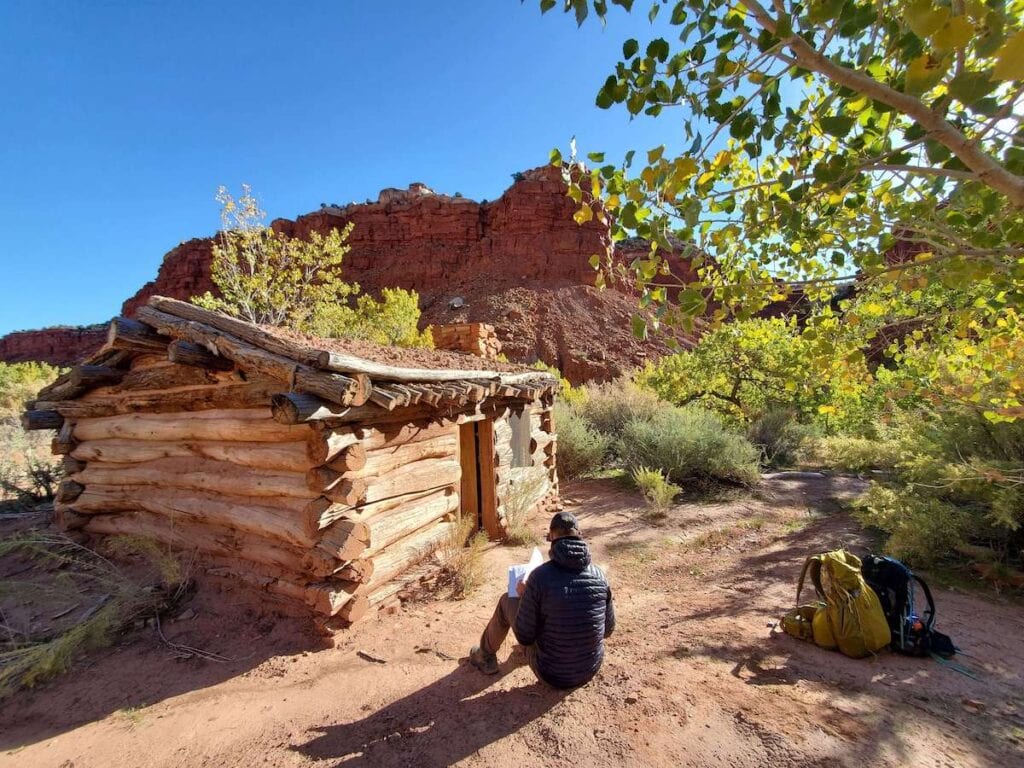
Travel back in time to visit a historic cabin and the beautiful Sam Pollack arch on this overnight trek into Lower Hackberry Canyon.
Located at the southern end of the Cockscomb, an imposing and colorful ridge of uplifted sandstone, Lower Hackberry Canyon winds into the heart of the comb, following a beautiful creek that runs most of the year.
About four miles into the hike, you’ll reach Frank Watson’s cabin. Built in 1914 using cottonwood logs harvested on-site, this one-room cabin was restored in 2021 and is an excellent example of a 100-year-old homestead.
Intrepid hikers may also want to seek out an even older abode in the nearby side canyon: a small food storage granary, some grinding stones, and an intriguing humanoid pictograph found nearby in a hidden alcove.
After exploring the cabin and the side canyon, hike another half mile north up Hackberry Canyon to the confluence with Sam Pollock Canyon where you’ll find some great tenting options under the cottonwood trees.
Following Sam Pollock Canyon to the northwest, in another 1.5 miles you’ll reach the spectacular Sam Pollock Arch.

Planning information
Read next: Heading to Kanab? Read our guide on the best things to do in Kanab, Utah to make the most of your visit.
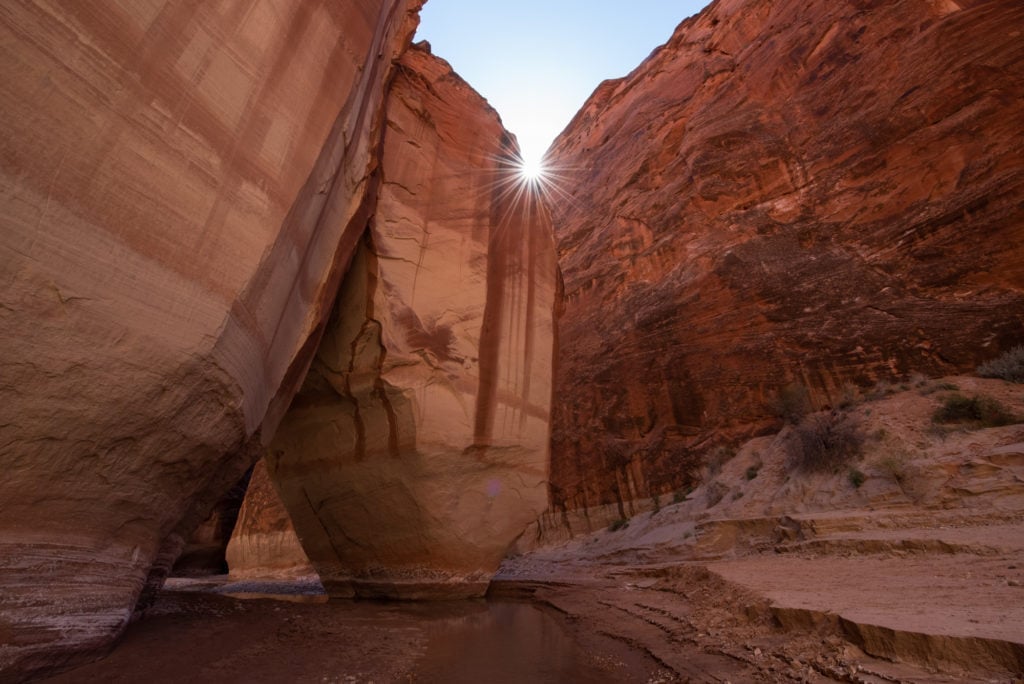
4. Paria River to Lee’s Ferry and Buckskin Gulch
- Location: Paria Canyon-Vermilion Cliffs Wilderness Area
- Trail Type: Point to Point
- Distance: 40 miles
- Suggested Time: 4 days, 3 nights
- Difficulty: Hard
- Permit needed? Yes (and they are competitive)
- Best Seasons: Spring and fall
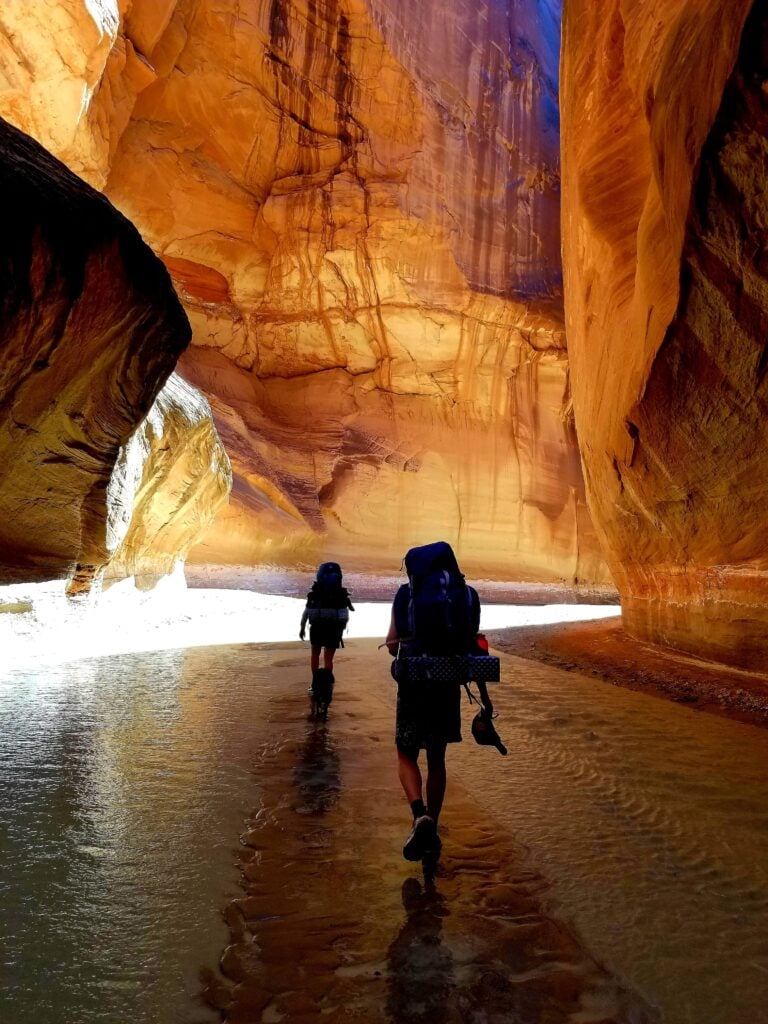
Get your fill of world-class slot canyons on this 40-mile route that starts in Utah and ends at the Colorado River in Arizona.
The Paria River is a major tributary of the Colorado, joining the Colorado River at Lee’s Ferry upstream of the Grand Canyon.
Along the way, you’ll spend two whole days in a narrow slot canyon with an optional side trip into Buckskin Gulch, one of the world’s longest continuous slots.
Permits for both the Paria and Buckskin Gulch are extremely competitive with only 20 people a day allowed into the Paria. See permit info below.
The Paria’s stunningly beautiful setting makes this a popular hike but it’s important to know that it is also extremely challenging. For much of the trek, you’ll be repeatedly crossing the creek and often wading in the water as well as dodging ubiquitous quicksand.
Spring and fall are the most desirable months but freezing water temperatures early and late season can make for miserable conditions.
In the summer, the canyon dries up and turns into a furnace while late summer monsoons can deliver deadly flash floods in these inescapable canyons.
If you manage to snag a permit during a good weather window when the Paria is running but not too high, you’ll be in for some of the most beautiful days of your life.
After leaving from the White House trailhead, the canyon begins narrowing down into its legendary slot, passing between towering red walls of Navajo sandstone.
Just after 7 miles, you’ll pass the confluence with Buckskin Gulch with a few campsites near the junction. A side trip up the narrow corridor of Buckskin Gulch is a must-do. This is one of the most beautiful and harrowing slot canyons on Earth!
Back in the Paria, you’ll continue south, following the endless twists, turns, and meanders into the ever-deepening and narrowing slot. Keep your eyes out for springs seeping from the walls. These are your best water sources, as the Paria itself is usually too silty to filter.
After more than 30 miles in the narrows, the canyon widens as it approaches its mouth at the Colorado River. Here you’ll find Lee’s Ferry, a historic crossing of the Colorado that now serves as the put-in for rafting trips into the Grand Canyon.
Read next: Get more tips for planning your adventure with our Paria Canyon Backpacking guide (which skips the Buckskin Gulch section).
Planning information
5. The Boulder Mail Trail
- Location: Grand Staircase-Escalante National Monument
- Trail Type: Point to Point
- Distance: 15 miles
- Suggested Time: 3 days, 2 nights
- Difficulty: Hard
- Permit needed? Yes
- Best Seasons: Spring and fall
Until the 1930s, the remote town of Boulder, Utah received its mail by mule, transported via the Boulder Mail Trail. Running in a fairly straight line between Escalante and Boulder, the Mail Trail crosses three major canyons and a lot of slickrock.
With precipitous drop-offs and deep water sections, the route is not for the faint of heart and it’s a wonder that the postal mules regularly traversed it with few mishaps.
The Mail Trail can be hiked in either direction but since the Boulder trailhead is almost 1,000 feet higher in elevation than the Escalante trailhead, most people hike from east to west for a net downhill hike, ending in Escalante.
Most of the route is well-cairned but you’ll want to be familiar with navigating on slickrock and have the route downloaded on your favorite hiking app before you begin.

The three major canyons, from east to west, are Sand Creek, Death Hollow, and Mamie Creek, each with its own character.
Water is usually found in both Sand Creek and Death Hollow and less reliably in Mamie. Death Hollow is the deepest and arguably loveliest of the three canyons, requiring an 800-foot descent down through Navajo sandstone benches into the canyon.
In Death Hollow, you’ll likely get your feet wet as you follow the creek for about a mile. Avoid the brushy banks as they’re often rife with poison ivy. Also, flash floods are a real danger here so be sure to check the weather before you commit to this hike.
The slickrock climb out of Death Hollow is marked by cairns and is easy to miss. The other route continues downstream to where Death Hollow meets the Escalante River.
You’ll also cross a fourth, unnamed canyon before reaching the Escalante trailhead. In total you’ll gain and lose around 2,500 feet of elevation throughout the 15-mile trek, going from Boulder to Escalante.
Planning information
6. Bullet Canyon to Grand Gulch
- Location: Bears Ears National Monument
- Trail Type: Point to Point
- Distance: 20 miles
- Suggested Time: 3 days, 2 nights
- Difficulty: Moderate
- Permit needed? Yes (and they are competitive)
- Best Seasons: Spring and fall
More than 1,000 years ago, this complex of deep serpentine canyons in what is now Bears Ears National Monument was a neighborhood inhabited by hundreds of people.
Many generations of families made a living here by growing food and hunting wild game and living in multi-roomed dwellings, often situated under overhanging cliffs. They also created art by painting and etching the walls of the canyon.
But as the climate became warmer and dryer, resources became scarcer and people began building defensive dwellings and food storage structures high on cliff ledges, reachable by only seemingly superhuman feats of athleticism and bravery. Around 700 years ago, people left the canyon, moving into larger Pueblo communities to the south and east.
Thousands of ancient dwellings are found throughout the Bears Ears region but Grand Gulch is famous for the density and preservation of sites. Today, Grand Gulch is preserved as an outdoor museum, with many artifacts and relics left in place.

All visitors to this fragile and sacred place must follow all Leave No Trace principles, as well as additional guidelines for visiting archaeological sites, including:
Permits for this trip, which follows Bullet Canyon to Grand Gulch to Kane Gulch, are competitive and all hikers, including day hikers, need to check in at the Kane Gulch Ranger Station before exploring the area.
Water remains scarce in these canyons so be sure to check with the rangers that springs are flowing or you may need to carry water for your entire trip.
Planning information
7. Under the Rim Trail plus Rigg’s Spring Loop

- Location: Bryce Canyon National Park
- Trail Type: Point to Point
- Distance: 31.8 miles
- Suggested Time: 3 days, 2 nights
- Difficulty: Hard
- Permit needed? Yes
- Best Seasons: Late spring, summer, and fall
Bryce Canyon is one of the country’s smallest national parks, only covering 55 square miles of land. But what the pocket-sized park lacks in size it makes up for in scenery. It boasts an incredibly colorful hoodoo spire-studded amphitheater that has been scooped out of the high-elevation Paunsaugunt Plateau.
Bryce is famous for its awe-inspiring overlooks but backpackers can get to know the park’s hoodoos, windows, and slot canyons on a more intimate level on the Under the Rim Trail.

This 23-mile trail begins at Rainbow Point in the south and runs north to Bryce Point, skirting the forested base of the plateau’s eastern edge. For bonus miles, add on the 8.8-mile long Rigg’s Spring Loop at the start of your trek.
Park shuttles connect all of the overlooks, including Rainbow Point and Bryce Point, making for easy logistics at the start and end of your hike.
Bryce Canyon reaches elevations over 8,000 feet, keeping this park much cooler in the summer months than the rest of Utah’s red rock country, which is often too hot for summer exploration. But even with cooler temperatures, water is still scarce in the amphitheater. Always check with park rangers about water availability before beginning your trek.
Some hikers elect to leave a water cache at the junction of the Under the Rim trail and the Swamp Creek connector trail. Bottles must be labeled with the hiker’s name and permit dates and must be packed out at the end of your hike.
Planning information
Read next: Looking to spend more time in Bryce National Park? Check out our complete guide for more tips on the best hikes, where to stay, and things to do.
8. West Rim Trail
- Location: Zion National Park
- Trail Type: Point to Point
- Distance: 14.1 miles
- Suggested Time: 2 days, 1 night
- Difficulty: Moderate
- Permit needed? Yes (permits are competitive)
- Best Seasons: Spring and fall
Take the scenic footpath route into Zion via the West Rim trail. This 14-mile route starts at Lava Point in the Kolob Canyons unit of Zion, northwest of the main part of the park.
Lava Point sits at nearly 8,000 feet of elevation, while Zion Canyon dips down to 4,000 feet, making this a net downhill hike.
For the first 6.5 miles, you’ll be treated to sweeping views of Wildcat Canyon and the West Rim of Zion before beginning your descent at Cabin Spring into Zion Canyon where you’ll end at the Grotto Picnic Area.
With a little planning and a lot of luck, you could also apply for a permit to hike Angel’s Landing, which you’ll pass on your way down into Zion. A new lottery system was implemented in 2023 to limit the number of hikers on the notoriously narrow route, but it’s worth trying for a permit since it’s a spectacular hike (if you don’t mind heights!)
The West Rim’s higher elevation makes this route possible during the hotter summer months, but you should be prepared to spend part of the day in the shade and hike in the cooler morning and evening hours.
There are nine designated campsites along this route and water is usually available from several springs and natural sources along the way but be sure to check availability before you start your hike.
Read next: Need help planning your trip? Check out our West Rim Trail Backpacking Guide and our general Zion National Park Guide.

Planning information
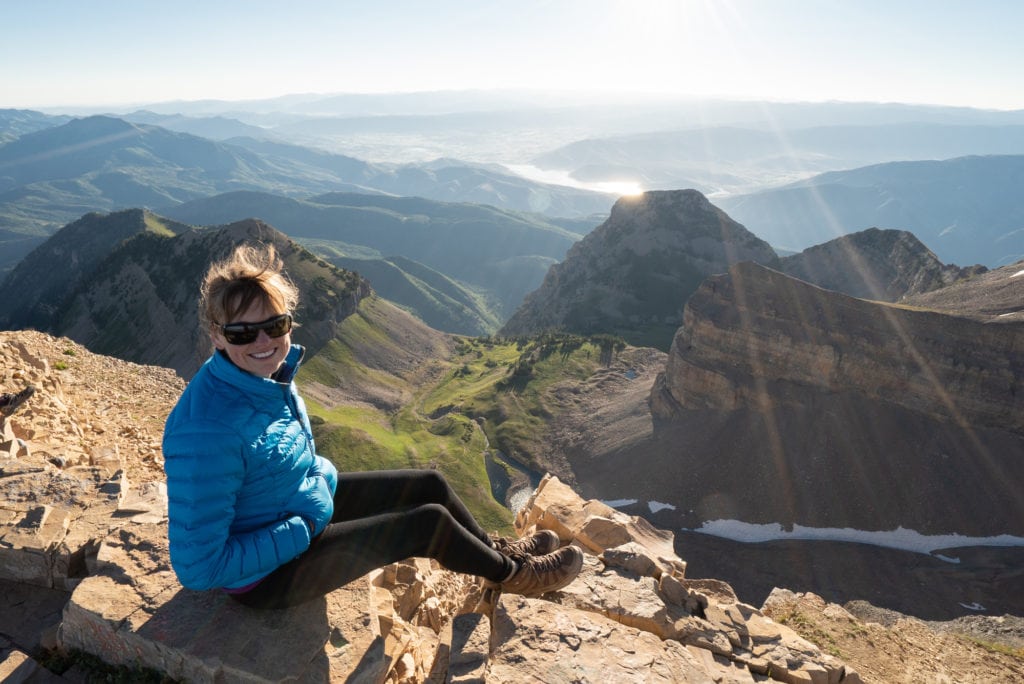
9. Mount Timpanogos
- Location: Uinta-Wasatch-Cache National Forest
- Trail Type: Out and Back
- Distance: 14.3 miles
- Suggested Time: 2 days, 1 night
- Difficulty: Hard
- Permit needed? No
- Best Seasons: Summer and early fall
Towering over the greater Salt Lake City metropolitan area, Mount Timpanogos, affectionately known as “Timp”, is the second-highest peak in the Wasatch Range, reaching 11,753 feet in elevation.
The 14.3-mile round trip hike to the summit gains over 4,400 feet of elevation and for many people, is best broken up into an overnight hike.
The trek begins at the Timpooneke trailhead, next to the Timpooneke campground, and follows the South Fork River past Scout Falls up into Timpanogos Basin. Most people elect to camp here, near Emerald Lake, and tackle the final climb up to the saddle and scramble along the windy ridge to the summit.
On top, you’ll be rewarded with unparalleled views of the Great Salt Lake Valley, Utah Lake and Provo Canyon. Mountain goats are often spotted on the surrounding cliffs and ridges.
Beware of lightning danger in the summer, though. It’s best to be off the summit by early afternoon to avoid thunderstorms.
This hike can also be done from the Aspen Grove Trailhead, which has a similar mileage and slightly more elevation gain, meeting the Timpooneke route near Emerald Lake.
Read next: Read our Timopanogos trail guide for more tips on planning your hike.
Planning information
10. Uinta Highline Trail
- Location: Uinta-Wasatch-Cache National Forest
- Trail Type: High Uintas Wilderness
- Distance: 104 miles
- Suggested Time: 9 days, 8 nights
- Difficulty: Hard
- Permit needed? No
- Best Seasons: Summer
Utah’s most famous long-distance hike follows the crest of the Uinta Mountains, an east-to-west running mountain range in the northeast corner of the state. Along the way, you’ll tag King’s Peak, the highest point in Utah at 13,528 feet and known for being one of the most remote high points in the state.

The Highline Trai can be hiked in either direction, but most thru-hikers elect to go from east to west, starting at McKee Draw and ending at Hayden Pass near Mirror Lake.
The trail crosses eight named mountain passes, all over 11,200 feet of elevation, altogether gaining and losing over 16,000 feet of elevation.
Water abounds on this route and can be found in many small creeks and alpine lake basins and meadows. In between the passes, you’ll dip back into aspen groves and pine forests, which can give some cover during the afternoon thunderstorms that often roll across the mountains in late summer.
The hiking season can be short in the Uintas, especially in deep snow years when the passes may remain snow-covered until late July or August.
Planning information
READ NEXT
Utah is home to unlimited outdoor adventures. Here are a few more Utah blog posts to help you plan an epic trip to this incredible state:
Have you done any backpacking trips in Utah? What are your favorite trails and routes? Which of these are on your bucket list? Let us know in the comments!
FYI: The shuttle at Bryce Canyon does not go to Rainbow Point. It only runs through the main amphitheater viewpoints.
Very nice photos and good information!