Joshua Tree Backpacking: The California Hiking & Riding Trail
Joshua Tree isn’t just for climbers! Learn about the 37-mile California hiking and riding trail – an awesome backpacking trip to spot spring wildflowers, stargaze, and get those legs ready for summer.
While most people visit Joshua Tree National Park for day hiking, bouldering, and climbing, a Joshua Tree backpacking trip is an incredible experience as well.
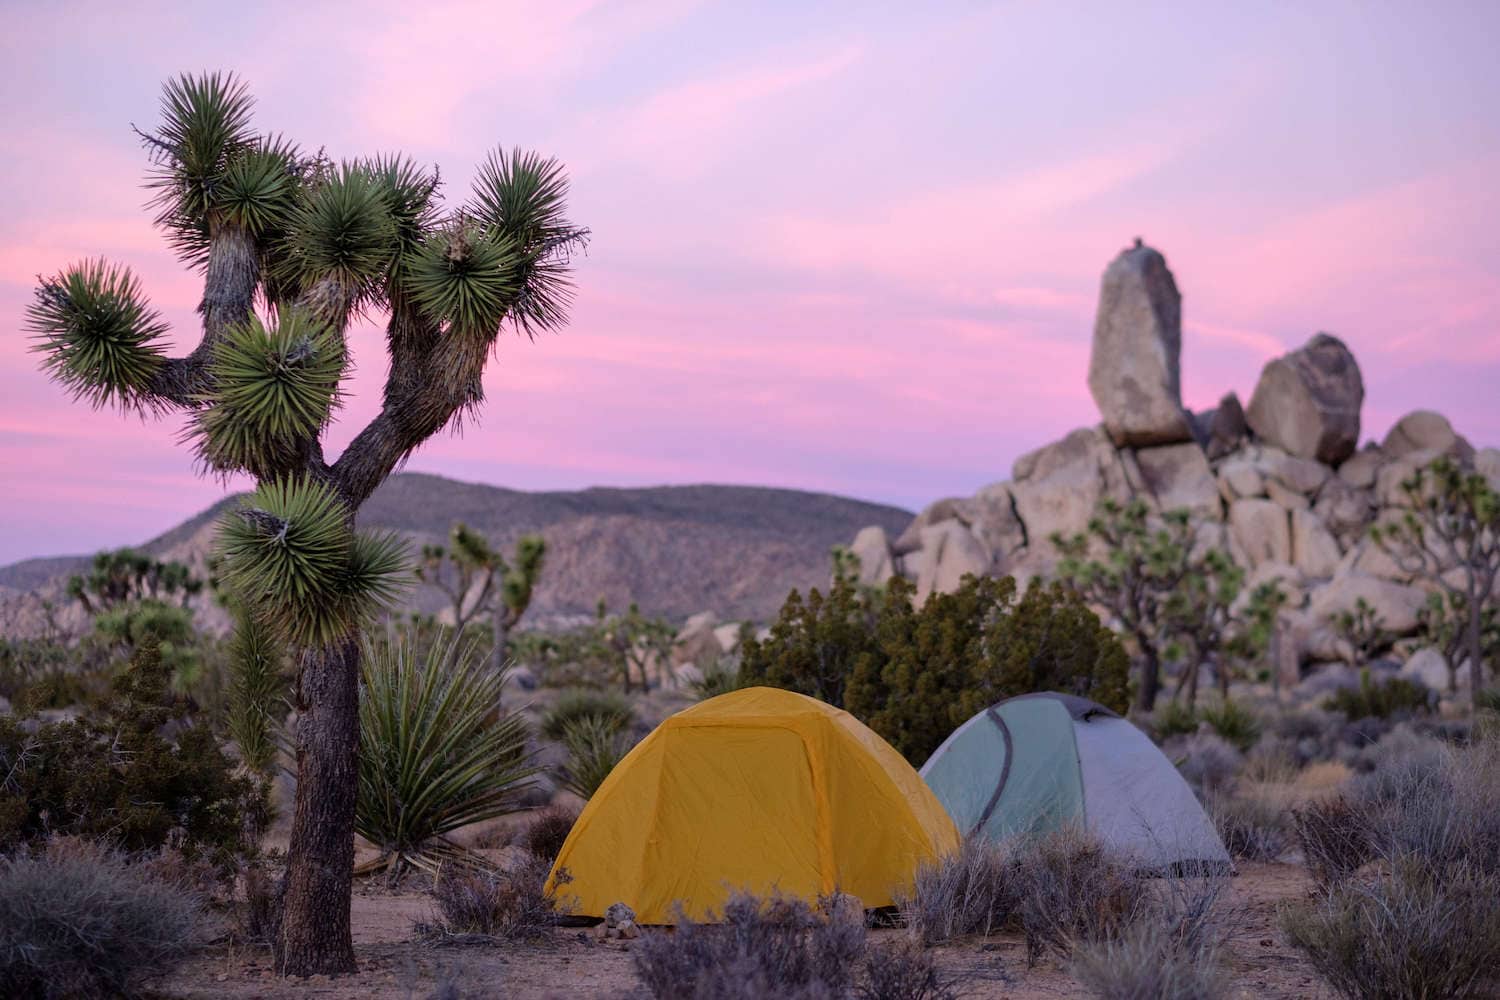
The 37-mile California Hiking and Riding Trail runs through the national park from west to east and offers hikers an unforgettable desert backpacking experience. From starry night skies to blooming fields of wildflowers to unique rock formations, and, of course, plenty of Joshua Tree photo ops, this is a great one to add to your backpacking bucket list.
In this post, I share all of the details you need to know to make this Joshua Tree adventure happen including what gear to pack, what to wear, how to plan water caches, and more.
This post may contain affiliate links.
About the California Hiking & Riding Trail
The California Hiking and Riding Trail was originally envisioned in 1945 as a 3,000+ mile trek from the Mexico/US border to Oregon. Although the trail was never completed, 1,000 miles were finalized and 36.5 of those miles are in Joshua Tree National Park.
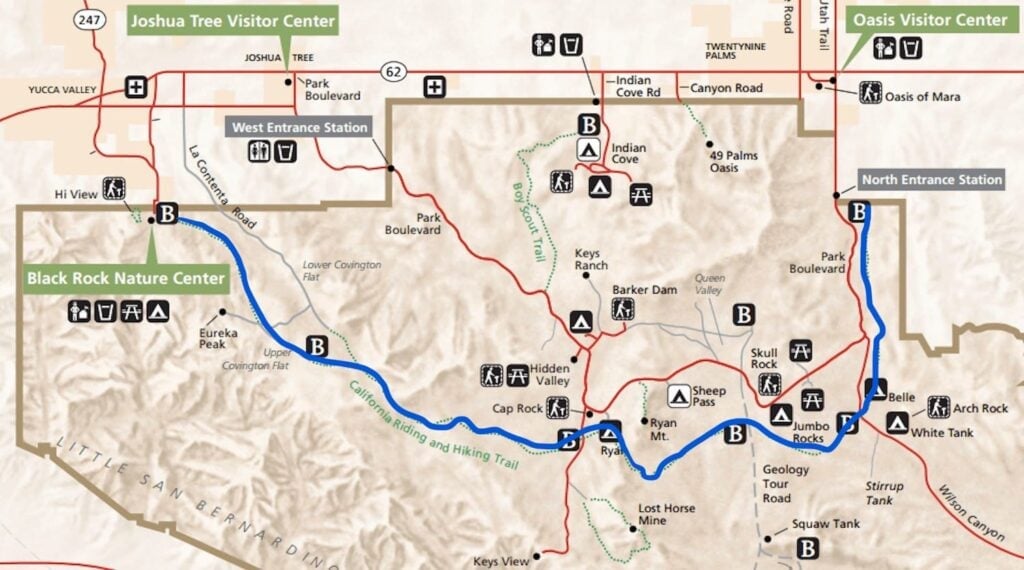
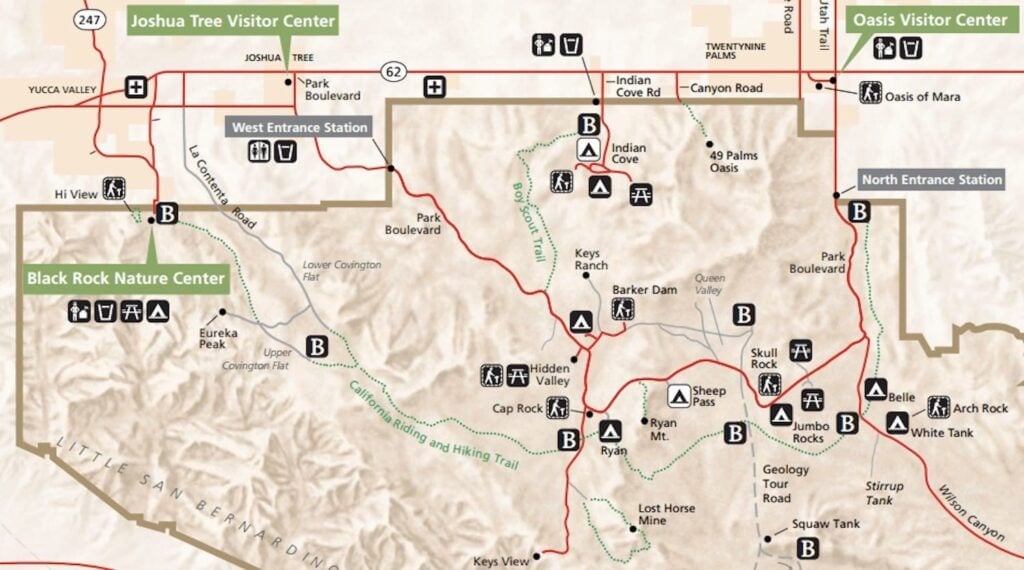
California Hiking and Riding Trail Map
Why do a Joshua Tree Backpacking Trip?
Here are just a few reasons to put the California Hiking and Riding Trail on your calendar:
- It is a great backpacking trip for first time backpackers as the terrain is fairly flat. It’s also a great introduction to backpacking in the desert.
- The 36.5 mile strech that traverses Joshua Tree can easily be done in a single weeked (2-4 days)
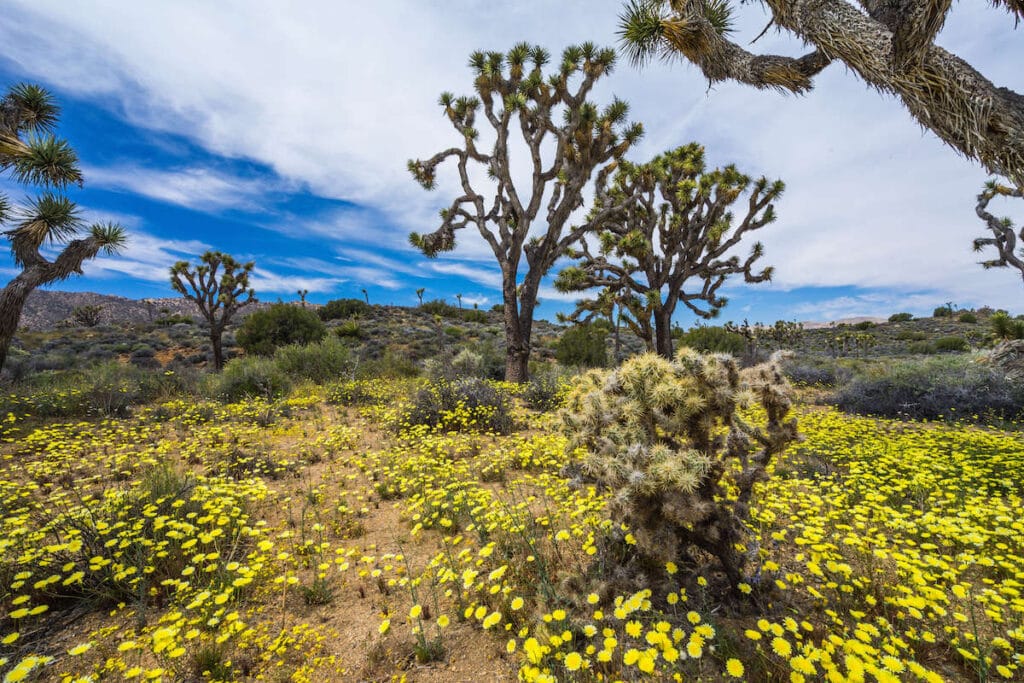
- Joshua Tree National Park’s wildflowers bloom from February to April, making this trail the perfect winter/spring desert backpacking getaway
Save this post!
Enter your email & I'll send this post to your inbox! You'll also receive my weekly newsletter full of helpful advice for planning your adventures.
Best Time for Backpacking in Joshua Tree
Temperatures in Joshua Tree National Park are most comfortable in the Fall and Spring with a daily average high of 85F and nightly lows around 50F. February to April is when wildflowers typically bloom in Joshua Tree and it is a very popular time to visit for this reason.
The average Winter temps in Joshua Tree are in the 60s during the day and 30s at night while the average summer temps can exceed 100F during the day and be in the low 70s at night. We do not recommend backpacking in the Joshua Tree desert summer heat.
How to Get to Joshua Tree
Joshua Tree National Park is located 2 hours from Los Angeles, 3 hours from Las Vegas, 2.5 hours from San Diego, and 4 hours from Phoenix. There are three official entrances to the park – the West Entrance, the North Entrance, and the South Entrance.
For the California Hiking and Riding Trail, you’ll start near the west entrance and end near the north entrance. There is a Visitor Center at both of those entry points.
How to prepare for your Joshua Tree Backpacking Trip
National Park Entrance Fees
There is a $30 per car entrance fee to visit Joshua Tree National Park. This pass is good for 7 days. Get the America the Beautiful Annual Park pass and save on entrance fees!
Camping
The California Hiking and Riding Trail passes by several established paid campgrounds that are both first-come, first-served (Belle, Hidden Valley, and White Tank), and reservations required (Jumbo Rocks and Ryan).
If you would rather disperse camp, backcountry camping is permitted in areas that are:
- 1 mile (1.6 km) from roads
- 500 feet from trails and water sources
- Not day-use only areas
If you do choose to camp in any of the designated campgrounds there is a fee and reservations are highly recommended. Campfires are prohibited outside of government-provided fire rings. Portable cooking stoves are fine, though.
Backcountry Registration
Before setting out into the Joshua Tree National Park backcountry, you are required to register at one of the backcountry boards. If you’re starting from the West Entrance, this would most likely be at Black Rock Campground and Nature Center.
If you’re starting from the North Entrance, you’ll want to register at the North Entrance Visitor Center. You can park your car at either starting point.
Transportation
The California Hiking and Riding Trail is not a loop. Unless you plan to hike out and back you’ll need two vehicles. Park one vehicle at the North Entrance Station, your final destination, and use the second vehicle to drive West back to the Black Rock campground where you’ll start the trail. Don’t forget to pack your keys for the car at the end!
Water and water caches
You’ll need to carry at least six liters of water per person per day. In Joshua Tree, even if you find water you can’t legally drink it as it is preserved for desert wildlife. You’ll need to either carry enough water for the entire trail (not recommended) or drop water caches BEFORE you start hiking.
A water cache is water that you hide in a strategic location to be picked up later on in your hike. In Joshua Tree National Park, you are allowed to cache food and water for up to 14 days. It is important to tag your cache with the date you plan to use it along with your name and email/telephone number so that park rangers can contact you if they need to remove your cache.
When I hiked the California Hiking and Riding Trail, I hid one 5 gallon water jug at two different water caches I created. It is important you remember exactly where you hide your cache so you can easily find it later. You can mark a nearby shrub with a string (remember to pick up the string with your water), take a photo of the area, write directions, or take a GPS waypoint of your cache.
I recommend dropping caches at the following locations: Ryan Campground & Belle Campground. If you are concerned about water, you can also drop at Geology Tour Road. All of these locations are accessible by vehicle.
You’ll want to drop your water either the morning you plan to start or the day before.
Joshua Tree Backpacking Gear List
This 3-day Backpacking Gear Checklist has all of the essential backpacking gear to take on a Joshua Tree backpacking trip. Here are a few additional recommendations for desert backpacking:
- Hiking boots or trail runners – since the terrain is fairly flat you don’t need heavy duty hiking boots for this trail, lightweight, breathable ones are preferred.
- Layers that provide sun protection – check out this post on what to wear hiking in the desert for some solid recommendations.
- A sun hat for keeping the sun off your face.
- Trekking poles – optional for this trail since the terrain is flat and not rocky.
- Gaiters – optional, but good for keeping sand and dirt out of your shoes.
- Sunscreen – the desert sun can be brutal even if it doesn’t seem super hot.
- Joshua Tree National Park map – The trail is well-marked along with frequent backcountry boards with information
- Water – You’ll need to carry extra water and prepare water caches as there are no water sources along the trail.
California Hiking and Riding Trail Itinerary
The California Hiking and Riding Trail in Joshua Tree is divided into 4 sections and most people hike the trail in 2-4 days. If you want to hike the trail in 2 days you would need to hike Section 1 and 2 on Day 1 then Section 3 and 4 on Day 2 and you’d average about 18 miles a day.
I chose to hike the trail in 3 days, which is an average of 12 miles a day. Here is how I broke the trail into 3 days:
The starting trailhead for the California Hiking and Riding Trail section that traverses Joshua Tree National Park is located in Black Rock campground. The road to Black Rock Canyon dead-ends at the campground where there is parking for backpackers at the backcountry registration board.
Backpackers are required to register at the backcountry board for overnight wilderness trips. Additionally, there is a visitor and nature center in the center of Black Rock Canyon campground where staff can help with last-minute questions.
Below, you’ll find a description of each of the four sections the National Park Service commonly breaks the Joshua Tree section of the California Hiking & Riding Trail into.
Section One
- Route: Black Rock Canyon Trailhead to Upper Covington Flats Trailhead
- Mileage: 7.75 miles
- Elevation gain: 1,200 ft
From the Black Rock Canyon trailhead, you’ll hike 7.75 miles through scrubland and a large wash to the Upper Covington Flats trailhead. This section includes a 1,000-foot uphill climb, which is the steepest elevation gain for the entire trail. After reaching the high point at 5,130 feet, you’ll have a downhill stretch for 2 miles to the Upper Covington Flats trailhead, parking area, and backcountry board.
Keep in mind, it is possible to drive directly to Upper Covington Flats so if you are short on time or don’t want to hike the first section this could be an option.

Section Two
- Route: Upper Covington Flats to Keys View Trailhead
- Mileage: 10.8 miles
- Starting gain: 1,230 ft
Section 2 from Upper Covington Flats to Keys View is the most remote section of the California Hiking and Riding Trail. This section begins rather flat then has a slight loss of elevation as you drop into a valley and cross several dry washes.
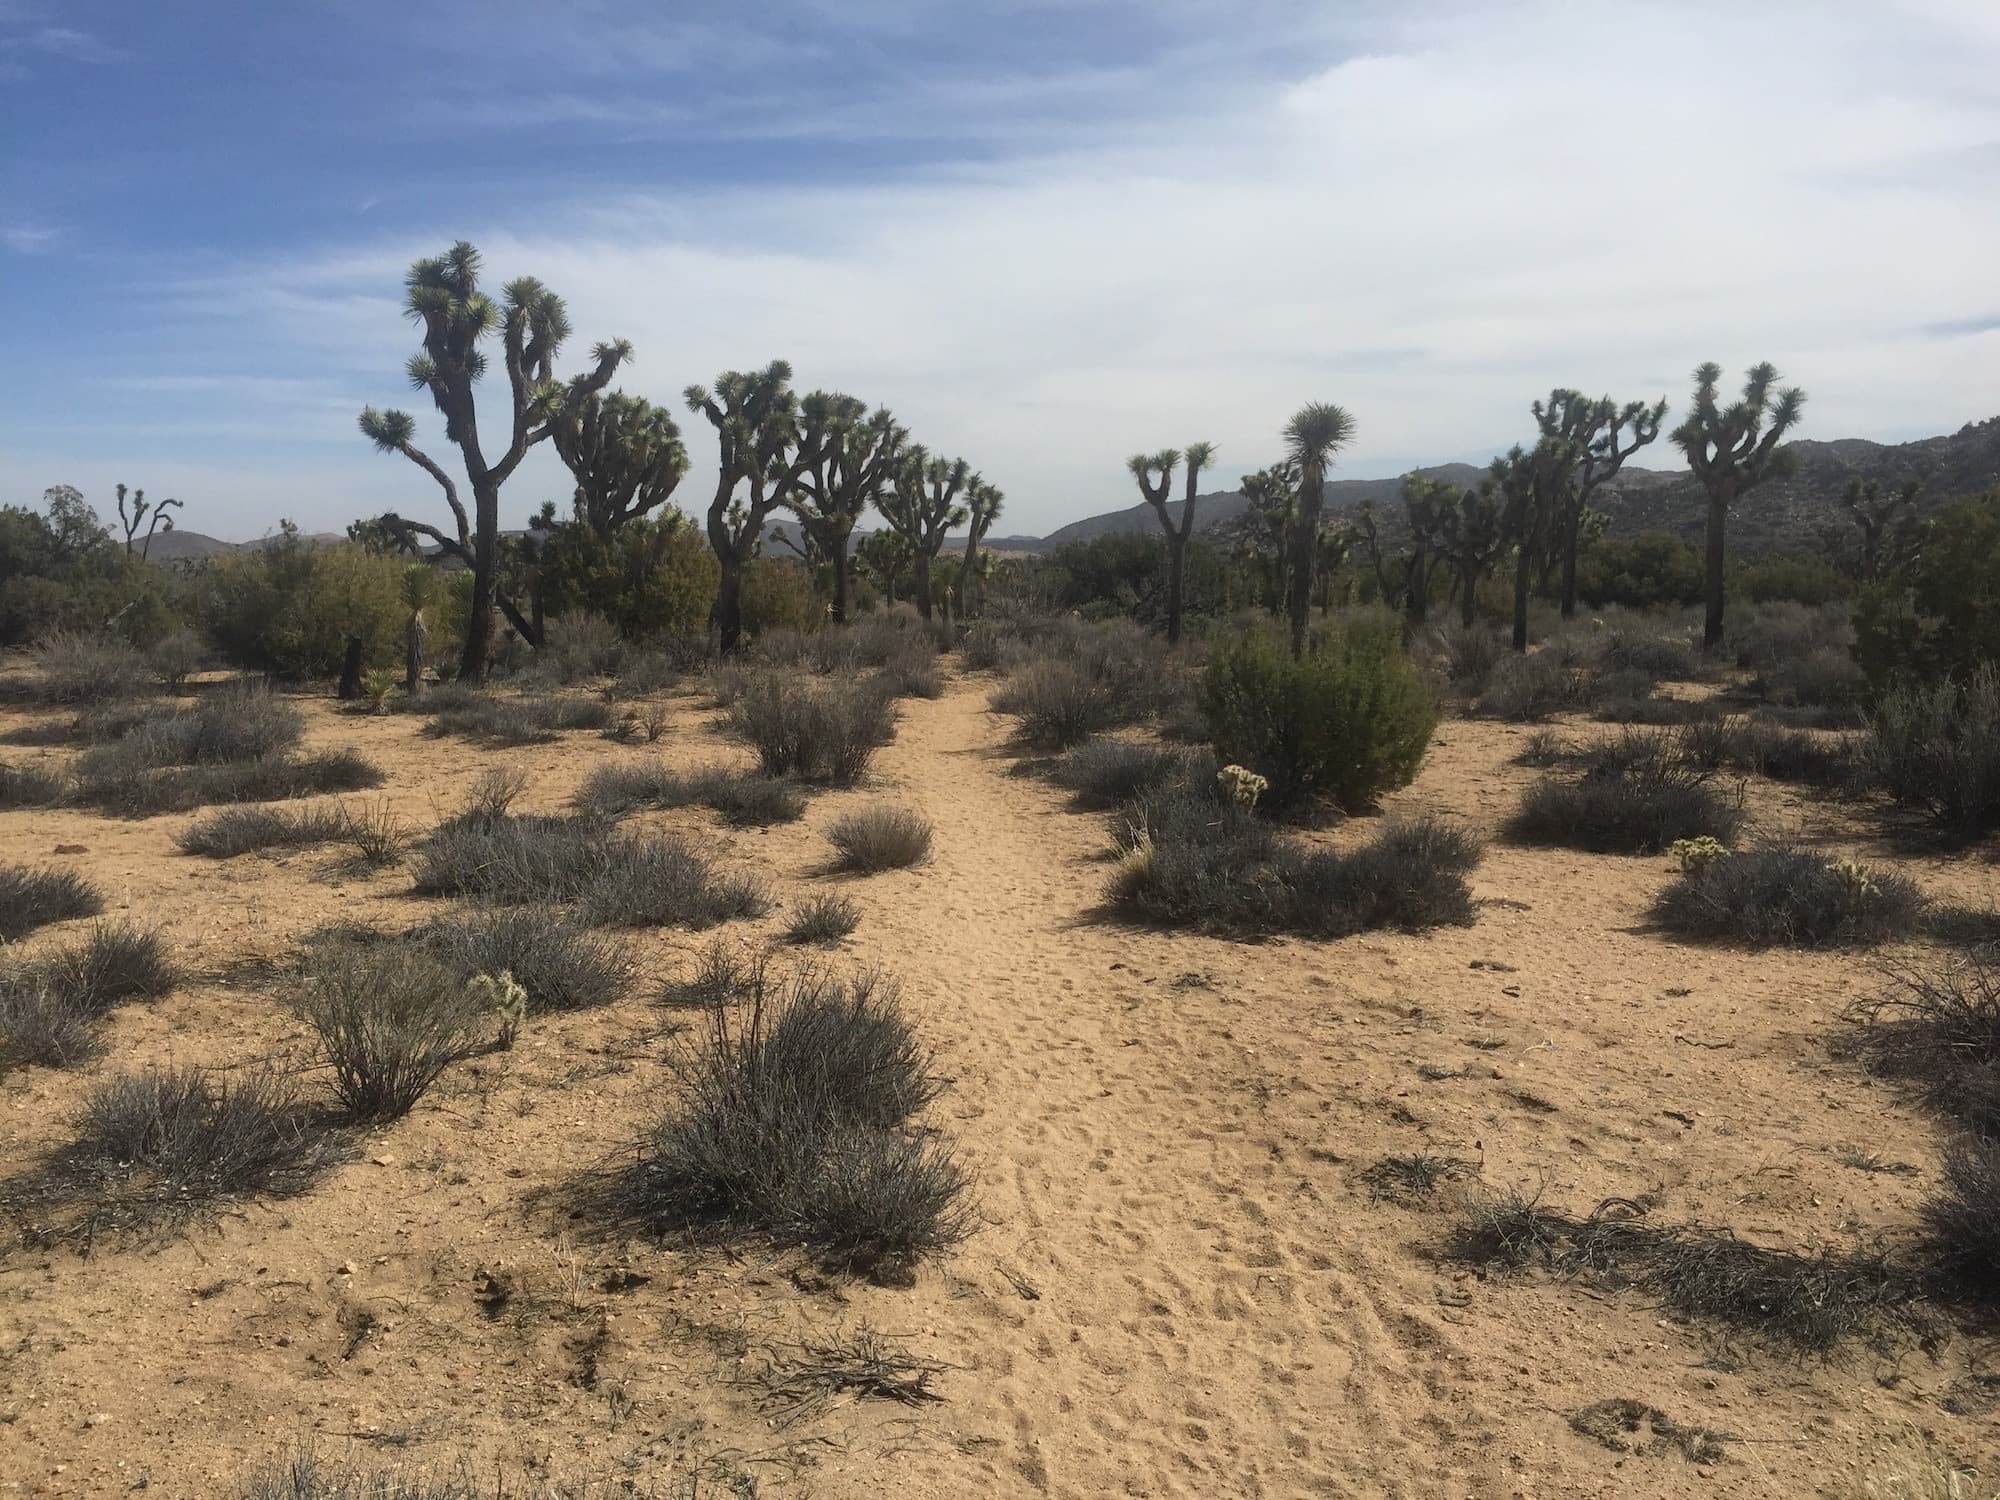
Next, you’ll climb again to above 5,000 feet with views over Juniper Flats. Once you start descending, you’ll enter Juniper Flats where you will start to see the infamous Joshua Trees that the park is named for. The trail continues traveling downhill from Lost Horse Valley to Keys View trailhead.
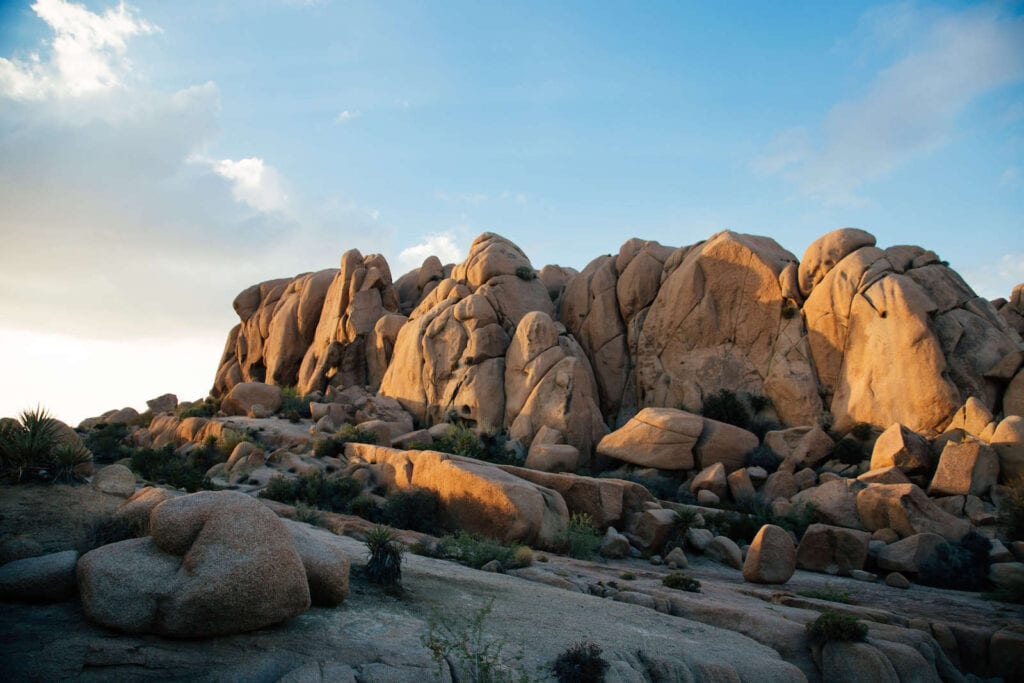
This was my favorite part of the California Hiking and Riding Trail as unique rock formations will begin appearing along the trail.
It is possible in this section to take a side trail to summit Quail Mountain, the highest mountain in Joshua Tree National Park at 5,813 feet. We didn’t see a sign for the side trail to Quail Mountain so I recommend you ask a Park Ranger before leaving or carry a good map if interested.
Section Three
- Route: Keys View Road to Pinto Basin Road
- Mileage: 11 miles
- Elevation gain: 470 ft
Keys View Road marks your halfway point. Just 0.8 miles from the trail is Ryan Campground where we camped our first night. We chose to pay to camp at Ryan Campground since I had hidden our first water cache here. I’m really happy we camped at Ryan Campground as numerous car and RV campers offered us beers that evening!
From Keys View trailhead, the trail is incredibly flat and it’s 6.5 miles to Geology Tour Rd. Don’t miss Jumbo Rocks which are tons of rocks stacked on one another almost like a building. Once you hit the Geology Tour Rd. it’s another 4.4 miles to Pinto Basin Road. Cherish these last two miles which offer spectacular views of Pinto Basin. Pinto Basin is geographically famous as it connects the Sonoran and Mojave Deserts.
Section Four
- Route: Pinto Basin Road to North Entrance
- Mileage: 7.3 miles
- Elevation gain: 75 ft
From Pinto Basin Road, you’ll begin traveling north. You will find a short side trail to Belle Campground. My friend and I camped here so that in the morning we’d be done before lunch. This is the only section of the trail where we did struggle a bit in finding and following the trail.
Make sure to use your compass and keep traveling due north. Towards the end, you’ll see a small hill which you summit. From the top, you’ll have a great view of the town of Twentynine Palms where the North Entrance and Oasis Visitor Center are located.
Joshua Tree Town Guide
The town of Joshua Tree itself is way cool and I highly recommend including a pre-trip final planning session or post-trip celebration in town! Here are a few highlights not to miss:
- Joshua Tree Coffee Company – On 29 Palms HWY, Joshua Tree Coffee Company, is a little hidden behind Pie for the People. They have the best vanilla latte I’ve ever had! Their nitro cold brew is also not to be missed.
- Pie for the People – This is arguably the most unique pizza joint I’ve ever been too. You have to check out their menu, which includes red sauce, white sauce and pesto sauce based pizzas and pizza names like “David Bowie”, “HWY 62 Revisited”, “The Chip”, and “Barry White.” And what better way to re-enter into society after 3 days hiking than pizza?
- The Natural Sister’s Cafe – A vegetarian cafe that is open 7-2 daily with vegan options available, tons of great smoothies, and juices too!
- Nomad Ventures – In case you forgot any gear or food for the trail, Nomad Ventures has you covered. It is by far one of the best gear shops I’ve ever been to outside of a large city and their prices are competitive. Honestly, I stop every time I am in town just to check out the sale racks!
What questions do you have about Joshua Tree backpacking or the California Hiking and Riding Trail? If you’ve already done this trip, what advice or tips do you have to give? Let us know in the comments below!

This writeup is appreciated but confusing because the points mentioned don’t align with the points listed on the NPS map that is shown.
Hi John, the map provided is a copy of the Joshua Tree National Park map, you can see the CRHT in green but unfortunately they don’t denote enough on the NPS route the individual stops. Drop us an email @ contact@bearfoottheory.com if you need further clarification. We provide that map as a general outline of where the trail is in the park. If you visit the NP visitor center before starting they can give you a slightly more detailed map or you can purchase a guidebook.
How do you cache food and water so that critters don’t get into it and you don’t add weight from containers? Do you leave containers and drive back after to pick things up?
Hi Alicia, we didn’t cache any food. We only cached water & we just tired the empty water bottles to our bags to carry out. Please make sure to pick up your containers and not leave them–it can get windy in JTree so you need to pack them out with you when you are hiking.
Tremendous advice. I haven’t been to Joshua Tree in 18 years and am taking my boy and two nephews and this hike is perfect. Any suggestions on supporting maps? I created a customized topo map but it doesn’t really jive with this route. Any suggestions? Again, thanks for putting this together, we’re going in 12 days and couldn’t be more excited.
Hi Dean, you can stop at the visitor’s center and they have really great maps–some available for free & some available for a small fee.
Additionally, is it possible to make this a three NIGHT trek and the last day we scoot out of the backcountry and to the Palm Springs airport? Where would you suggest camping to get maximal “alone” or “wilderness” time.
Hi Dean! Great question. You could definitely make this a three-night trek. To be more remote stay just off the trail and not in the campgrounds.
Hi! Just had to post that I just finished this hike last week using all the info from this site (including all the town/food recs (hit them all). Thanks for all of the detailed information. My hike was fantastic, and I owe much of that to you (and the current super bloom;). For those asking about more detailed maps, I used Alltrails app (they have the CHRT specifically) in addition to the NatGeo paper map. Cheers. –Jetpack
Can you explain more about caching water? I live a couple of hundred miles away. Is the only option to drive there, do the hike without a backpack stashing water along the way, and get out again? Then do the actual hike? Sorry if this is a dumb question, but I just don’t understand the process of caching and would appreciate more clarification. The hike sounds amazing! Thanks!
Hi Steve, thanks for the question. Yes, caching water does mean stashing water along the trail beforehand so that it’s available during your hike. If possible, you can stash water near drive-in access roads that cross the trail or vehicle-accessed campsites so that you don’t need to hike far to cache water.
I’m planning a 3 day trip in the beginning of April and just recently found out that my backpack is way too small so I need to get a new backpack on a very tight budget. Considering I’m new to backpacking so my equipment, though it’s compact enough for backpacking, it’s on the bulkier side. What would be the minimum recommended size in liters for a men’s backpack?
For a three-day backpacking trip, a 30-50L pack is a good size. It really depends on how much gear you need to carry and how compact/lightweight everything is. Check out our Where to Find Discounted Gear post for budget options.
So I just completed this hike on April 3rd and here are some suggestions for new hikers… In no particular order.
1. I went just before Easter Sunday (Thursday-Saturday hike) and could NOT get an Uber, Lyft, or taxi. At all. I was planning on the standard west entrance to north entrance. Since I was stuck at the north entrance with no ride, I decided to walk from North to West. Lesson 1 – don’t assume you’ll get a ride the day of. Plan that ahead no matter how often you hear that it’s easy to get an Uber.
2. Ran into some snags because I didn’t plan on walking North to West… The most important one being in Covington Flats. From West to North there are 2 CRHTs that merge. If you start at Black Rock campground you don’t have to pay attention to this. Heading west, I managed to take the Lower Covington Flats trail instead of the intended Upper Covington Flats trail. Difference: LCF has a backcountry board but you likely didn’t leave water there. You can take an access road to get back to the UCF trail, but who wants to hike on a road when you came to see the desert, plus you’d miss the beauty of UCF. Lesson #2: don’t just rely on trail markers and your map… Use your brain, too (I failed to do that and it cost me an extra 4 miles due to backtracking). Also, make a plan for walking both directions just in case.
3. Make 3 water drops and carry less water (weight). I did 2 water drops and carried 5 liters. If I did it again I’d carry 4 liters and make 3 drops… One at Covington Flats, one at Keys View Rd, and one at Twin Tanks. The backcountry unpaved roads to Covington Flats is totally accessible without 4 wheel drive. It’s very well maintained dirt. I had temps in the 50s at night and low 80s during the day. Adjust your water to your needs. I would have been totally fine had I not needed to give mine away. Lesson: carry less and fill more.
4. Pack extra food and water, if you can, to give to those in need. I came across three guys who got in over their head. 5 miles from their water drop, out of water, and clearly done (they pushed the emergency button on their GPS). I have them 2 of my own liters to hold them over until help arrived.
5. Weather forecast is a general guideline. First day I had cloud cover and some sprinkles despite the forecast saying clear skies (this is not a complaint). I ran into a guy who has been hiking Joshua Tree for 35 years and he said just the week before he had snow then suddenly clear skies. He said you can get anything in March and April.
6. Though it’s all beautiful, you can’t camp just anywhere. Some places are just not suitable for sleeping bags and tents. Look for boulders. Also, I didn’t even set up my tent. I felt totally safe cowboy camping… Just in case you’re considering it.
7 (last one). Give yourself plenty of time. Because I didn’t start walking into 2:45 (Uber issues) on Thursday, I was rushed and so couldn’t sit back and enjoy it all.
Sorry this is so long.
I want to hike this solo and will not have the option of a second vehicle. Are there shuttle services to take me back to my car?
Hi Caitlin, while we haven’t personally tried this, we’ve heard you can take Uber/Lyft/taxi. Most people leave a car at the end of the hike (easier to arrange a drop off rather than a pick up), at the North Entrance Backcountry Lot, and then get a ride to the beginning of the hike at Black Rock Campground. Cell reception from the North Entrance can be bad, so it’s best to pre-book a ride. Good luck!
I’m a bit confused as to where you camped the first night. Initially you say you went to 4 miles past Covington. Then further down it says you chose to pay and camp the first night at Ryan. That’s a long first day carrying 6 liters of water.
Hi there – a former contributor wrote this article, but what I think she meant is that the night before she started her hike she camped at Ryan and cached her water there before starting the trail the next day and camping at Covington. I can see how that would be confusing and I’ll work on fixing it.