Campervan Water Systems: Tanks, Greywater, Heaters, Plumbing, & Showers
Get your campervan water system dialed and learn options for water tanks, greywater storage, water heaters, and more.

Deciding what kind of campervan water system you want is an important decision in your planning and build process. In this blog post, we talk all about water storage, greywater and blackwater tanks, pumps, heaters, showers, and more.
It’s a lot, but all this is important to consider upfront because these are key components for your van conversion. Plumbing is a big step in the build and an important one to plan correctly to ensure you don’t run into any leaks or issues down the road.

This post may contain affiliate links.
Campervan Water Storage
Planning for water in your camper van is so important because water is essential to our survival – it’s not a luxury. A 5-minute hot shower might be a luxury, but when it comes down to it, you don’t want to run out of water in a tight spot unsure of the nearest fill. Plus, it’s not fun having to search for a water source when you’re in the middle of cooking or cleaning in your van or right before you head out for a big hike.
Two major things to consider are:
- How much water do I want in my van?
- Where am I going to store it?
Determining how much water storage you need in your van comes down to your water usage and how long you want to be able to go without refilling. The longer you plan to be away from facilities, the more water storage you’ll need. Washing dishes, brushing teeth, cooking, boiling water for coffee or tea, drinking water for you and your pets, showering, hosing off gear – these are all things you’ll be using your water for.
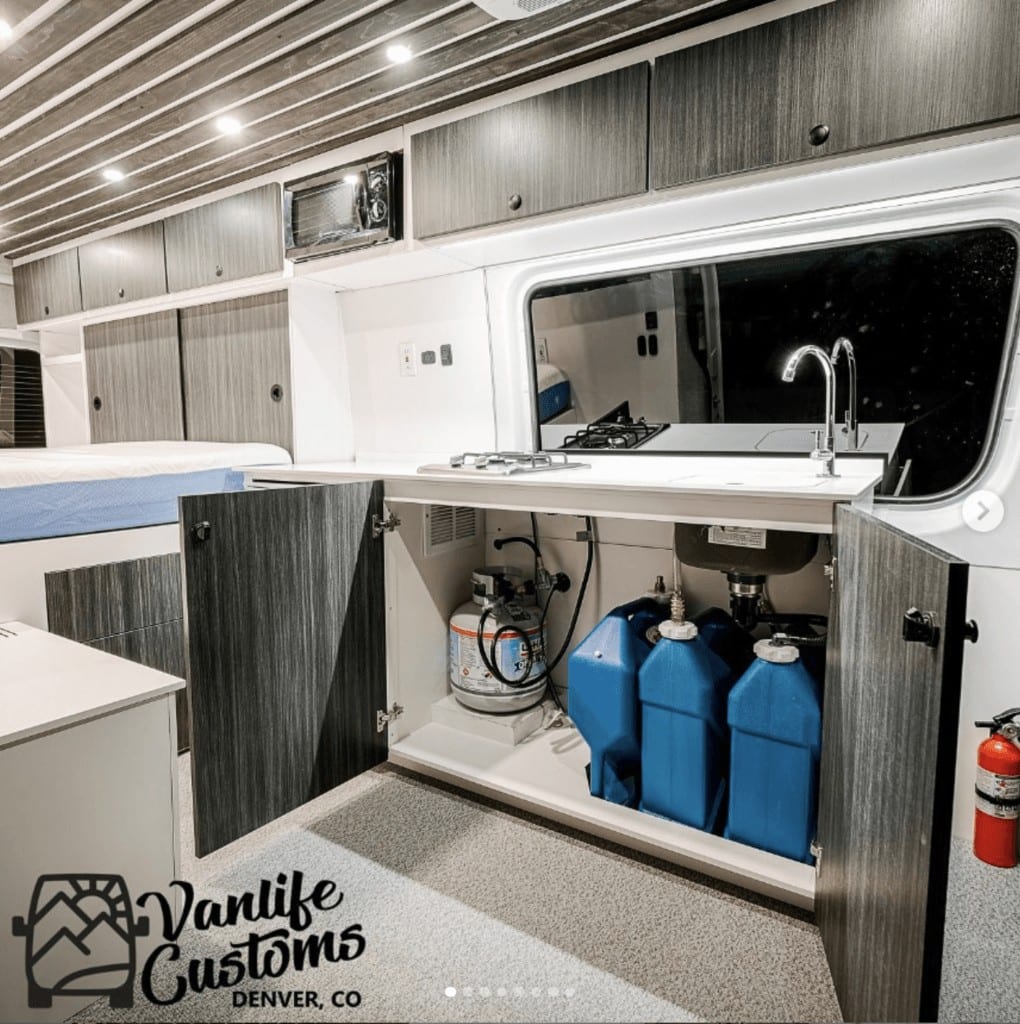
When deciding your van layout, you should keep your campervan water system top of mind to make sure you are balancing your weight evenly. Typically, you’ll want to keep your water storage on one side of your van and your electrical system on the other side since those are usually two of the heaviest items in a van build.
In my second Sprinter van, we had a 25 gallon permanently installed water tank. If we weren’t using it to (outdoor) shower, we could go 5-7 days without needing to refill. This requires conscientious use when we’re doing our dishes, filling up at gas stations and campground spigots when possible, and never letting the water run unnecessarily.
You might ask, why not get a 35 or 40-gallon tank? The answer is weight. A gallon of water weighs 8.34 pounds, so a 40-gallon tank would set you back 333 pounds. It’s important to keep in mind van weight considerations and payloads, and water is one of the heaviest things you’ll be loading up your van with. If you simply size up your water tank without thinking about how this affects your overall weight, it could put you over your vehicle’s maximum payload. If you do know that you need 35 or 40 gallons, you should consider this when choosing a vehicle since payloads vary, even across different van models. If you want to extend your water storage, consider carrying a collapsible water jug that you can use for those times when you need to carry extra water.
Once your plumbing system is set up, it’s a good idea to do a practice run to find out how little water you need to completely wash your dishes, brush your teeth, cook, shower, etc. Carefully conserving water can take some getting used to when you first hit the road, but it’s easier to keep track of than in a regular house since you’ll be refilling the water yourself. Your water conservation habits will get better once you get used to having a limited quantity of water.
Save this post!
Enter your email & I'll send this post to your inbox! You'll also receive my weekly newsletter full of helpful advice for planning your adventures.
Permanent Freshwater Tank vs. Portable Jugs
The two options for water storage in your van are permanent tanks and portable jugs. There are benefits and drawbacks to each one. The first question to ask yourself is: “Can I or will I lift and carry my water containers regularly?”
As I just mentioned, a gallon of water weighs about 8.34 lbs, so if you’re filling a 5-gallon jug, that’s over 40lbs of weight. If you’re not physically able or don’t want to move heavy jugs regularly, this quickly rules out the portable container option. Here are the options for your campervan water system:
Permanent Freshwater Storage Tanks
Permanent tanks have a greater capacity, which is helpful if you live in the van full-time. You don’t have to think about water as often, and it’s less of a chore when you need to fill up. Both of my Sprinters had permanent freshwater tanks.
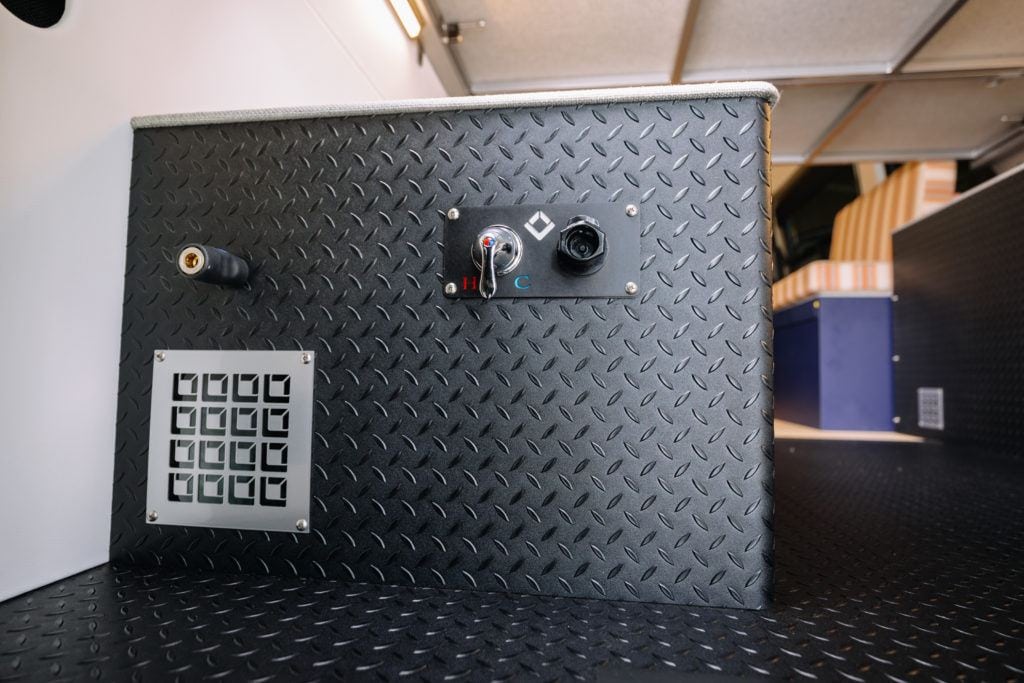
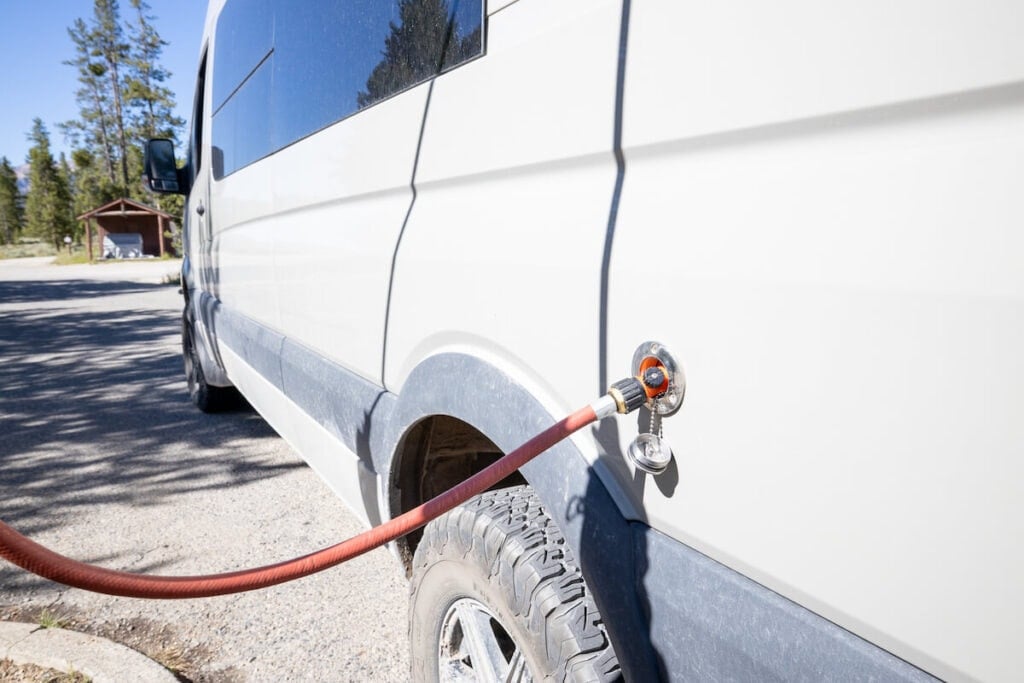
To make it easy, you’ll want to install a fill port on the outside of the van and keep things simple by having major water lines on one side, including your tank, sink, water heater, and shower if possible. Some folks who use portable jugs might argue that it’s easier to find places to fill up 5-gallon jugs vs places you can connect to with a hose, but there are great resources for finding potable water, regardless of your setup.
The downside of permanent tanks is they require additional steps to winterize. If the van will be sitting for a while in freezing temps, you’ll either need to blow out the entire system with an air compressor or maintain a warm interior temperature to prevent freezing of the pipes and tanks.
Large permanent tanks also take up precious storage space. However, I highly recommend storing all of your water inside the van. There’s less of a chance of it getting damaged, it’s easier to install, and it’s less likely to freeze. Storing your tanks outside becomes a serious headache if you ever encounter below-freezing temperatures and puts your pipes at risk for damage, plus it’s harder to install.

Portable Water Jugs
Portable jugs are a budget-friendly option for people who want a simpler setup. If you don’t have a shower, want to fill up anywhere, and like having the flexibility to add or take out jugs depending on the length of your trip, portable jugs might be the way to go.
Most people who go this route have a couple of five-gallon jugs stored under their sink, and you can always throw another one in your garage if you plan to be away from facilities longer than usual. Unlike permanent tanks that need a designated fill station or hose, you can fill them up anywhere you go, including grocery store water dispensers and inside friends’ houses.
As I mentioned, you’ll be carrying these in and out of the van each time you need to refill, so it’s best to use multiple 5-7 gallon jugs as opposed to one larger container. Portable jugs are also easier to clean than permanent tanks and you can dry them out between use.
When it comes to winterizing, it doesn’t get much simpler than portable jugs. All you need to do is take the jugs out of the van and make sure there isn’t any water left in the plumbing lines, and you have nothing else to worry about.
Ultimately, you need to determine how much water you need and want to store at any given time. If you need 25 gallons stored, a permanent tank is probably the solution. If you’re comfortable with refilling regularly, portable jugs will probably work well for you.
Inline Water Filter
Since you’ll be filling up with a hose and you won’t always be sure of the water quality, you’ll want to get an inline water filter that you can attach to your hose when you fill up or one that’s installed directly in your water lines.
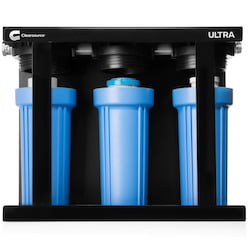
I used a Camco TastePURE RV Water Filter for years, which filters out some chemicals and pathogens, but I recently upgraded to a Cleansource Ultra Water Filter which is much more robust, thorough, and efficient.
This three-stage filter reduces or removes rust, sediment, chlorine, pesticides, volatile organic compounds, viruses, heavy metals, and more, so you can feel safe drinking your water no matter where you fill up.
It’s also designed to be extremely durable, which is helpful when bouncing down rough roads in a van. We did get the carrying case for extra protection, which doesn’t have to be removed when installing the filter.
You will need two hoses to install the Clearsource filter. One goes from the water hookup to the filter and the other goes from the filter to the van. We have these hoses that are made specifically for drinking water that are lead and BPA-free.
Get 25% off a Clearsource water filter
(Discount applied at checkout)
Where Do You Fill Up Your Water for Van Life?
A commonly asked question is: “Where do you get water?”
This is dependent on whether you have a large permanent tank or smaller portable jugs. As we discussed, portable jugs can be filled at most grocery stores, inside gas stations, or your friend’s house, but permanent tanks require a bit more planning. In the US, there are many places to fill up.
RV dump stations are scattered all across the country and generally have potable drinking water available. National Parks, campgrounds, state parks, gas stations, and bike shops are just a few of the places we’ve filled up. Keep in mind that most of these spots do not provide a hose, so it’s good practice to carry a hose and attachments with you.
Campervan Greywater & Blackwater Tanks
If you decide to build a sink, shower, or plumbed toilet in your van bathroom, you’ll most likely need a grey and/or blackwater tank in your campervan water system.
Greywater tanks collect used water that goes down the drain from washing dishes, cooking, tooth brushing, hand washing – everything other than human waste and chemicals. Greywater tanks can be stored inside or outside your van, depending on how big of a tank you choose. If it’s inside, the tank can be hooked right up to the sink drain, otherwise, you’ll need to plumb the line down through the floor to the exterior tank.
Blackwater tanks collect human waste. Typically, chemicals are used in black water tanks so for this reason you need to empty blackwater tanks at RV dump stations. We aren’t going to talk too much about blackwater tanks, because all camper van toilet options we recommend don’t require a blackwater tank, and blackwater tanks are very rare to see in van builds. However, if you are planning to have a toilet that requires a blackwater tank, they are usually stored underneath the van and will need a port installed to make the dumping process easier.
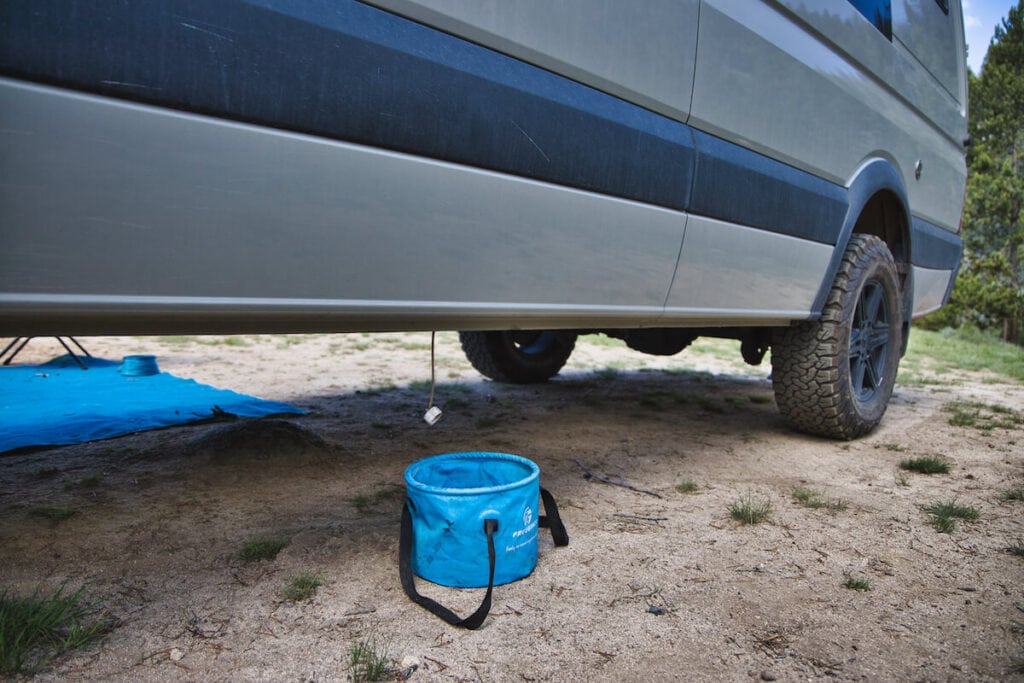
Some people, including myself, opt not to have a greywater tank and instead have a hose that drains directly out of the van. It’s one less thing I have to think about when traveling in the winter. However, not having a greywater tank requires special care to ensure you are abiding by Leave No Trace guidelines when you are disposing of your greywater, as explained below.
Leave No Trace Guidelines for Greywater
Here is the process we use to Leave No Trace when doing dishes and using water in our sink in general:
- First, we scrape off all food particles into the trash. We have a strainer in the sink that catches any remaining scraps.
- If we used a paper towel to eat with, we wipe off any remaining food particles and sauce with the paper towel.
- Then, we only do dishes with the minimal amount of eco-friendly, biodegradable dish soap.
- We collect the greywater in a bucket that we place under the van where the gray water drains. Usually, we can get away with doing all of our dishes with less than 2 gallons of water.
- When it comes time to dispose of the greywater, we make sure we are at least 200 feet from rivers, lakes, or streams and then scatter it on barren dirt. Even biodegradable soap is harmful to aquatic life and can pollute waterways, so making sure you are at least 200 feet away from water is very important.
Biodegradable soaps need the bacteria in the soil to break down, so it’s only okay to drain greywater if you’re well over 200ft from a water source. Otherwise, the most environmentally friendly option is to have a greywater tank that can be emptied into proper receptacles. Typically a 4 or 5-gallon greywater tank is enough for regular sink use if it’s emptied once a day or every other day, but you’ll have a better idea of what size greywater tank you’ll need once you determine your estimated water usage.
If you do get a higher capacity greywater tank – like 5 gallons or more, the best practice is to empty it at an RV dump station.
Campervan Water Pumps
Water pumps are a valuable component of the entire plumbing system in your campervan water system. They move water from your water storage tank to you. Depending on how fast you want your water delivered and your space allowance, there are manual hand or foot pumps, as well as mechanical pumps. Both styles of pumps are commonly used in boats, so check marine websites and stores while you’re researching options.
Manual Foot Pumps
Manual foot pumps are usually mounted on the floor and can pump about an average of 3-4 gallons per minute which is a lot of water. The biggest appeal for manual pumps is that they don’t need power to operate. They also help conserve water since you’re manually pumping each time you want water. Available in a wide range of prices, you’ll likely find one that falls within your budget.
Manual hand pumps are also available, but keep in mind that you’ll need one hand to pump so it makes dishwashing and everything else more difficult.
Overall, going with a manual foot pump is simple and saves electricity, but it feels less like the sink you’re used to at home. I personally want my van to feel more like a home, so I prefer a mechanical water pump.

Mechanical Water Pumps
Mechanical water pumps are electrical, so they do require power but you won’t have to think about water delivery, which makes the van feel like a regular house. They also keep the water pressurized, so once the faucet is open the pump will automatically engage and deliver the water at a steady rate.
In most cases, you’ll want to install an on/off switch for the pump and keep it turned off whenever you aren’t running the water. This switch will also prevent the pump from continuing to run if the water tank runs dry. Prolonged dry use can damage the pump.
Mechanical pumps run on 12v DC power, so they can be hardwired right into the battery bank.
Both mechanical and manual water pumps vary in price but average around $25-85, so it doesn’t have to break the bank. Just focus on finding a quality product that will meet your water delivery needs.

Campervan Shower Options
Showering on the road is a hot topic in the van life community for good reason. You’ll likely meet people from all over the spectrum; those with enclosed instant-hot showers in their full van bathrooms, travelers who frequent gyms and campgrounds, van dwellers that go a week or more without showering, and everything in between. Having a shower in your van will heavily impact your campervan water system because you’ll need more water storage.
Converting your van into a livable space for you is all about your preferences, needs, and priorities. A shower is no exception here, so take some time thinking about what’s important for your hygiene and the options available to you.
Here are a few questions to ask yourself:
- Are you comfortable waiting a few days to shower until the next facility or do you want to be able to shower every day?
- How much space are you willing to dedicate to a shower in the van and will you be able to store enough water to take showers?
- Will you be frequently traveling through areas with gyms and community rec centers where you can shower or will you be off the grid more often than not?
- Are you comfortable taking showers outside, with privacy of course?
If you decide a shower is a must for your van build, you have a few options:
Indoor Showers
Building a fully enclosed van bathroom with a shower is appealing for several reasons, privacy and accessibility just to name a couple. Plus, if you plan to live or travel in your van throughout the winter in a cold climate, showering outside will probably not be an option, making an indoor shower even more appealing. In this case, you’ll require a four-season build with all of your water stored inside so your pipes are protected from the cold.
Installing a fully enclosed indoor shower is complex and has a lot of components, including a quality water heater which we’ll talk about soon. For this reason, it can add a huge cost to your build.
A built-in shower also requires a lot more water. Without a built-in shower, you can get away with 10-15 gallons of water for 4 or 5 days off the grid, especially if you conserve. Add a shower into the equation and you’ll need at least 25 gallons, if not more, depending on the number of people and usage. Even with 25 gallons, you’re not going to be showering every day, unless you are hooked up at a campground, otherwise, you’re going to be filling up all the time.
When you do shower in your van, you’ll need to carefully conserve, shutting off the water when you soap up. I highly recommend getting a shower head that has an on/off switch to make this easy. You’ll also need to think about where you can store enough water for your shower. Storing this much water inside is feasible if you have a larger van, but you’ll have to do some serious finagling to fit that much water plus an indoor shower into a shorter van.
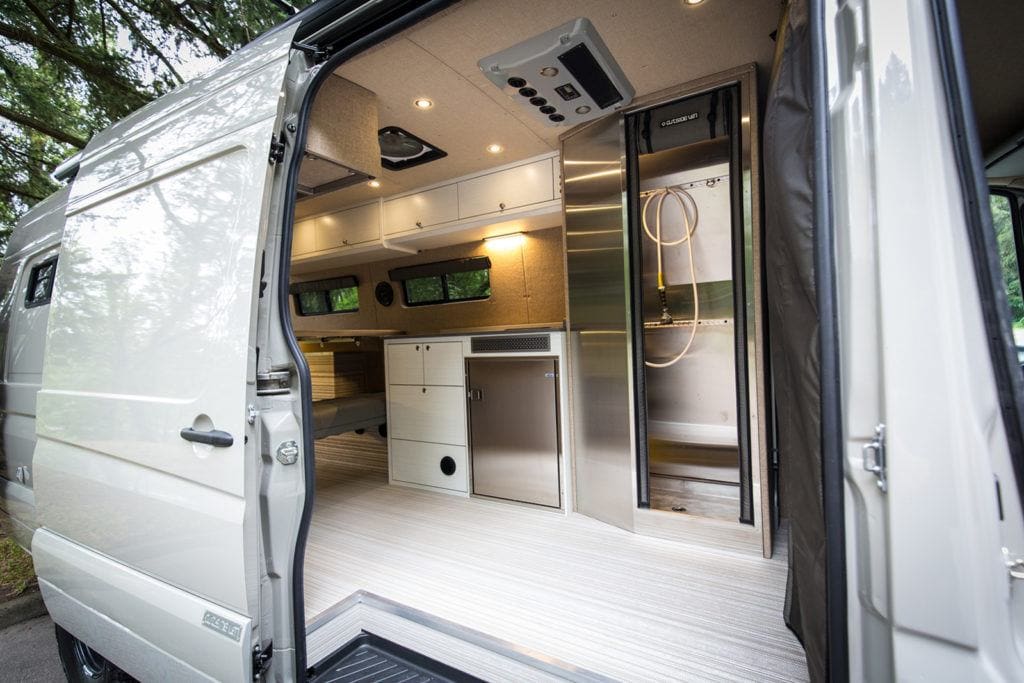
Another thing to contemplate is how durable the van bathroom needs to be. If you want a sturdy build that can handle rough dirt roads, choose aluminum for the structure and shower pan (like in the Outside Van below). While beautiful tile work looks nice in photos, it’s a heavy material and has the potential to crack from the constant vibrations as you drive. You can also cut down on weight, cost, and space by using a simple shower curtain instead of a door.
You can of course use your enclosed shower for storage, as I did in my first van. But what I found is that by the time I took everything out of the shower and put it back in, I could have gone into a recreation center or a campground shower facility and had a better shower, which is why I don’t recommend having an indoor shower in your van.
One other option that I’m seeing more of is van conversions with retractable or recessed shower pans and removable curtains. This allows you to set up a shower inside the van when you want, and stow it away when it’s not in use. For example, here is the Halo Hidden Shower system in Storyteller Overland’s 4×4 Mode Adventure Van.

If someone else is converting your van, it’s imperative that you properly screen them to ensure they have experience installing showers. Otherwise, you could end up as a guinea pig with a leaking shower and inadequate equipment, like what happened to me with my first Sprinter.
Ultimately, an enclosed shower in your van bathroom has its perks, but it’s up to you to decide whether the pros outweigh the cons and if it’s within your budget, as this is the most expensive and labor-intensive shower option for van life.
Outdoor Showers
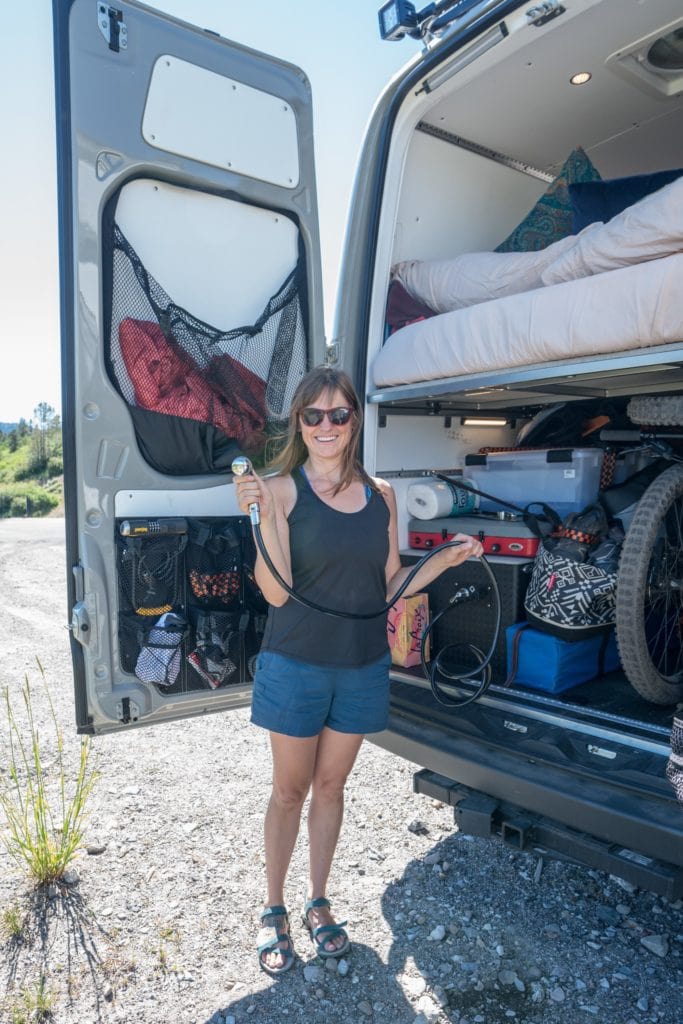
If you want a hot shower, but aren’t into the idea of a built-in shower, then it looks like you’ll be showering with a view. The perks of showering outdoors are that it won’t take up any real estate inside the van, it requires simpler plumbing, and it’s a whole lot cheaper. You still need to be aware of water consumption if you’re using your reserve, but you’ll also have more options for how you will get hot water.
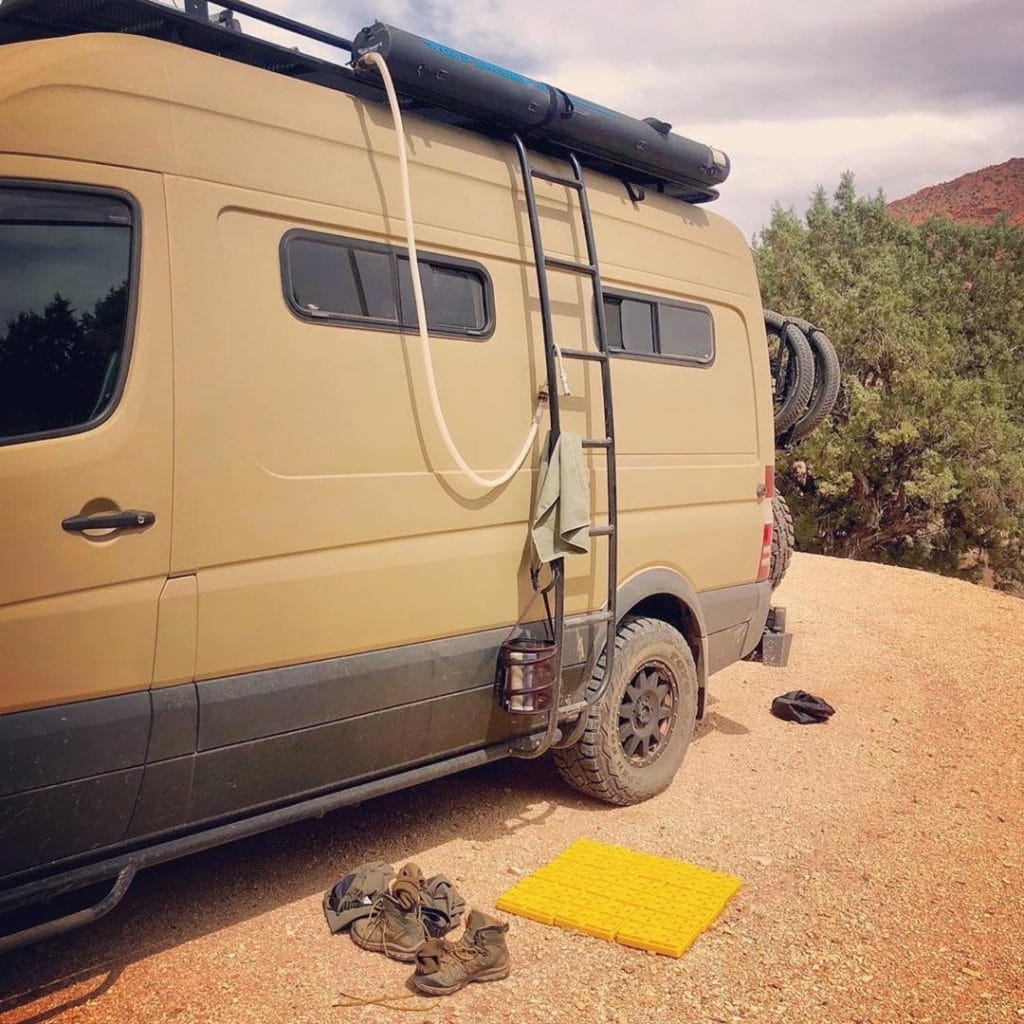
In my second van, Outside Van installed a port where I can hook up a shower hose to the back of the water tank for outdoor showers. If I’m being perfectly honest, I only used it a handful of times, but for the purpose of resale, I think it was a smart decision.
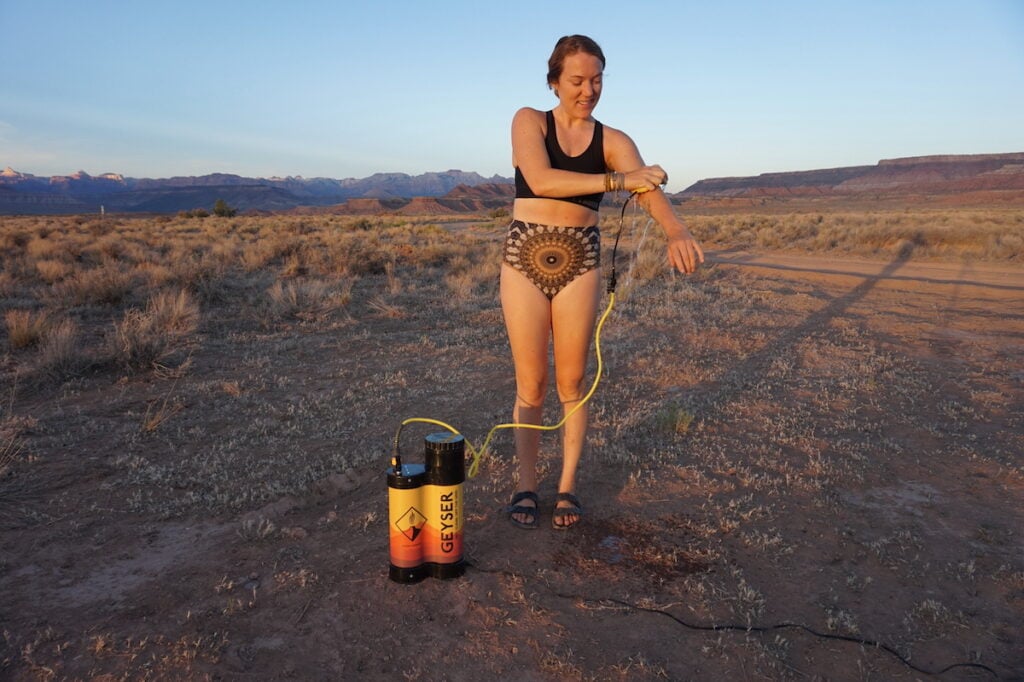
Portable outdoor showers have come up in trend recently because they’re easy to use and easy to store. There are many brands out there, but RinseKit is a popular one van lifers use to get decent water pressure without any pumping or power needed. BFT Team Member Courtney uses the Geyser Systems Portable Shower in her van, which uses less than 1 gallon of water and has an internal water heater for hot showers.
Solar Showers
Another option that is a lot more economical is to use a rooftop solar shower on your van, such as the Yakima Road Shower. This is essentially a black cylindrical tube attached to the roof rack that heats water from the sun’s warmth. An air compressor or bike pump can be used to pressurize the shower for proper flow, or in a pinch you could let gravity do the work for you but your shower would be a trickle.
For an even more economical solar option, the classic solar shower bag holds about 5-7 gallons of water and heats up in the hot sun within a few hours.

Another similar option is the Nemo Helio shower which works via a foot pump that pumps the water up through the hose rather than using gravity like a Road Shower or shower bag.
All three of these solar showers are good options if you plan to be in warm, sunny conditions most of the time otherwise none will reach a very warm temperature.
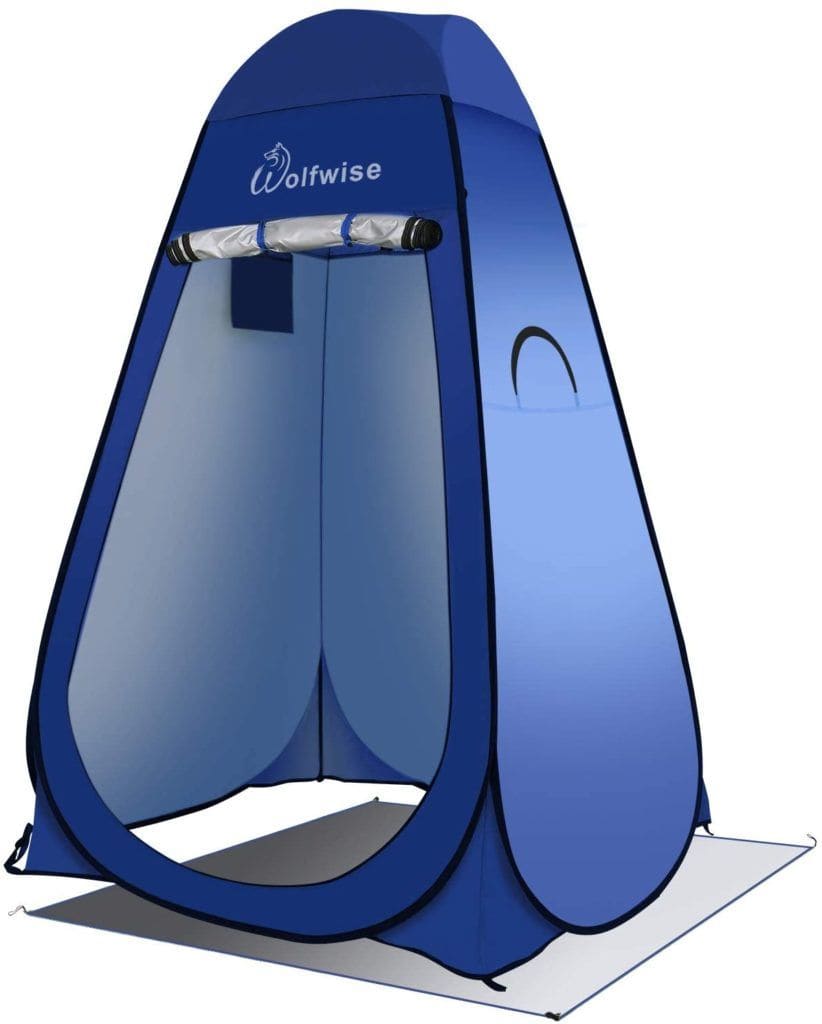
In all cases, if you plan on showering outdoors, I recommend a pop-up shower tent over stringing a shower curtain across your back doors. While both provide privacy, a shower tent will also provide some insulation from the wind.
Alternative Shower Options on the Road
If you want to forego a van shower set up altogether or want to be prepared in the event you need a shower elsewhere, let’s talk about your other options. There are plenty!
- Gym memberships: They are super popular, but it’s an extra monthly expense, so you want to make sure it will be worth the cost. Planet Fitness is one of the most popular options and costs around $22/month for their Black Card, which allows you access to any Planet Fitness in the country plus a free guest pass with every visit (great for couples on the road).
- Recreation centers typically have day passes available for purchase, which often gives you full access to their facilities. Sometimes, they have a shower-only fee, so inquire about that if you just want a shower.
- Many campgrounds and RV parks have showers, but usually only if you’re a paying camper.
- Pilot and Flying J truck stops have showers, but these tend to be on the pricier side around $15.
- Don’t forget about your friends and family! Most of the time friends are happy to let you shower, but if you want to show up clean and polished beforehand maybe stop at one of the other places first.
Campervan Water Heaters
As you can imagine, whether or not you need a water heater depends on your situation. If you want a fully enclosed indoor shower in your van bathroom, then yes, you will need one. Having a water heater is also nice for outdoor showering or for doing dishes in the colder months.
There are several options for water heaters with a wide range of costs for your campervan water systems. We’ll talk about a handful of popular options that meet a variety of budgets. The major difference between the different options is the fuel source. Water heaters typically run off diesel or propane.
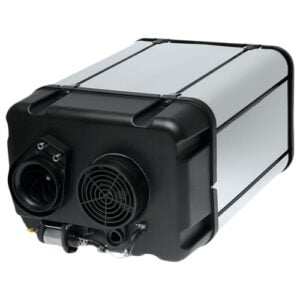
Diesel Water Heaters
The first option is to use a diesel heater, like the Webasto Dual Top EVO, which I had in my second Sprinter. This is a dual-purpose heater that heats both the water and the air by siphoning a small amount of fuel from the vehicle’s diesel tank. This is an efficient choice that consumes a small amount of battery power, although it will still have a noticeable draw if you are running it 24/7. However, you can choose to only run the air heater or the water heater if you don’t need both at the same time to save energy.
The Webasto Dual Top has a decent-sized footprint and is fairly expensive. As for installation, the Webasto was designed for exterior mounting, but if you often drive in harsh environments or rough dirt roads where dirt and rocks are being kicked up underneath the van, you should consider installing it inside.
The Webasto in my second van lived in the same storage box in my garage as my 25-gallon water tank. Similar to a lot of other water heaters, it can heat about 3 gallons at a time, so for showering, you’ll have to be mindful of your consumption. Other top-of-the-line diesel heaters that heat both air and water include Propex, Espar, and Truma.
Propane Water Heaters
Propane tankless water heaters are another popular option that can be tapped into your existing water tank. The biggest advantage of these is you get unlimited hot water on demand. This means you won’t run out of hot water unless you run out of propane or your water runs out altogether. Available with a pump or without a pump, you can connect a propane tankless heater to your water pump if necessary. This is an inexpensive, easy-to-use option for instant hot water that provides a flow rate of 2-3 gallons per minute. This one by GasLand Outdoors runs ~$170.

Campervan Toilet Options
Understandably, a toilet is another important decision to make in regard to your personal needs, but typically a toilet is separate from your campervan water system. Depending on what you’re comfortable with, you have several options for your van bathroom. If you need a toilet, you need a toilet. If space is more important and a toilet isn’t a concern, you can usually find a toilet when you need one while traveling.
In my first van I had a toilet, but I decided to forego one in my second Sprinter van. When I had my first van, dumping the porta-potty was that chore I never wanted to do, and after talking with a few more experienced van lifers, I learned different options for getting by without one. If you are considering a toilet in your build, we dive deep into all the van toilet options in this blog post.
Resources Section
Instagram accounts featured in video:
- @alwaystheroad
- @exploringinavan
- @bendtobaja
- @van_yacht
- @the.activ
- @norva.vehiculeaventure
- @alpinemargarita
- @ourhomeonwheels
What kind of campervan water system are you planning for your build? Share your questions, tips, and experiences down in the comments, and make sure to sign up for our van life newsletter.

Really helpful as I am in the planning stage of a van build. I’ll be building on a ford transit mid roof 144” or 148” wheel base. I may use the 3.5 ecoboost engine or Atlis electric platform if available. Some of my desires are, 1. Radiant heat flooring, 2. Shower recycling water. 3. 1,000 solar. 4. Induction stove. 5. A lift style bed. I look forward to following your blogs as I venture into the van world. Great information, thanks
Thanks for sharing that! Glad to hear this has been helpful. Sounds like you have a good idea of what you want which is great – best of luck with your van and keep us posted!
Do you have any opinions about flushless systems?
Is it possible/practical for someone who has a very difficult time using public bathrooms (for reasons I’d rather not state) to live in a van at all? Because that’s one big roadblock (heh) for me that I don’t know if I could deal with.
If you set up your van with a toilet and blackwater tank you can avoid public bathrooms but you’ll need to empty the tank in designated RV dump stations every so often – likely weekly, potentially more or less – depending on the size. In short, it’s possible but will take a little more planning during the conversion process and as you travel/live on the road.
Thanks for the answer.
Where do you find the Halo Shower system?
Hi Kim, I believe the Halo Shower is part of The Storyteller Overland builds. It’s doesn’t look like you can purchase it separately.
Do you have any links to the details on the actual shower pictured in this post? I really like the aesthetics and i think the showerhead and location look good too.
Do you know what showerhead and mixing valve it is? Are those smart tiles or real tiles? Do you know the floor dimensions?
Thanks
The featured photo is the bathroom in Kristen’s first van built by Outside Van. You can read more about it in this post