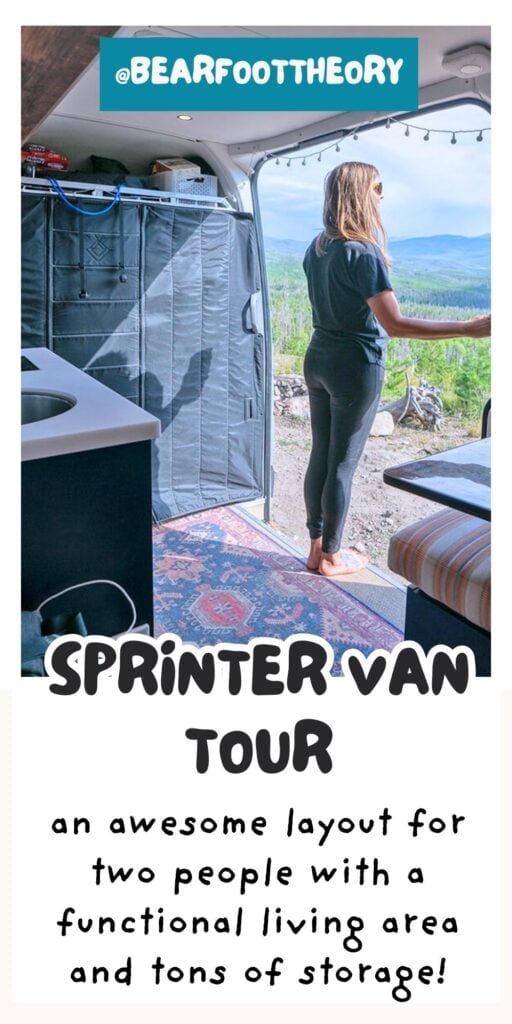
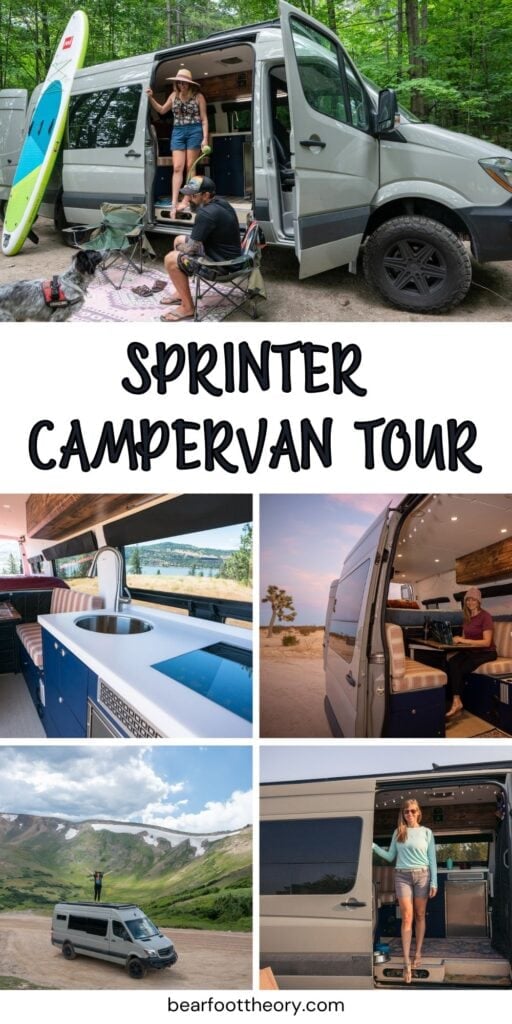
Touring My 170″ Sprinter Camper Van: The Ultimate Adventure Rig
Take a tour of my second converted Sprinter Van! This van was built by Outside Vans and I share everything about it including what I loved and what I didn’t like.
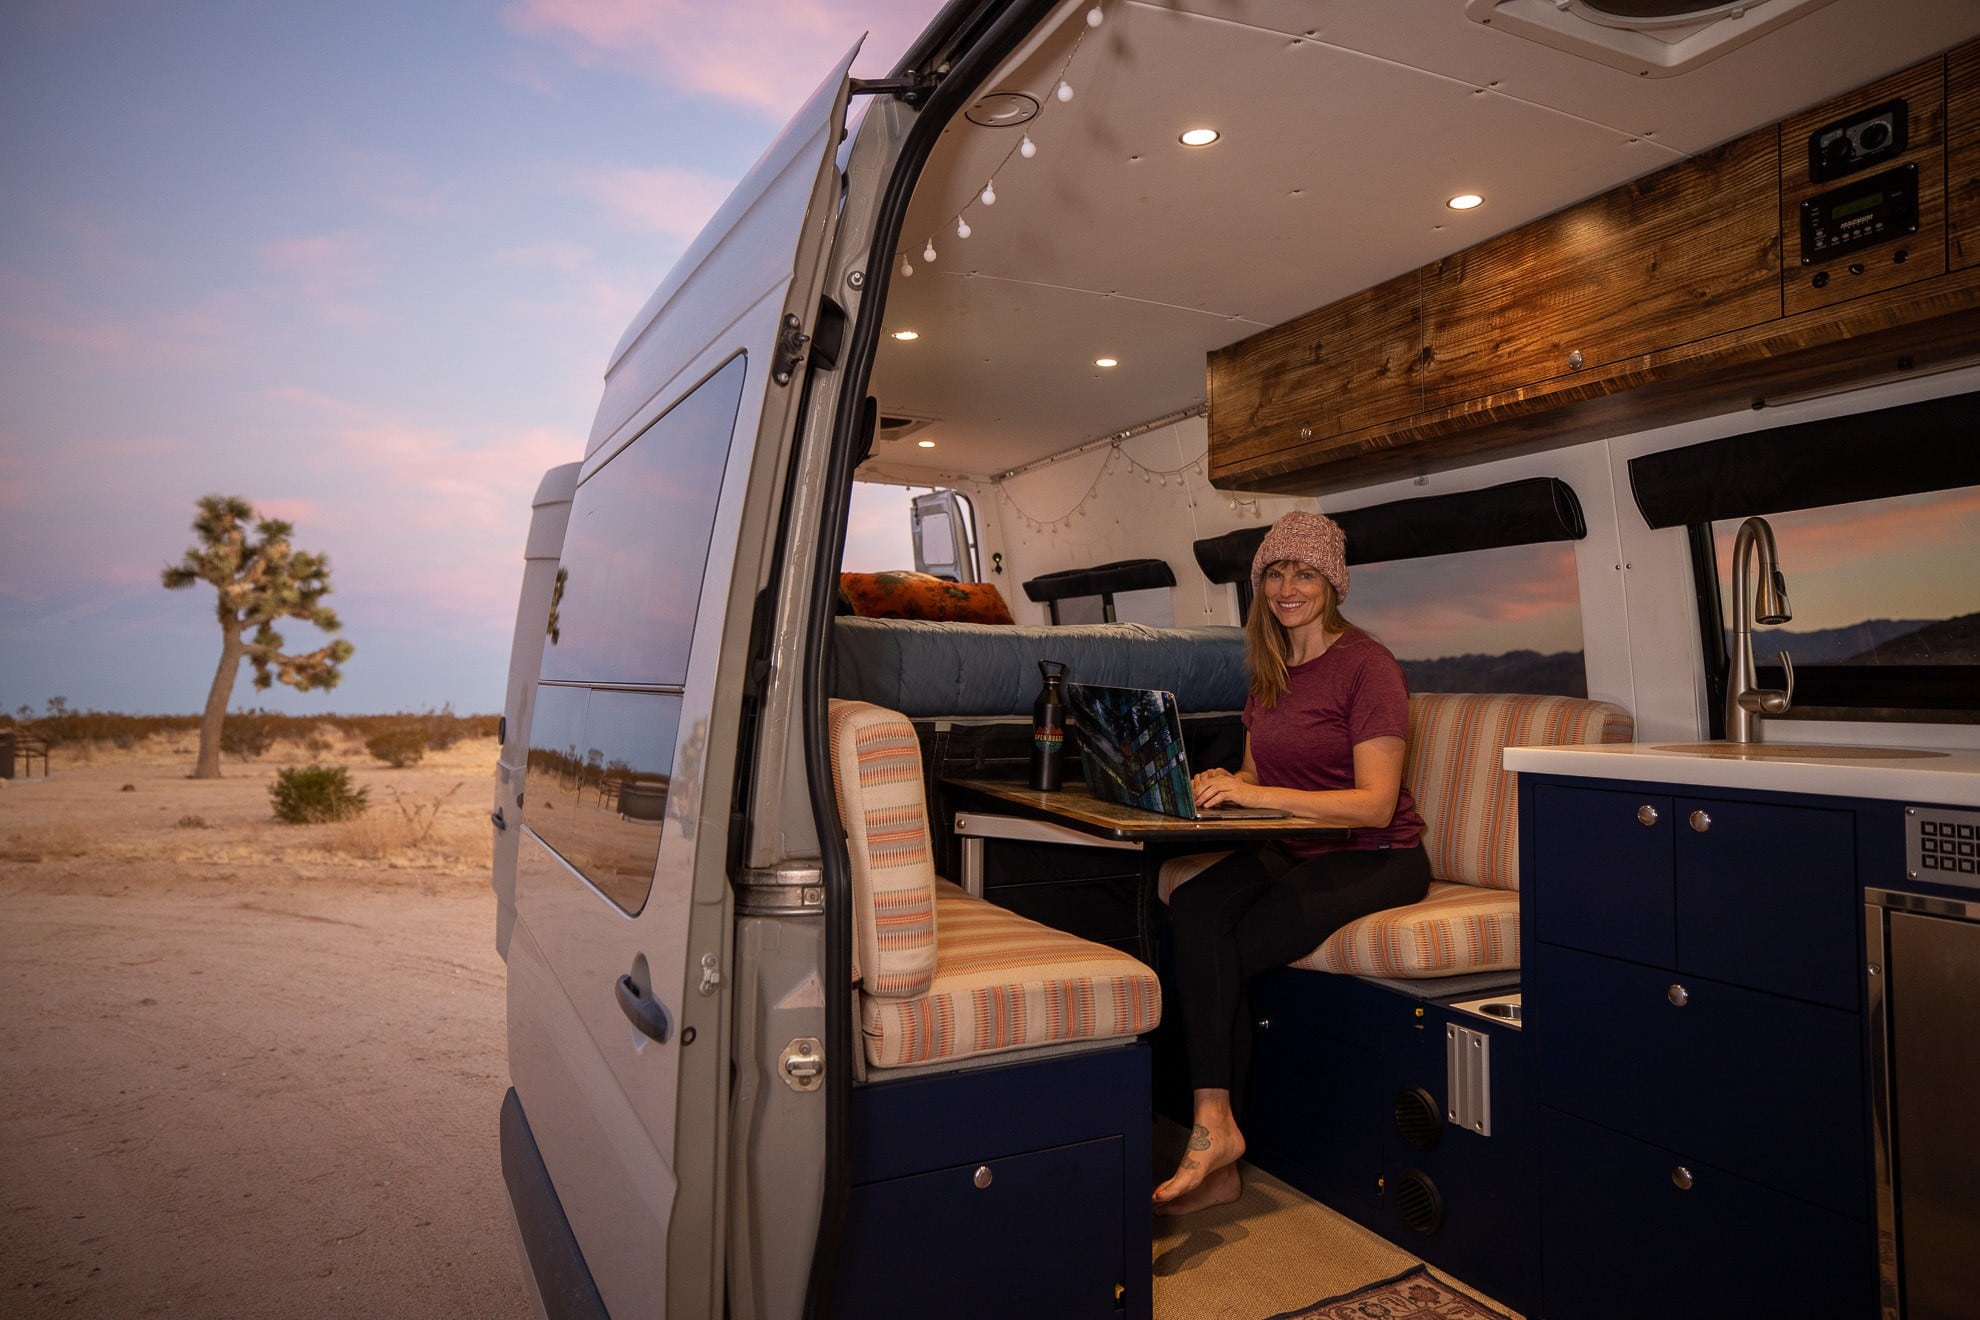
I started van life in 2016 and since then, I’ve owned three different Sprinter Vans. My second Sprinter Van was converted by Portland-based Outside Van, a well-known industry expert, and out of all my vans, this one – designed for 2 adults -had my favorite floorplan.
Built on a 170″ chassis, this 4×4 Sprinter easily handled everything I threw at it – whether that be rough 14,000-foot mountain passes in Colorado, icy roads while chasing powder, or driving across the country for the fall colors.
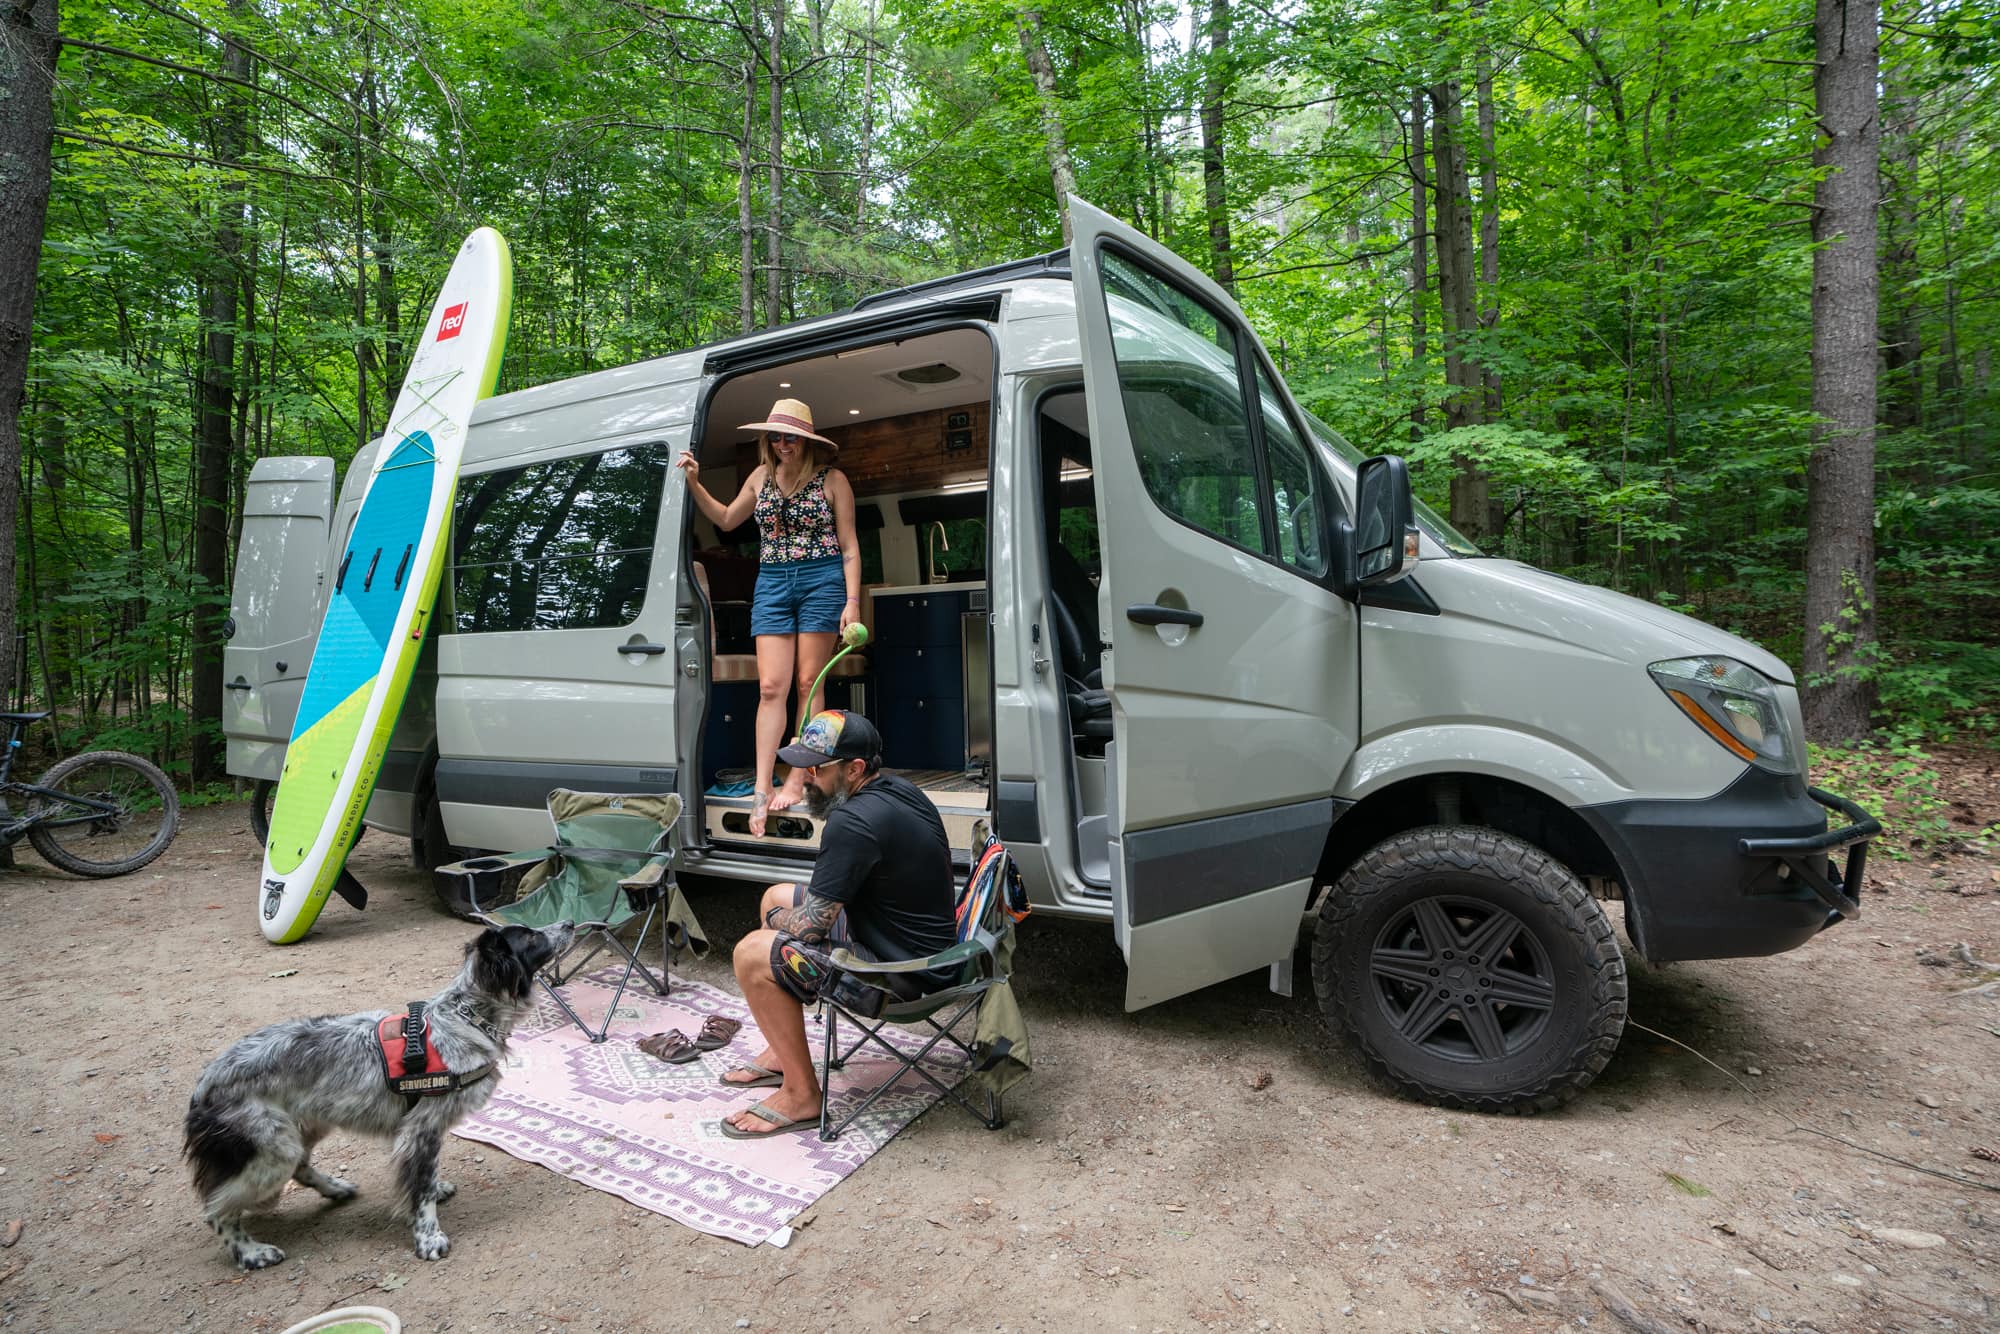
The van was designed a couple (and our two dogs) with a platform bed, small dinette, and a galley with lots of storage for our bigger outdoor gear including e-bikes, backpacking gear, packrafts, and more.
In this post, I’m giving you a full tour of my Sprinter van conversion, and I’ll share what I loved most about the layout and what I’d tweak.
This post may contain affiliate links.
My Priorities for this Sprinter Van
With this van conversion, I wanted to make some major changes to my floorplan from my first Sprinter Van (a 144” wheelbase). That van had a full indoor bathroom, an open aisle layout, and a convertible dinette/sofa bed. Overall it was great for solo travel and shorter trips, but I couldn’t carry a lot of big gear. Plus, I was now joined by my partner and our pups. My evolving situation meant my needs in a van changed.
For my second Sprinter Van, I wanted:
- More storage for multiple bikes, outdoor gear, and seasonal adventure equipment
- A dedicated workspace that didn’t require constant setup and teardown
- A lighter, better-balanced build that could handle rough dirt roads without falling apart
- A robust power system that could support 4-seasons of off-grid living
I wanted the van to have a modern, cozy vibe, but I was unwilling to sacrifice function for looks. I wanted to be able to go anywhere in this van, so it needed to be built with durable materials that could stand up to the bumps in the road.
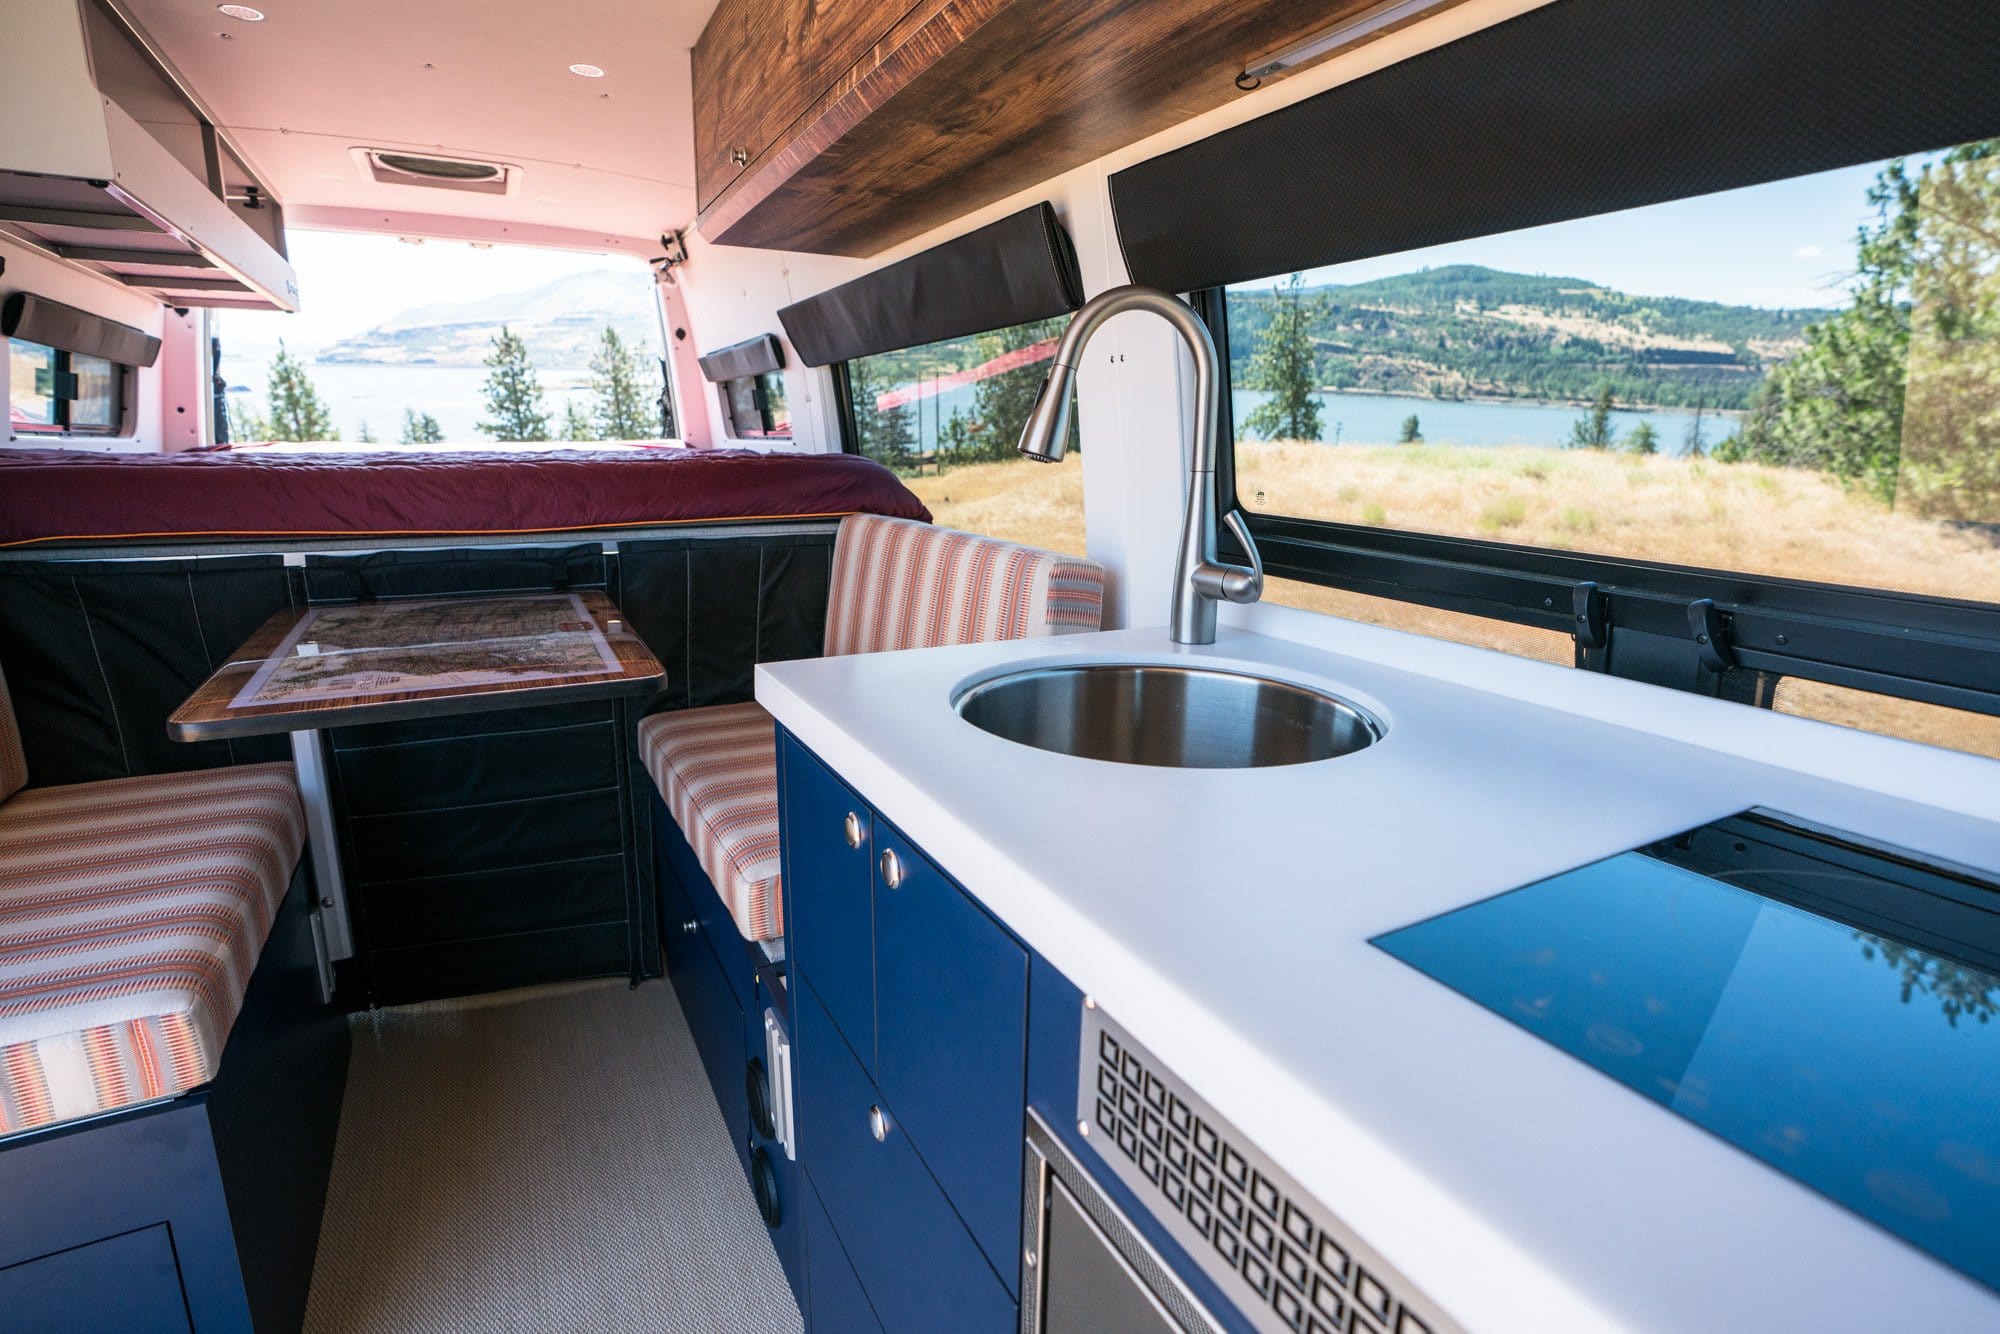
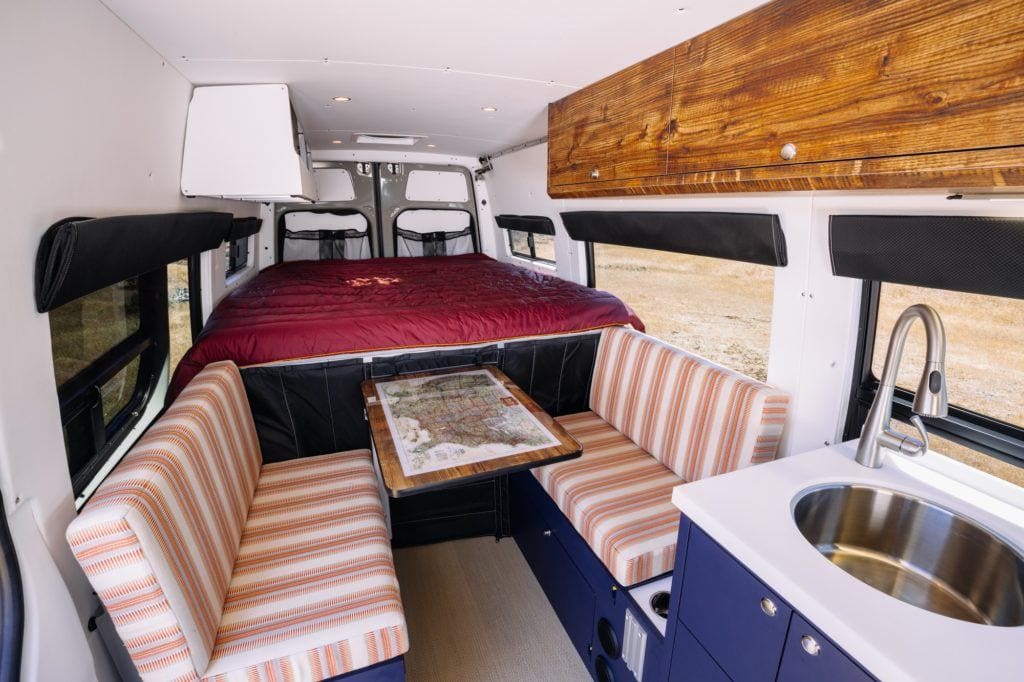
The floorplan I decided on was a galley across from the slider door, a small dinette for working and eating, and a big platform bed with a huge gear garage underneath.
Read next: Tips for Planning your Van Layout
Save this post!
Enter your email & I'll send this post to your inbox! You'll also receive my weekly newsletter full of helpful advice for planning your adventures.
Sprinter Van YouTube Tour
I’m going to get into all of the details about this Sprinter camper van below, but if you prefer to watch, I filmed a full video tour for my YouTube channel.

What I loved about this Sprinter Camper Van
This Sprinter Van floorplan was extremely functional for two adults. It had *almost* everything we needed to live full-time on the road. Here are a few of the features I really loved about this Sprinter conversion:
What I wanted to change about this Sprinter Camper Van
I really nailed the layout in this Sprinter, so there wasn’t a whole lot I didn’t like. The things I did want to change came down to a few minor design details.
There was also no bathroom, but that was by design. We didn’t need one at the time, and instead we used a Go Anywhere foldable toilet that stored easily in the garage and could be pulled out only when we needed it.
Now I’ll get into the details of the build and the components.
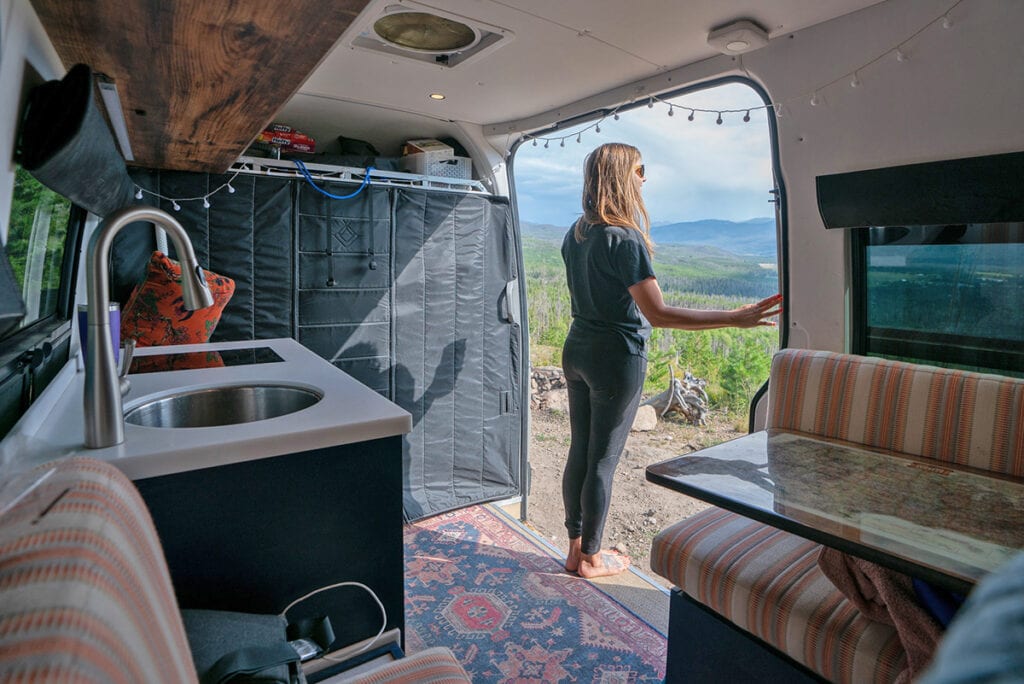
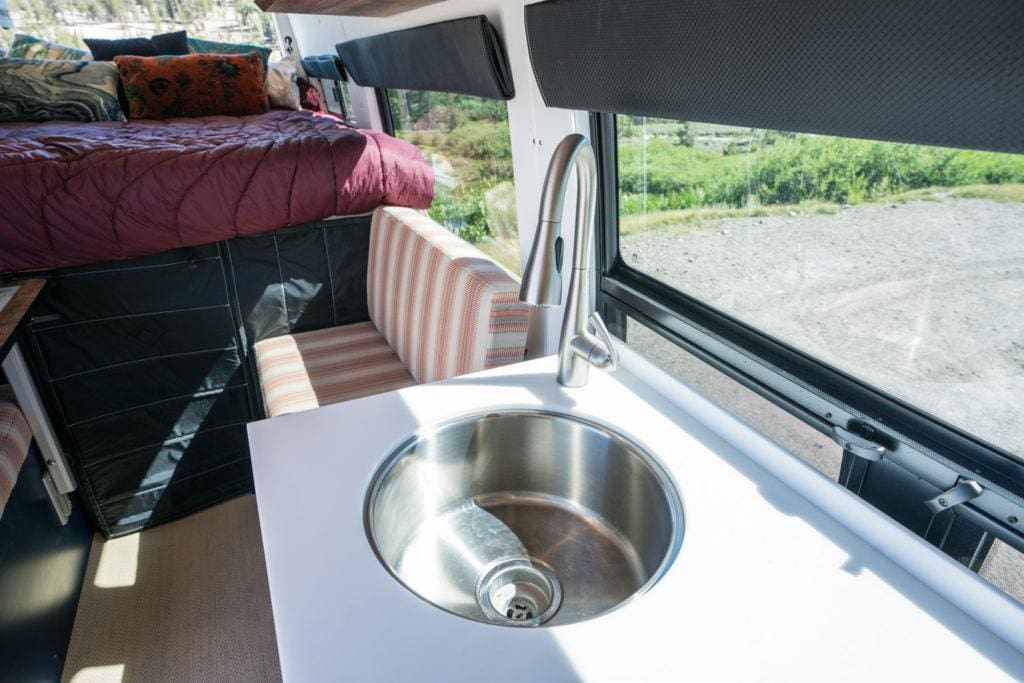
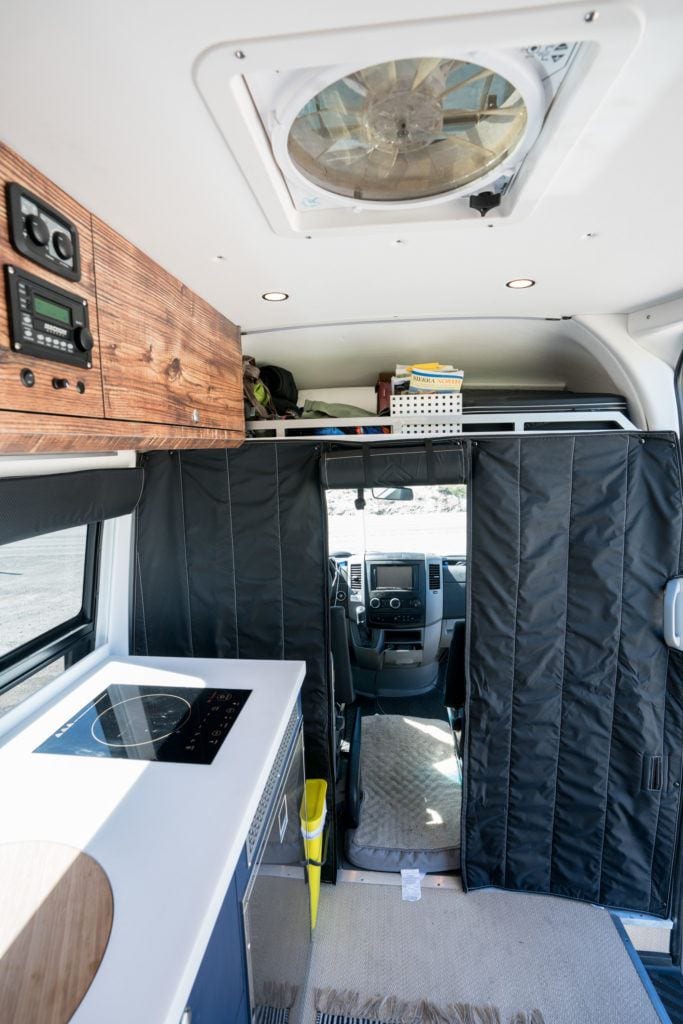
Galley
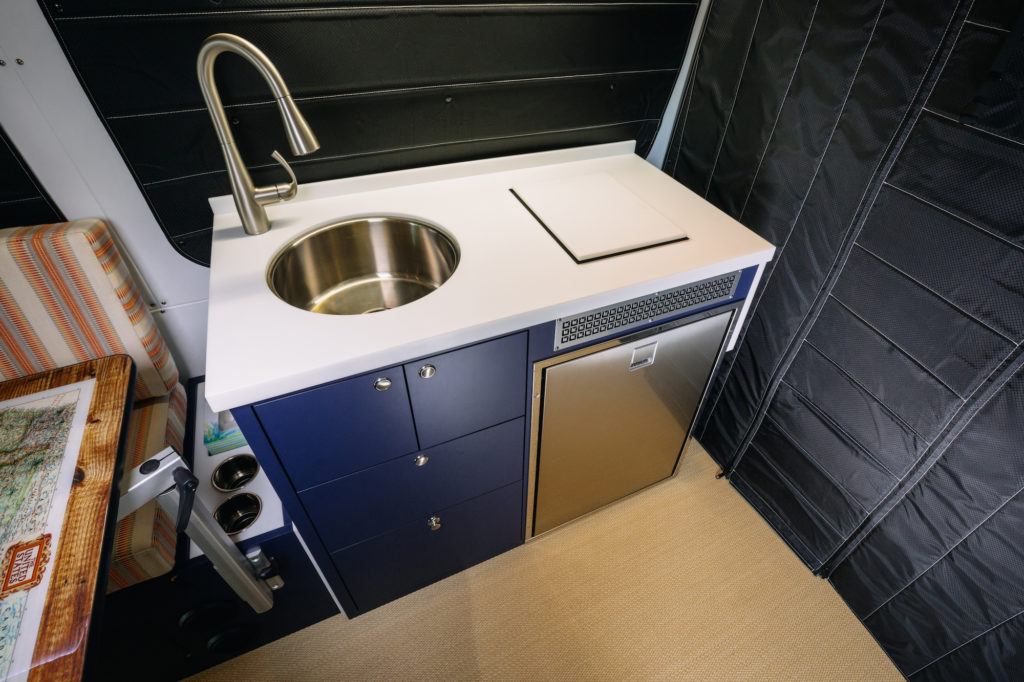
The galley had a large sink, a one-burner induction stove, a 4.6 cu ft fridge, and drawers for all of our essential van cooking equipment. While we didn’t have a ton of counter space, we could use the table in the dinette when the counters got too crowded.
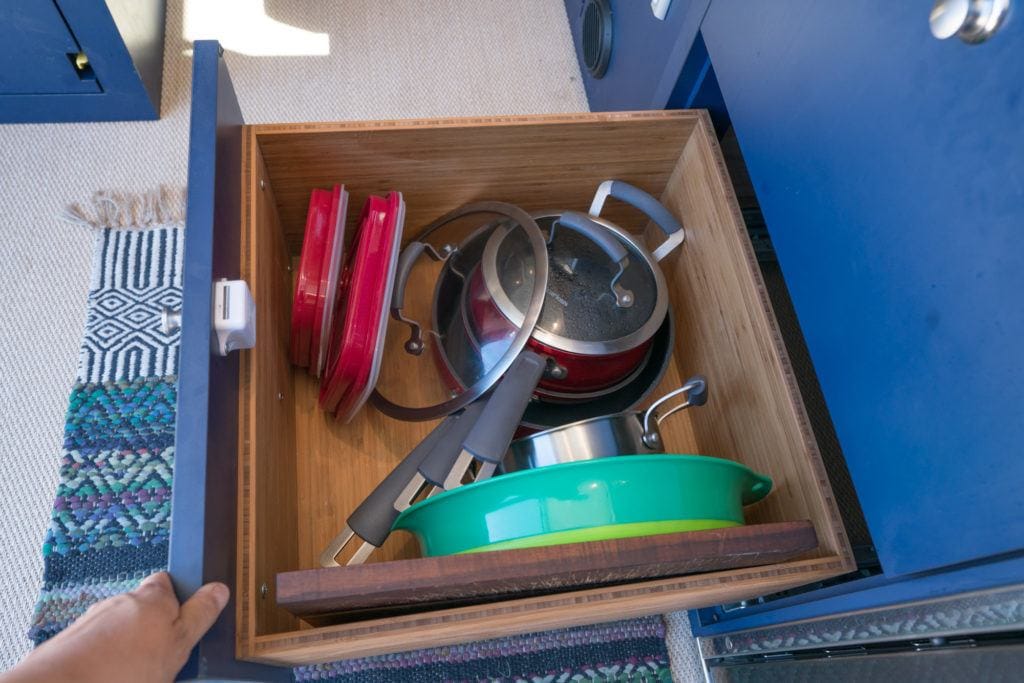
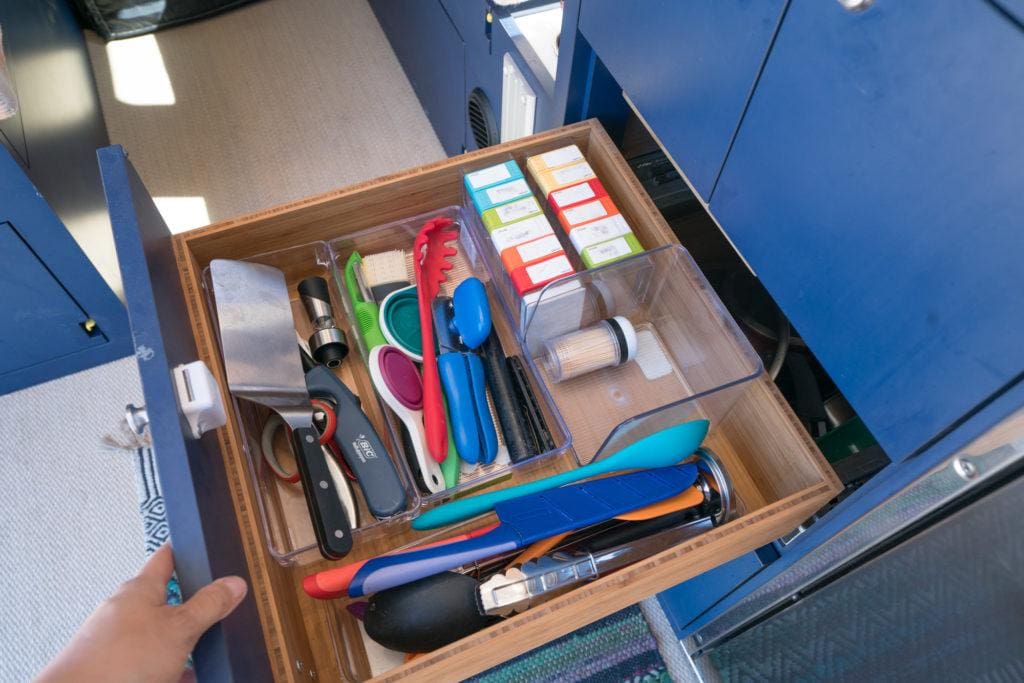
Cabinets and Drawers
The overhead cabinets and the galley drawers fit our pots, pans, utensils, food, and toiletries. Here are some of the specs:
Read next: Kitchen Ideas for your Van Conversion
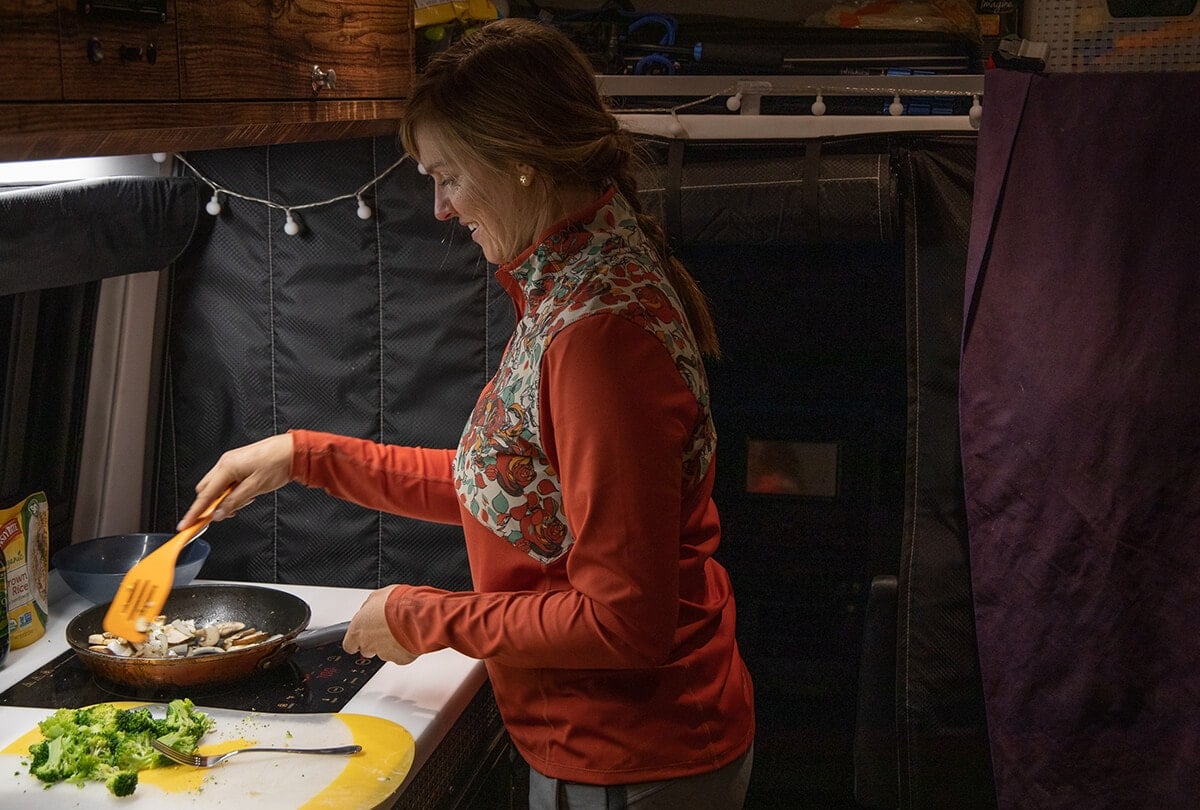
Induction Stove
The one-burner induction stove was great for morning coffee, simple meals, stealth camping, and bad weather days. However, induction stoves require a lot of power, so we still did most of our cooking outside on a two-burner portable camp stove.
Induction stove vs Gas Stove for Sprinter Camper Vans
While an induction stove does require a powerful battery bank and an inverter, they have a lot of benefits. Here’s why I chose one over a gas stove:
- Induction stoves heat up and cool down extremely fast, so you aren’t likely to burn yourself
- They are easy to clean
- They are safer since your aren’t combusting gas inside the van.
Isotherm 4.6 cu ft Fridge
Isotherm is one of the main fridge brands you’ll see in camper van conversions. Designed for boats, these are made to survive shaking, vibration, and rigid movements. This 4.6 cubic foot model is large enough to have ~5 days of fresh food for 2 people, although you really have to cram everything in there.
I’ve had Isotherm fridges in all of my vans, and I’ve had the same complaints each time around. After about 4 weeks, the small freezer starts to ice up and you have to pull everything out of the fridge to defrost it. It’s such a pain when you don’t have anywhere to put that food to keep it cold during this process. I’ve also had the freezer door break, the door shelf covers break, and the shelves collapse and break.
I’m not sure why this fridge is the industry standard, and someone definitely needs to come out with something better. Side note: If you’re open to a chest style fridge, I love the Luna National brand. They are built tough for overlanding and are very efficient as far as power consumption.
Large Stainless Steel Sink
I think having a large sink is essential in a van. The dirty dishes add up so quick when you are cooking in a small space, so having somewhere for them to go helps keep the mess at bay.
The pull-down faucet made it easy to conserve water while doing dishes. However, because this type of faucet can rotate, we had issues with it twisting around while driving on bumpy roads.
Dinette & Workspace
Running this blog is my full-time job, so I wanted a dedicated work area that was ready for me to sit down and crank out work at all times. I really liked being able to sit across from someone, and it worked out fabulous for working, eating, and hanging out.
Under the bench seats were two large drawers. We stored our dog food and supplies in one drawer and my work stuff in the other. It was really convenient having my computer so close to my work space.
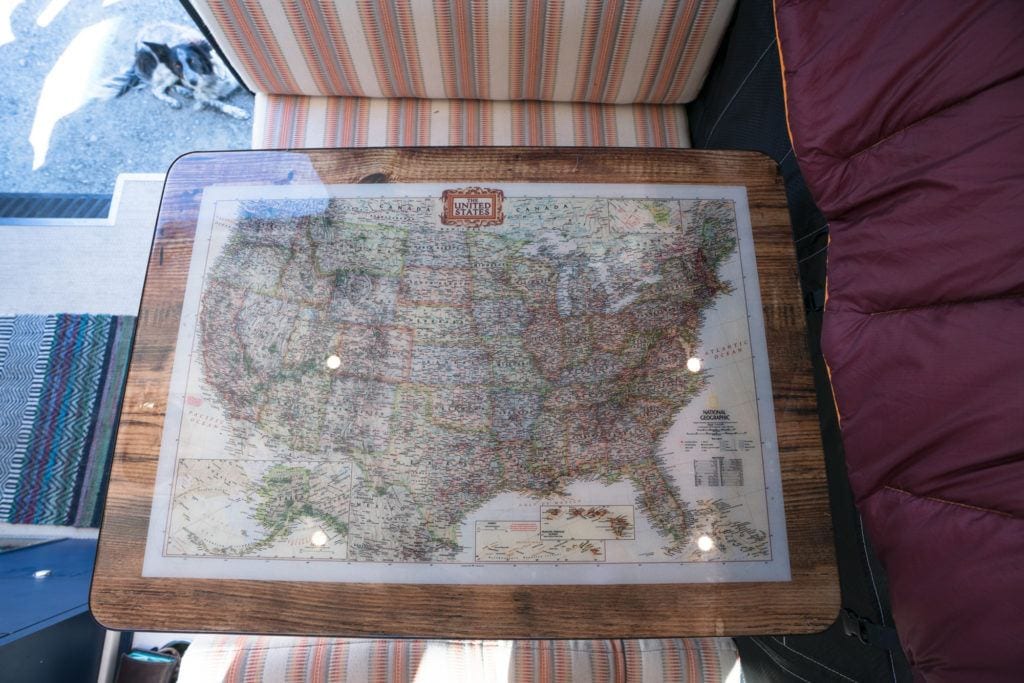
Lagun Swivel Table
The table in the middle of the dinette is on a Lagun swivel mount and serves as a desk and dining table. The Lagun mount allows you to move the table around or to push it all the way to one side when you want it out of the way. We usually kept the table in place while driving, but you could also remove it if you wanted to turn the dinette into a lounge (more on that below).
In my case, the swivel mount made it easier to access the gear garage from in inside the van. I also had the idea to have a US map placed on the tabletop to add some character to the van.
Convertible Lounge
The dinette converted into a small bed or lounge, although I’ll admit we never once used this. In theory, it sounded great, but we didn’t really need for an extra bed, especially since we didn’t have a seatbelt for a third passenger.
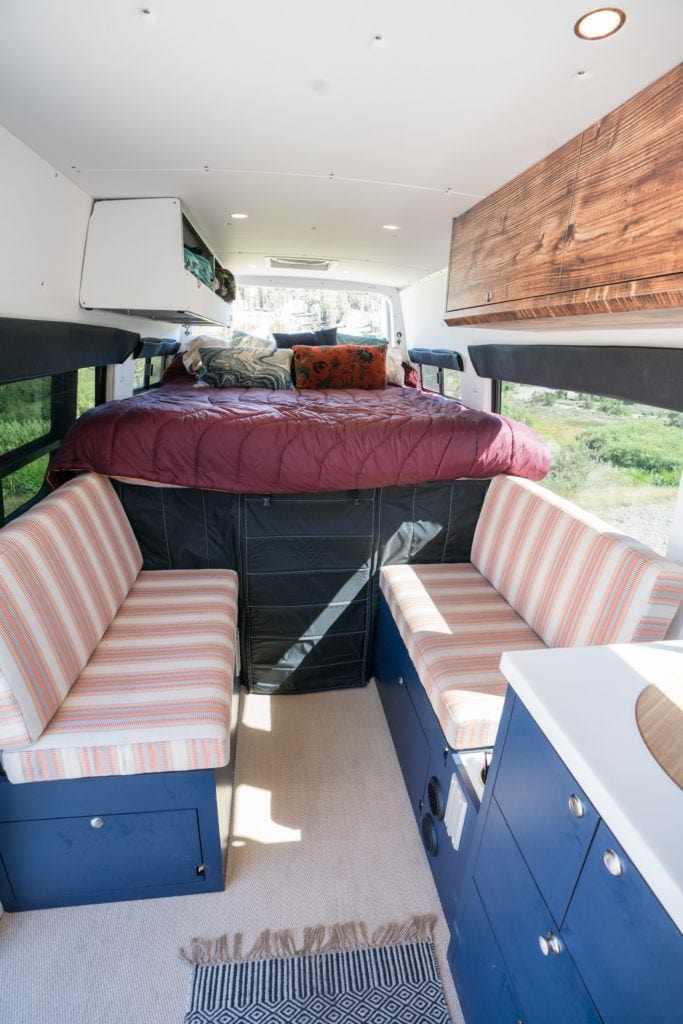
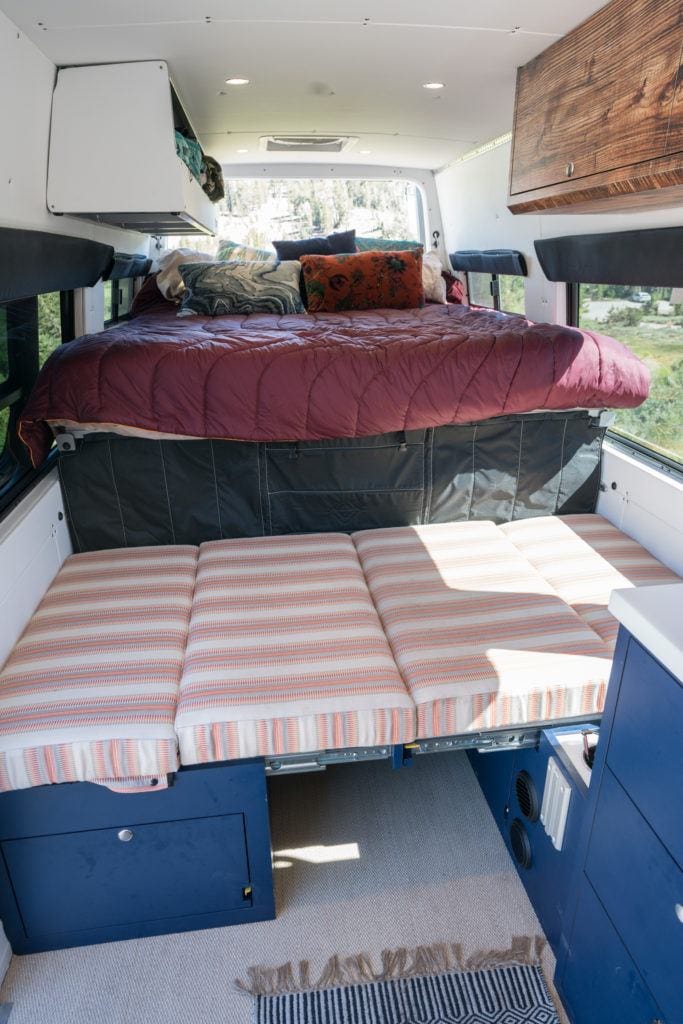
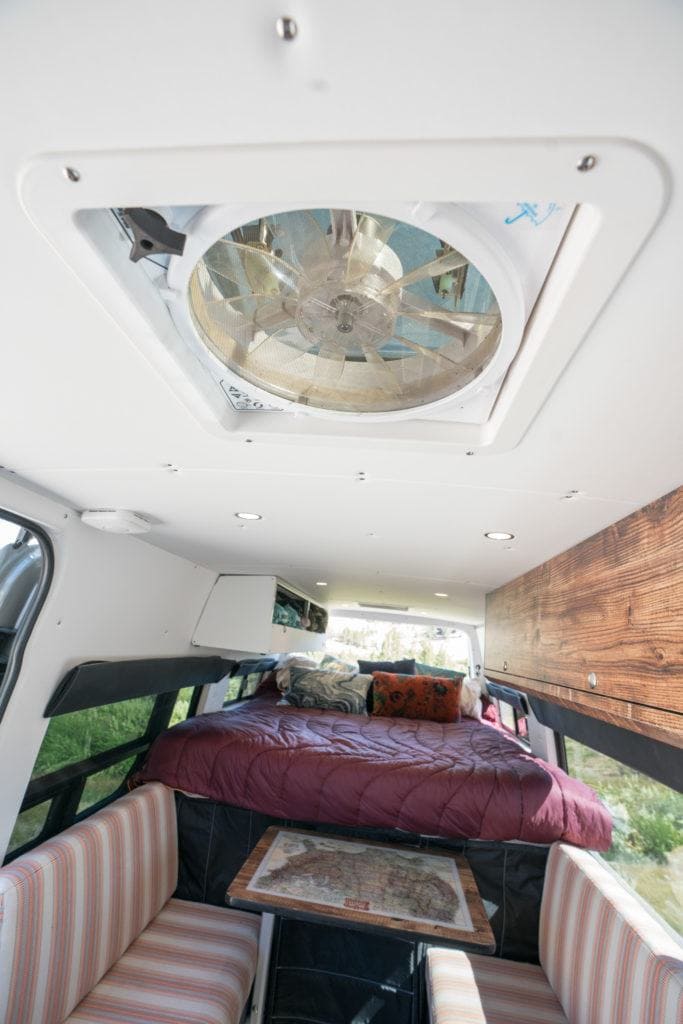
Platform Bed
I wanted a bed that didn’t have to be set up every single day, so I opted for a queen sized three-panel aluminum platform bed.
The bed had a capacity of 500 pounds and all three panels secured to the bed rails via a spring-loaded threaded fastener. While the bed was removable, I never once took the panels out.
The mattress the van came with was only 4″ thick, so I added a 2″ organic latax topper that made it comfier than any bed I’ve ever owned. I just had to cut the topper so it was the right size.
The only thing I didn’t like about the bed is that I didn’t have a whole lot of head room, especially with the topper in place. Having a lower bed with more headroom would have meant that we couldn’t fit our bikes underneath, so like everything in a van conversion, this was a trade off.

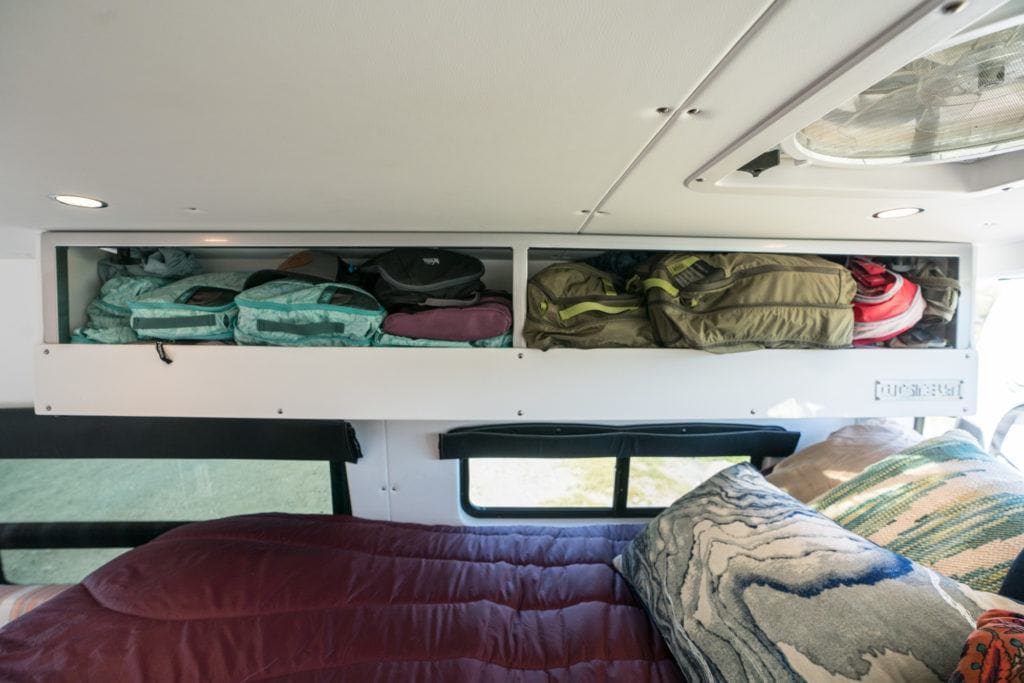
Clothing Storage
All of the clothing we packed for van life was stored in packing cubes in an open cabinet on the side of the bed. There was room to sleep underneath it, but not really without accidently hitting your head in the middle of the night. So instead, the dogs slept under it pushed against the wall.
The open style had its pros and cons. The lack of cabinet face meant it was quick and easy to pull a packing cube or or stuff something up here. However, it hated that this area always looked so sloppy.
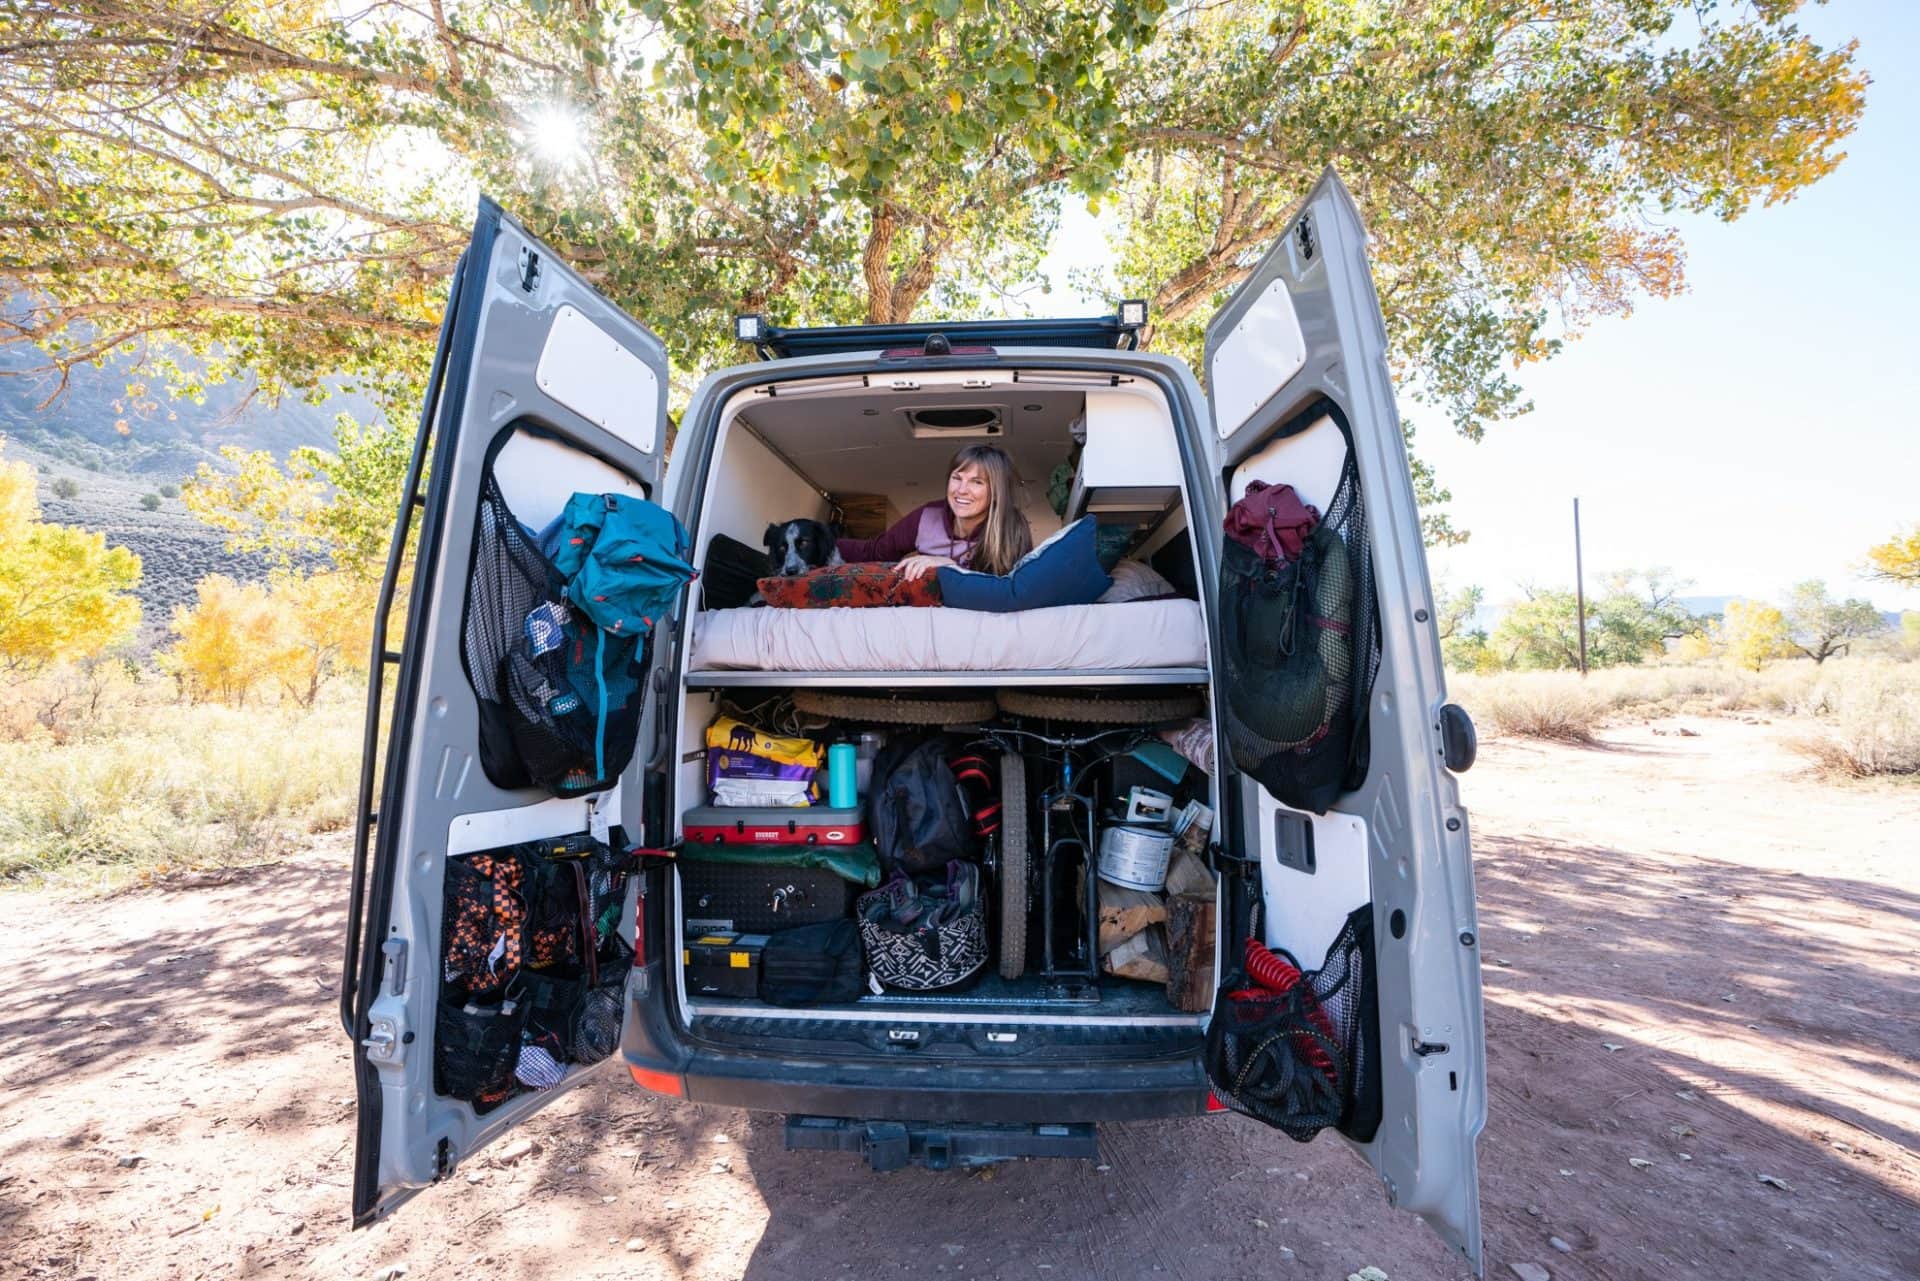
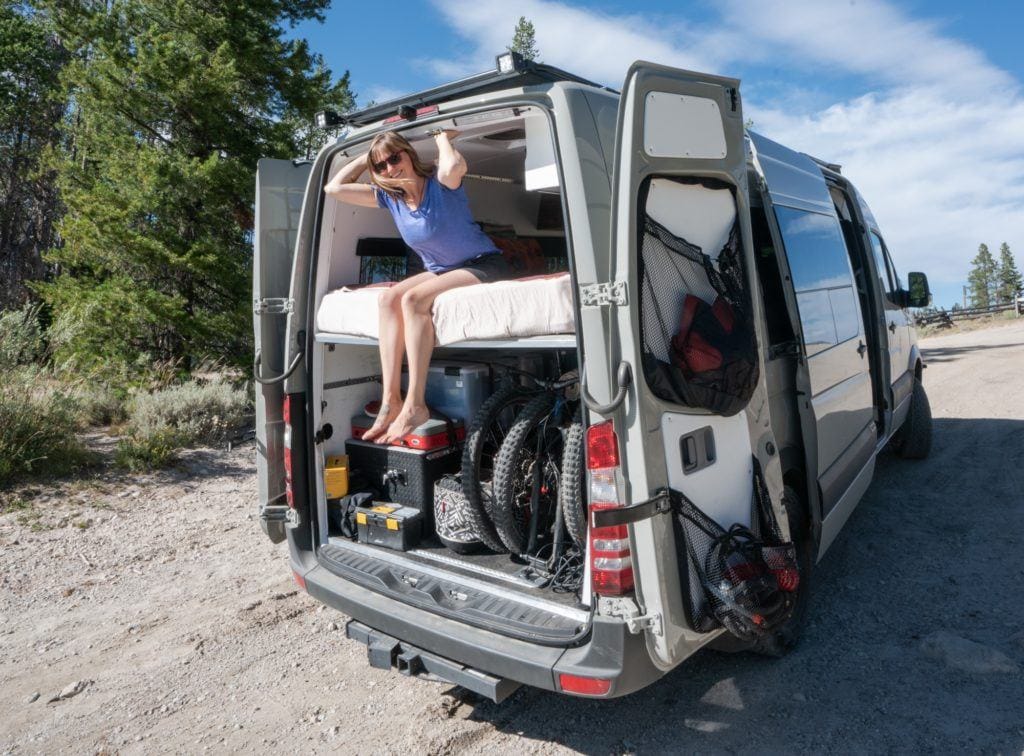
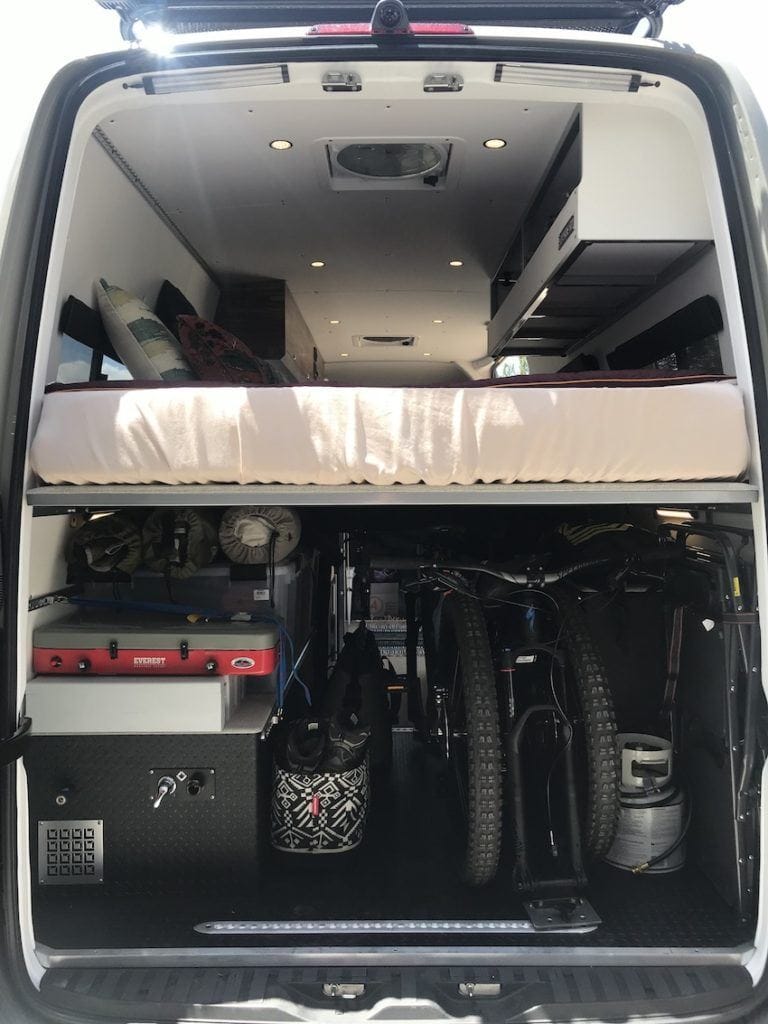
The Gear Garage
Underneath the bed there was a ton of storage for all of our big gear. So much that if we didn’t have our bikes, we had a tough time filling it! We could fit two Specialized e-mountain bikes, all of our camping, and outdoor gear, shoes, and even a couple of small inflatable packrafts.
In addition, the garage had 25 gallon water tank and a Webasto Dual Top Evo 6 for heat and hot water on the left side and all of the electronics and batteries on the right side.
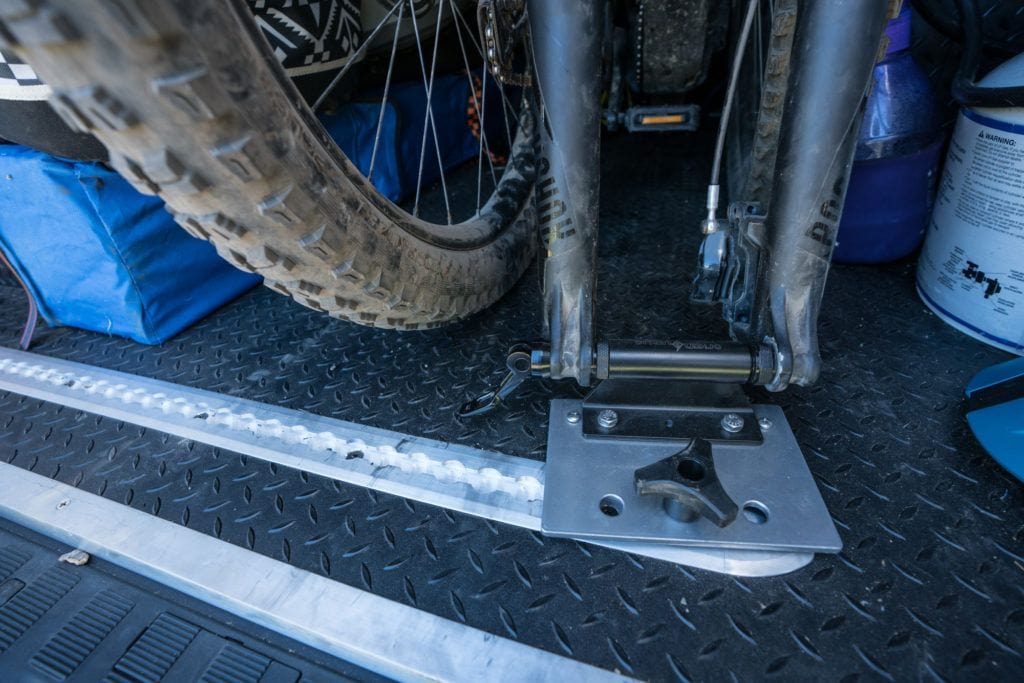
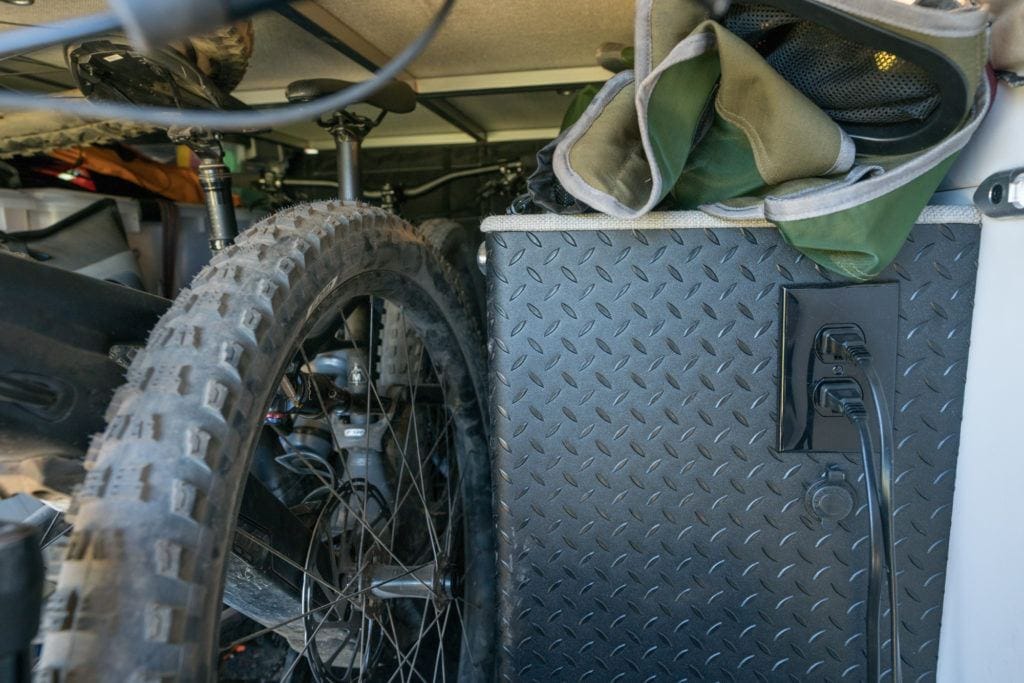
Bike Storage
In order to get the bikes under the bed, we took the front wheels off and faced each bike in opposite directions to get them as tight as possible. Then we used a fork mount to mount the bikes to the floor’s L-track so they didn’t shift around while we were driving.
I was very happy being able to store the e-bikes inside the van, but it was a bit of a hassle to get them in and out since all of the other gear next to the bikes also had to be pulled out to get the bikes inside.
It would be cool to have the bikes on some sort of slider system, but you end up losing a few inches vertically, and I didn’t want our bed any higher.
Garage organization
You may be wondering how easy it was to stay organized with one huge open garage vs having drawers and compartments. A big drawer system, especially if it’s made of wood, adds weight to your build and is another component of the van that you have to worry about breaking if you like to drive off-road.
Having a big open space was great because we could store our gear in plastic bins and duffel bags. This gave us a lot of flexibility to swap out gear each season.
There was L-track along the floors and side walls that we used to quickly strap bins down.
Power System
Running low on power can be stressful—not to mention harmful to your batteries if they drop too low—so I wanted a setup that would keep everything running smoothly. We lived in this Sprinter van for 8 months a year, so I needed a system that could handle electric bikes, my computer, camera, induction stove, heater, and other electronics without any worries, especially in winter.
Batteries
This van was built before lithium batteries became the industry standard. Instead it had a 660 amp/hour AGM battery bank, which at the time was considered to be VERY powerful.
Note: Since then, AGM batteries have mostly been phased out of new van conversions for lithium, and in general people have really beefed up their batteries banks. For example, in my current rig, we have 1000 amp hours of lithium batteries.
In the 4 years that I lived mostly full-time in this van, we never had to plug in out of necessity, and the system was powerful enough for our needs. The only time we found ourselves conserving was in the winter when we were cooking on the induction stove a lot and the solar panels weren’t as effective.
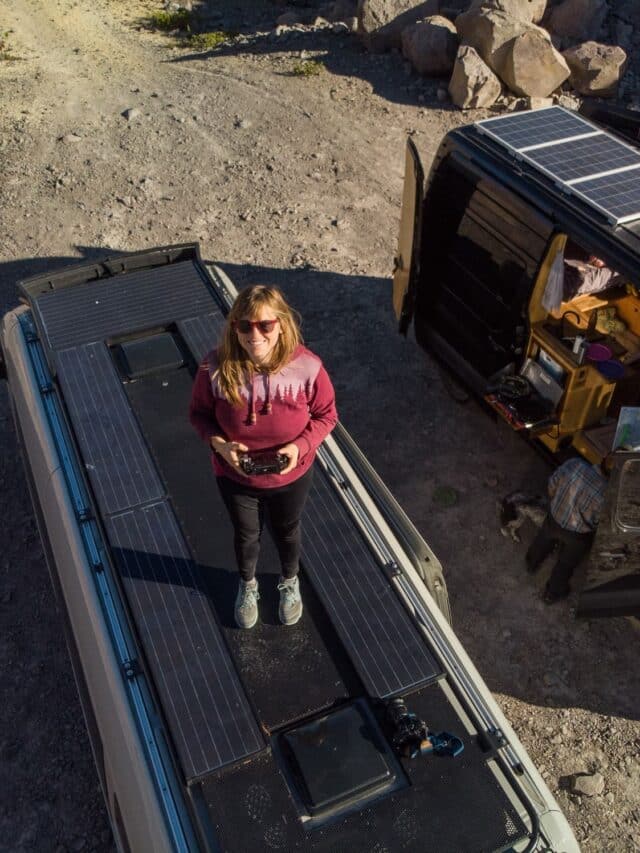
The batteries got charged in 2 ways. First we had a hearty panel system on the roof.
The batteries were also hooked up to the van’s alternator which I highly recommend. It’s helpful to be able to charge the batteries while you’re driving especially when your batteries are low and the sun isn’t out.
Solar panels
There were 445 watts of Zamp Solar panels on the roof. Zamp (now owned by Dometic) makes all of their panels right here in the US.
Almost the entire roof was covered except a small walkway in the center of the roof rack. There were four 80-watt panels and one 125 watt panel.
To give you a rough idea of how much power solar can produce – on a fully sunny day, one of my single 80-watt solar panels could create enough power to run the fridge.
Inverter
The final piece of any van’s electrical system is an inveter, which converts battery power into usable AC power for my appliances and outlets. Inverters are rated by wattage, and the larger the wattage, the more applicances they can handle at once. I had a 2000-watt pure-sine inverter which is pretty standard and can handle an induction stove or a blender and charging small devices at the same time.
Temperature Control
Battery banks at the time weren’t powerful enough to reliably run an air conditioning without having to be plugged in. Good news…that’s changed so if you want an AC (my new rig has one), it is possible. If you don’t have or want AC, here are some tips for staying cool in your van in the summer.
Ceiling fans
I had two Maxx Air Fans. One above the galley and one above the bed. They each have a rain sensor and create really nice airflow in the van. Compared to my Fantastic Fan in my first Sprinter Van, I prefer the Maxx Fans.
Windows
We had windows running the length of the van. The front and rear ones had vents that you could open. With the fans running, we could get pretty good airflow in the van, especially at night.
Insulating window shades
All of the window coverings were insulated. This helped keep things cooler in the summer and prevented warm air from escaping through the windows in the winter.
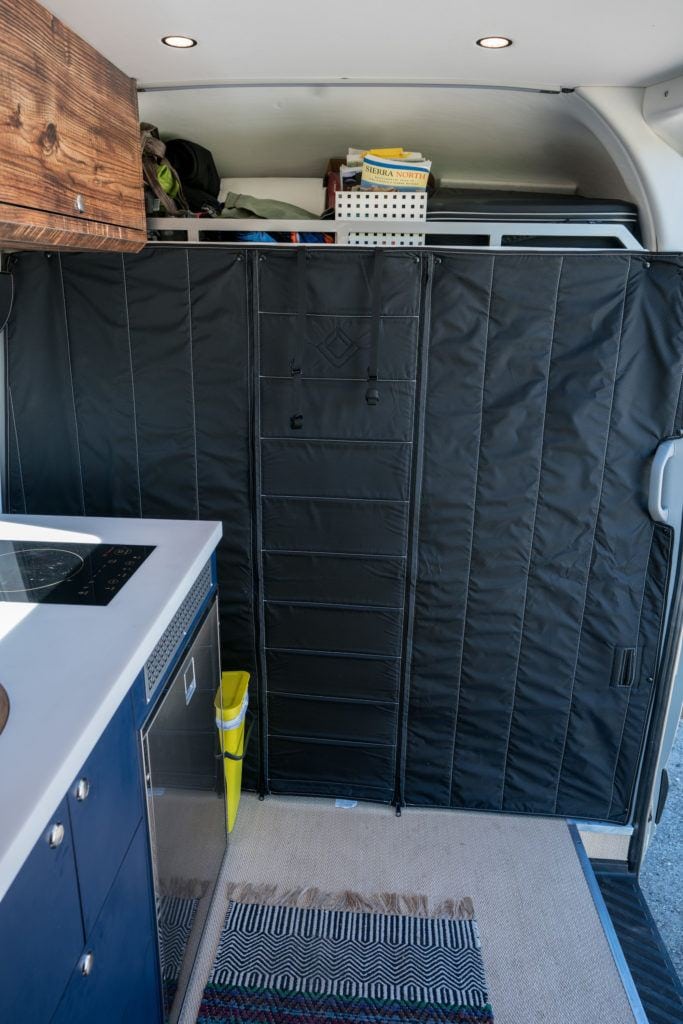
Privacy & insulation curtain
The curtain that led to the front of the van was also insulated with zippered walkway in the middle. This was one of my favorite things in the van because it was incredibly easy to zip closed when we wanted privacy or to insulate the living area from the cab.
Heating for winter adventures
For heat in the winter, we had a Webasto Dual Top Diesel Heater. The Webasto produces hot air and hot water and runs off the diesel in your existing diesel tank.
We had our van down to single digits at night many times on ski trips, and the van always felt toasty warm inside.
The biggest issue with Webasto is that it’s really hard to find places to service them if something goes wrong. While the Webasto functioned well, I would recommend looking at a different diesel heater brand.
Water Systems
I wanted my entire plumbing system contained inside the van, so I didn’t have to worry about anything freezing in the winter. It was a simple streamlined setup and very easy to fill up our water.
Water tanks
I had a 25-gallon water tank inside a cabinet in the garage, alongside the Webasto Dual Top heater which stores an additional 3 gallons of hot water in the boiler. The BPA-free water tank was permanent, but it could easily be filled using a hose or 5-gallon jugs if I couldn’t find a spigot with potable water.
Water that runs through lines to the sink goes through a three-stage charcoal water filter that ensures the water we were drinking was clean.
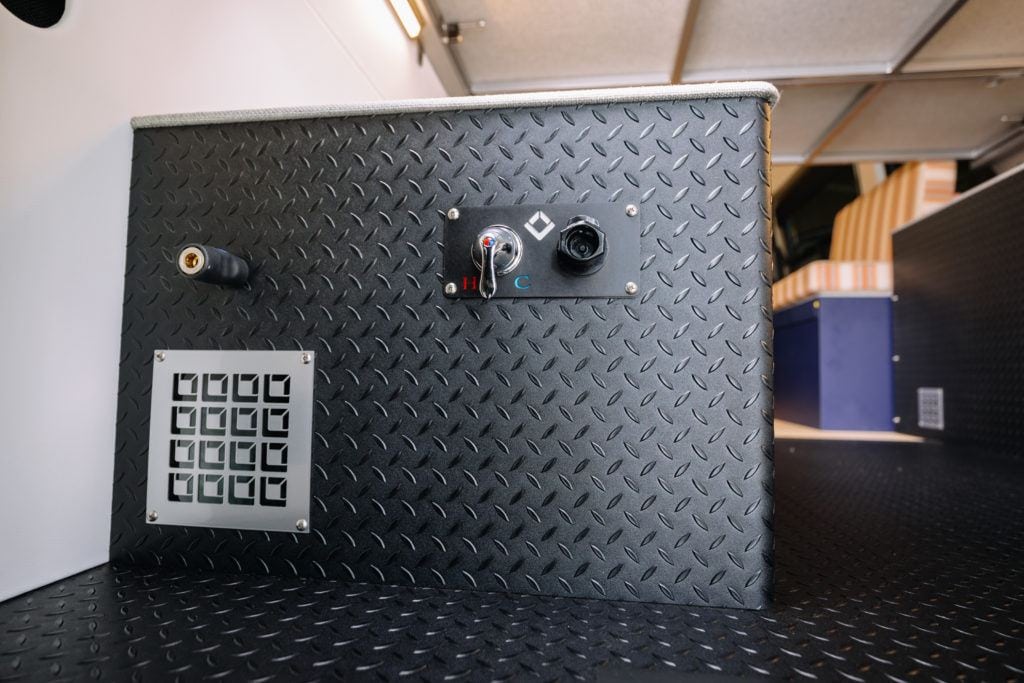
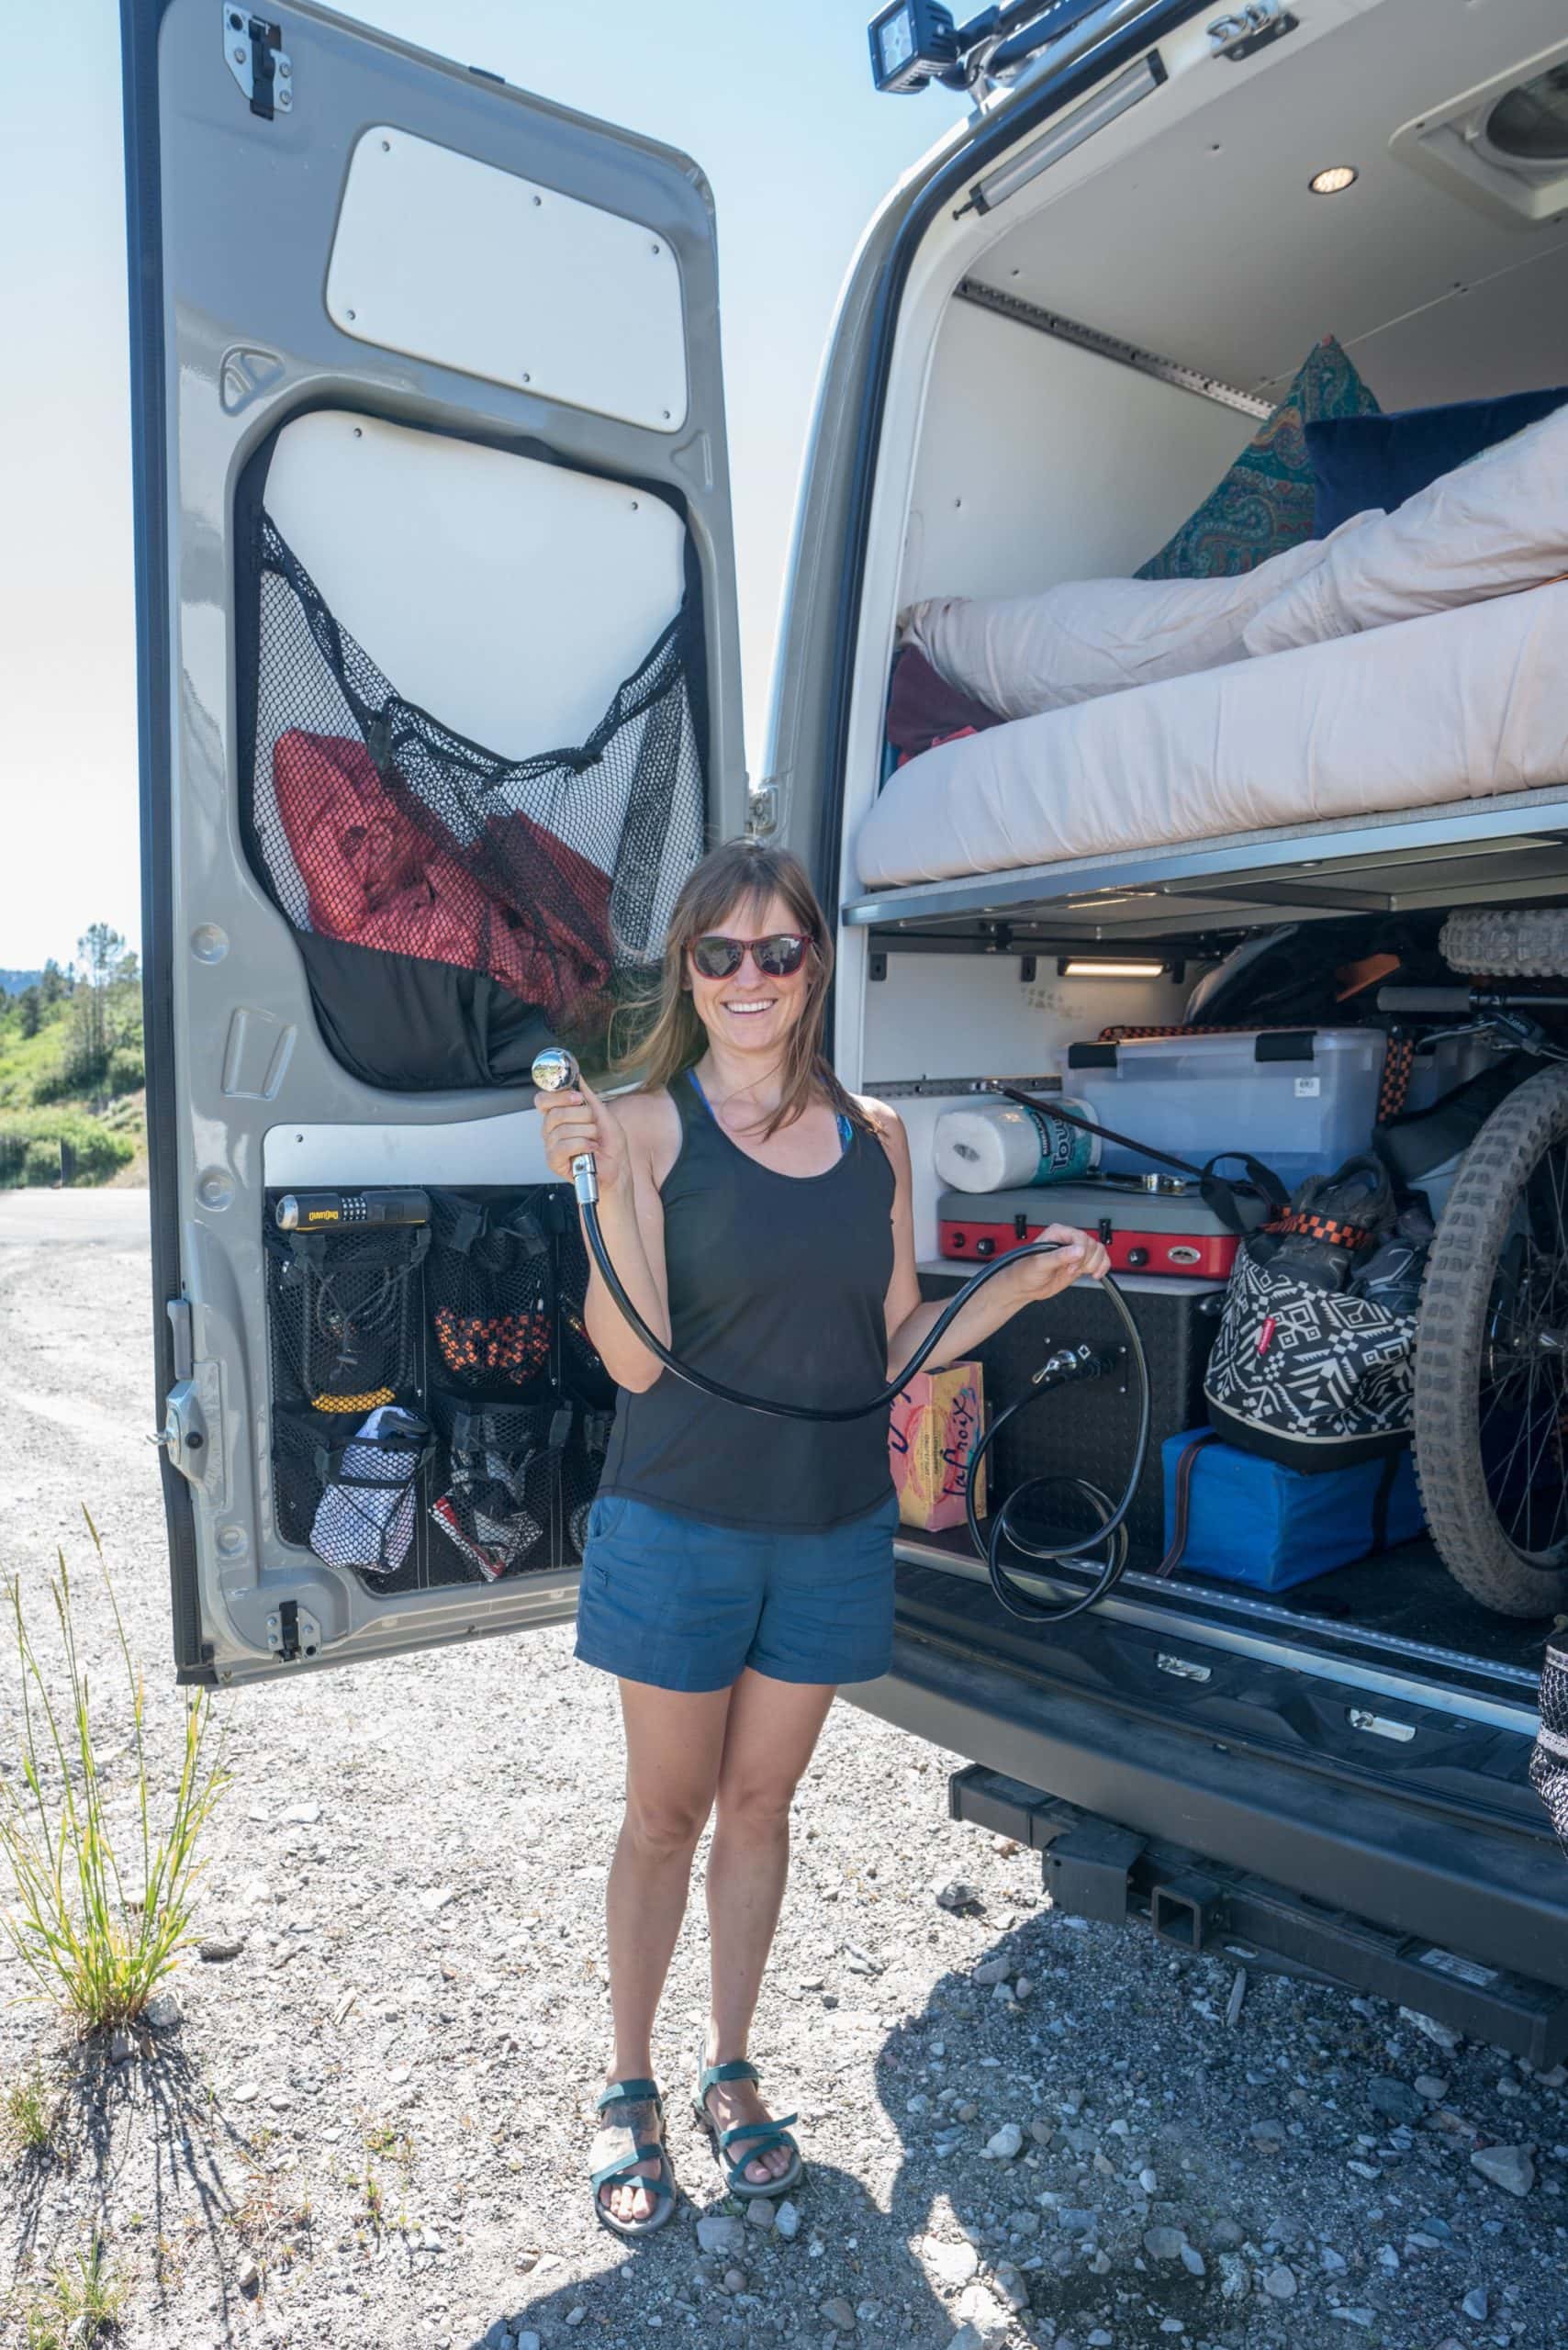
Shower
I skipped the indoor shower in this van. With 25 gallons of water, you can’t really do much showering or you’d be filling up your tanks constantly. Instead, we had an outdoor shower where we could quickly hook up a shower hose to the back of the water tank. To be honest, we never really used the outdoor shower except for a hand full of times. Showering outside can only be done a few months a year or its too cold, and you also have to be somewhere private enough to use it. There is also the issue of the greywater runoff which means you can’t use it in a paid campground.
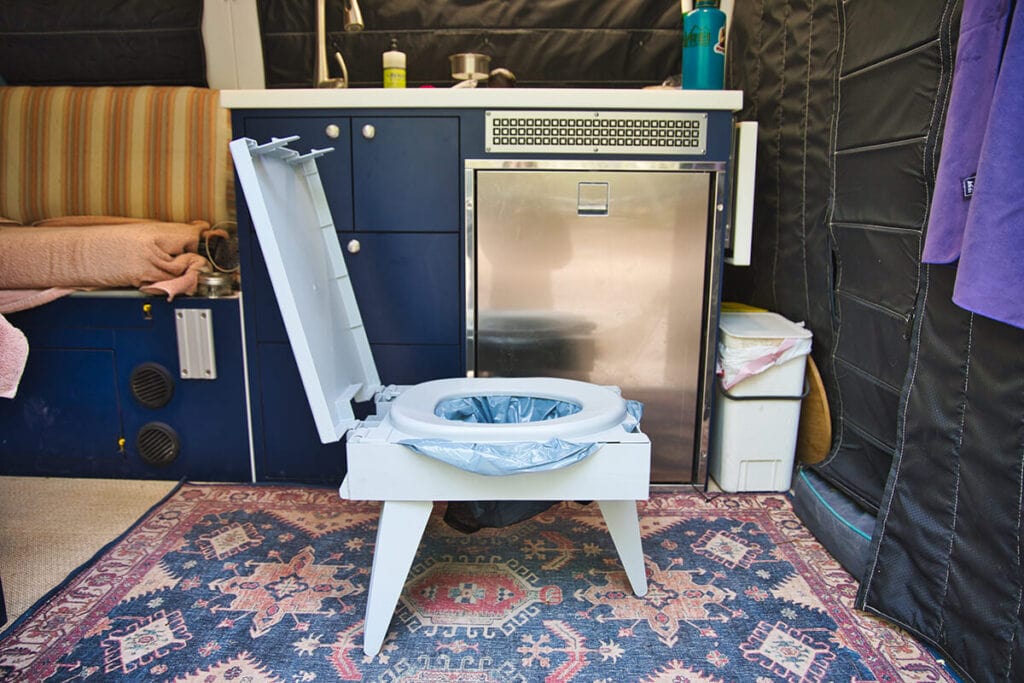
Toilet
Since there was no dedicated bathroom in this van, I wanted the smallest, easiest toilet to deal with. For pee, we peed in pee jars and for poop, we used this foldable Go Anywhere toilet that utilizes wag bags. Once you’re done going, the bag just goes in the trash can. The bags do get pricey, so if there was a clean public toilet available, we would go in that instead.
Read next: Best camper van toilet options
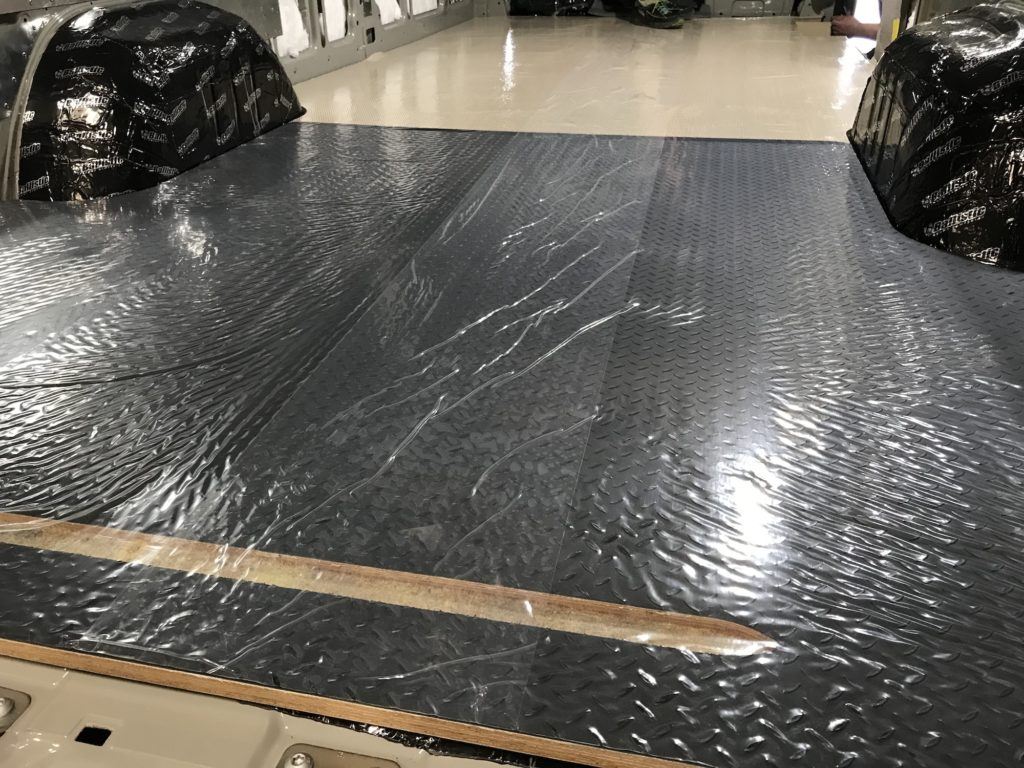
Floors
I had two different types of flooring in this van. A vinyl weave in the font and a durable diamond plate vinyl in the gear garage.
The vinyl weave in the front looked nice, but it was IMPOSSIBLE to clean. Every little piece of dirt and grime got stuck in the weave, and I ended up covering up a good chunk of the floor with a rug. This floor material was my least favorite part of the whole van.
In the garage, the diamond plate vinyl was scratch resistant, which was perfect for sliding around our bins and bikes. It was not the most elegant looking, but it was very functional for its purpose.
Read next: A guide to flooring materials for your van
Sprinter Van Walls
The walls in this van were made of a synthetic, non-toxic leather material called Sileather, which I absolutely loved. It was eco-friendly and waterproof so you could wipe it down with a wet cloth. It was also perfect for dog owners since dog hair and dust didn’t stick to it.
I would highly recommend Sileather if you are planning out a van build.
What questions do you have about this Sprinter van conversion? Leave a comment below and let me know!