Hiking the Zion Narrows: A Complete Guide
Hiking the Narrows is the best adventure in Zion National Park. Learn about permits, campsites, getting to the trailhead, the best time to visit & more.
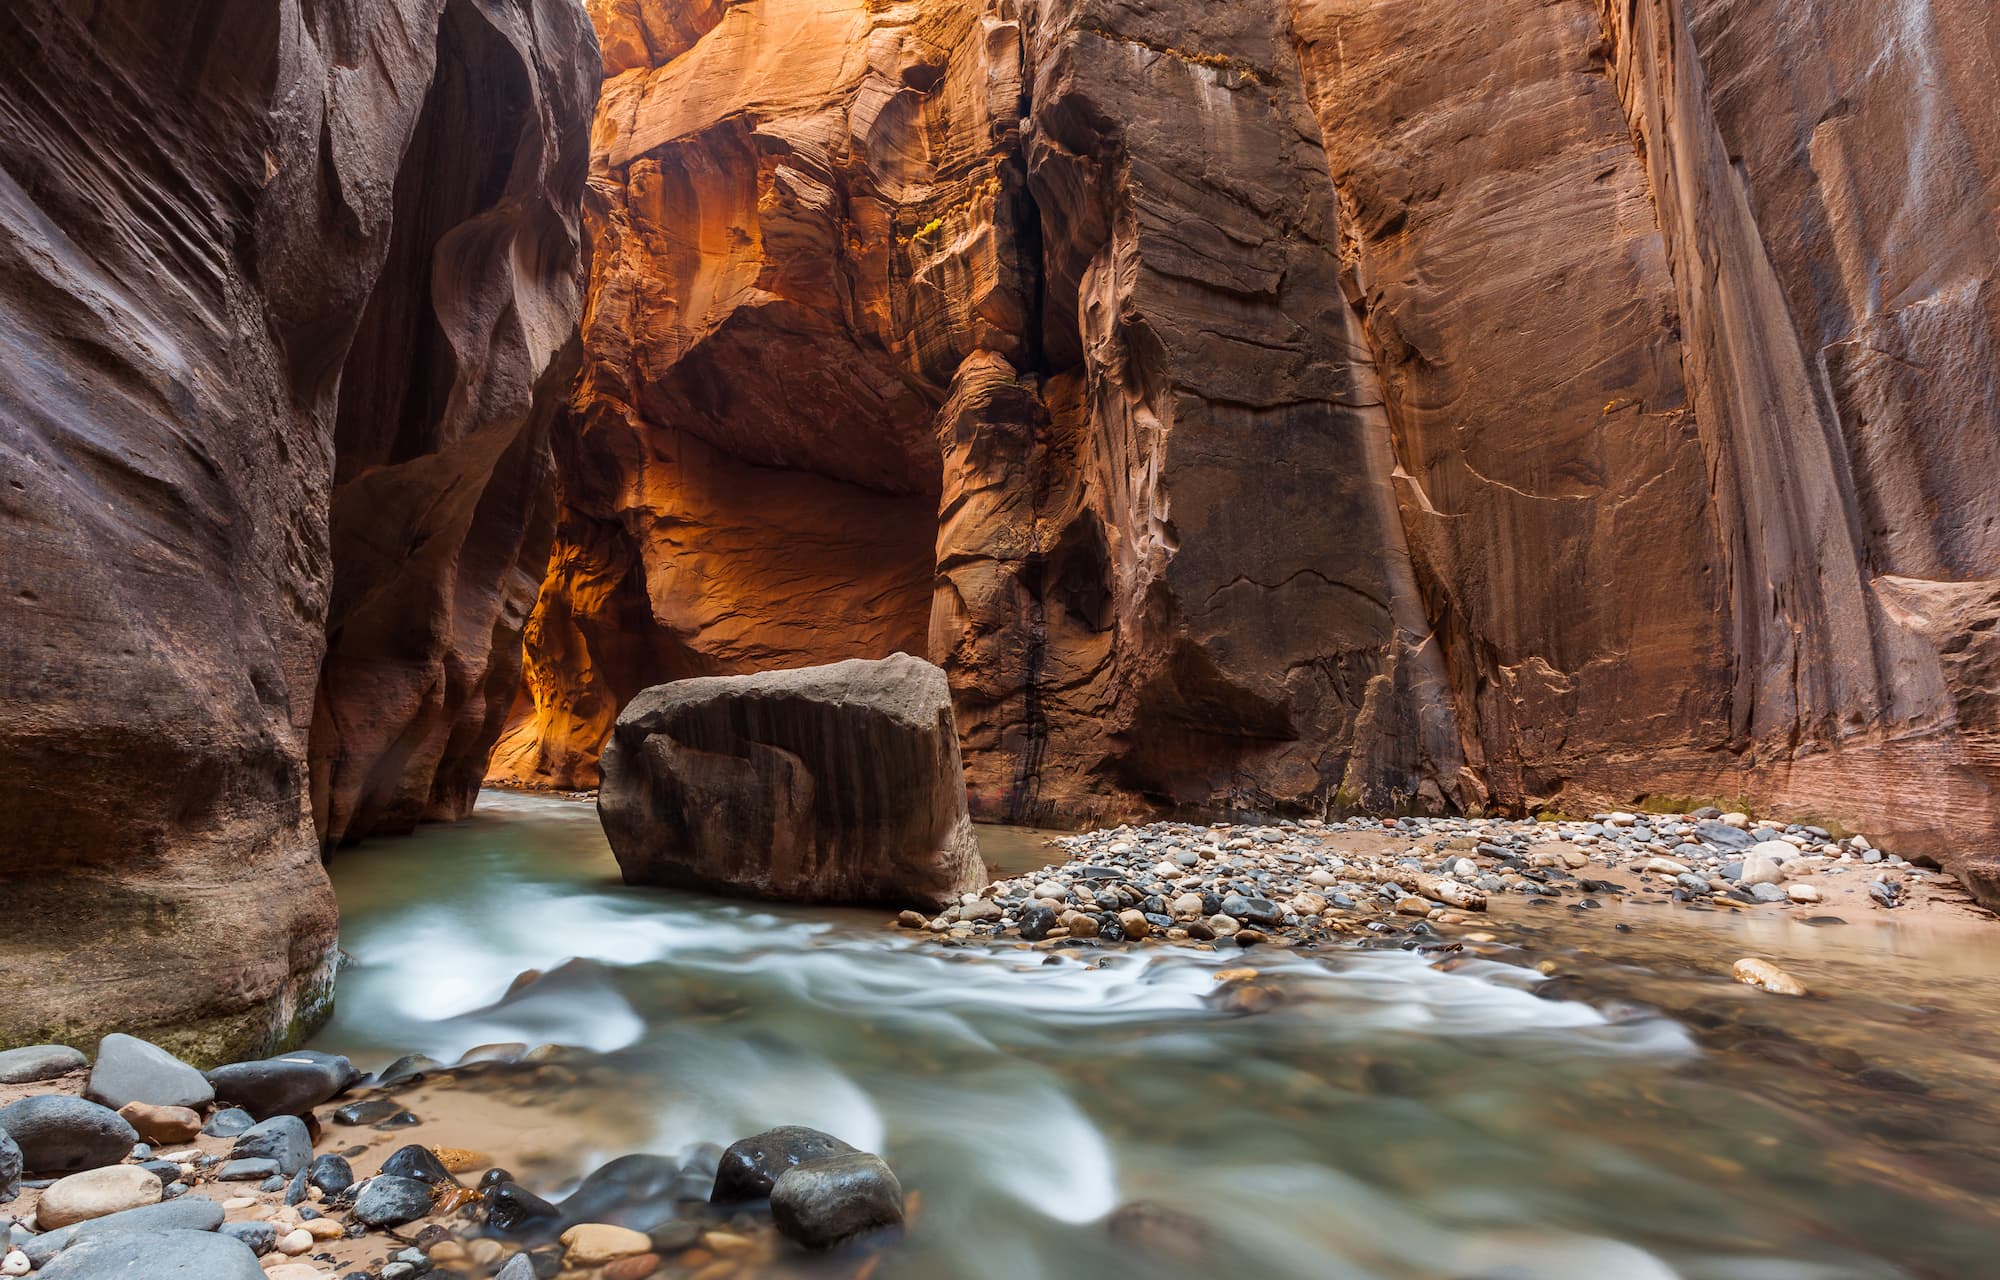
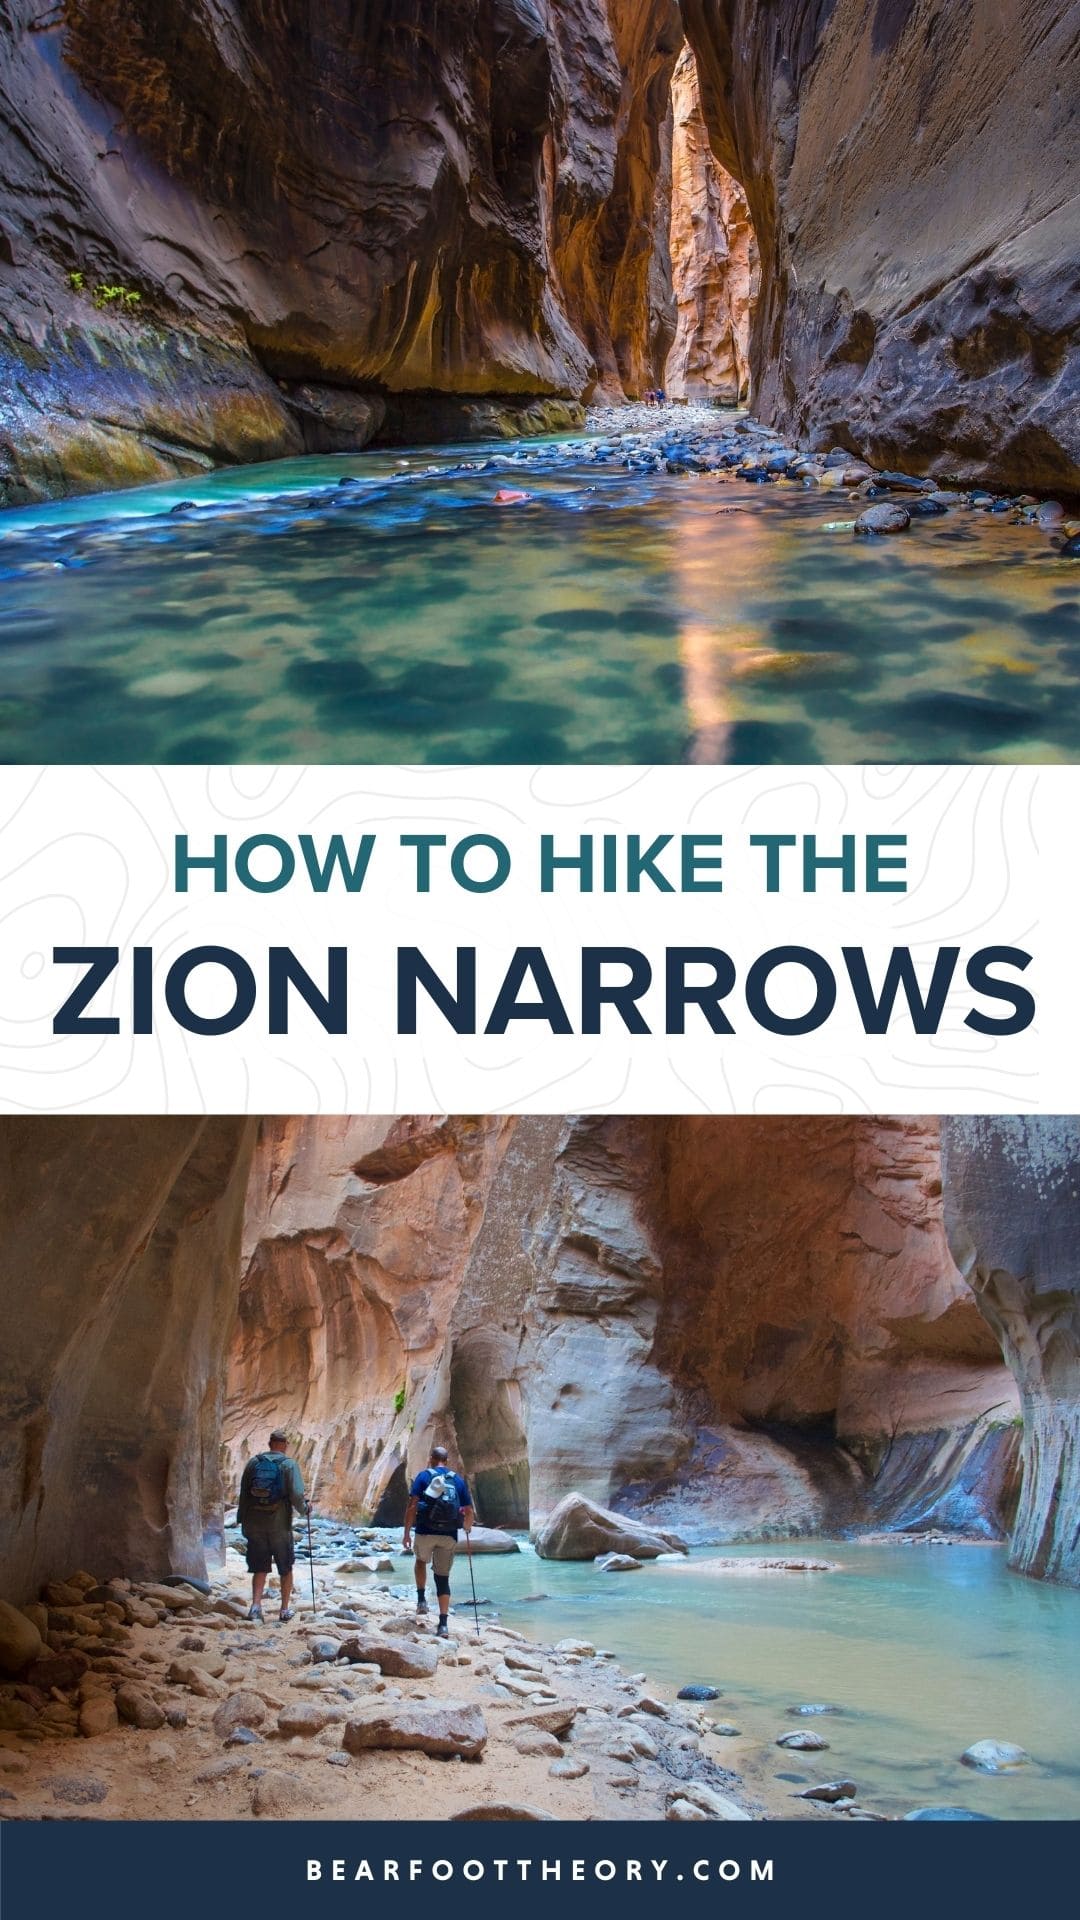
Hiking the Zion Narrows in Zion National Park is an adventure that should be on every hiker’s bucket list. With its steep canyon walls, turquoise water, secluded camping, and a trail that runs right through the riverbed, the Narrows is one of the most unique trails in the country and certainly one of the best in Southern Utah.
The Narrows can be done as a bottom-up day hike or as a top-down overnight backpacking trip. Like most overnight backpacking trips, though, hiking the Narrows requires some planning ahead to secure permits, set up transportation, and gather the right gear to make the trip a success. I backpacked the Narrows a few years ago and had a blast, so in this post, I share all the important tips and information to help you plan your overnight trip through this amazing canyon.
This post may contain affiliate links.
Ready to experience the unique adventure of hiking the Zion Narrows? In this guide, you’ll find everything you need to know about planning a successful hike through this natural wonder.
As it goes in all of the destinations we share, please practice good trail etiquette and remember to Leave No Trace. This means packing out all of your garbage, being respectful to others, and following the established rules.
Zion Narrows Basics
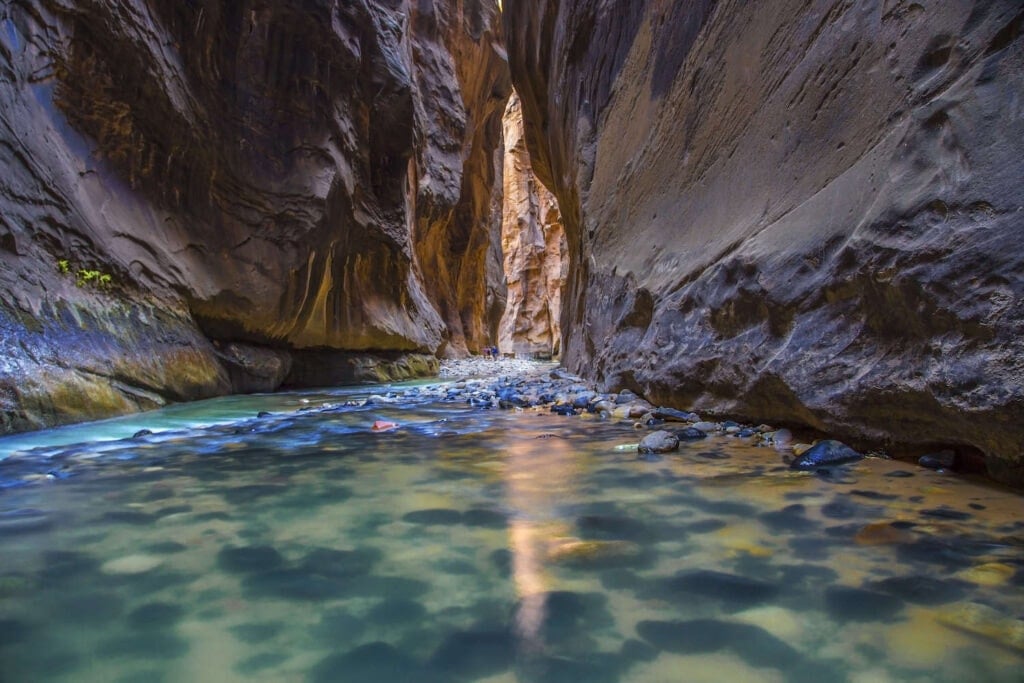
The Zion Narrows is located in Zion National Park. It’s a section of the North Fork of the Virgin River that lies in between Chamberlain Ranch to the north and the Temple of Sinawava in the south. This 16-mile section of the river is known as ‘the Narrows’ because it runs through the narrowest part of Zion Canyon. With towering walls on either side that stretch up thousands of feet, some parts of this gorge span less than 20 ft across.
The Zion Narrows is one of the most popular areas of Zion National Park and it can be experienced in several ways. There is a wheelchair-accessible Riverside Walk that crosses the opening of the Narrows. You can also hike through the Narrows as an out-and-back day hike from the bottom-up or as an overnight backpacking trip from the top-down. In this post, we’re mainly covering the latter – how to hike the Narrows as a backpacking trip from the top-down. For more information about day hiking in the Narrows, visit our Zion National Park Travel Guide.
Save this post!
Enter your email & I'll send this post to your inbox! You'll also receive my weekly newsletter full of helpful advice for planning your adventures.
Hiking The Zion Narrows: Top-Down Route
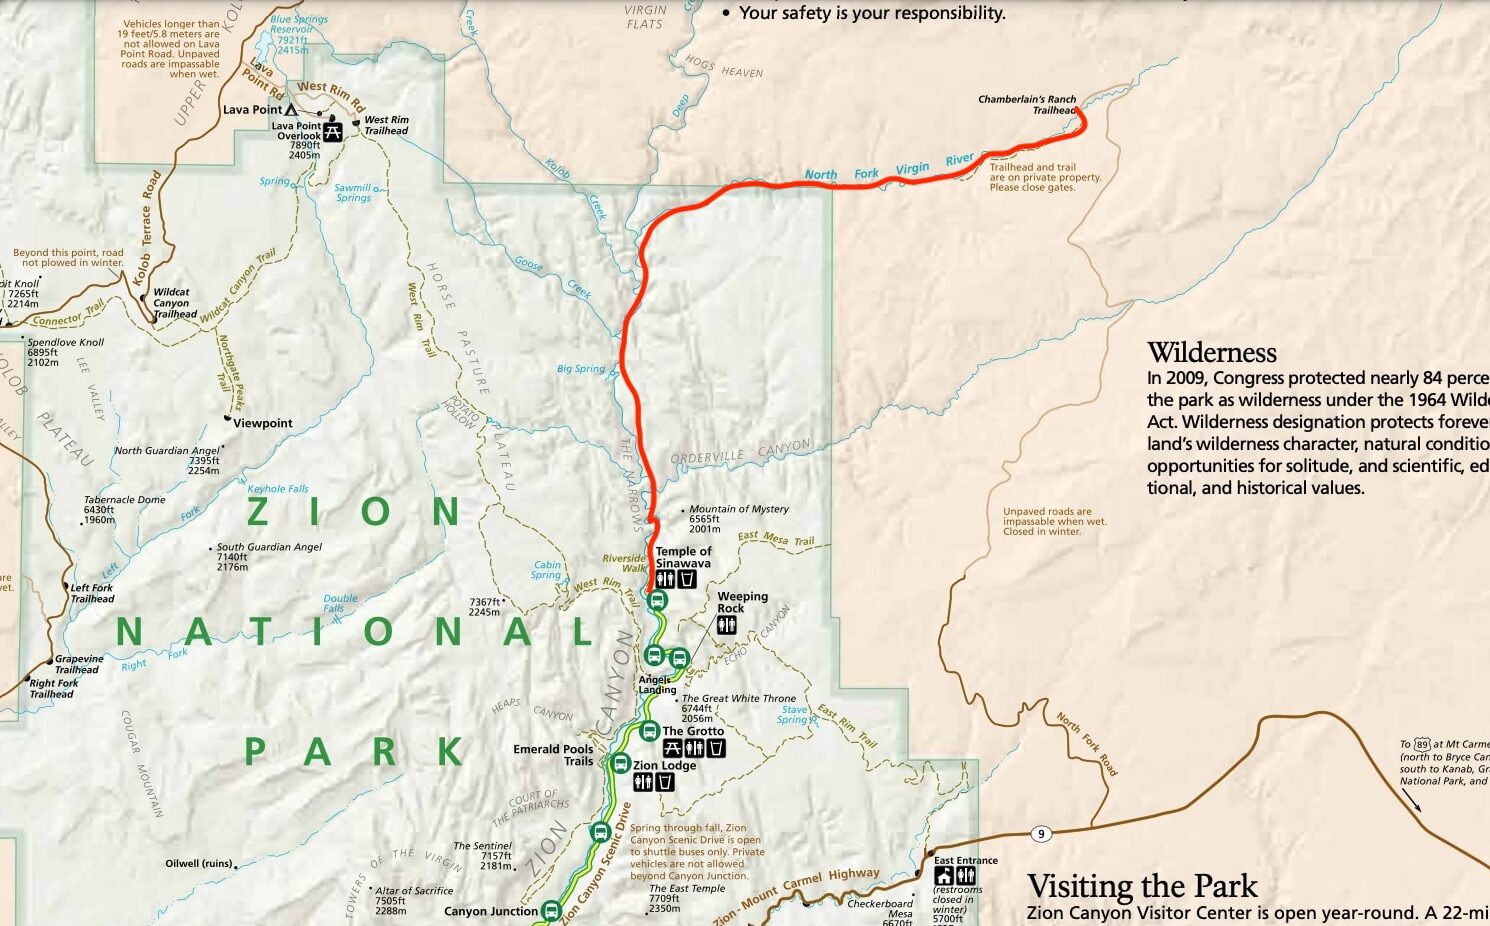
The top-down Zion Narrows route is a 16-mile hike that can be done as an overnight backpacking trip or as a strenuous day hike. Whether backpacking or day hiking, this route requires a permit from the National Park Service and a shuttle to the start at Chamberlain Ranch (more information on transportation is below).
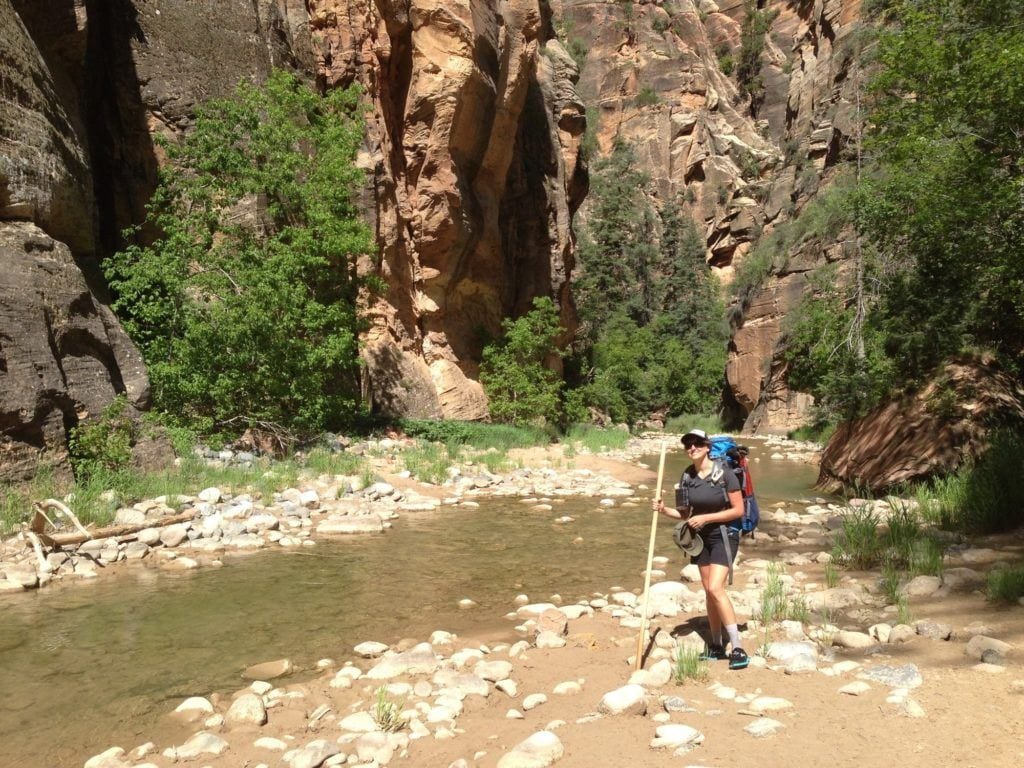
The top-down route allows you to explore a larger portion of the canyon and experience the subtleties of the canyon as it shifts from an open pasture to the deepest and darkest slot canyons that you see in the photos. You will also have the canyon mostly to yourself for the first 2/3 of the hike, encountering very few day hikers. The top-down route took us 15 hours in total, spread across two days, and we made numerous stops for swimming, snacks, and photos.
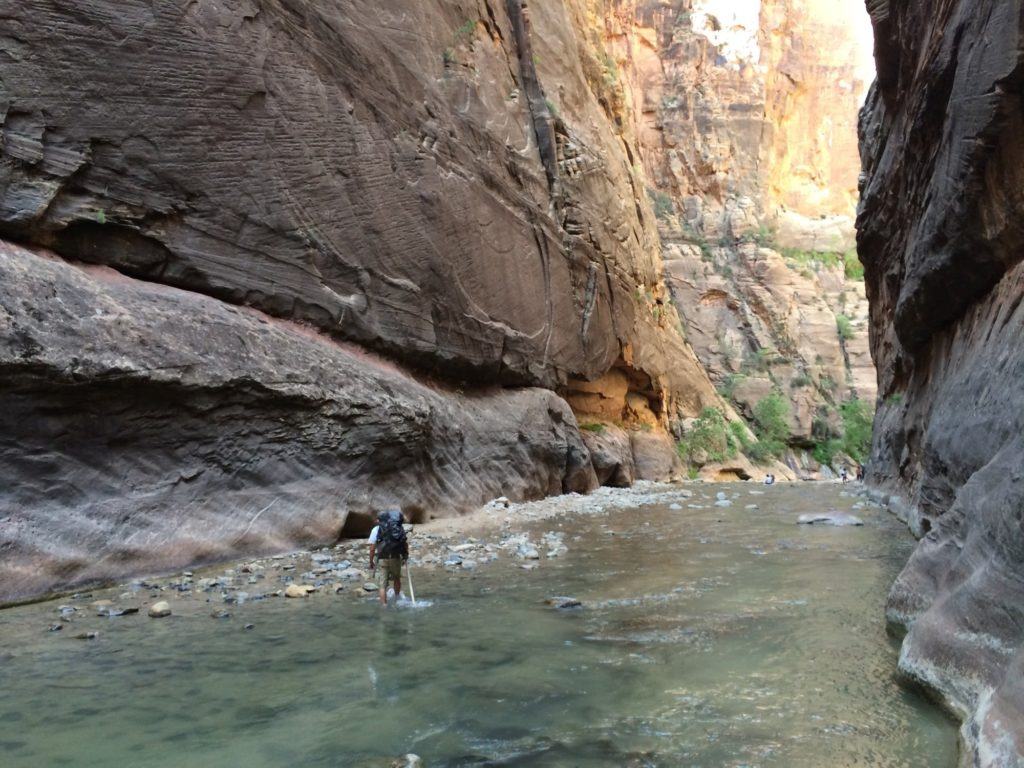
With a lighter day pack, you could potentially hike the top-down Zion Narrows route in as little as 12 hours, but you would need to be on the trail very early in the morning and you would have very little time to stop and explore. For that reason, unless you are an ultra-speedy hiker, I recommend doing the top-down route only as an overnight backpacking trip. If you prefer to hike at a more enjoyable pace, consider opting for the bottom-up out-and-back route.
The Best Time to Hike the Zion Narrows
The best time of year to hike the Zion Narrows is in May, June, late September, and October. Water levels tend to be lower in the late spring and fall and temperatures are comfortable. Water levels in July and August are good for hiking, but those months are hot and the risk of thunderstorms is high. Always check the weather forecast before attempting the Narrows.
I backpacked the Zion Narrows at the beginning of June. I found both the water and air temperatures to be comfortable.
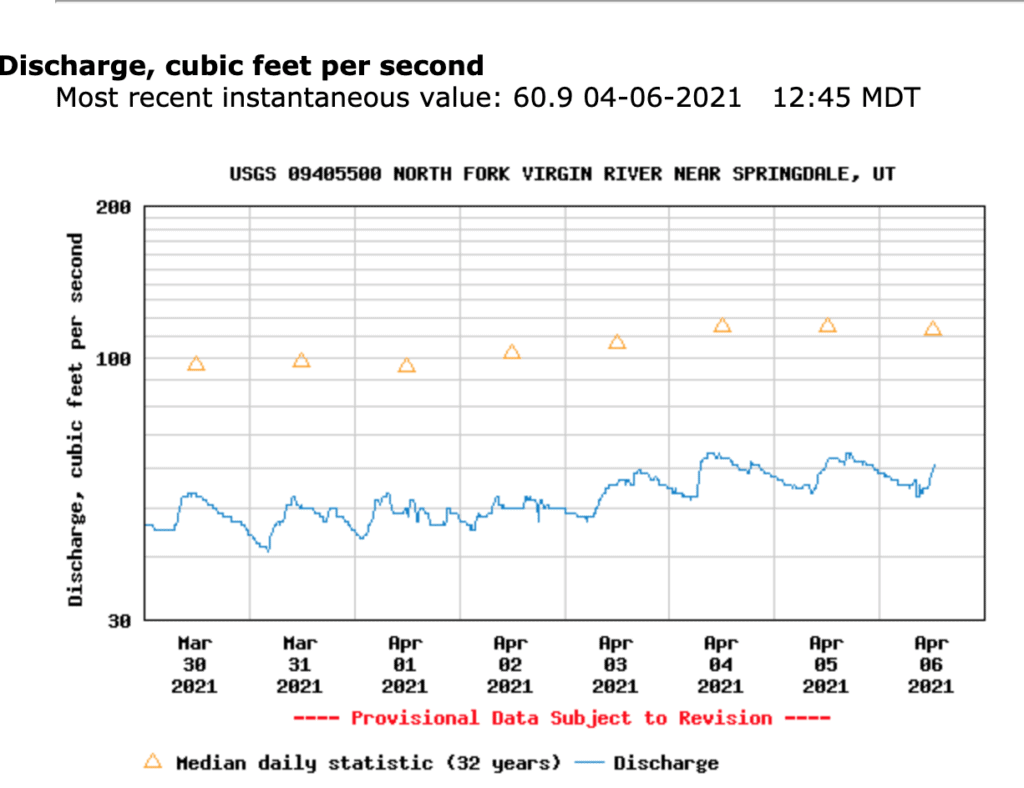
Hiking the Narrows should be avoided when rains are predicted, as the danger of flash flooding can be very real. The bottom-up day hike may also be attempted in the winter and spring months, but a dry suit is necessary due to the cold water temperatures. No matter what time of year you hike the Narrows, before beginning your hike, you need to check the water levels on the US Geological Survey (USGS) website. The National Park Service considers conditions ideal when the flow is less than 70 cubic feet per second and they close the Narrows if the flow goes over 150 cubic feet per second.
On the USGS graph, the blue line indicates current discharge, while the yellow triangles represent the average water flow over the last 32 years. When I backpacked the Narrows in early June, water levels were at 36 cubic feet per second, and only once did we encounter a waist-deep pool.
Toxic Cyanobacteria in The Narrows
Toxic cyanobacteria is present in varying concentrations throughout the three major tributaries of the Virgin River including the North Fork where the Narrows is located. This harmful bacteria can be dangerous – and even fatal – to humans and pets. The National Park Service closely monitors the levels of cyanobacteria in Zion National Park and issues Danger Advisories when the presence of this bacteria is high. Always check the current conditions alerts before planning a backpacking trip through the Narrows.
Note: Water filters do not remove cyanotoxins and there is NO SAFE WAY to treat water from the Virgin River. Plan to hike in with all the water you need, or talk to a ranger to locate the safe side springs to refill along the way.
Permit Process for Hiking the Zion Narrows
Online Reservations For Overnight Trips
Online reservations for hiking the Narrows are available during a two-month time frame. On the 5th of every month at 10:00 am MT, reservations become available for the following month. For example, a permit for a trip in September is available online on August 5th. Make sure to set a reminder in your calendar, as the permits often get swooped up immediately for hikes during busy months. If slots are still available after the 5th of every month, reservations can be made until 5:00 pm MT on the day before your trip.
Even if you make an advanced reservation for your Narrows hike, you will still need to visit the Zion Canyon Visitors Center permit office in person to pick up your permit before setting off. They will go over the rules and regulations, including prohibitions on fires and other safety measures.
Also, everyone hiking the Narrows is required to pack out any solid human waste using the bags provided by the permit office. The permit office typically opens at 7am during the summer months and 8am during the winter months, but always double-check times.
This and additional permit information will be provided in your reservation confirmation email. Keep in mind the permit office’s hours if you are catching a morning shuttle up to Chamberlain Ranch.
Getting a permit is the most difficult part of planning your overnight backpacking trip through the Zion Narrows. There are only 12 campsites in the Narrows, meaning only 12 backcountry permits are issued for each day. To make a reservation, visit Zion’s online Wilderness Reservation System.
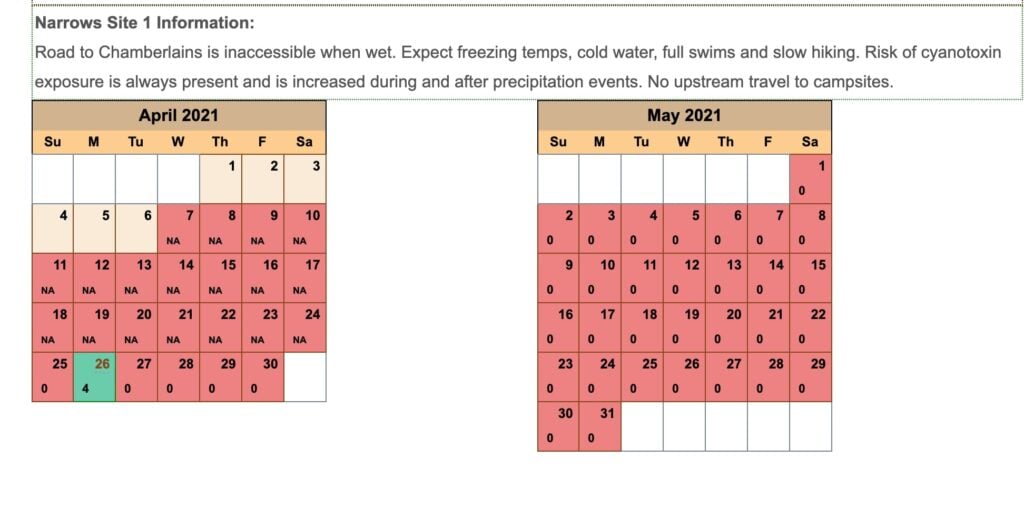
On the drop-down menu, you will see a list of all of the backcountry campsites that are available for advanced reservation as well as the maximum group size in parenthesis for each campsite. Once you select a site, a two-month calendar will pop up:
- Dates appearing in green indicate that online permits are available for that date.
- Dates appearing in red with a 0 have no available permits
- Dates appearing in red with a number other than 0 indicate walk-in availability. These permits can be obtained 1 day before the date.
If your desired date is green, click it and complete the reservation form. There is a reservation fee of $5 per site.
If there are no sites available for your desired dates, there is still a way for you to obtain a permit. The first thing you should do is continue to check the online reservation system. If there are cancellations at any of the sites, this will be reflected in the calendar’s availability.
When we backpacked the Zion Narrows, I was checking the reservation system the entire week before our trip and there were no permits available. However, the morning before we left for Zion, there was a cancellation for Site #7 in the Narrows and I was able to score a last-minute permit. So keep checking back, as things do open up!
Walk-up Permits For Overnight Trips
If you are unable to get a permit through a cancellation, there is still hope. You’ll notice the drop-down menu on the online Wilderness Reservation System only lists Sites 1, 3, 5, 7, 9, and 12 as available for advanced reservations.
This means that Sites 2, 4, 6, 8, 10, and 11 are held for first-come-first-serve walk-up permits. Walk-up permits are issued starting the day before when the permit office opens at the Zion Canyon Visitors Center (check opening hours depending on the season). Plan on being the first in line the day before your desired backpacking trip and you might just get lucky. Just remember if you are successful in getting a walk-up permit, make sure to call the shuttle companies immediately to reserve a shuttle to Chamberlain Ranch (information below).
Zion Narrows Campsites
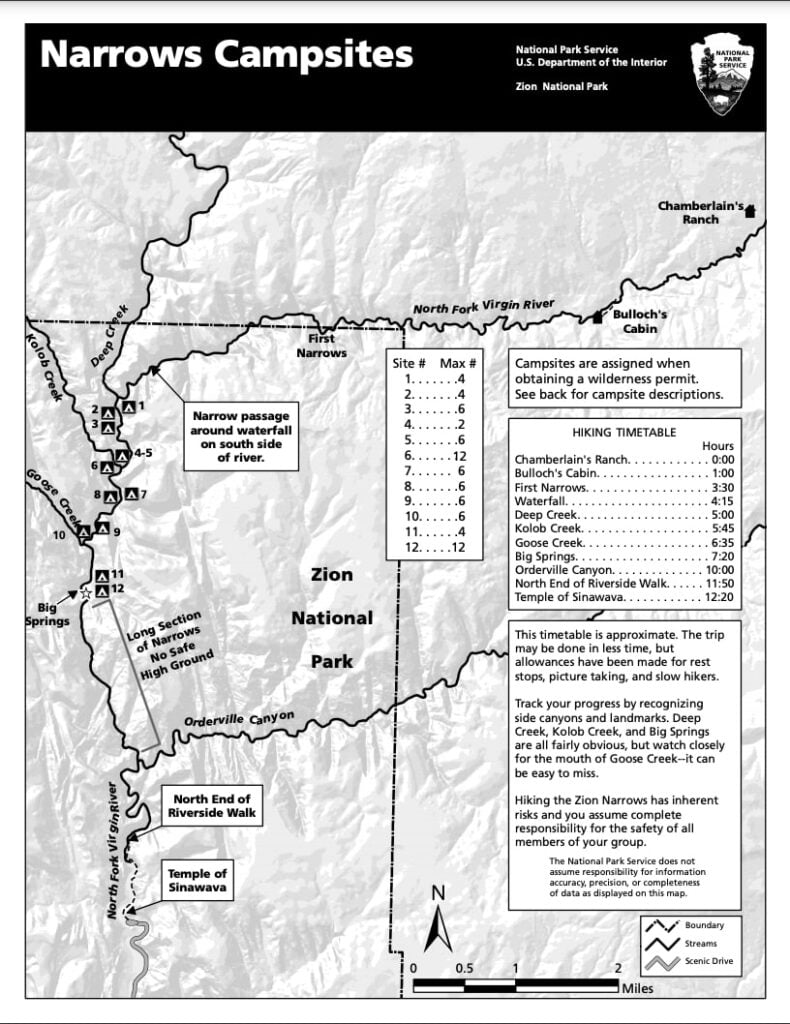
In terms of choosing a campsite, you really can’t go wrong. All of them are isolated, riverside sites with beautiful views of the canyon. The location of each campsite is indicated on the map below. From my quick observations during our trip, I determined my favorite sites to be:
- Campsite #1 – Near the confluence of a big creek. Really nice views. A downside is that it leaves a lot of mileage for day 2.
- Campsite #6- Huge riverside rock for sunbathing and several nice swimming holes.
- Campsite #7 – Set up on a bench above the river. A short hike uphill, but very private. Small beach with a nice swimming hole.
- Campsite #8 – Very cool spot in a narrow part of the canyon. Set right on the river next to a large cave.
Top-Down Day Hike Permits for the Zion Narrows
You also need a permit to day hike the Zion Narrows from the top-down. Remember, you do NOT need a permit for day hiking the Narrows from the bottom-up. The top-down day hike is listed as a “canyoneering” permit and can be reserved here.
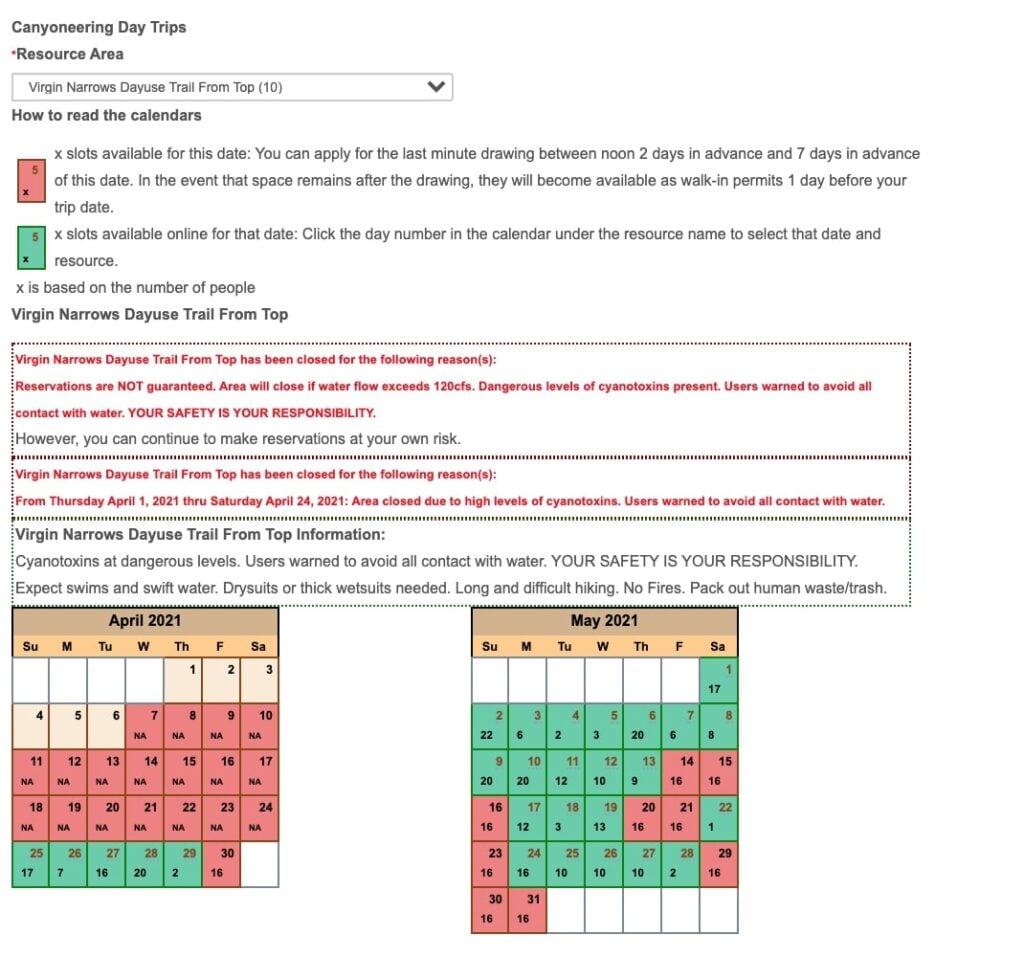
In the drop-down menu, select “Virgin Narrows Day Use Trail from Top,” and the two-month availability calendar will pop up. From here, the process of reserving the permit is the same as for the backpacking permit. Through this lottery, you can apply for a permit between 2 days (until noon) and 7 days in advance of your trip. There is a $5 application fee for the last-minute drawing.
If no top-down day hiking permits are available for your desired date through the advanced permit system, then your next option is to enter the Online Last Minute Drawing. To enter, go to the Last Minute Drawing site, log in or create an account, and choose “Virgin Narrows Day Use Trail from Top” from the drop-down menu. On the next page, it will show you the available dates, the number of permits available, and the number of people who have already entered the lottery. Choose the date you would like, enter your information, and cross your fingers. There is a $5 fee to enter that is non-refundable, even if you are unsuccessful. The last-minute drawing runs 2 days prior to the requested trip date at 1pm MST.
Read More
More Southern Utah Adventures
What Gear to Bring for the Zion Narrows
Preparing for the Zion Narrows is a little bit different than a normal backpacking trip since you’ll be (happily) slogging through 16 miles of river. Nothing ruins a trip faster than a soaked sleeping bag or damaged camera, so before heading out, you’ll need to put some thought into how to waterproof your stuff. Which shoes to wear for hiking the Narrows is also an important consideration.
In addition to the suggestions below, be sure to check out our Backpacking Checklist for other overnight gear you may want to bring and What To Wear Hiking for clothing recommendations.
Heavy Duty Trash Compactor Bag
Trash compactor bags are a cheap and reliable solution for keeping all of your stuff inside your pack dry. Compactor bags are extra-thick and don’t tear or rip easily. Simply open up a compactor bag and use it to line the inside of your backpack. Then place all of your items inside the compactor bag. This way, if you end up wading through some deep pools and the bottom of your pack gets wet, the stuff inside should stay totally dry.
Dry Bag
If you have any larger electronics or other items that you want to strap to the outside of your bag, pick up a 3 or 5 liter Sea to Summit dry bag. These super-strong dry bags roll down and easily clip to the outside of your pack.
Check price: REI / Backcountry
Shoes for Hiking the Narrows
Hiking boots will get heavy and waterlogged, making it very difficult to walk. So ditch the boots and sport an old pair of tennis shoes instead. I hiked all 16 miles of the Narrows in a 2-year old pair of Brooks tennis shoes that I wore daily to the gym. They were light, provided enough support, and I came home blister-free. When making your shoe choice, the most important thing is that they are closed-toe, closed-heel. Avoid hiking sandals at all costs or you’ll be stopping constantly to dig the little pebbles and rocks out. You’ll also end up with stubbed toes and cut-up feet.
If you don’t have old tennis shoes to spare, the Oboz Sawtooth X Low Hiking Shoes (non-waterproof version) are a great option. They’re lightweight, have good traction, and they’re breathable so they’ll have more of a chance to dry out. They come in a men’s version as well.
Check price: REI
If you are uncomfortable hiking in regular tennis shoes or if the water is chilly, you can stop by Zion Rock Outfitters in Springdale and try on a pair of their rental canyoneering shoes. These shoes have grippy rubber on the soles to prevent slipping and they are lined with neoprene to help keep your feet warm.
Neoprene Socks
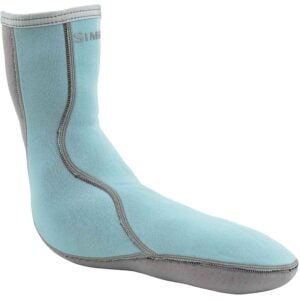
If the water temperatures are slated to be cold or you are prone to getting cold feet, I highly recommend packing a pair of Neoprene socks. These socks act as a wet suit for your feet and help keep warmth trapped inside. The Simms Neoprene Wading Socks offer 2.5mm of insulation and are designed to fit snugly so that they don’t bunch up while walking. They also come in a men’s version.
Pro tip: These socks are thicker than normal socks, so be sure to try them on with your hiking shoes before your trip to make sure they fit and are comfortable.
Check price: Backcountry
Extra socks
While hiking the Narrows, your feet will almost always be wet, so it’s a good idea to pack some extra socks so that you can keep them warm and cozy while at camp and after you exit the canyon. I love the Darn Tough Hiker Micro Crew Cushion Socks because they dry quickly and are very durable.
Check price: REI / Backcountry
Trekking Poles or Hiking Stick
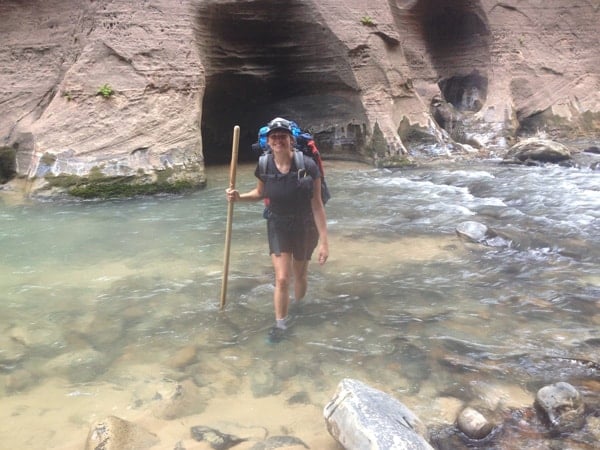
If you are going to follow just one piece of advice in this post, this should be it: man was I happy that I rented a hiking stick from Zion Rock Guides in Springdale for $6 a day! You will be crossing the river every few minutes and some of these crossings can be swift and deep.
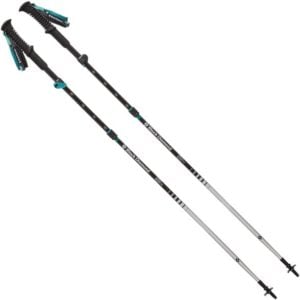
Trekking poles or a walking stick provides a great deal of balance and stability and will also give you more confidence in your footing. For more information about choosing trekking poles, head over to our guide on the Best Trekking Poles & Why You Should Use Them.
Check price: Backcountry / REI
Transportation for Hiking the Zion Narrows
Getting to Chamberlain Ranch
For the top-down Zion Narrows route, the drive to the trailhead from Zion’s main canyon takes about 1 hour and 15 minutes and much of it is on a dirt road. Since the last thing you are going to want to do at the end of your hike is to carpool back to the top to pick up your car, I would highly recommend using one of the outfitter companies in town that offer shuttle service from Zion Canyon to Chamberlain Ranch.
Shuttle prices range from $35-$60 a person or more depending on how many people in the group and depart either from the outfitter’s office or from the Zion National Park Visitors Center. Departure times vary, but most offer a first departure time around 6:30 am and a second departure around 9:30 am. As soon as you know the dates of your Narrows hike, you should call to reserve your space in the shuttle. Shuttles do fill up in advance and if there is no space, then you are pretty much out of luck.
When you call to reserve your space, tell them you need a ride from Zion Canyon to Chamberlain Ranch. I would also suggest taking the earliest departure possible. This will allow you to get on the trail earlier, giving you more time to stop, as well as to hang out at your awesome riverside camp.
Four companies that offer shuttle service are:
- Zion Rock Guides – (435) 772-3303
- Zion Adventure Company – (435) 772-1001
- Red Rock Shuttle – 435-635-9104
- Zion Guru – (435) 632-0432
Exiting the Narrows
When exiting the Narrows, the trail ends at the Riverside Walk Trail in the main Zion Canyon. Follow the paved Riverside Walk Trail for 20 minutes to the Temple of Sinawava shuttle stop where the Zion National Park shuttle stops every 10 minutes. Hop on and take this shuttle back to the Zion Visitors Center or your desired destination within the Park.
What If You Don’t Get A Narrows Permit?
If you fail to obtain a permit through all of the methods outlined above, don’t be bummed. The bottom-up Zion Narrows hike, which does not require a permit, is an excellent alternative. It requires less planning, less equipment, and if you get an early start, you will still cover the best ground in the Narrows while beating the crowds.
This route starts at the north end of the Riverside Walk trail at the Temple of Sinawava in the heart of Zion Canyon. It’s easily accessible using the Park’s free shuttle service. The bottom-up route is an out-and-back hike and can be as easy or as strenuous as you want since there is no specific turnaround point. You hike up as far as you like and then when you are ready to head back, just turn around and hike back the same way you came.
You do not need a permit to hike the Narrows from the bottom-up. Therefore, it is a more plausible option for those who haven’t been able to plan in advance or get a permit, as well as those who are not interested in backpacking. I recommend getting an early start. The first 1.5 miles as you hike up from the Riverside Walk Trail can be very crowded with families, especially in the afternoon, and the further you hike up, the fewer people you will encounter.
That wraps up everything you need to know about hiking the Zion Narrows including how to get a permit and the best gear to bring. What questions do you still have? Have you hiked the Zion Narrows? What was your experience like? Let us know in the comments!



Thanks so much for putting all this info together Kristen! Zion is one of my favorite parks in the US and Aron and I have always wanted to hike the narrows. We have a few days off over 4th of July and might look into taking a trip out there 🙂
Great info! FYI for you and your readers, day hikers from the bottom up are not allowed past Big Springs without a permit.
Hey Jenn – Thanks for the tip! Cheers -Kristen
I greatly appreciated this post. I am planning a trip to Zion in 2017 and an overnight Narrows hike is on the short list. I live in Georgia and so there are few folks here who have spent a significant amount of time in Zion that I can gather information from. Your post was very helpful and addressed some of the topics I have been unable to find elsewhere.
Super. Glad it was helpful Paul! You’ll have to come back and let me know how your trip goes.
Hi Kristen! I am looking into doing this hike in a few weeks. I reserved already for camping in the Narrows (campsite 7) for April 20th. And the night before I was going to do the Wildcat trail camping there and entering through Lava Point (still dont know how Ill manage both and moving from one point to the other. I was reading your post and I see that you recommend to book a private shuttle from Zion to Chamberline, but I thought that Zion nat. Park had shuttles that you could take within the park.
Also, Ill be flying into Las Vegas, taking a shuttle to St. George and from there another shuttle to Zion. Do you have any specific recommendations on transportation? (I wont be able to rent a car). Ive been reading a lot these past days but it is quite confusing!
Thank you very much!!!
Dominique
The Park shuttle is only in the main canyon. It does not go to Lava Point or to Chamberlain Ranch. You have to arrange a private shuttle for those trailheads. Also, you’ll need to check but the road to Lava Point might still be closed. Check this page for current conditions: https://www.nps.gov/zion/planyourvisit/conditions.htm
I don’t have any recommendations for transportation from St George. Sorry about that!
Dear Kristen,
Thank you for your post. I have a question. If there is a lottery-type reservation for both, backpacking and hiking permit, what if you get one but loose the other? Also, the fire ban is against camp fires and not little gas stove to boil water, right? Thank you! Roman.
If you get a backpacking permit, you can stay the night. If you get a hiking permit, you can only do a day hike. And that’s correct. You can’t have a wood fire, but you can still use your backpacking stove.
How do you know if you got a permit? I got payment confirmation, does that mean I have it?
You should get an email confirming that you got a permit.
Invaluable! Thank you!!!
Awesome post and thanks for all the info! (A little note, the sidebar with all the Social Media sharing options hovers over the text and doesn’t move making everything difficult to read.)
Can you backpack/camp the narrows from the bottom up? Or are you required to start at the top and hike down?
I believe the permits are for top down only….but if you got one of the lower sites and didn’t want to shuttle…you could probably start from the bottom. I’m not totally sure though, so you should probably check with the ranger office.
Per the NPS Wilderness Reservation System – No permits are issued for upstream access to campsites.
We have a group of six planning to do the two-day hike, so shuttling up will be expensive. I have thought of two options: driving up and leaving the vehicle for two nights, taking a shuttle up (just me) the day after we get done and retrieving it, or driving up with the group earlier in the morning, then driving back down (just me) and taking one of the later shuttles while the group waits. I can’t really find any info on parking at the trailhead, other than that there is parking. I assume since people do the two-day hike that overnight parking is allowed. The advantage of driving up and leaving the vehicle is that we can still start fairly early in the morning, but not too early (and, in fact, can try to sort of time our start to be in the middle of the shuttle runs). The advantage of dropping off is that the vehicle is not sitting up there for two days, and no extra time is used on the third day. Any thoughts?
Hey Robert – You’ll definitely save money if you can avoid having to shuttle every one in your group up. I think the idea of driving up and one person shuttling up at the end would work. You’d just need to make sure you have a campsite reserved or somewhere to stay in Springdale on your second day. Hope that’s helpful and have fun!
I just finished the top-down route in one day. It was amazing!
It was an easy hike and tooked me only 8.5 hours. ✌️️
Hi!
We plan on driving to chamberlin ranch to to do the top down hike..
When we finish our hike how do we get back to our car in chamberlin ranch?
Thanks for the advice 🙂
Autumn, great question! Kim (Bearfoot Theory editor) has used Zion Adventure Company before and recommends them–they offer a one-way shuttle back to Chamberlin Ranch. The only other option would be for you to have two vehicles and leave one at the bottom to access after you finish and then drive back up. Enjoy the hike! Have fun!
Hi!
This is really helpful.
I am applying for the permit in the narrows top down-day hike since the overnight permit is running out.
But I am not sure my group will be able to complete the entire trail in one day but we want to avoid crowd, I am thinking if we can do a returning trip from top. I do not see you talk about that option and wondering whether that is not an option?
Thanks
Jia
I would not recommend doing a return trip from the top. You have to walk several miles before reaching the Narrows through a long cow pasture. Plus the trailhead is hard to reach and you still need a permit.
hi there, stumbled on your blog after doing some research on hiking the narrows since i will be going in august 2017. i’m dreading the hot weather but it’s the only time i’m able to do it. anyway, i will be doing the bottom-up route since i won’t be able to do an overnight hike. can you give us some info on that route, do we need to get a shuttle, where we start, etc.? thanks!
Hello Angie! That is great to hear that you are heading out to Zion to explore the Narrows. Bottom-up is actually the way I usually explore the area. You’ll want to take the Zion National Park shuttle to the Temple of Sinawava. From there you’ll see the paved path along the river that takes you to the mouth of the Narrows. Don’t fret too much about the weather as the water will keep you cool–keep in mind it is mostly snow melt so it is really refreshing! Since you are doing bottom up without an overnight I’d start early in the morning to beat the crowds and try to be on the first shuttle from the visitors center. You’ll be able to hike as far as you’d like up the Narrows and then when you decide you’ve had enough you’ll want to turn around and head back. Hope that makes sense.
Hi Kristen,
Loooove your site, great info!
I am planing in real time my first roadtrip with Jeff.the.West (falia) solo women to Utah! Very excited. So, many questions, but here’s 2: When you talk about permit, is it the pass America the Beautiful?
I haven’t reserved nothing for camping, in Utah from 19 sept – end of oct. Will it be enough with the first arrived ones?
Is it better to do Moab, canyonlands, Page, Grand Canyon, Zion, Bryce, Capitol Rief in that sense (clock wise) or the other way around, arriving from Colorado (actualy, Qc, Canada!)
Thank you in advance!
Josée
Hey just so you know Zion Outfitters does NOT do a shuttle service. They refer you to Red Rock Shuttle and its $45 per person.
Thanks for the update, Pat. We have adjusted the information. It looks like on their website they list the current price to be $40.
Bummed….I have my campsite reserved at Watchman for mid June. We also want to overnight the Narrows so I went on at 11am central to hopefully get an overnight top down campsite reservation. I even practiced last month when it opened on the 5th so I was fast at it…plus my brother was on another computer trying to reserve for me. I couldn’t believe it…failed in literally minutes. I wanted to Give a tip for others that do this in the future…make sure you fill out the car license plate exactly how they want it. I screwed that up and it probably cost me the trip.
Question would be for those that have tried to get a permit the day of by waiting in line. How did it work? I’m thinking I will pretty much sleep at the office doorstep so I’m first in line. Any help is appreciated.
I am in the same situation. Permits were all reserved in about 15 seconds. I thought I was fast enough. I am driving 7 hours in the hops of getting a walk up permit. If anyone can help with information on how early I need to be there it would be greatly appreciated.
I will be there in mid June and will let you know how it goes.
When are you going? Please let me know how it goes. Thank you!
At what time starts the ticket sale online? What timezone applies? Thanks a lot in advance!
Hi, thanks for the post. My one concern for the hike is water. Did you carry a filter? With it being a 16 mile hike, I would think you’d need to fill up at some point.
Hey Adam, packing the lightweight Sawyer Squeeze or Sawyer Mini for this trek is a great idea. If you’re interested in learning more about water filters you might want to check out this post: https://bearfoottheory.com/best-backpacking-water-filter/
I filtered at Deep Creek confluence with a Sawyer Mini. I also used a Smartwater bottle instead of the bag it comes with…easier to use. Worked like a champ and the water was safe. I did NOT treat with tabs, though if you filter farther UPSTREAM (nearer to Chamberlain Ranch trailhead) or farther downstream as you see more and more hikers, you may want to add the purification tabs. The ranger at the Visitor Center told us NOT to drink the water, even if we filter it because of potential for human waste UNLESS we used water from a side creek (such as Deep Creek, et. al.). Hope this helps.
Thank you for the informations it was really helpful. My Boyfriend and I going to hike the bottom up route on June 23 2018.
Great tips here! We just got back from doing this…8.5 hours top down in one day! Still had a great time!
LOVED all the information you provided here. It made for a successful trek through the Narrows. We did it in 8.5 hours…partly due to the storm clouds we saw developing and we didn’t want to be in Wall Street if it was raining. lol. Of course, the rain never appeared. Nevertheless, I would add that a printed guide of what is what and how far between certain landmarks would be helpful. I found just that at Zion Adventures — AFTER we got done and when to return our stuff. Figures. I’m teaching a class on this for REI and following some of your breakdown on permits, planning, etc. Thanks again for all the useful information!
Thank-You for giving me info to book a shuttle service! That was very helpful!! I appreciate the info. Thanks
I need to get a walk-up permit for the end of this month, what time do you suggested to go the rangers station to wait in line for one?
Hi there, Nikki! I recommend being there @ 7AM right when they open. We also encourage you to call & make sure operating hours haven’t changed at all.
Hi! I noticed you can only book 1 night. Is that enough? would you recommend booking an additional night ? So if i booked for a saturday and we drive up friday where do you recommend camping or staying on friday. we live in phoenix so it is about a 6 hour drive.
Where did you camp after the narrows? Is there camping nearby?
Also for transportation? Do they do round trip? we will only have one car.
You would leave your car at the bottom and then shuttle to the top…so one car is fine. For camping afterwards, you can get a site inside the Park or you can camp for free outside of the Park on BLM land.
Very informative, thank you! Looking into doing the bottom up route. Any idea how much policies and regulations have changed due to COVID?
Hi Sam! I recommend checking Zion NP’s official website for up to date information since this can change: https://www.nps.gov/zion/planyourvisit/backpackinginfo.htm. Currently it looks like wilderness permitting for backpacking has been suspended.
We hiked the Narrows from bottom up August of 2015. Two 14 year olds and parents. It was an unforgettable day, the canyons just rose up all around us and the water was so refreshing on a hot day. I hope to do it again. Now I have The Wave on my “to do” list.
Very useful site! One suggestion. You said: “Water filters do not remove cyanotoxins.” You should also say that neither boiling nor water purification tablets will remove the toxins, and that there is NO SAFE WAY to treat water from the Virgin River in the Narrows. It would also be helpful if you had a section on how to find the places where you can get water from side springs that can be safely treated. Thanks!
Hi Ed, thanks for pointing this out – you are totally right. We added this clarification to our post with a note to talk to a ranger about locating the safe springs.