REI Base Camp 4 Tent Review
The REI Base Camp 4 is my new favorite car camping tent. It’s roomy, packed with awesome features, and holds up well in crummy weather. Read on for the pros, cons, and the details on how to set it up.

More than 20 years ago when I was in college, my girlfriends and I went car camping on the Olympic Peninsula. It was pouring rain and the inside of our tent and our sleeping bags got completely soaked. I ended up gathering what was left of my dry gear and hiding out in the driver’s seat of my car. It was a miserable experience, and I learned that one of the most important car camping essentials is a quality car camping tent.
A great car camping tent is easy to set up, spacious, durable, and will keep you dry no matter the weather. I’ve been testing the recently updated REI Base Camp 4-person tent, and it hits all of the marks – plenty of room, a HUGE vestibule for your gear, lots of vents to improve airflow, and an insane amount of pockets to keep things organized on the inside.
In this REI Base Camp 4 Tent Review, I share my opinions on why I like this tent and a few things I’d like to see improved after testing it in a variety of weather conditions.
Sponsored by REI Co-op
REI Co-op is my favorite outdoor gear retailer and a long-time supporter of my work here at Bearfoot Theory. Their 1-year return policy for Members is hands-down the best in the industry, and Members also get 10% back on their purchases every year.
This post may contain affiliate links.
REI Base Camp 4 Tent Overview
This REI Base Camp 4 Tent review is based on my experience testing it in a variety of climates over the last few months. On one trip to the Arizona desert, conditions ranged from a blistering 95 degrees to 50 mph winds and heavy rain showers. I’ve also used it in the Uintas in Utah where nighttime temperatures got down into the 30s. On every trip, the tent has performed well, and it’s packed with special features and details that make this one of my favorite car camping tents to date.
REI Base Camp 4 Tent Details
Pros
Cons

Save this post!
Enter your email & I'll send this post to your inbox! You'll also receive my weekly newsletter full of helpful advice for planning your adventures.
Ease of Setting Up
By myself, I was able to set the REI Base Camp 4 Tent up in 15-20 minutes the first time around. I couldn’t find the instructions…turns out they are attached to one of the stuff sacks that the tent comes in. Still, the color-coding made it extremely easy to figure out.
Because of its size, it feels a little cumbersome the first time if you are setting it up alone, but that would be true of any 4-person tent. Also, if you’re using a 4-person tent, most likely you have an additional set of hands to help you.
Toward the end of this review, you’ll find step-by-step instructions for how to set up the tent, along with a lot more photos.

Spaciousness
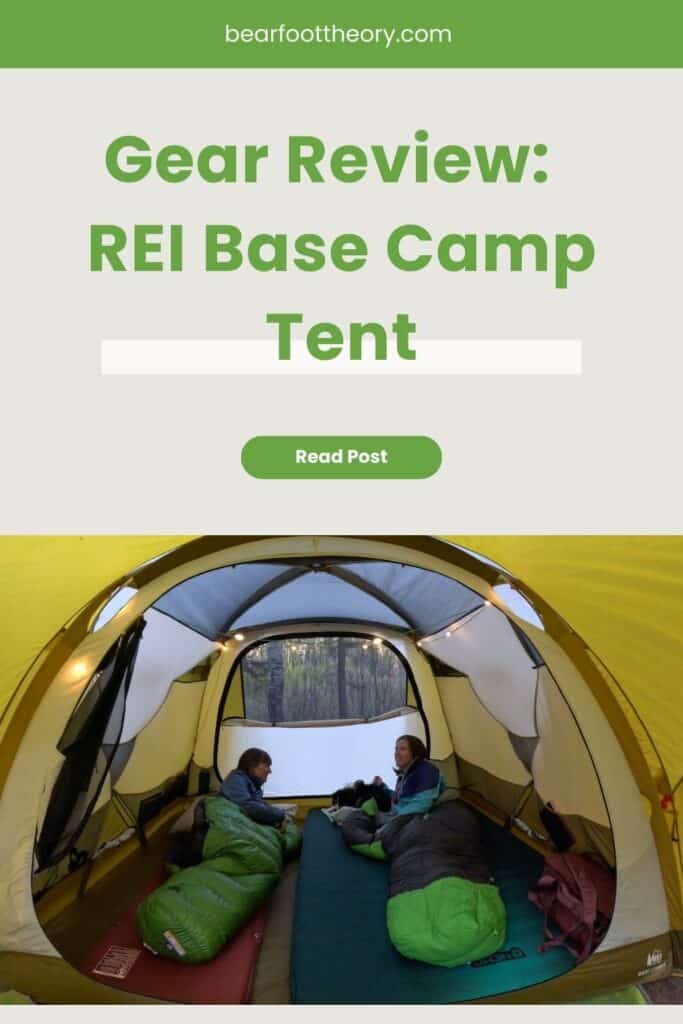
While the REI Base Camp 4 is rated for 4-people, it would be pretty tight trying to fit 4 adults in here. In fact, I set up a NEMO Double Roamer (a 2-person sleeping pad), the REI Campwell Sleeping Pad, and another old Thermarest car camping pad I have, and they didn’t all fit. You can see in the image below how the blue and red sleeping pads overlap.

Now, the car camping sleeping pads I set up were wider than the average sleeping pad, but I do think four backpacking-style sleeping pads would fit, no problem. However, even then there wouldn’t be a whole lot of wiggle room with four adults, which is why I give it 4/5 stars for spaciousness.
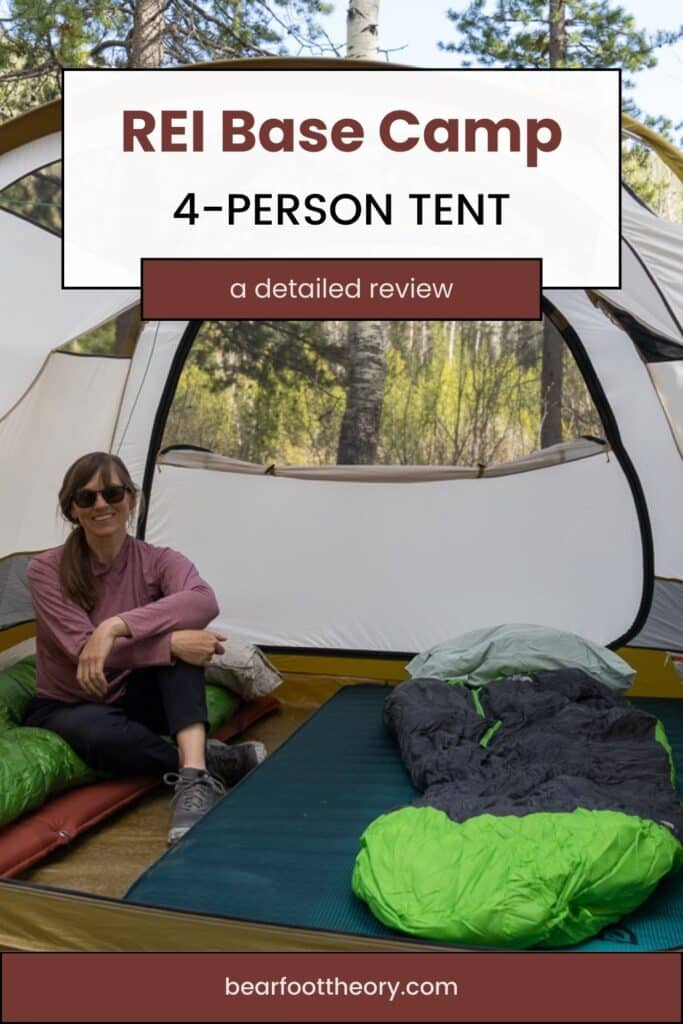
Now for two adults and two kids (or pups), this tent would work great. For even more comfort, I’d personally want to limit it to three people which would leaves a bit of extra space in between the three sleeping pads so it doesn’t feel like you’re sleeping on top of one another.
My family of 3 plus 2 dogs can fit in here with some room to spare (but our dogs are on the smaller side). You can see in this photo how much better it is with sleeping pads that accommodate a total of three people.

This tent would also be great for two adults who simply want more room. I slept in here with a girlfriend and loved how we both had our own space. You could easily fit two cots in here, a small table, or even two compact camp chairs if you were hiding out from the rain.
Windows and Vents
One of my favorite things about this tent is all of the windows it has. Not only does this improve ventilation in hot weather or reduce condensation from your breath on a cold night, it also allows you to enjoy all of the nice views.
If you don’t put the rainfly on, the top has four mesh panels so you can stargaze as you’re falling asleep. I love that this mesh doesn’t come at the cost of your privacy though.

The doors of the tent are made of two layers. First is a solid layer that can be zipped up for privacy. If you want better airflow and views, you can zip down the solid layer, revealing a second mesh layer that keeps the bugs out.

In addition to the mesh on the ceiling and doors, there are also two-floor vents that you can open. I love this feature because sometimes I want to feel a little extra breeze on my face on warm nights.

Finally, there are four vents on the rainfly that can be popped open. These allow some of the warm air from inside of the tent to escape as it rises which prevents condensation.

Pockets and Organization
There are 18 pockets in the REI Base Camp 4 tent! I don’t think I’ve ever slept in a tent with that many pockets. They are conveniently placed all around the tent, so if you were sleeping with 4 people in here, everyone would have their own pockets for their stuff within reach.
Not only are there a lot of pockets, but they are all really big. I fit my Nalgene in the pocket by the door without having to stretch the material. In the others, I placed my Kindle, headlamp, phone, hat and gloves and other essentials that I need throughout the night.

There are also loops you can hang things from like a small lantern or even a small portable fan. I used the loops to string up my string lights which created a nice ambiance when hanging out in here at night.

Finally, I’ll mention the pocket by the door. The doors unzip almost all of the way, and they are much to big to easily roll to the side. It took me a minute to figure this out, but when the door is fully unzipped, you can stuff it in the pocket next to the door so it’s out of the way.
Vestibules
Simply put, the vestibules in the REI Base Camp 4 tent are awesome. With a total of 38.5 square feet inside the two vestibules, there is more than enough room for ALL of your gear. You could fit a cooler, a couple of backpacks or suitcases, shoes, and whatever else you want to keep out of the elements.
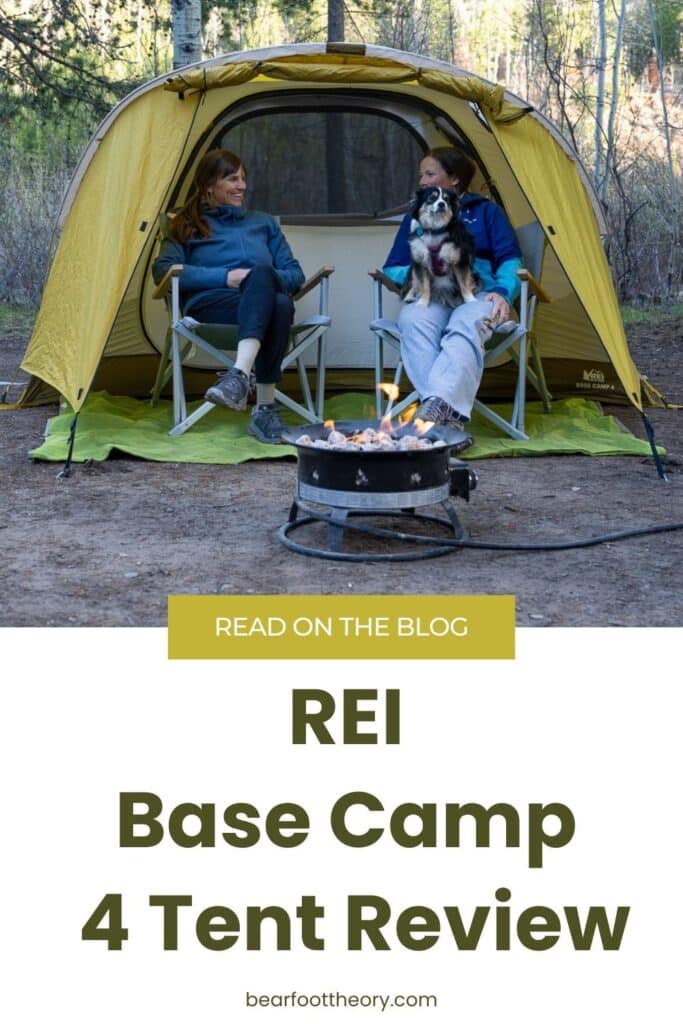
My friend and I even set up my two Dometic GO Camp Chairs in here with room to spare. I could see this being really handy on a hot day when you want to get out of sun. And with the vestibule on the other side, you still have plenty of room for your gear.

Each vestibule has two zippers, one on each side. This makes it easy to get in and out of in the middle of the night.
The only reason I’m docking half a star here is because rolling up the center of the vestibule is a little difficult. It’s a lot of fabric and quite wide, so rolling it up with one person was challenging.

Weatherproofness and Durability
While I can’t yet speak to long-term durability since I’ve only had this tent for a few months, I can say that it can withstand heavy winds and rain. When I was recently camping in Arizona, we got hit with a sudden storm, and the REI Base Camp 4 tent stayed dry as a bone on the inside.
The ground where we set up the tent was almost as hard as concrete, so the tent wasn’t staked down as well as I’d like. We also didn’t have access to big rocks to weigh down the stakes. Instead, we were able to secure the guy lines in a few places, and we also put some of our camp furniture in the tent to weigh it down as much as possible.

With how poorly the tent was staked down, I couldn’t believe how well it held up. The poles are pretty thick, so they don’t bend or buckle easily like the poles from a lighter-weight tent would. The rainfly didn’t leak a single drop.
In rain, you’ll want to make sure that the four roof vents are closed and secured with the velcro so water doesn’t blow in through those.
I have full confidence that the REI Base Camp 4 tent is tough enough to be used in almost any type of weather that you would camp in.
Packability
The REI Base Camp 4 tent weighs more than 17 pounds, and the footprint adds another 1 lb 5 oz. While this sounds awfully heavy if you’re used to sleeping in a backpacking tent, if you’re looking for a tough 4-person car camping tent that you can almost stand up in, you’ll be hard-pressed to find one that is significantly lighter.

Anything that is lighter is going to be missing features that make this tent so functional. For example, The North Face Wawona 4 weighs 13 lbs, but it only has one vestibule that is significantly smaller than the REI Base Camp 4. It also doesn’t offer any privacy without the rainfly on.
Another option – the MSR Habiscape 4 – weighs 12 lbs 11 oz (I have a previous version of this tent called the MSR Habitude). It has more headspace than the REI Base Camp 4, but similarly to the Wawona, the vestibules are much smaller. In my experience, it also doesn’t seem quite as durable as the REI Base Camp 4.
Other than those two alternatives, the REI Base Camp 4’s packaged weight is very much in line with other 4-person car camping tents. For all of the features it offers, I would choose this over the other car camping tents I own, as long as I can drive right up to my campsite.

What I do like about the REI Base Camp 4 is that everything easily fits in the bag that it came in. I didn’t have to struggle to get it back in after using it, and the footprint even fits in the same bag, even those it’s sold separately.
When I’m storing it, I don’t bother trying to fold it all nice and neat. I just stuff it in the bag like I would if it were a sleeping bag.

How to Set Up the REI Base Camp 4 Tent
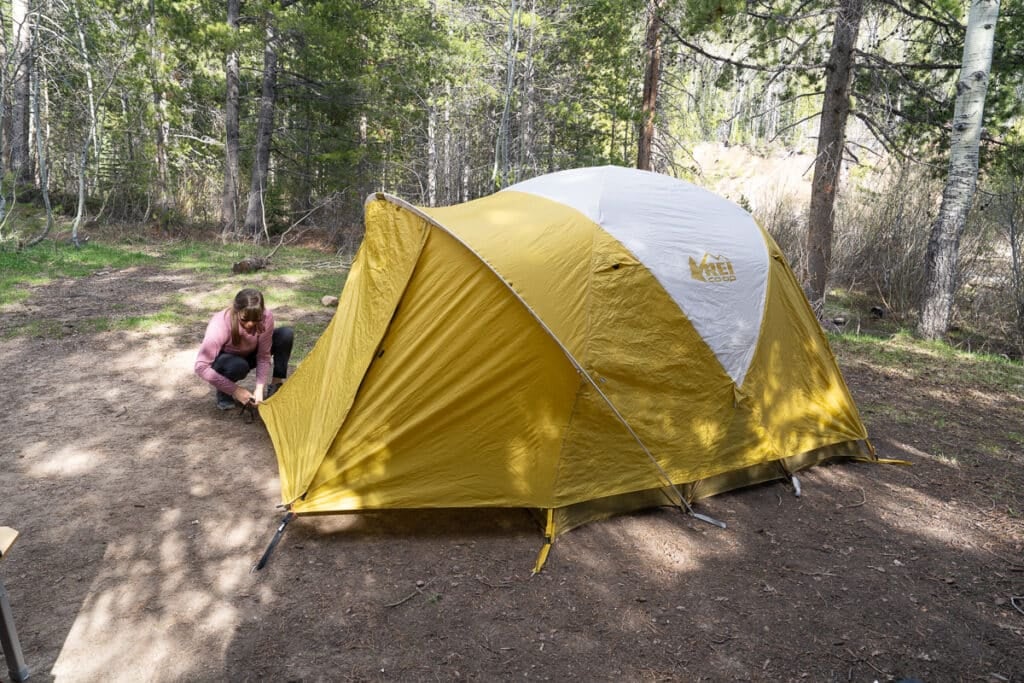
Setting up the tent is very easy. It takes me about 15-20 minutes by myself, and if Ryan helps me, that time gets cut down to 10 minutes. Here are the steps:
1. Put down footprint and pull everything out
The first thing to do is to unfold the footprint and pull all of the tent parts out of the bag. I like that the poles, stakes and tent all have their own sacks to keep everything organized.
The REI Base Camp 4 Tent Footprint is sold separately, but I highly recommend it as it provides an added layer of protection for the underside of the tent. It is also the exact size of tent and can be staked out.

2. Insert the gold poles into their sleeves
Find the two gold-ended poles and insert them into the gold sleeves on the tent. These create the initial structure for the tent.

Something unique about this tent is that it has “dead-end pole sleeves.” This means the tent poles don’t poke out the other end when you are pushing the poles through. This makes it much easier to set up by yourself without the help of another person. The only thing you have to pay attention to is that the rounded end of the pole must be inserted first

Once the poles won’t go through any further, insert the end of the pole you are holding into the grommet.

3. Insert the brown poles into their sleeves
Next, there are two poles with brown ends that provide additional support for the tent. These run through the brown sleeves across the top of each door.

Once through the sleeve, you’ll run the poles diagonally across the side of the tent sticking the ends in the brown color-coded grommets.

On the sides of the tent, there are clips that you attach to the poles to make the tent more taut.

There is also a hook that goes around both poles holding them together where the cross.


4. Stake down the tent
Before you put on the rainfly, make any adjustments to your tent’s placement, making sure it’s even with the footprint. Then stake out the tent loops and the footprint loops together.

5. Add the Rainfly
The cool thing about this tent is you don’t actually need the rainfly for privacy. The solid fabric on the doors means people can’t see through the tent unless they are very tall and standing right next to it, peering in from the top.

But if you are anticipating any weather or it’s cold and you want to cut down on the breeze, then it’s worth putting on the rainfly.
The rainfly creates two different-sized vestibules. I suggest putting the bigger vestibule on the side where you think you’ll be entering and exiting the tent the most. The side with the bigger vestibule has a white pole sleeve.
Orient the vestibules the way you want so the rainfly doors are aligned with the two tent doors. Then clip the two corners of the rainfly down near the smaller vestibule.

Next thread your final silver-ended pole through the rainfly’s pole sleeve and stick the two ends in the grommets.


6. Stake out the vestibules and tie out guy lines
The final step is to insert the rest of the vestibule clips into the tent clips and then stake out the vestibule corners. This will create a nice patio and ensure. the vestibule doesn’t flap around in the wind.

If it’s windy, the REI Base Camp 4 Tent also comes with a set of guy lines that can easily be attached to the tent. We had to use these down in Arizona because the ground was too hard to properly stake out the tent and fly. The guy lines helped immensely in that scenario.

Where to Buy
The REI Base Camp 4 Tent is only available at REI. It retails for $474, but it frequently goes on sale during REI promotional events. Here are the links for the tent and its optional accessories.
I hope you found this REI Base Camp 4 review helpful! If you have any questions or experience with this tent, leave a comment below.


