A Complete Guide to Van Insulation, Sound Dampening & Wall Panels
Learn about options for proper infrastructure for a comfortable van conversion including insulation, sound dampening, wall paneling options and more.

Van insulation is a hotly debated topic among van lifers (pun intended!), but there’s one thing for certain: if you want to stay comfortable in your converted camper van, you need proper insulation. A poorly insulated van could mean suffering in uncomfortably hot or cold temperates, dealing with mold issues, or having to listen to everything that is happening outside your van at all times due to poor soundproofing.
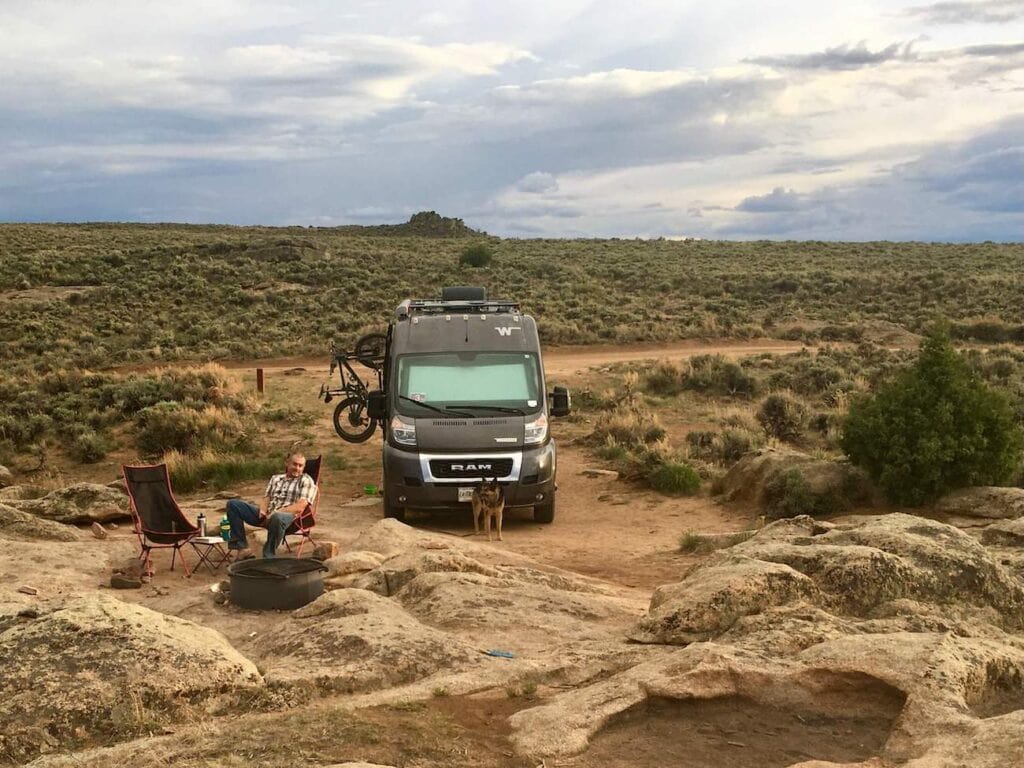
I’ve lived and traveled in two converted Sprinter vans and I’m planning the build and layout for my third, so I have a pretty good understanding of how to insulate a van and the best materials to use.
In this post, I break down everything you need to know to make wise decisions about your van insulation whether you’re doing a DIY van build or working with a professional builder. You’ll learn about different options for insulation materials, the importance of sound dampening, and a few tips on choosing van wall panels.
This post may contain affiliate links.
Stay warm, cool, and dry in your van with this guide to camper van insulation plus tips on soundproofing and wall panels.
Van Insulation Basics
Before we jump into the best options for van insulation materials, it’s important to get a basic understanding of how insulation works and why you need it.
Heat Transfer 101
The goal of van insulation is to keep the inside of your van at a constant, comfortable temperature as much as possible. On hot days, this means absorbing, redirecting, and reflecting heat so your van stays cool. On cold days, good insulation helps keep the inside of your van warm and cozy.
There are three types of heat transfer mechanisms you need to keep in mind when choosing insulation materials and building out your van:
- Radiation
- Convection
- Conduction
Radiation
Radiation is the heat that is transferred directly from the sun into your van, typically through clear windows. Radiant heat can be great for cold, winter days, but it’s definitely not ideal during hot summer temps.
Reflective window coverings or film can be used on windows to minimize the sun’s radiant heat. Alternatively, if you want to retain heat in colder months, you can use reflective surfaces inside your van to soak up the sun’s rays.
A reflective windshield sunshade is also a good idea to use when you are parked or camping under direct sunlight.
Convection
Convection is the manner in which heat moves through the air. Since warm air rises, having insulation on the roof of your van can help keep heat in during cold temperatures. Alternatively, if you want to reduce convection heat in your van, installing a ceiling fan can help move warm air out, keeping temps cooler inside.
Conduction
Conduction refers to heat that is transferred through solid surfaces. When the sun’s rays warm the exterior metal panels of your van, some of that heat is then conducted through the metal and into your van, heating up the interior. This is where a white van is likely to stay cooler compared to a black van since white reflects sunlight and black absorbs it.
Conduction can also occur in the opposite direction. When it’s cold, heat from inside your van can be lost through conduction to the outside via the metal panels if you don’t have proper insulation.
R-value
If you do a lot of backpacking or tent camping, you’re probably familiar with the term R-value since many sleeping pads have an R-value rating. The R-value of a material indicates its ability to insulate. A higher R-value provides better insulation while a lower R-value allows for more airflow and therefore less insulating power.
Different van insulation materials will have different R-values. If you plan on doing a lot of winter camping, you’ll want to use a material with a high R-value.
Condensation control
Some van builds include a vapor barrier which, in theory, prevents moisture from causing rust or mold and mildew. However, a seal-tight vapor barrier is almost impossible to achieve, so instead, we recommend choosing van insulation materials that don’t retain moisture.
Save this post!
Enter your email & I'll send this post to your inbox! You'll also receive my weekly newsletter full of helpful advice for planning your adventures.
Best Camper Van Insulation Materials
There are a number of different campervan insulation options available and they all have their pros and cons. Whatever material you ultimately choose, it should have these four things going for it:
- Be resistant to water, mildew, and mold
- Be easy to install if you’re doing it yourself
- Be non-toxic
- Be affordable
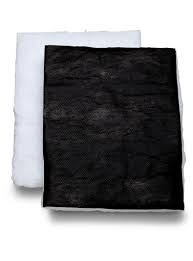
While there are a lot of insulation options out there, not all are a good fit for camper vans, so we’re narrowing it down to the top three van insulation materials here to cut to the chase and save you some time: 3M Thinsulate, Havelock Wool, and foam boards.
3M Thinsulate
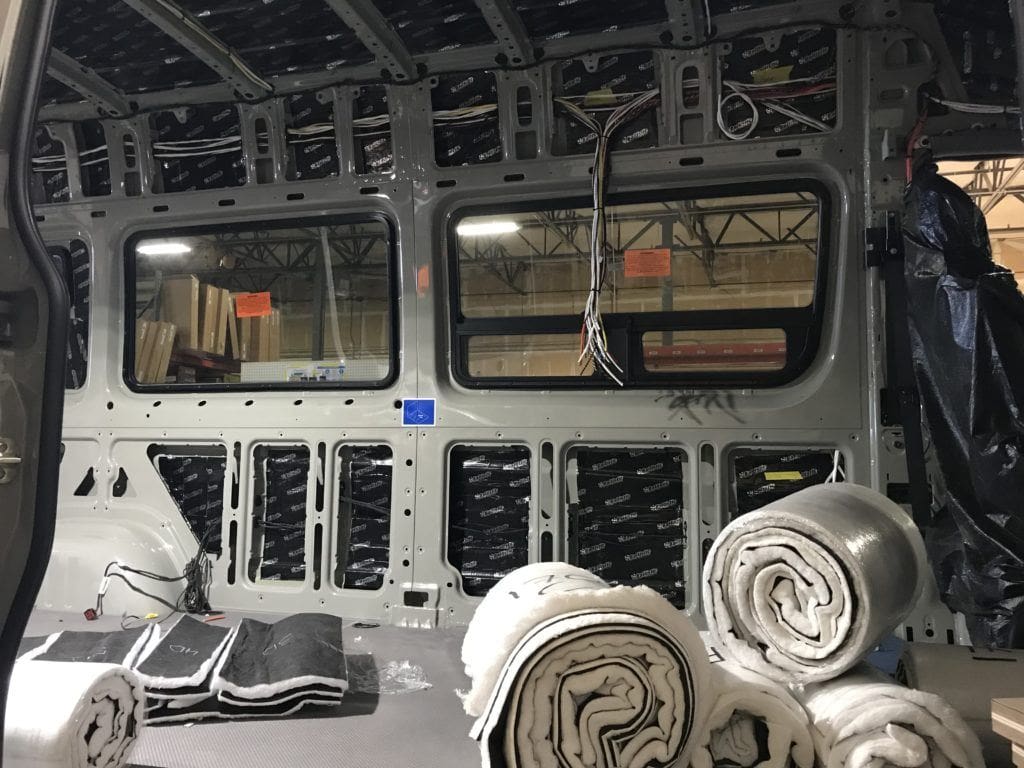
For my second Sprinter van, Outside Van used 3M Thinsulate for insulation. 3M Thinsulate is a synthetic material that is non-toxic and easy to install. It also has some sound dampening properties. Despite having a higher price tag and a slightly lower R-value of 5.2 than some of the other options, 3M Thinsulate is a clear front-runner in discussions on Sprinter Van forums.
Combined with additional sound dampening material, Outside Van estimates that they achieved an R-value of around 6 in my second Sprinter van. Putting numbers aside and speaking from qualitative experience, the insulation in my van seems very effective. We do have a heater (more on that in our guide to van heating and cooling systems), but we’ve slept in sub-freezing temperatures on ski trips and have had no issues with temperature control or moisture.
Quick Stats:
- R-Value: 5.2
- Thickness: 1 3/4″
- Cost: $1.70/sf
- Where to buy: Amazon
Check price: Amazon
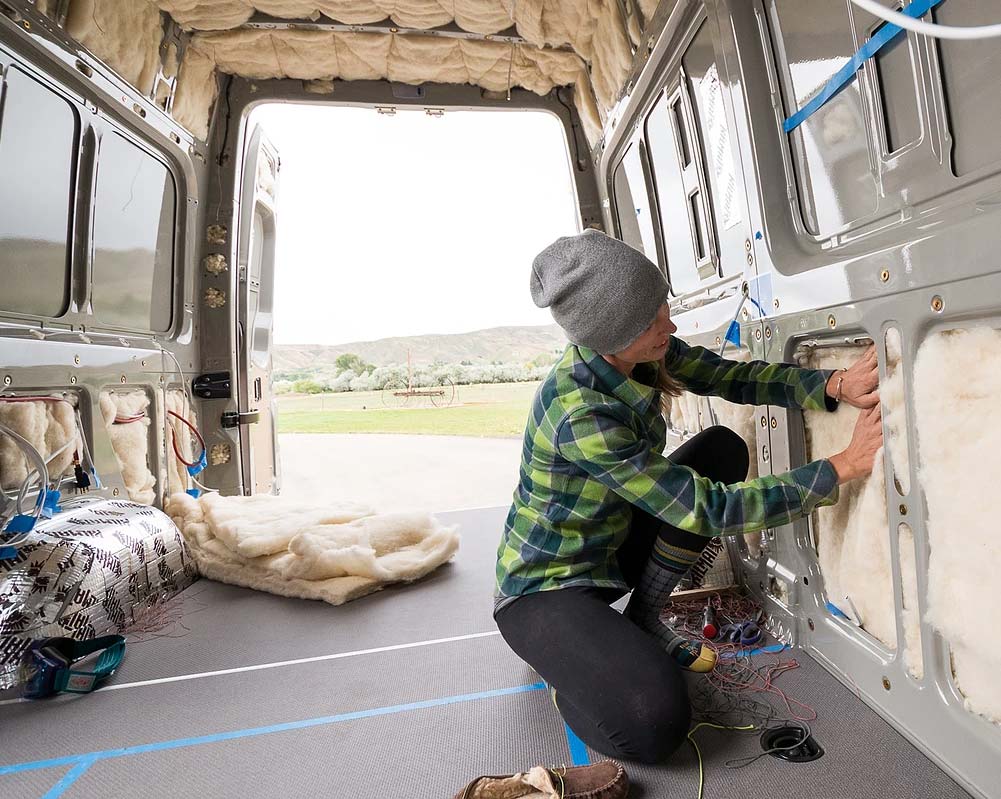
Havelock Wool
Another emerging front-runner for van insulation is sheep’s wool from a company called Havelock Wool. An all-natural material, sheep’s wool has been touted as an eco-friendly insulation choice. It’s got a slightly higher R-value than 3M Thinsulate (R-value of 7.2 for a 2″ thick batt) and it’s cheaper, has natural moisture-wicking properties, and also provides sound dampening.
However, bugs love wool, so in order to prevent insects, as well as reduce flammability, Havelock applies a small amount of boric acid to the sheep’s wool. This is considered non-toxic, according to the National Pesticide Information Center.
One last thing to consider is that compared to 3M Thinsulate, sheep’s wool is reported to be slightly messier on the install, although Havelock’s insulation comes in 4’x1.3′ batts (sheets) to help simplify installation.
Quick Stats:
- R-Value: 7.2
- Thickness: 2″
- Cost: $1.50/sf
- Where to buy: Havelock Wool
Foam Boards
A final option I’ll mention for van insulation is rigid foam boards, like Polyisocyanurate. Polyisocyanurate foam boards have an R-value of 6 for a 1″ thick panel although thinner panels are available as well (R-5 for a 0.75″ panel – you don’t want to go any lower than that if you want your van to be nice and cozy). These are widely available at hardware stores and are relatively cheap making them a good budget option.
If you decide to use a rigid foam board, you’ll need to pay attention to any air gaps between the boards and make sure to fill them in with spray foam, 3M Thinsulate, or wool. Otherwise, airflow will result in moisture build-up in those areas.
Also worth mentioning is that Polyisocyanurate foam boards are made from plastic, so while they’re considered non-toxic and don’t off-gas, they aren’t necessarily environmentally friendly.
Quick Stats:
- R-Value: 6 for 1″ thick panel
- Thickness: Varies from 0.5″ – 1″
- Cost: ~ $0.78/sf
- Where to buy: Most hardware stores
Van Insulation Options to Avoid
There are a few materials you’ll want to avoid for van insulation, including
Denim
Denim retains moisture so you don’t want to use it when insulating your van walls, even though it’s nontoxic and environmentally friendly since it’s made from used/recycled materials.
Reflectix
Reflectix used to be popular as a van life insulation, but as it turns out, it’s not very effective. Reflectix is great for reflecting sunlight and radiant heat, which is why it’s commonly used as a sunshade for front windshields and on the outside facing side of insulated window coverings. But it has a low R-value, so once put behind a wall, it’s not very effective.
Fiberglass
Fiberglass contains formaldehyde and is toxic – not something you want in your living space. While that’s enough said right there, fiberglass also has a lower R-value than the recommended van insulation options listed here and it absorbs moisture which you definitely don’t want.
Insulating your Van Windows
The windows of your van are a main way that both heat and cold can enter and exit your van. In fact, the more windows you have, the less insulated your van will be overall and the more subject it will be to outside temperatures.
You can minimize this by purchasing or making insulated window covers. These make a huge difference in terms of comfortable temps inside your van and are great for privacy as well.
DIY Insulating Window Covers
While we’ve heard that DIYing insulated window covers is a ton of work, it is doable if you’re on a budget, handy with a sewing machine, and have time on your hands. The outward-facing side is generally made from a reflective material such as Reflectix or Low-E with a layer of fabric on the inside for a finished look. For more insulation which you’ll likely want if you’re traveling in hot or cold climates, you can add a layer of insulating material (3M Thinsulate as discussed in the best van insulation options above is a good choice) between the reflective outer layer and fabric inner layer. You may also want to consider making the inside of your insulated window coverings black so you can flip them around at night when you need to go stealth mode.
Keep in mind that you’ll also need to figure out a way to easily attach and detach your insulated covers to your windows. Magnets are the most commonly used option we’ve heard of.
Where to Buy Insulating Window Covers
The far easier (although pricier) way to go is to invest in a good set of insulating window covers that are professionally made, look nice, and are super easy to install. They should last you a very long time so while you’ll be spending more upfront, you’ll likely have a product that you end up being happier with for years and years.
Adventure Van Co who was at our van life festival, Open Roads Fest, makes great insulating window curtains for Sprinters, Ford Transits, Ford E-Series vans, and for Dodge Promasters.
Insulating your Van Floor
You’ll want to insulate and add sound dampening to your van floor as part of your build as well. The same insulation options recommended above as well as the sound dampening materials recommended below apply.
Outside Van insulated the floor of my second van with 3M Thinsulate, the same material they used to insulate the walls. Below that, they installed a layer of sound deadening material similar to the options covered below.
For more on this topic check out our post on camper van floor layers.
Sound Dampening Materials for your Van
Sound dampening materials make a huge difference in reducing the vibrations and road noise in your van. These materials help keep outside sounds outside and inside sounds inside so you can enjoy the peace and quiet of your van whether on the road or camped out. You also won’t be as easily heard from the outside, which is helpful when stealth camping.
Sound dampening materials are typically installed directly on the inside of the vehicle’s metal walls before adding insulation.
Peel-and-stick sound deadeners are a popular option for van conversions. They are easy to install and you don’t need a ton of material to make a big difference. Applying the material to even just 25% of the inside space will significantly reduce outside noise and vibrations if you’re using a good product specifically designed for this purpose.
I suggest applying sound-deadening materials to walls, the ceiling, the cab, the floor, wheel wells, doors, and under the hood. 50 square feet is typically enough for the major areas of a panel van, but you’ll need more if you want to cover the entire inside.
Outside Van covered the whole interior of my second van with sound dampening materials, and other van lifers who rode in it always commented on how quiet it was. So I’d say adding sound dampening to the inside of your van walls before installing insulation is worth it.
Here are three popular sound dampening materials that are commonly used in camper vans:
- FatMat Self-Adhesive Rattletrap Sound Deadener
- Kilmat Automotive Sound Deadener
- Noico Automative Sound Deadener
Van Wall Panels
When it comes to selecting materials for the wall panels and ceiling in your van to cover the layers of sound dampening material and insulation, there are a lot of options. You can go with something prefabricated or custom-built, and you can go in a variety of directions in terms of look, from rustic wood-paneled walls to something more modern and clean.
There are some great resources out there that offer building materials at discounted prices, like salvage yards, upcycling centers, and local construction stores – so keep that in mind as you search for the right wall panels for your van if you’re doing a DIY build.
Ultimately, material selection is based on a few things: budget, aesthetic choice, and availability of resources.
In my second van, Outside Van used Mahogany luan panels (basically a type of plywood) for the walls. They adhered a layer of closed-cell foam to give the panels a little cushioning and then wrapped each panel in the desired upholstery. In the case of Outside Van, they typically use polyolefin, which is an upholstery with many uses such as carpeting and vehicle interiors. It’s durable, resistant to stains, mildew, and sunlight, so it’s a great option for camper vans.
In my second van, Outside Van used a material called Sil-Leather, which is made of silicon. Sil-Leather is eco-friendly, non-toxic, waterproof, and highly durable, and I was very happy with it in my van. I could literally get a wet cloth and wipe the walls clean (especially nice since the walls were white). I also love that dog hair doesn’t stick to it like it would on more traditional upholstery.
Another option to consider for upholstered wall panels is Sunbrella which is a durable outdoor fabric that’s easy to clean (although not as easy as wiping Sil-Leather) and doesn’t fade like a lot of other materials.
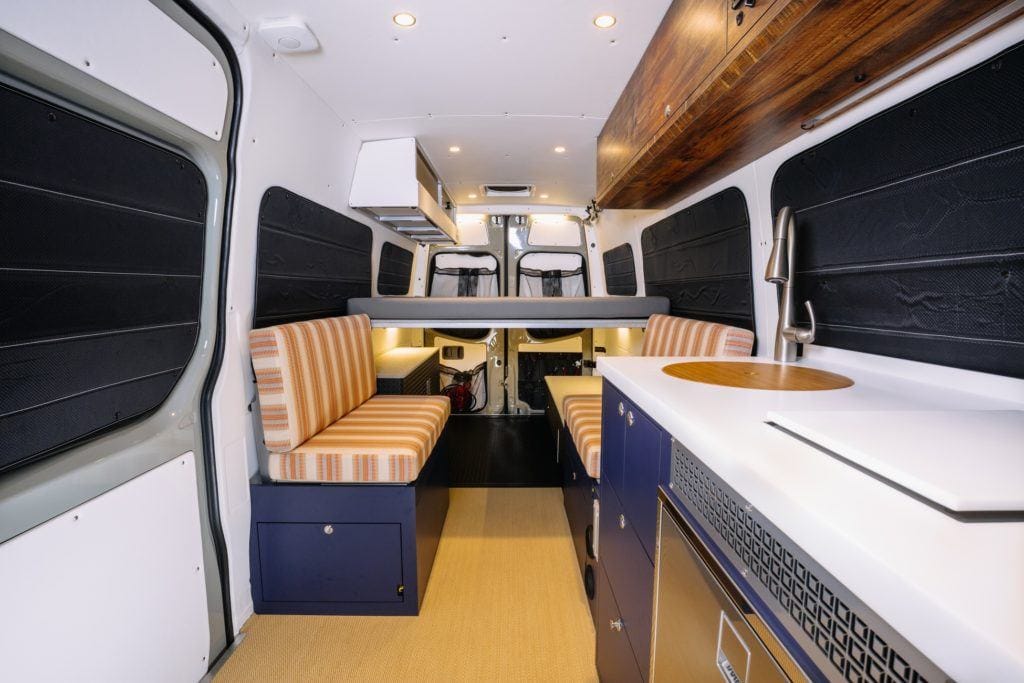
Other van lifers like the look of wood paneling. I don’t have personal experience with wood, but many DIYers opt for tongue and groove paneling. Others on a tighter budget just use marine-grade plywood and paint over it.
Van Interior Conversion Kit Option
A final van insulation option I’ll recommend is the Adventure Wagon Van Conversion Kit. These conversion kits are currently available for Sprinters (both the 144 and 170 wheelbase) and Ford Transits. They come with everything you need to build a solid foundation for your van including insulation, wiring, upholstered wall panels, trim, L-track, and more.
For folks who want to DIY but don’t want to deal with building all the infrastructure, this is a great option.
Resources Section
- 3M Thinsulate – the most popular van insulation material and what Outside Van used in my second Sprinter van
- Havelock Wool – a naturally, environmentally friendly camper van insulation option
- Sprinter Source Forum – this camper van insulation thread has some helpful opinions and information
- How to Soundproof a DIY Campervan by Explorist.Life – DIY instructions if you want to soundproof your van yourself
- Adventure Wagon Sprinter Van Conversion Kit – an interior conversion kit that comes with insulation, wall panels, and more
- Adventure Van Co – insulated window covers
Do you have questions about van insulation? What did you go with in your van? Share your questions, tips, and experiences in the comments below, and make sure to sign up for our van life newsletter!
How much Thinsulate do I need for 2019 Sprinter Passenger van?
Hi Steve – we don’t have an exact answer for this. Your best bet is to contact a Thinsulate vendor or google more information on this so you can do the calculation based on how much space you need to cover. Best of luck!
Did the Sil-Leather just go over plywood? or some other material? Is that technically lighter than having wood paneling on the walls/ceiling?
Hey Cass! Yes, the sil-leather can go over marine grade plywood, I’m pretty sure that’s how it’s done in Kristen’s van. This wouldn’t necessarily be lighter than wood paneling since you’d still be using plywood. Hope that helps!
Foamed foamed PVC sheet is a lightweight alternative to plywood, it’s fire retardant too and doesn’t splinter. Comes in black and white, use black if you’re using a dark fabric.
Im insulating a Ford Transit, I’d like to insulate the cab doors and the slider. I have almost finished the rest of the van with Havelock Wool, wondering if there is enough room in the cabs doors and slider to do so? Is it worth the work?
Please let me know your thoughts…
Many thanks
Rosanne ( I do enjoy your posts!)
Its well worth fitting sound deadener and insulating the sliding door but with the two cab doors its just sound deadener because of the window operation it’s not possible to fit insulation inside the door panels but you could always fit extra insulation to the inside factory door panels but i opted not to do so i was quite happy with level of insulation on the Ford Transit fitted panels.
I’ll add a vote for Armaflex by Armacell. I’m a retired HVAC ventilation engineer and we used this product for sound liner in clean environment duct systems like hospitals, microchip manufacturing facilities, etc. I’m about to use it on my third and last van conversion. It’s flexible, has a high R-value per inch, formaldehyde free and sheds no particulates. A little expensive but worth it. It hasn’t really caught on in the van build community here in the USA yet but is becoming the go to in Europe.
As mention above Expanded PVC panel is waterproof, super lightweight and way cheap option compare to plywood and you can get it locally from sign supplier. Plus you can either cover it or leave it as it without any treatment or paint. Also in my van build, I use aluminum composite panel(ACP), its similar weight to plywood panel and it come prefinish either white, black, alu, or gold. So I didn’t have to deal with painting or treating any exposed edge. If you plan to cover the panels, it probably best to use the expanded pvc panel since they easy to cut and super lightweight.
Also on the insulation I think this article is a bit misleading, comparing R value of this different thickness. In term of environmentally friendly, both Thinsulate and polyiso is make from plastic and provide a lot of sound damping. Polyiso have the highest R value per inch of thickness (2″ polyiso = 12 R value). IMO, Its best to used the combination of polyiso on large flat area to maximize R value and thinsulate/havelock wool on hard to reach/ curve area.
Hi Pat, thanks for sharing your experience!
Any suggestions for insulating the rear doors of a Sprinter 170 and the slider? My build (done by a conversion company) has Havelock wool in the walls and ceiling with painted tongue and groove walls, ceiling. The slider and rear doors aren’t covered and are huge heat and cold transfer points.
Hi Layne, those are notoriously hard areas to insulate – the panels of those doors can be insulated, but it still can cause a draft. We’d recommend getting insulated window coverings – there are lots of companies that make custom covers.
Any suggestions for permanently covering windows (that will be behind walls)? I was thinking of going with Reflectix on outside followed by Polyiso. Want options for keeping it stealth when I go into cities….
Does Reflectix loose any of its reflective properties if sprayed black with like Flex seal or Plasti Dip? Thanks and your website is so informative!!!
Hi Dean, unfortunately we don’t have any experience with covering walls to be able to provide a recommendation there. The thing to keep in mind with spraying Reflectix black is that black absorbs heat, so in theory, it could lose some of the temperature control properties, although I’m not sure if the difference would be that noticeable. Best of luck!
Hi,
Except if I missed it, but why there is no mention of “spray foam insulation” not just for holes?
It seems to be the best ratio between thickness/R value.
Tks
Spray foam insulation is messy and has hazardous chemicals you have to be aware of during install. Also, it can expand and warp causing issues with the van. Finally, it’s very permanent, so if you decide to renovate your van and do something different with it, it’s very hard to remove.