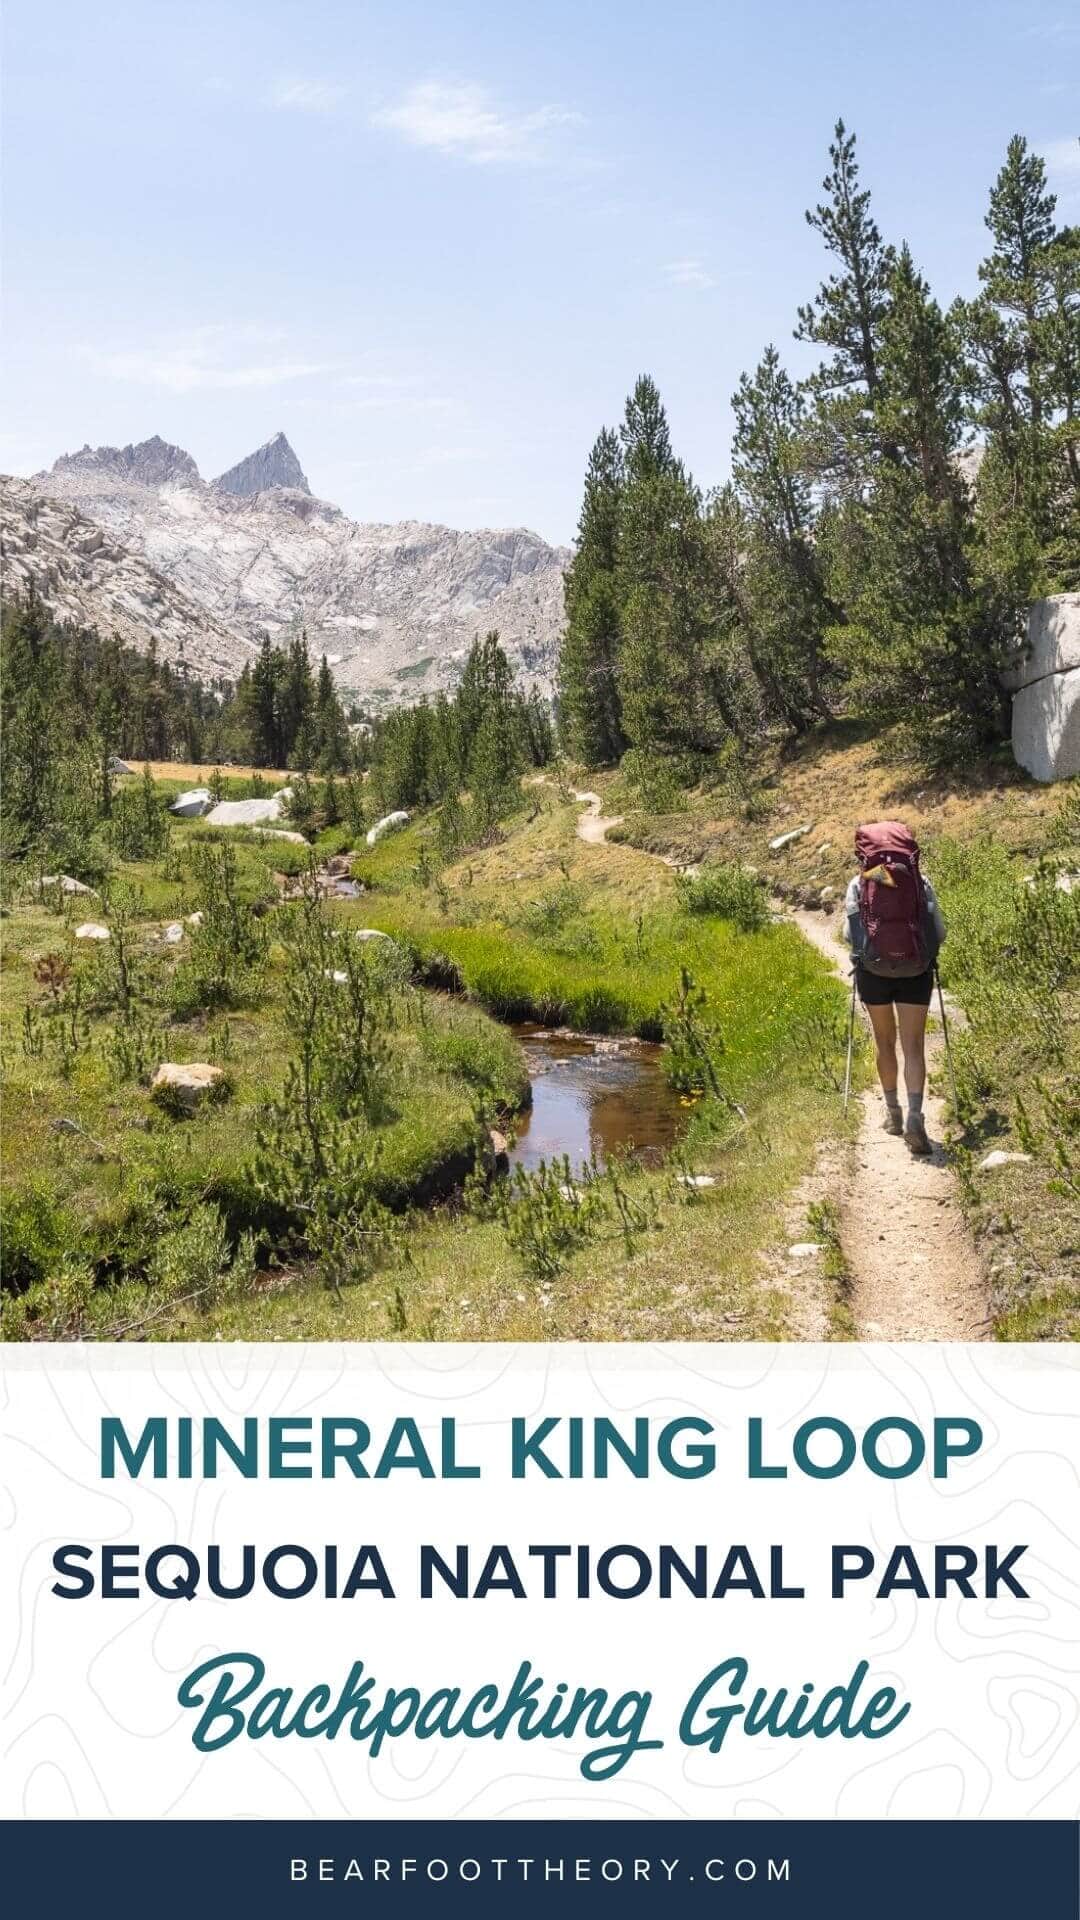
Backpacking the Mineral King Loop in Sequoia National Park
A guide to backpacking the Mineral King loop in Sequoia National Park including permits, gear, when to go, and a full trip report.
Is backpacking the Mineral King loop in Sequoia National Park on your bucket list? If it’s not, it should be! This was hands down one of the most incredible backpacking trips we’ve been on and is easily some of the best backpacking in the Sierra Nevada.
Our 44-mile route out of Mineral King went over Timber Gap and exited via Sawtooth Pass, with a portion of the trip following the High Sierra Trail. It took us 6-days, but if you don’t have that much time, we also suggest a shorter alternative loop that covers a lot of the same ground.
If you’re interested in exploring this region of the Sierra Nevada on a backpacking trip, this guide has you covered.
Learn all about backpacking the Mineral King loop in Sequoia National Park including planning, permits, when to go, what to be prepared for, and more.
This post may contain affiliate links.
Mineral King Loop Basics
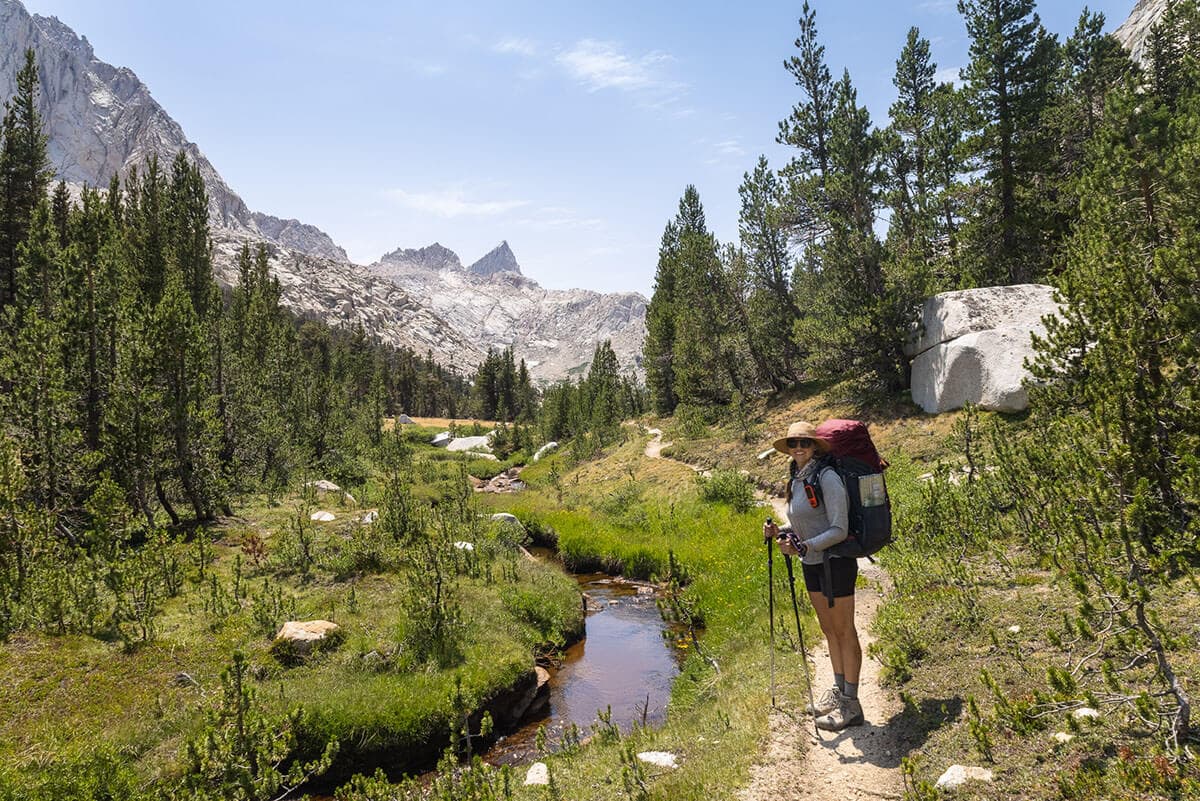
The Mineral King loop is not an easy backpacking trail – there is a lot of elevation gain and loss, and much of the trail is at high elevation above the treeline. You’ll want to be prepared for weather, altitude, sun exposure, and a couple of long, strenuous days of hiking to do this backpacking trip, but those who are willing to put in the effort will surely be rewarded.
You’ll find a couple of different versions of the Mineral King loop online. The most popular route is shorter than what we cover here and takes you from Timber Gap up to Pinto Lake and over Black Rock Pass. This is a great option for people who have less time.
The route we cover here is a larger loop that takes you through some really spectacular scenery and includes a section of the High Sierra Trail. If you have the time, we highly recommend this longer route.
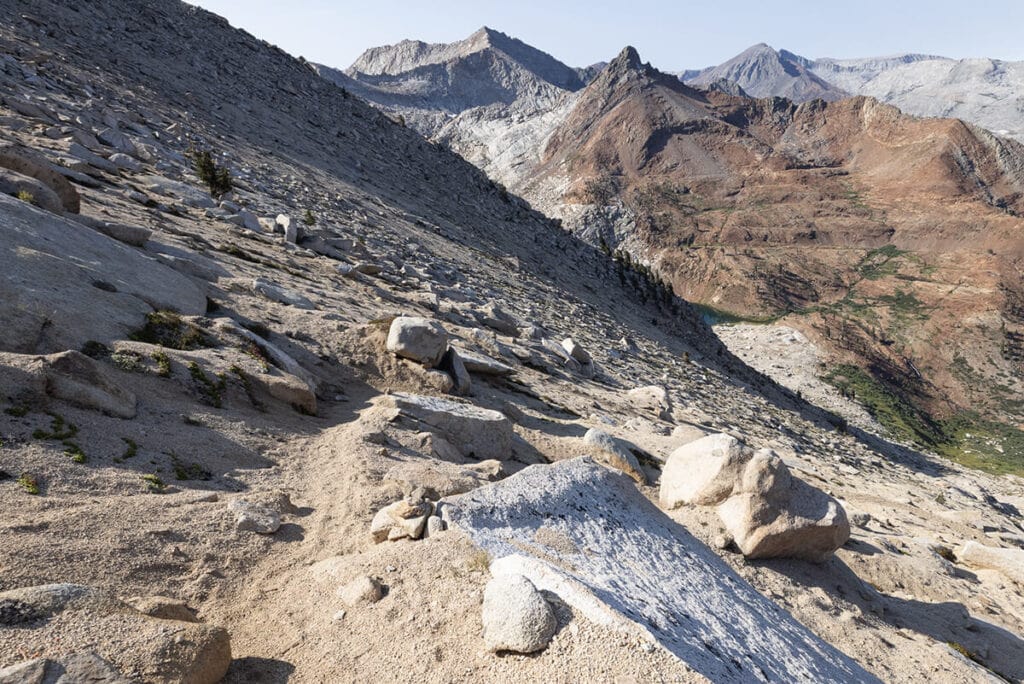
The entire Mineral King loop can be done in two directions: starting at Timber Gap and coming out at Sawtooth Pass, or starting with Sawtooth Pass and coming out at Timber Gap. We highly recommend going clockwise, starting at Timber Gap and exiting via Sawtooth Pass.
If you go counterclockwise and start at Sawtooth Pass, be ready for an added challenge. The south side of Sawtooth Pass is very steep and composed of loose dirt, sand, and gravel, and hiking up feels like sliding a step back for every step forward you take. In fact, there’s not exactly “a defined trail” up Sawtooth pass – you’ll see all kinds of different pathways in the sand and it’ll be up to you to pick the best route up. In addition, the top of Sawtooth Pass is the highest elevation of the trip at 11,745 feet, so covering all of that elevation gain on your first day with a full pack would be very tough.
Mineral King Loop Trail Stats
- Total Distance: 44 miles
- Total Elevation Gain: 15,303 feet
- Lowest Elevation: 6,024 feet (Granite Creek)
- Highest Elevation: 11,745 ft (Sawtooth Pass)
- Difficulty: Strenuous
- Dogs Allowed: No
- Permits Required: Yes during quota season
- Recommended Time: 5 nights / 6 days
- Cell Service: None
View the full map with elevation details and more on CALTOPO
Save this post!
Enter your email & I'll send this post to your inbox! You'll also receive my weekly newsletter full of helpful advice for planning your adventures.
Best Time to Hike the Mineral King Loop
The best time to hike the Mineral King loop is June – September. Temperatures in the summer are warmer and the snow will generally be melted, although this depends on the amount of snow each year so check with the Mineral King Ranger Station for updates. July and August are the hottest months in the Mineral King area but temperatures are generally comfortable (mid-70s) making this a great time to hike with less chance of any lingering snow at higher elevations. Note that the road to Mineral King closes late October through late May.
One thing to keep in mind is that the West is in a drought and our fire seasons seem to start earlier and last longer than in the past. Depending on drought conditions, hiking earlier in the summer (June-July rather than August-September) might give you a better chance of not getting caught in smoke or not having to cancel your trip due to fires (this actually happened to us when we originally planned to do this hike in September 2020 – we had to cancel due to fires in the area).
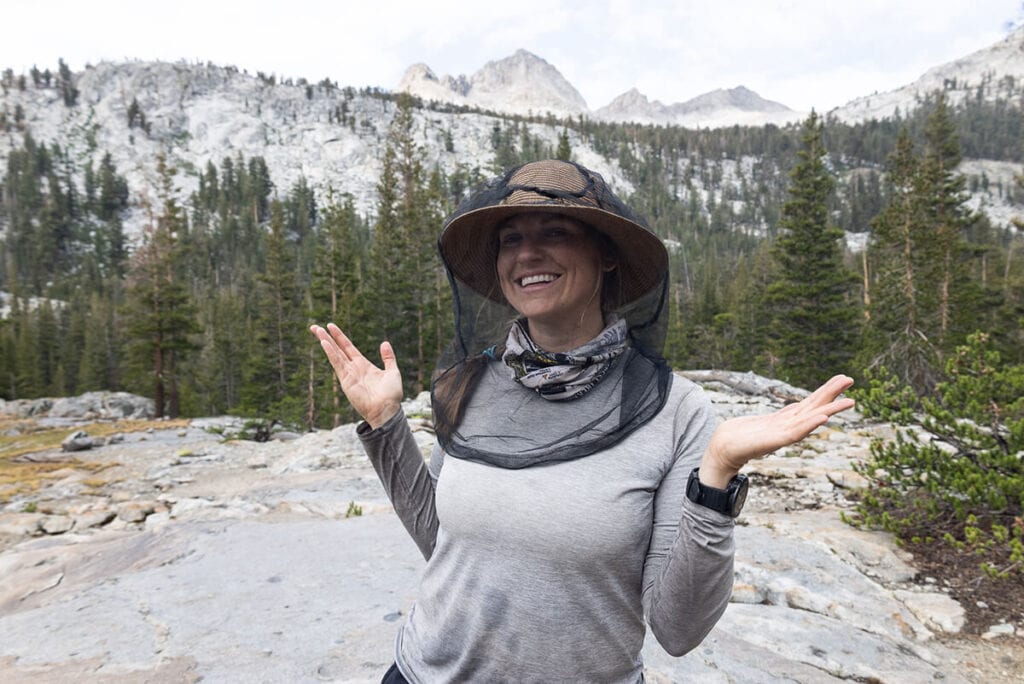
The other thing to keep in mind is bugs. Bugs are most prevalent in the early season when snow is melting and conditions are wet.
We hiked Mineral King Loop in mid-July during a heatwave when temperatures at the Mineral King Ranger Station and the trailhead were in the mid to high 80s. Our first few days of hiking were very hot but luckily there was some shade on the trail. Once we got up to higher elevation on Day 3, it was a little cooler (mid to high 70s). By this time, most of the mosquitos were gone except for a few spots on the trail where we put on our head nets.
Mineral King Loop Permits
During quota season from May 28 – September 18, permits are required for this backpacking trip and are reserved by entry point. For completing the Mineral King Loop clockwise as it’s written here, be sure to select Timber Gap as your entry point.
Reservations are available in advance through Recreation.gov. If you’re not able to get an advance reservation, keep an eye out for cancelations. This is what we did and we were able to secure a permit a few weeks before our trip. Permits have a $15 reservation fee and a fee of $5 per person.
Walk up permits can be obtained (if available) starting at 1pm the day prior to your trip start. No show permits (from parties who do not show up to pick up their permit) become available at 10am the day of.
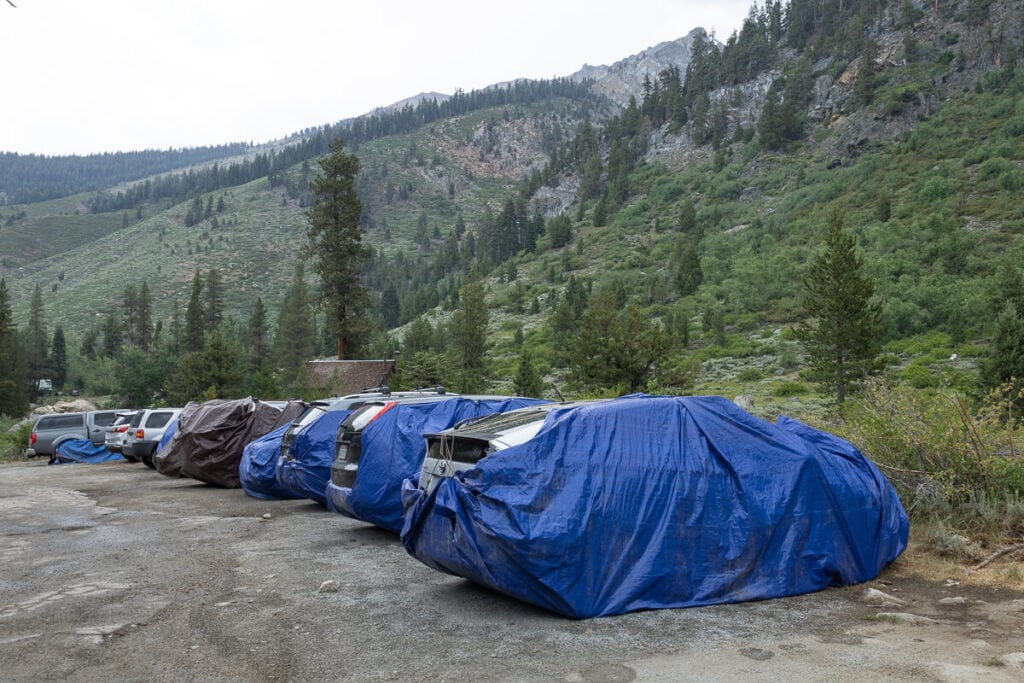
Reserved permits can be picked up after 1pm the day prior to your start date or before 10am the morning of your start date. If possible, we recommend picking up your permit the day before so you can get an early start on the first day of your hike. On our start day, we arrived at the Ranger Station to pick up our permit at 7:30am when they opened and there was a long line of people already waiting. It took us 1.5 hours to get our permit so by the time we parked at the trailhead, tarped our car (marmots – more on that later), and hit the trail it was nearly 10am which wasn’t ideal for the hot, exposed trail we were setting out to hike up.
Outside of quota season (September 19th through May 26), wilderness permits are free. There’s no quota and you can self-issue your own permit at the nearest permit issuing station. Not all ranger stations in the area are open year-round, including Mineral King Ranger station which closes from Sept 24 – May 25, so check opening dates, hours, and locations before heading out to get a permit.
Exact quota dates may shift slightly each year so check the official NPS website for current information.
What to Know Before You Go
Here are a few important things to know before heading out to backpack the Mineral King Loop in Sequoia National Park.
Elevation
The trailhead for this hike starts at 7,800 ft and much of this loop is at high altitude so you’ll want to do some acclimating. Make a reservation at Cold Springs Campground for the night before your start date and get up there as early as you can so you have some time to acclimate.
Luckily, when you do the loop clockwise as we recommend here, you’ll spend your first two days hiking between roughly 6,100 – 9,500 ft and won’t hit the higher elevation areas until day 3.
Read our guide on how to prevent altitude sickness for more on this topic.
Weather
The weather in the mountains can change quickly and summer thunderstorms are common so it’s always best to be prepared with layers and a lightweight rain jacket. Check the weather forecast before you leave home so you can pack accordingly, and get an updated forecast from the Ranger station before heading out.
Be prepared for rain no matter what the forecast says, and don’t be caught in an exposed area during a thunderstorm. If you see a storm rolling in, make sure you’re somewhere safe (in trees, in your tent) and that you’re not the tallest thing around. If you’re high up and exposed, descend to safety as quickly as possible.
Marmots
Marmots love the high Sierra, in fact, we’ve never seen as many marmots as we did during this backpacking trip. They can be pretty sneaky, so it’s important to keep an eye on your belongings and never leave your gear unattended. Marmots have been known to chew through backpacking packs and we even met a hiker who had the handles of his trekking poles chewed off by a marmot (apparently they’re after salt).
Marmots are also known to mess with cars at the trailheads in the Mineral King area, especially in early summer, so it’s recommended that you tarp your car – basically wrapping the entire bottom half with a tarp so that a marmot can’t get to any of that delicious coolant or whatever it is they’re after. During our trip, there were plenty of extra tarps in a storage shed near the ranger station that were free to use.
Bugs
Bugs can pretty much ruin a backpacking or hiking trip if they’re bad enough. And they can be pretty bad in parts of the Sierra Nevada at certain times of year. Early summer seems to be the worst due to wet conditions from snow melt and when we did this hike, the rangers mentioned that peak bug season in the Mineral King area was late June/early July.
We hiked the Mineral King Loop in mid-July and the bugs were tolerable. In fact, the first few days of the hike we didn’t really notice any mosquitoes – maybe because of the heat. Once we got up to higher elevation with more lakes and moisture on day 3, we did start to notice mosquitos both during the day and especially in the evening, but it was manageable with bug repellant and a bug net.
Bears
Bears live in and are active in much of the Sierra Nevada, including in the Mineral King area. In order to protect them and keep them wild, bear canisters are required in the backcountry here (hanging food in the area has proven unsuccessful). You’ll want to keep all food in your bear canister and put your toiletries and anything else with a scent (think sunscreen, toothpaste, bug spray, chapstick, etc) in your canister at night and set it at least 20 ft from your tent.
We saw a bear while driving up Mineral King Road, and while we didn’t see any on our hike, we ran into a couple of other groups of hikers who had seen them on various points along the trail.
Water
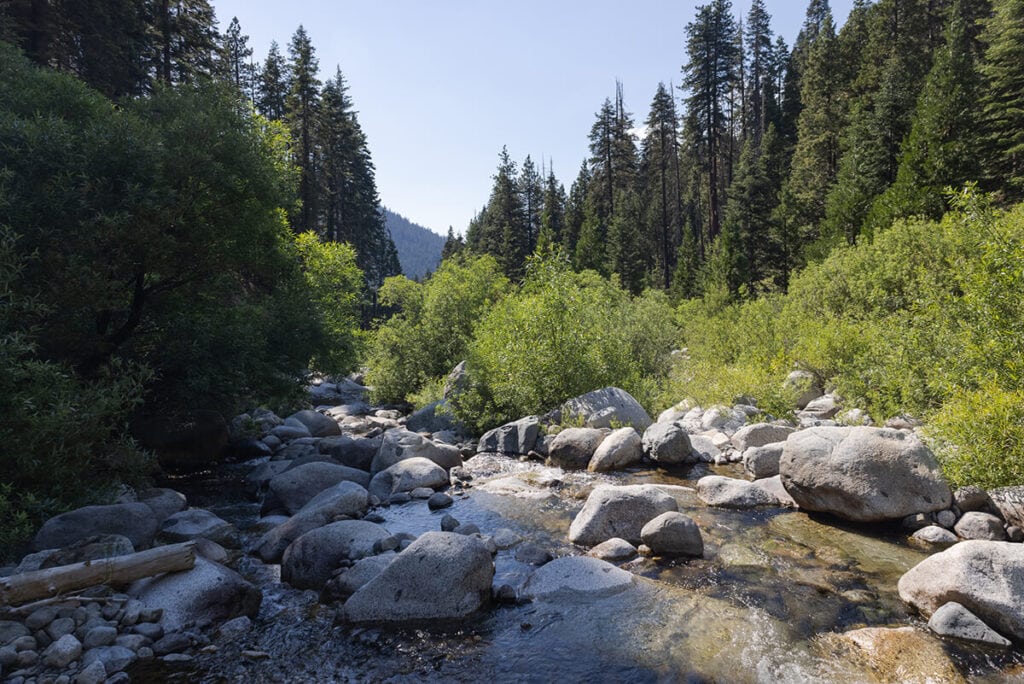
Water availability is good along this entire route. We never hiked more than a couple of hours/miles without coming across water. The longest stretch without water when we hiked this trail was from the trailhead at Timber Gap until we got down to Cliff Creek 4.8 miles later. Check with the Ranger Station for the latest on water availability before heading out as this is subject to change.
Getting to Mineral King
The Mineral King Ranger Station is about a 5 hour drive north of Los Angeles. The last major city you’ll drive through is Visalia, about 2 hours prior to arriving at Mineral King, so if you need any last supplies that’s your chance to get them. You’ll also pass through the small town of Three Rivers (about 1.5 hours from Mineral King) which has a market, a mercantile, a gas station, and ice so you can also get some last items there as well.
Be forewarned that Mineral King Road – the road from Three Sisters up to the Mineral King Ranger Station – is narrow and very windy. The road is paved, but it’s 25 miles of blind corners, and personally, we wouldn’t recommend driving a large vehicle up there (ie long-wheelbase Sprinter Vans, bigger truck campers, etc).
It took almost 2 hours to drive up, and you go from under 900 ft elevation all the way up to 7500 ft. Keep an eye out for wildlife on this road and be sure to give them space.
Mineral King Camping
The closest campground to the Mineral King Ranger station and the Mineral King Loop trailhead is Cold Springs Campground which is open from May 26th – October 5th. It’s a nice campground along a creek with plenty of shade and is in walking distance to the Ranger Station.
At the time of writing, sites are reservation only (no first-come, first-serve) and this is strictly enforced so be sure to make your reservation ahead of time. There is no cell service once you head up Mineral King Road. If you’re not seeing the date(s) you want available, keep checking back. We were able to snag a reservation this way due to a cancelation. Reservations can be made on Recreation.gov here.
Cold Springs campground has nice, spacious campsites, some of which are right along the creek, but not all of the parking spaces are flat, so it’s best for tent camping. Each site has a picnic table and fire pit (although fires were banned when we were there due to the fire danger), and a bear-resistant storage locker. Make sure to keep your food, cooler, and anything else scented in the bear-resistant locker and keep it closed when not in use. If you are allowed to have a fire and decide to do so, be sure to do it safely.
Atwell Mill Campground used to be a camping option as well and is located about 10 minutes before you get to Cold Springs Campground, but it closed in 2021 due to hazardous trees. The National Park Service is working to reopen it in future years.
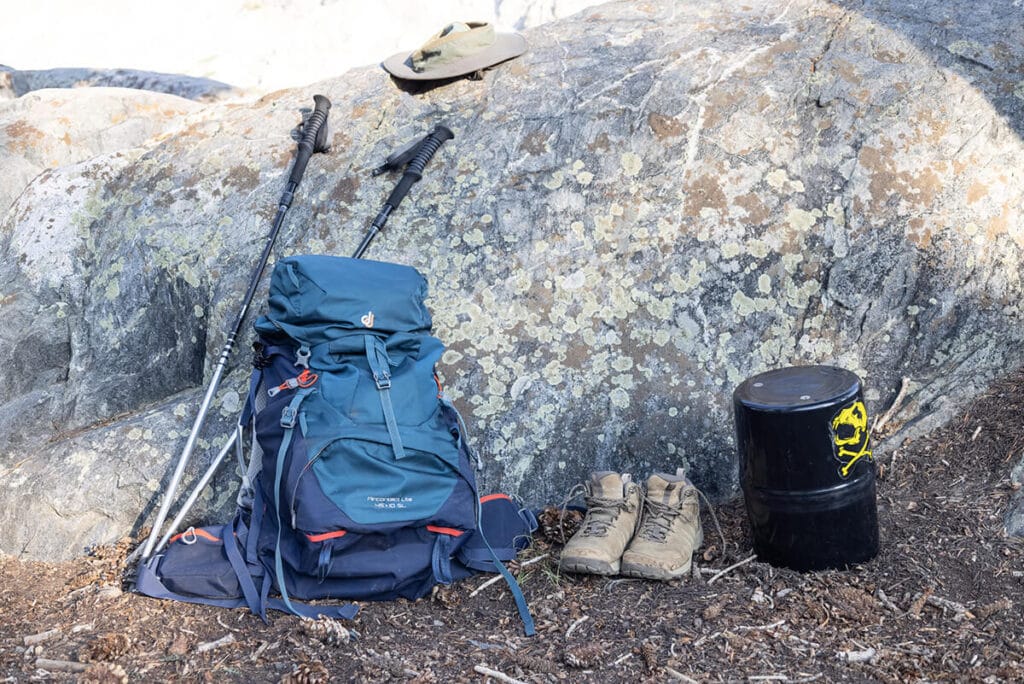
Gear for the Mineral King Loop
See our backpacking checklist for a complete list of the items we take on every backpacking trip. Here are a couple of specifics worth pointing out for the Mineral King Loop:
- Map – A paper map of the trail is always essential to bring along
- GPS – We brought a Garmin inReach which has a GPS map of the trail and we ended up using it quite a bit to make sure we were on the right trail.
- Bug Net – We were told peak bug season had passed, but we decided to bring bug nets just in case (they weigh practically nothing) and were glad we did. There was one day of hiking (in the Big Arroyo area) where mosquitos were pretty rampant, and there were also a lot of mosquitos in the evening in the Little Five Lakes and Big Five Lakes area.
- Trekking Poles – There is a lot of up and down throughout this entire backpacking trip, and trekking poles are a lifesaver for this type of terrain. They help distribute weight so your lower body isn’t bearing the brunt of everything. They also take the pressure off your knees and joints and help with balance.
- Lightweight rain jacket – For those unexpected afternoon summer thunderstorms
- Bear Canister – This is required for safe food storage on this trail
Mineral King Loop Itinerary & Trip Report
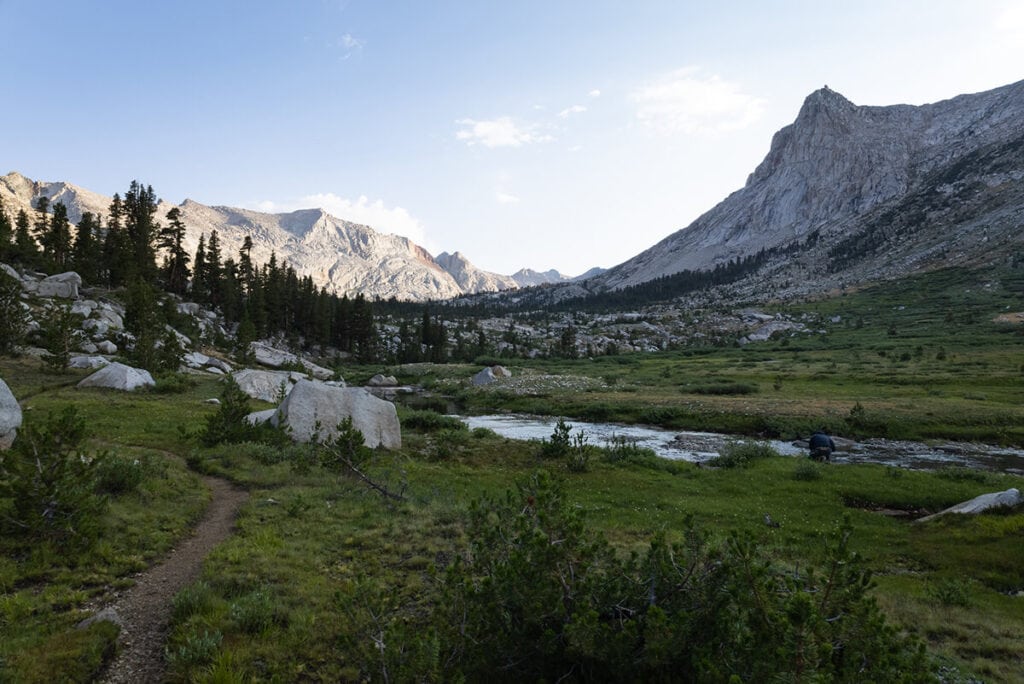
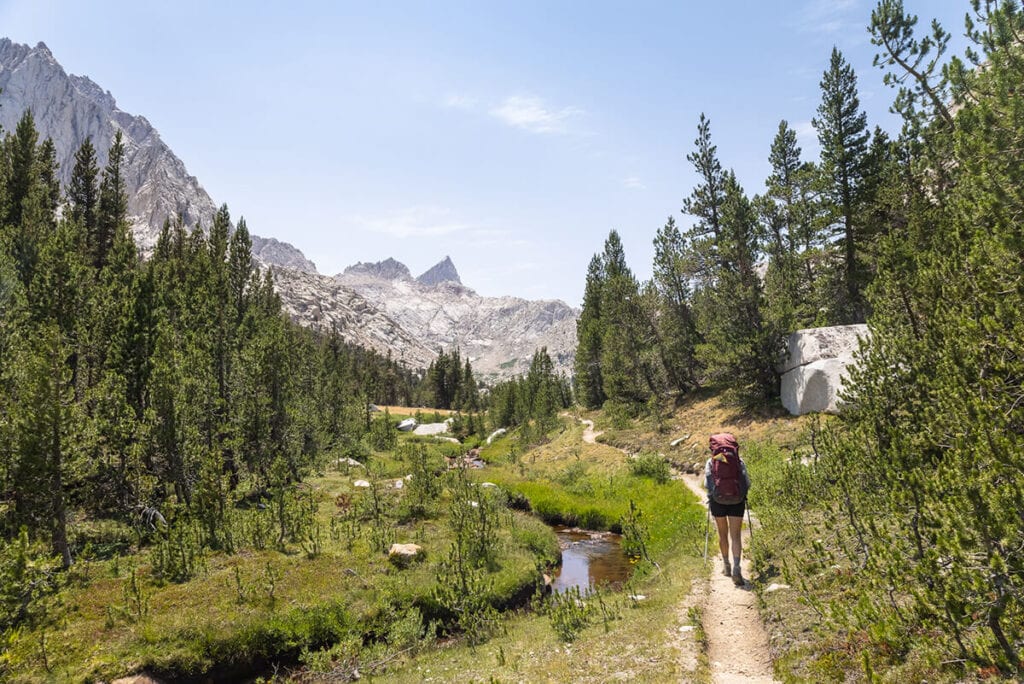
Day 1: Timber Gap to Cliff Creek
- Distance: 6.42 miles
- Elevation gain: 2,020 ft
- Elevation loss: 3,406 ft
- Highlights: Valley views in both directions and wildflowers
The ascent up Timber Gap is exposed and takes you up a steep series of switchbacks. We didn’t start until 10am, and it was already very hot and sunny at that time but we survived. It was lush and green mid-July with lots of wildflowers, and the views down into the valley were lovely. You’ll likely be feeling the elevation at this point and will be getting a nice warm-up for the rest of the ascents you’ll be doing along this backpacking route.
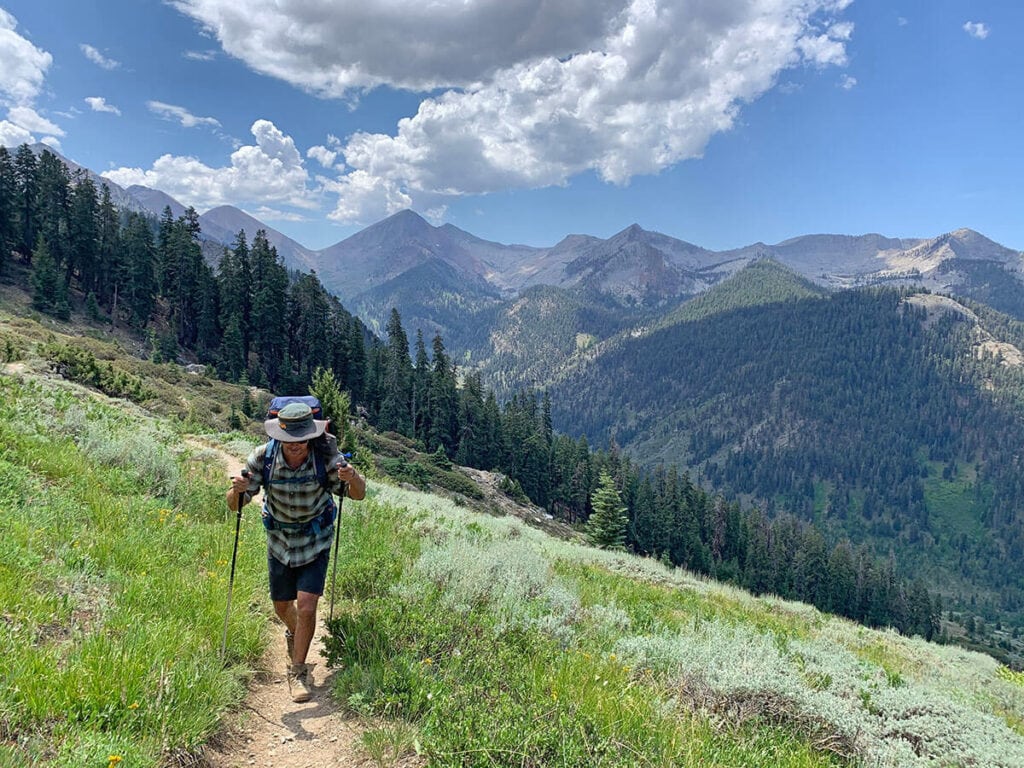
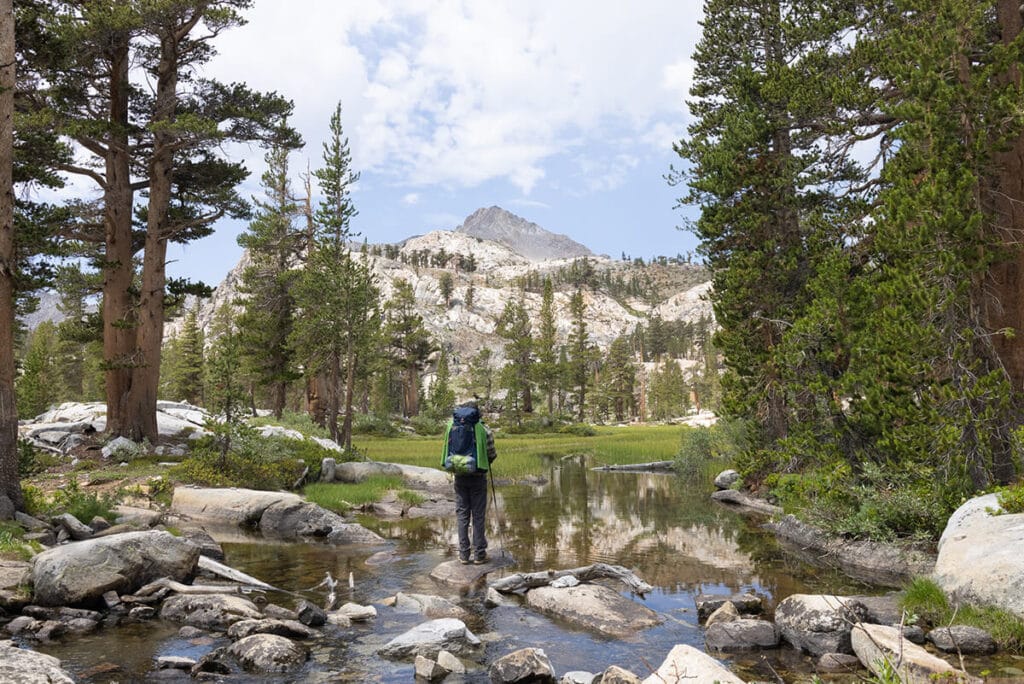
When you get to the top of Timber Gap, you’ll have views of the valley on the north side and will start descending down. There were tons of wildflowers and butterflies along this section as well and not much shade. After about 4.8 miles from the trailhead, you’ll get to Cliff Creek, a nice spot to stop for lunch and to filter water. This is also where the intersection is for the trail to Pinto Lake and Black Rock Pass, a shorter version of the Mineral King Loop trail. There are some campsites at this junction as well but if you can press on you’ll find more scenic ones.
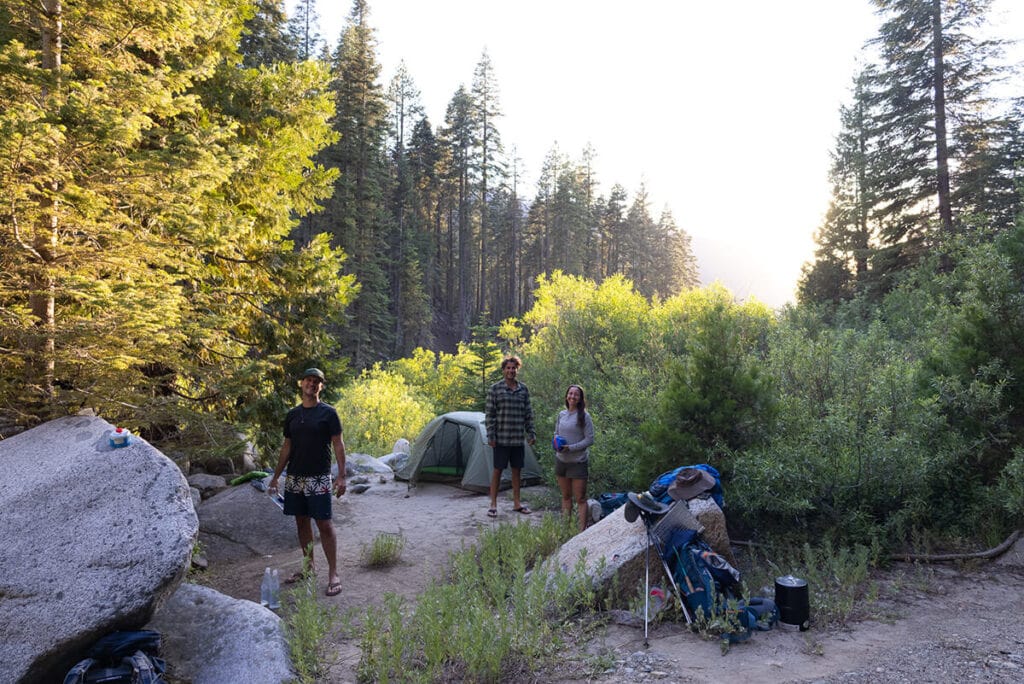
From here, the trail will veer away from the creek for a while (for a mile or so), and when the trail nears the creek again, you’ll see a nice campsite down on your left nestled in a sandy spot alongside the creek. This is where we camped our first night. It was easy to miss, and it was the last place you’ll encounter water for the next 3 miles.
Stopping here made for a long day 2 so if you get an earlier start and you’re up for it, you may want to continue on to the Kaweah River, about 3.2 miles further (about 1 mile past Redwood Meadow), where you’ll find a nice campsite. Camping at the Kaweah River would make your first day ~9 miles).
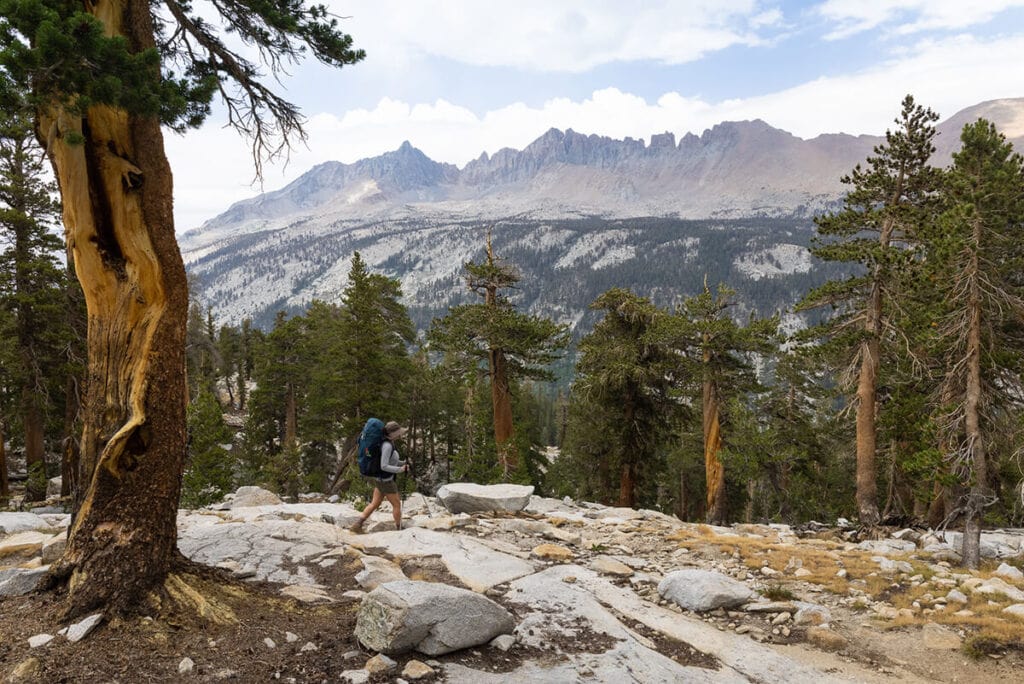
Day 2: Cliff Creek or the Kaweah River to Hamilton Lake
- Distance: 10.69 miles
- Elevation gain: 4,786 ft
- Elevation loss: 2,983 ft
- Highlights: Hiking through a Sequoia grove, incredible views of the granite peaks of the Great Western Divide, and sunset at Hamilton Lake
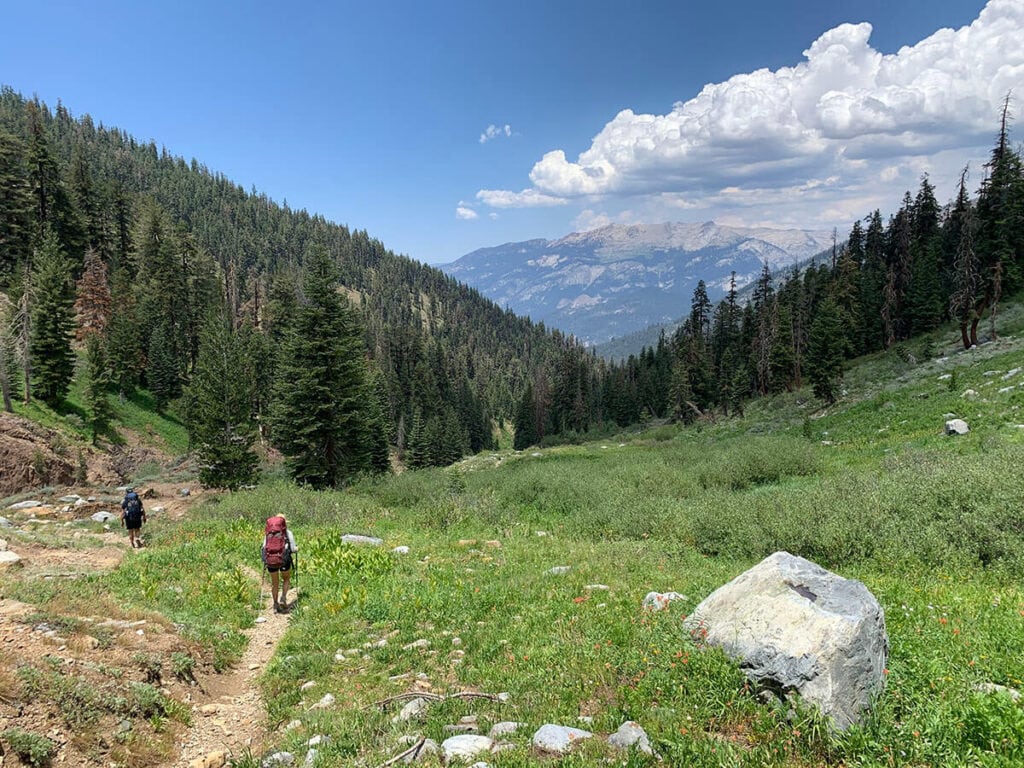
If you camped at Cliff Creek, get an early start for a big day all the way up to Hamilton Lake which is quite the climb. You’ll be hiking through the forest with a good amount of shade all the way until Bearpaw Meadow.
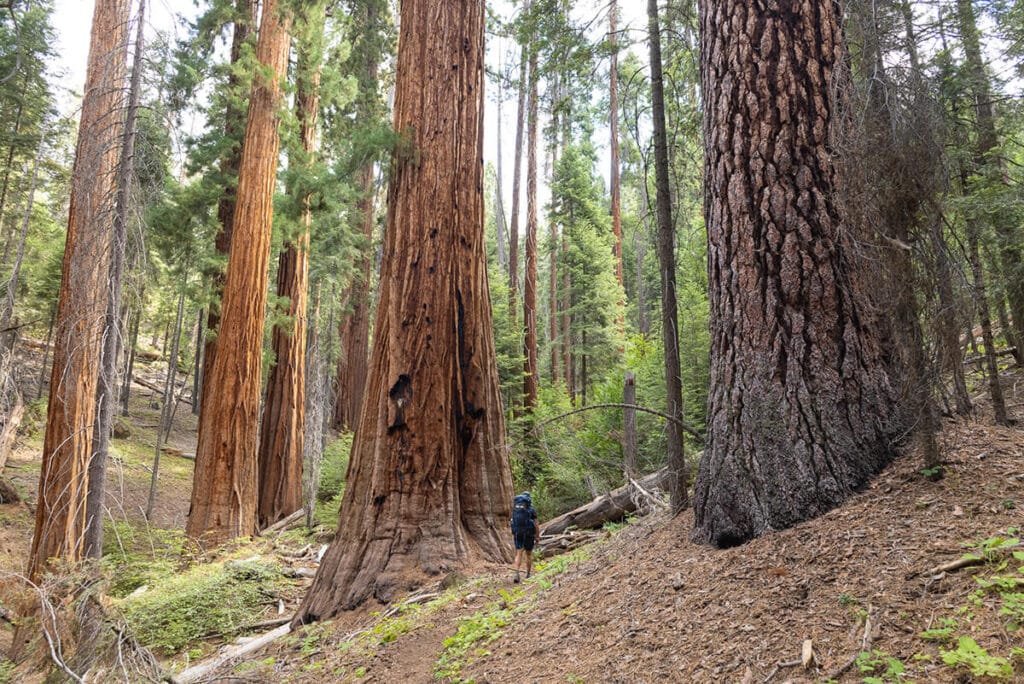
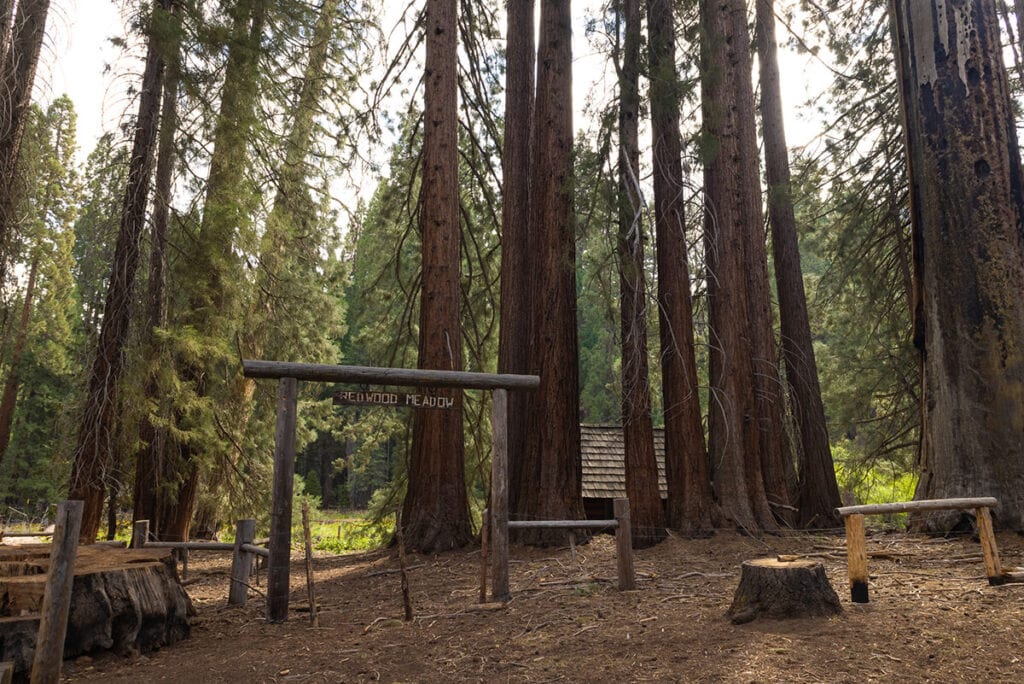
Before you hit Redwood Meadow which is a nice place for a snack or lunch break, you’ll hike through an impressive giant Sequoia grove, a highlight of this section.
There is a Ranger Station at Redwood Meadow but it was unmanned when we were there. There is also no water available here. From Redwood Meadow, stay to the right at each junction until you reach Bearpaw Meadow.
On your way up to Bearpaw Meadow, you’ll start to see spectacular granite peaks of the Great Western Divide to your right.
At Bearpaw Meadow you’ll find a large campground with a number of campsites, as well as a couple of water spigots that you can use to fill your water with (this water is non-potable and needs to be filtered). There were a lot of flies at Bearpaw when we passed through, so we were glad to be continuing on. If you do end up camping at Bearpaw Meadow, the last campsite on the right side of the trail as you leave the area was the nicest in our opinion.
There is a Ranger Station at Bearpaw Meadow, and we were told it was manned while we were there but it’s a little off the main trail so we didn’t venture up. There is also a pit toilet and some bear-resistant lockers at Bearpaw Meadow.
From Bearpaw Meadow, it’s only 4 miles to Hamilton Lake but it’s a tough climb. This stretch took us 3 hours to complete, but it had been a long, very hot day of hiking already so we were likely moving a little slower than usual.
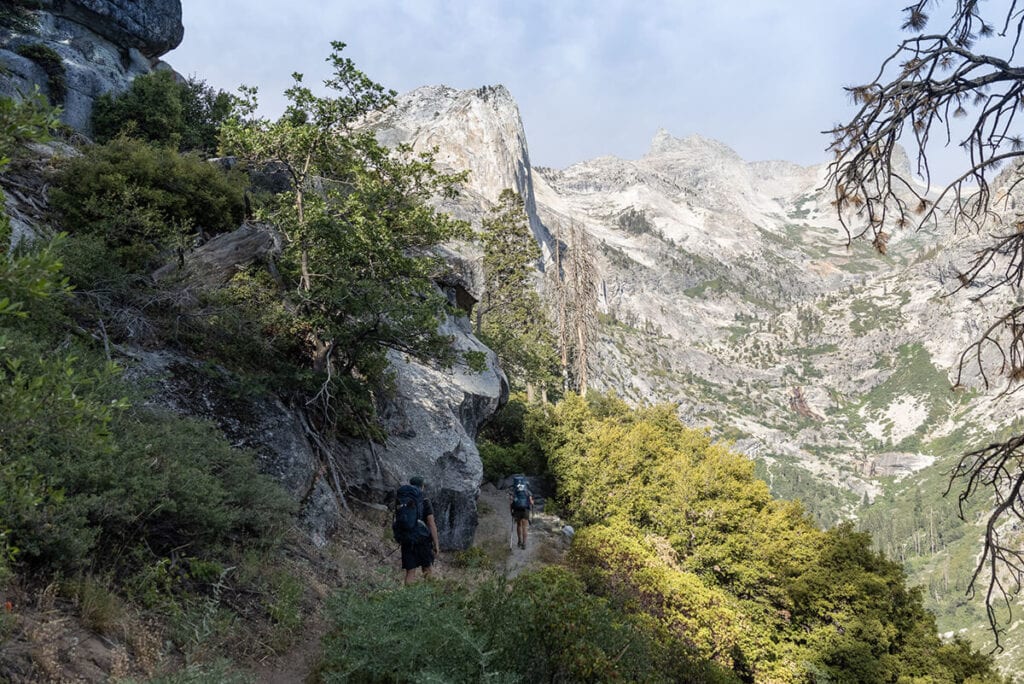
Leaving Bearpaw Meadow, you’ll be hiking along a steep cliff with incredible views of the Kaweah River canyon below and the granite peaks of the Great Western Divide across the way. This whole section of trail from Bearpaw Meadow to Hamilton Lake was spectacular. It is exposed and sunny, so it can be hot depending on the weather and time of day. We hiked it in the late afternoon after taking a long break at Bearpaw Meadow so the sun wasn’t too hot and we had some beautiful evening light.
After you hike across the bridge over Lone Pine Creek, you’ll start your climb up the Great Western Divide to Hamilton Lake. You’ll be switchbacking up the side of a granite ridge and you’ll likely be breathless, but the views will keep you motivated. You’ll even see waterfalls cascading down into the canyon below at various points along the trail.
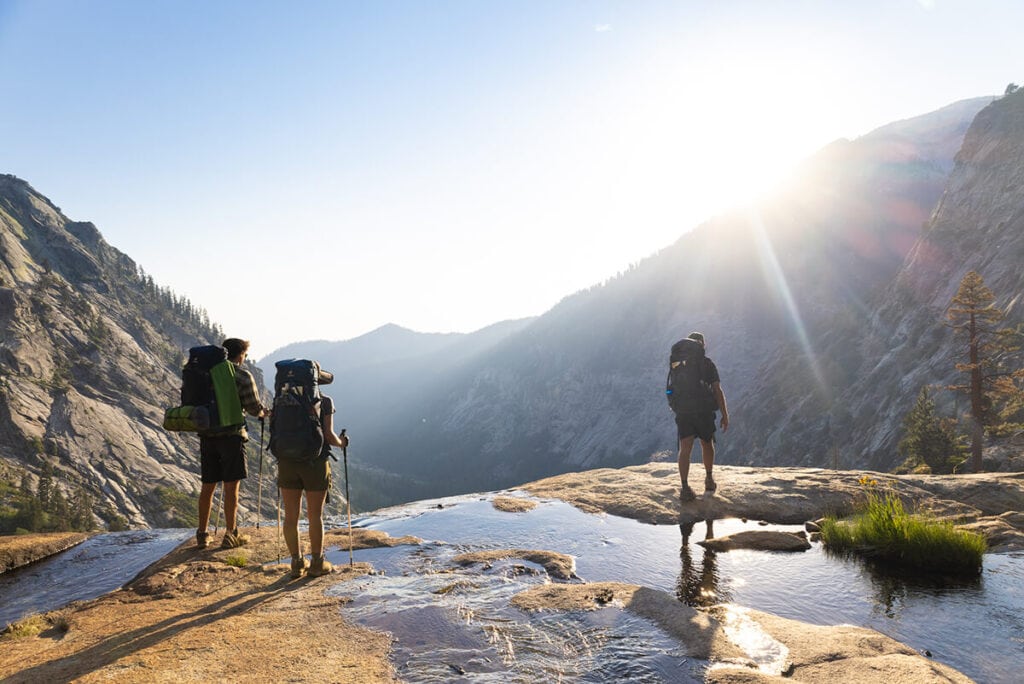
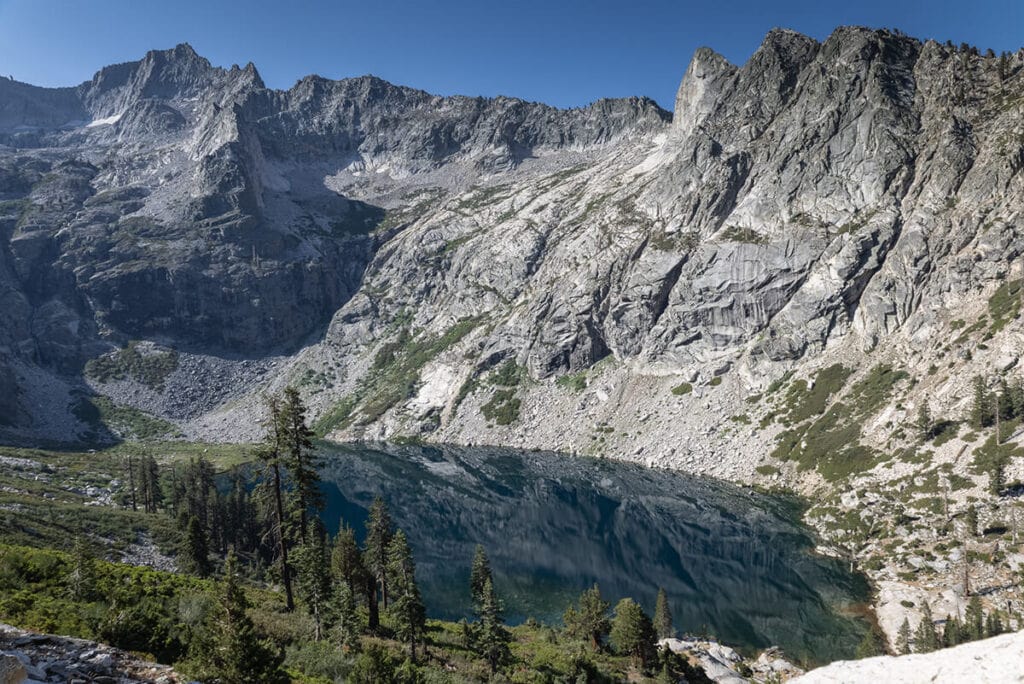
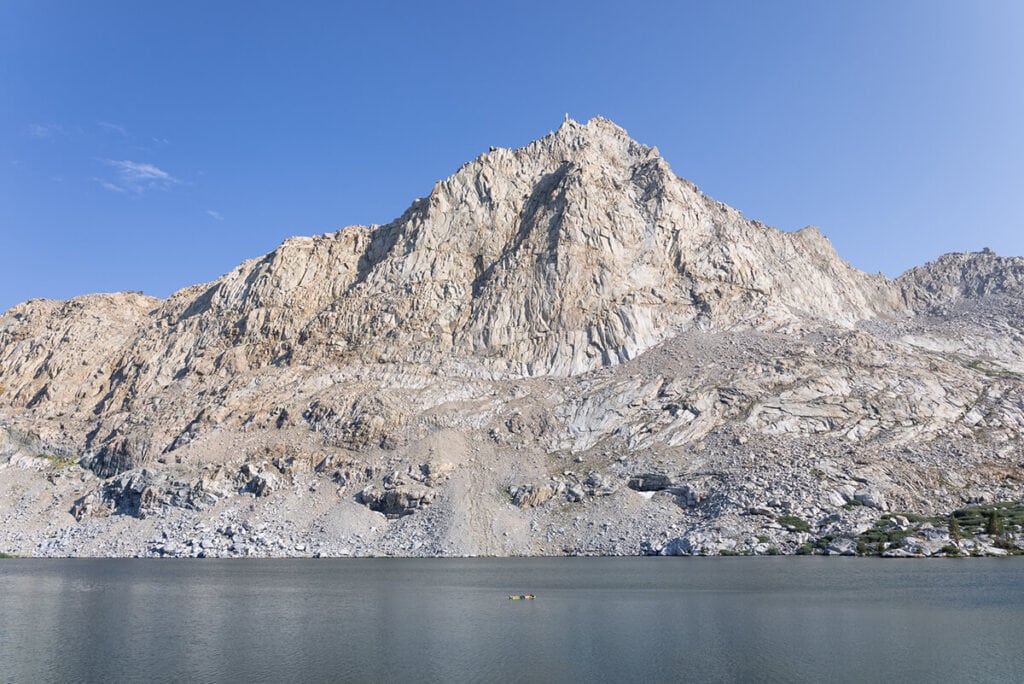
Eventually, you’ll reach a crest where you’ll see Lower Hamilton Lake, and just past this you’ll arrive at Hamilton Lake itself. You’ll see a few campsites where Hamilton Lake flows into Lower Hamilton Lake when you first arrive, but if you continue on you’ll find some even more scenic campsites overlooking the lake and Mt Stewart above.
Hamilton Lake is one of the most popular campsites along this trail so there is a one-night camping limit. It can be crowded at times, but we only saw a few other groups when we were there and there was plenty of space. There is a pit toilet (which campers are required to use in order to preserve the area) and some bear-resistant lockers on the south side of the lake. A swim in the lake is highly recommended!

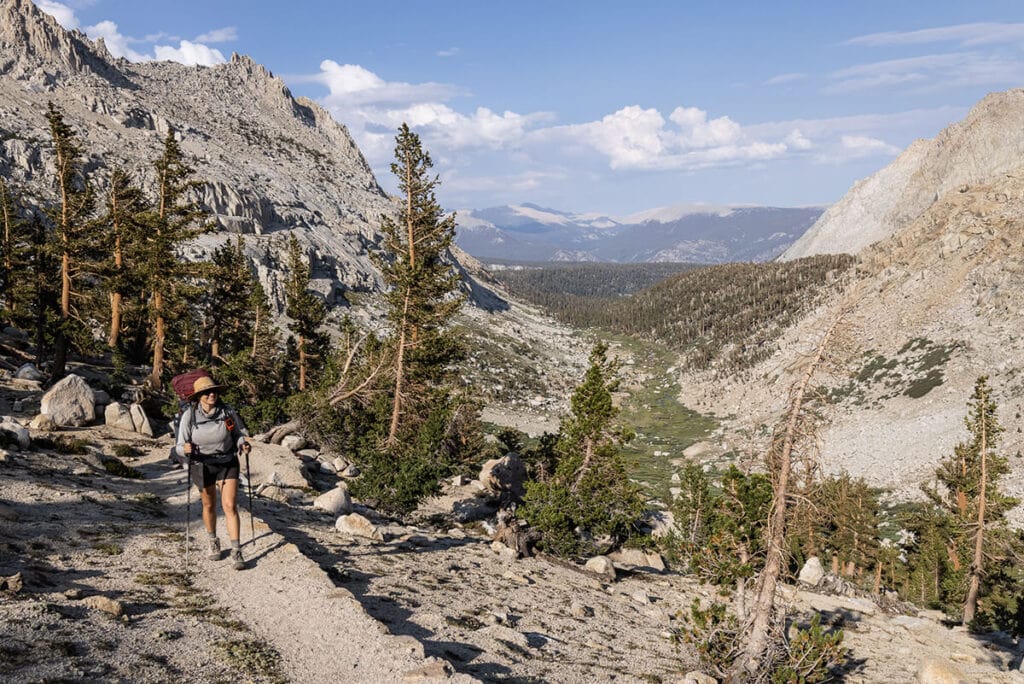
Day 3: Hamilton Lake to Big Arroyo
- Distance: 5.02 miles
- Elevation gain: 2,973 ft
- Elevation loss: 1,175 ft
- Highlights: Precipice Lake, crossing the Great Western Divide, views of the Kaweah Peaks, and the beautiful Big Arroyo river valley
From Hamilton Lake, you’ve got another big climb up and over the Great Western Divide to Kaweah Gap. You’ll be on switchbacks again before you know it with views of the beautifully blue Hamilton Lake below. This section is rocky, hot, and exposed, especially once the sun comes up over the Great Western Divide, so get an early start if you can. Even though this section is one of the most strenuous of the entire trip, it’s beautiful as well. In mid-July, there were wildflowers of all types in every crevice, trickles of water flowing down the slopes, and close-up views of the nearby peaks that you’ll be level with.
At one point, you’ll find yourself walking alongside Hamilton Gorge, a steep gorge where the trail is cut into the stone cliffs. Like us, you’ll probably marvel at how this trail was built. You’ll walk through a tunnel cut into the rock and you’ll see remnants from an old suspension bridge that used to span the deep gorge (yikes!).

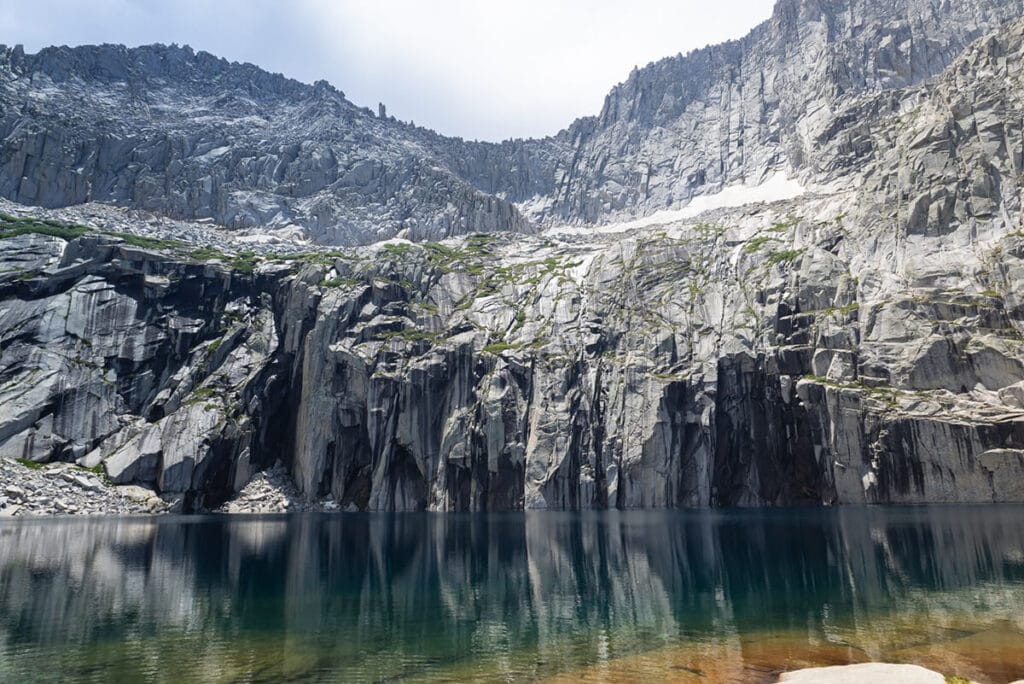
From here, you’ll continue to climb until you arrive at Precipice Lake at around 10,400 ft, a welcome place for a break. You may recognize Precipice Lake from a famous Ansel Adams photo taken in 1932. The steep granite rising out of and reflecting on the lake makes for an impressive sight. This whole area is pretty exposed, as is the next section through Kaweah Gap, so be thunderstorm aware.
From Precipice Lake, you’ll continue uphill for a short stretch until you reach Kaweah Gap at 10,700 ft which will officially take you across the Great Western Divide. It’s a magical, quiet, lush alpine wonderland with a few small lakes and lots of high alpine grasses and wildflowers.
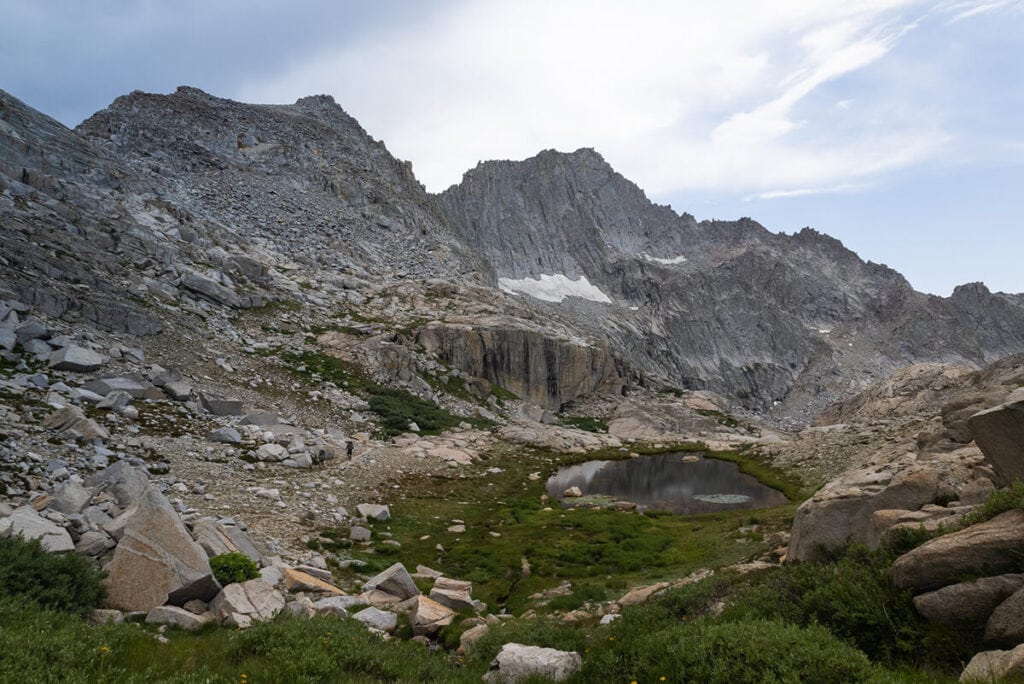
Once you pass through Kaweah Gap, you’ll have views of Nine Lakes Basin ahead with the first lake nearby, and Big Arroyo down to the east. It looked pretty dark and stormy over the Kaweah Peaks so we decided not to venture into Nine Lakes Basin and continued down the trail to Big Arroyo. If you had an extra day on the trail, Nine Lakes Basin (which is all off-trail) would be an amazing place to explore.
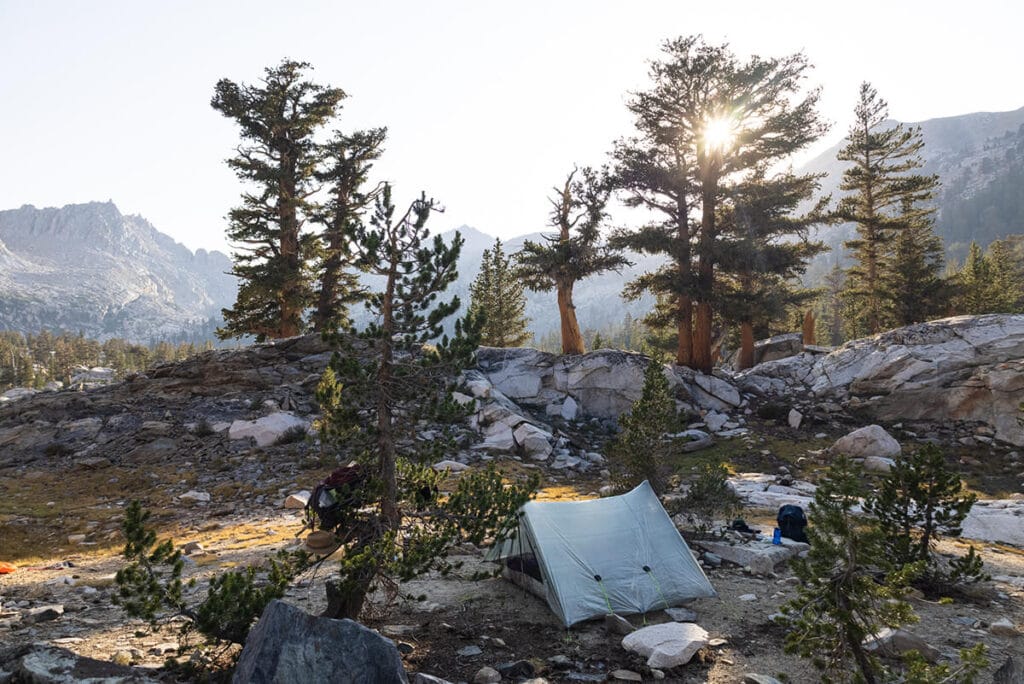
From Kaweah Gap, you’ll be gradually descending for a while, and once the trail nears the river you’ll come to a really nice campsite on your right nestled in some small trees with a river on your left. This is a great spot for lunch or to camp if you’re done for the day. We stopped for lunch and continued on until we reached the river again.
This next stretch is through a beautiful, green Big Arroyo river valley with peaks all around. At this point, we were ready to be done but had a difficult time finding a campsite. There are a few up above the river to the right but they were small spots with space for one tent only (we were a group of 4). After quite a bit of searching, we found a place to camp, but looking back it would have been easiest to camp at the campsite just past Kaweah Gap.
If you’d like to hike farther, you’ll soon reach a forest and will be in the trees along the river for a while where you’ll find some campsites. When we did this hike in mid-July it was very buggy and seemed like it would have been a miserable evening so we backtracked and found a campsite out of the forest.
Day 4: Big Arroyo to Big Five Lakes
- Distance: 7.19 miles
- Elevation gain: 1,729 ft
- Elevation loss: 1,532 ft
- Highlights: Big Arroyo River Valley, Little Five Lakes, and Big Five Lakes
Wake up early and enjoy the morning light on the surrounding peaks as you finish hiking through Big Arroyo. You’ll soon enter the forest and will be hiking a nice flat stretch through the trees along the river for a while with a few river crossings. We were able to find our way across on rocks and logs but have heard it can be a little more difficult to find a place to cross earlier in the season when the water is higher.
This was by far the most mosquito-filled stretch of our entire backpacking trip, so wear pants, long sleeves, a hat, a bug net, and douse yourself in bug spray. The mosquitos were relentless and this stretch would have been pretty miserable if we hadn’t been prepared.
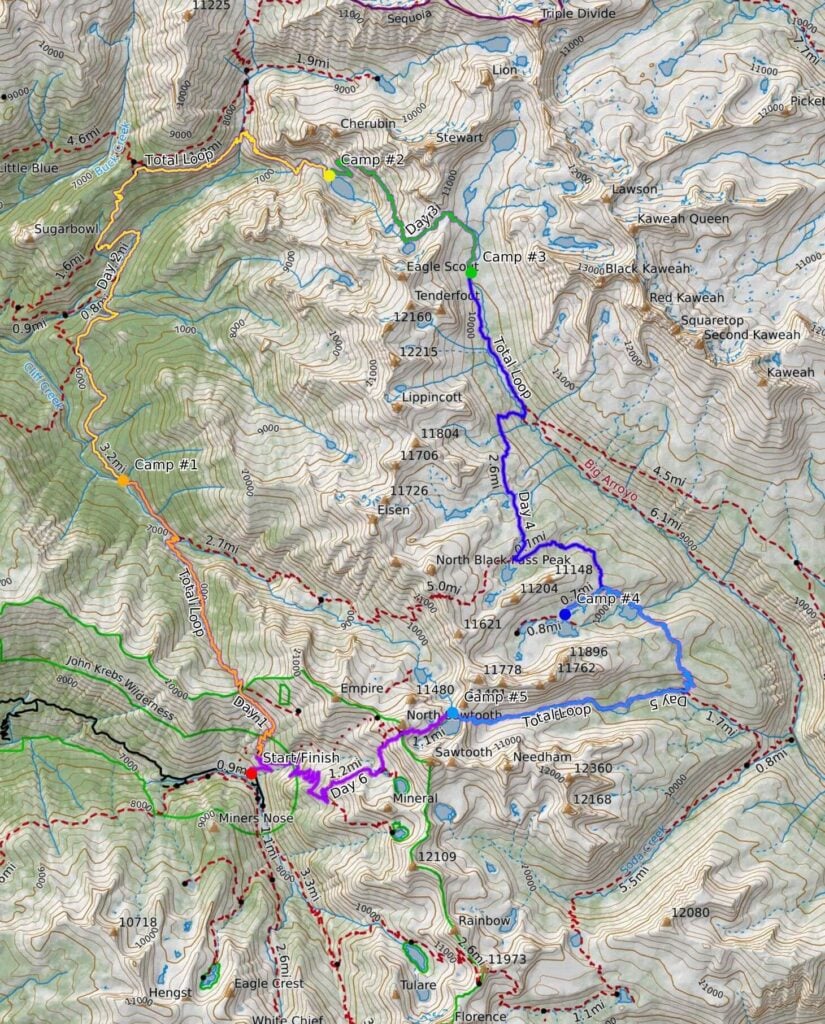
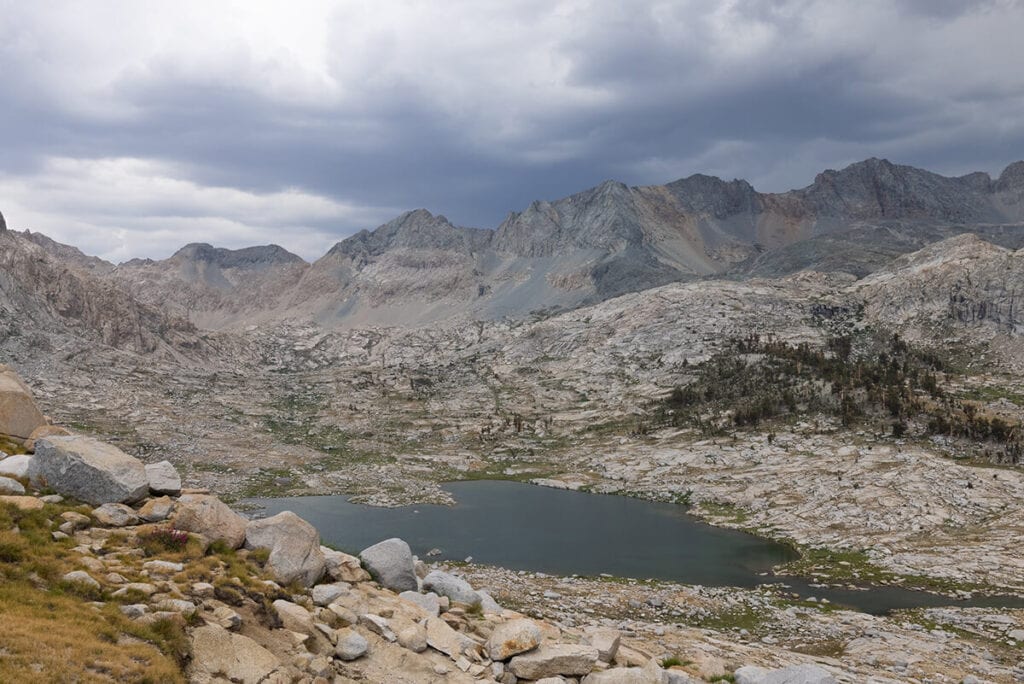
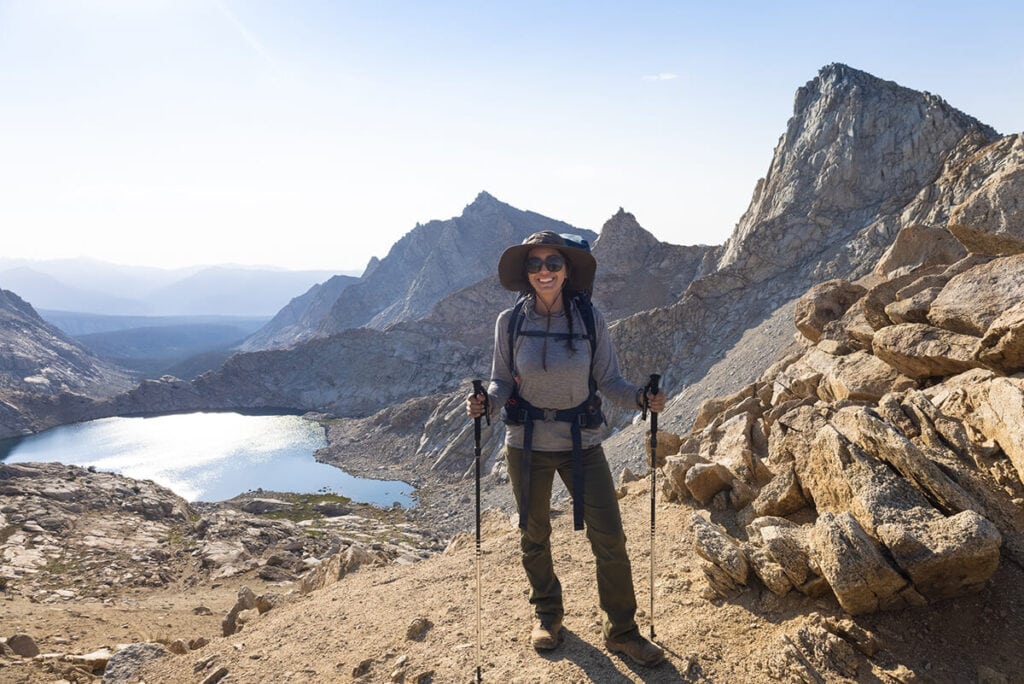
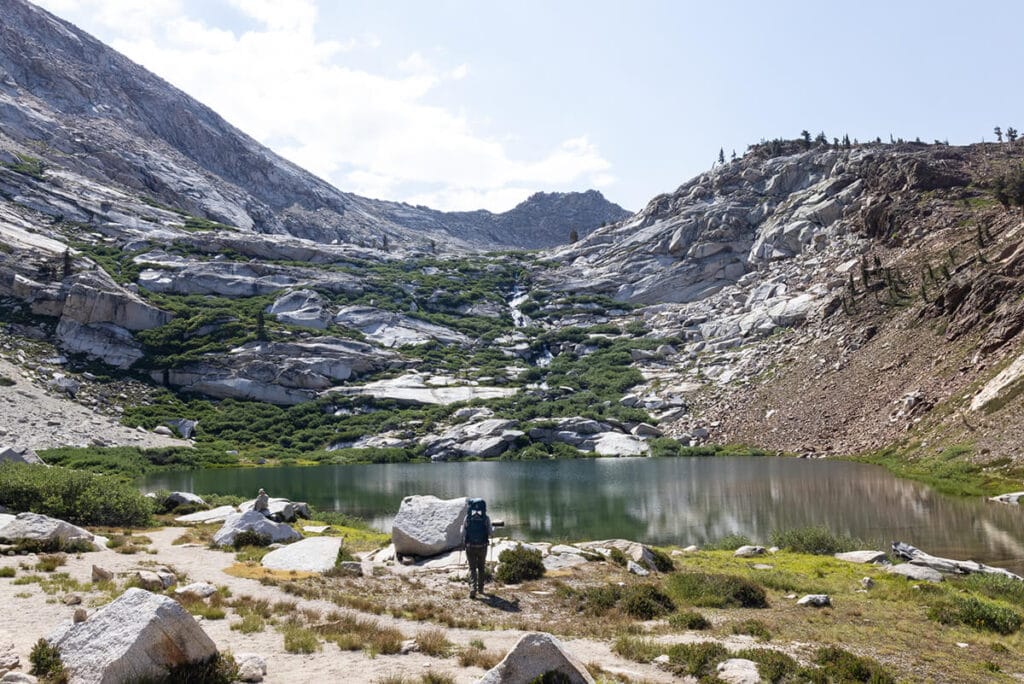
When you reach a small trail junction, take the trail to the right to Little Five Lakes. From here, you’ll have a decent ascent up to Little Five Lakes. The mosquitos thinned out the higher we got. The first lake you’ll get to is beautiful, but if you continue on you’ll get to the largest of the Little Five Lakes which is a great spot for lunch and a swim with views of Black Rock Pass.
From here, you’ll continue to Big Five Lakes, one of our favorite areas on this trip. After 1.7 miles, you’ll see a trail on your right that leads to a few of the lakes – take it. It’s a 20 minute “detour” but will take you to some of the most beautiful lakes in this area and we hardly saw anyone out there. The first lake you get to is beautiful, complete with a sandy shoreline. We continued on to the second lake and were glad we did because it was even more stunning. We saw a number of beautiful campsites along the north shore of the lake, picked one, dropped our bags, and went for a swim. The evening and morning light on the peaks overlooking the lake was beautiful.
Day 5: Big Five Lakes to Columbine Lake
- Distance: 7.72 miles
- Elevation gain: 2,376 ft
- Elevation loss: 1,747 ft
- Highlights: Morning light at Big Five Lakes, Lost Canyon, and sunset at Columbine Lake
Note: As of 2022, camping is no longer allowed at Columbine Lake due to the sensitive alpine environment. Please be respectful of this closure – alternative camping spots are Lost Canyon or Monarch Lakes.
After a leisurely morning at our beautiful campsite on the lake, we hiked the 20 minutes back up to the main trail and then descended to the last of the Big Five Lakes. There were some downed trees on this descent so we had to make a few detours and find our way down along makeshift trails, but soon we were able to connect back to the main trail.
From here, you’ll climb back uphill and then will drop down into Lost Canyon, another spectacularly beautiful section of the trail. Keep an eye out for the junction and the trail to the right that will take you to Lost Canyon and Columbine Lake.
The entire Lost Canyon stretch will take you very gradually uphill along Lost Canyon Creek. You’ll see a few small waterfalls, cascades, and wildflowers depending on when you do this hike (there were lots in mid-July). When you come out of the trees you’ll see a nice big, flat area to the left, across the creek with some nice spots for lunch as well as a really nice campsite. We stopped here for a long lunch break (and even a nap), then decided to continue on to Columbine Lake in the late afternoon to reduce the amount of climbing we’d have to do tomorrow.
Columbine Lake is very exposed and would not be a good place to be during a thunderstorm or strong winds, so don’t head up that way if the weather looks iffy. On this particular afternoon, everything looked clear so we headed to the end of Lost Canyon and started our climb. The climb up to Columbine Lake will take you up a long series of rocky switchbacks but you’ll barely even notice it because the views back down over Lost Canyon and the mountains beyond are just spectacular. We stopped at almost every switchback to take photos.
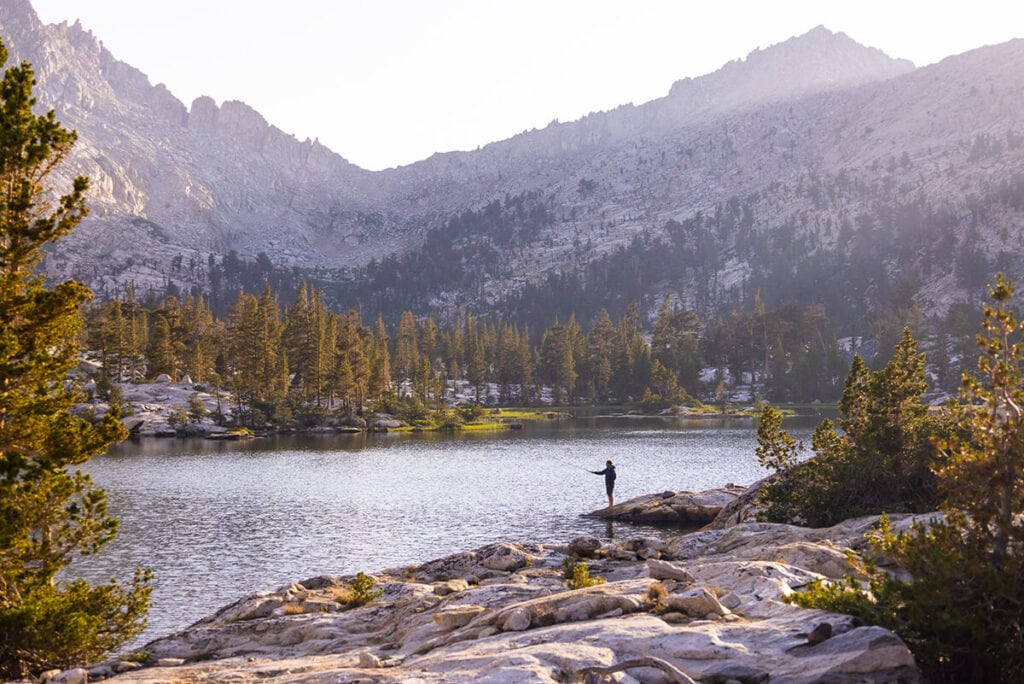
We arrived at Columbine Lake just before sunset and had to do a little scouting to find a campsite with space for two tents. The area around the lake is very rocky and exposed, but if you search around a bit you’ll find a few flat, gravely campsites.
Note: As of 2022, camping is no longer allowed at Columbine Lake due to the sensitive, high alpine environment. Please be respectful of this closure – alternative camping spots are Lost Canyon or Monarch Lakes.

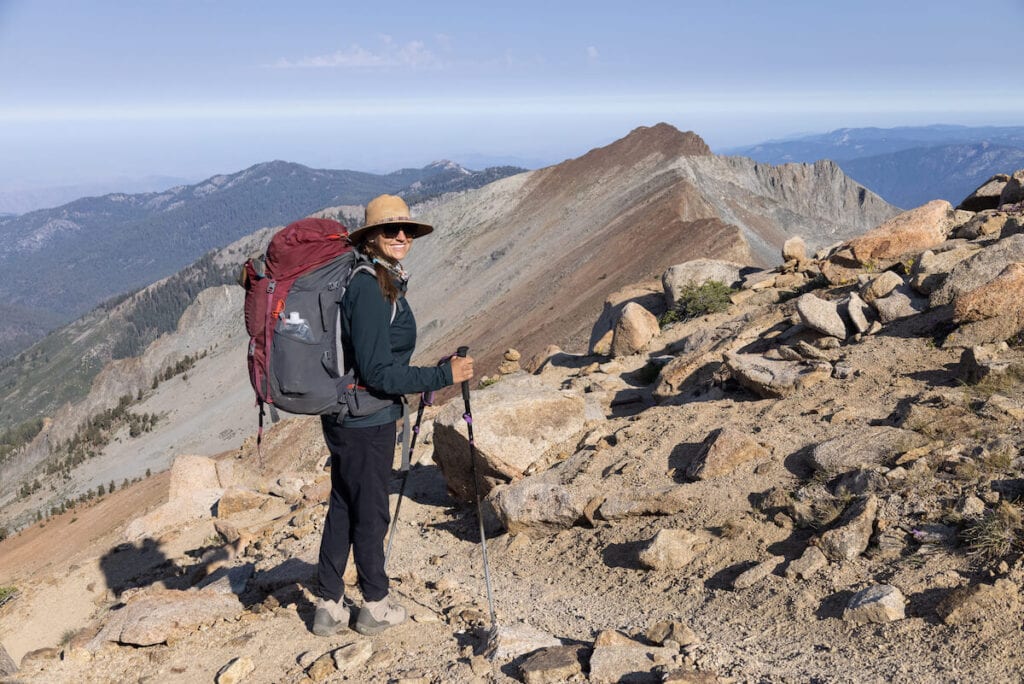
Day 6: Columbine Lake to Mineral King trailhead parking lot
- Distance: 6.22 miles
- Elevation gain: 1,464 ft
- Elevation loss: 4,498 ft
- Highlights: Views over Columbine Lake and the mountains beyond Lost Canyon, views from Sawtooth Pass
Sawtooth Pass, the grand finale, was looming over us so we decided to get an early start before the heat of the day. From Columbine Lake, the climb up to Sawtooth Pass was relatively short (only 0.8 miles), but not easy. At nearly 11,000 ft, we felt the altitude and were a little out of breath as we climbed. The trail is rocky, winds back and forth, and can be easy to lose, but if you keep an eye out for rock cairns they will guide you. You’ll have beautiful views down to Columbine Lake and the mountains beyond Lost Canyon as you climb, and depending on the time of year you’ll see lots of little high alpine flowers along the trail as well.
Sections of this trail are rocky, steep, and sandy so take your time and watch your step. Soon you’ll find yourself at the top of Sawtooth Pass, the highest point of this backpacking route at 11,745 ft. You’ll have expansive views down into the valley below and over to Black Rock Pass and the surrounding peaks. This is a great place to enjoy the views, take some photos, and have a snack before heading down.
The southern side of Sawtooth Pass is composed of mainly loose sand and gravel and the way down is very steep so you’ll likely be sliding a bit as you make your way down. The trail map showed a path to the right which we took and it seemed to be the “easiest” way down. You’ll see a variety of different routes that people have used but this one seemed to be the most traveled and the most gradual (although still steep).
It is really nice to have trekking poles on this section, and you will be so grateful that you’re hiking down, not up. We kept turning around and looking at how steep the trail was going up and talking about how difficult going up looked. In fact, a couple of hikers we ran into on the trail through Lost Canyon the day before said they never wanted to do that again.
As you near the end of your descent, you’ll see Monarch Lakes – an upper and a lower lake nestled into a bowl under Mineral Peak. The trail will lead you to the lower lake which is a nice place for a break, although there’s no shade here. Monarch Lakes is popular for day hikers so you’ll likely start seeing more people from here on out.
From here, you’ll continue your descent, slowly at first, then via a series of long switchbacks. You’ll soon be back in the trees where you’ll find some welcome shade. And before you know it, you’ll be back at the trailhead!
Got any questions about hiking the Mineral King Loop or any experiences to share? Leave a comment below!
Back in the late 50’s to mid 60’s, most summers our Boy Scout Troop would hike from Mineral King, up over Sawtooth Pass down to Columbine Lake. How well I still remember that “trail” up over the pass. It was one step forward and slide three steps backward. We’d camp at Columbine for a week and so day hikes around the area to different lakes each day and fish. It was a wonderful week. We seldom saw anyone else. The hike back over Sawtooth and down to Monarch Lakes was so awesome! We’d pretty much go straight down and slide all the way in the deep sand. One year we hiked from Mineral King up to Mt. Whitney and down the east side of the Sierras. Took 10 days. I really enjoyed reading of your trip and seeing the pictures. They brought back so many wonderful memories of the many trips we made to Mineral King. Thank you.
Thanks for sharing your memories, Dennis!
Thanks very much. i’m a first time reader so this was very helpful. we’re heading up on sept 12 and doing a similar loop but through black rock pass. great tips, pics and insights. thanks again, Terry
Hi, Love this write up. I’m looking for a hike in November. I think this area would be too cold for my gear but I’ve also read that some areas of SEKI the elevation is low enough that it’s a little warmer. Do you have any whether statistics for hiking this area around Thanksgiving? Thanks for any input. 🙂 ( I Have other warmer trips in mind but this hike looks amazing.
I probably wouldn’t recommend this backpacking trip in November. It’s at high elevation so not only will it be very cold, there could also be a chance of snow. It also looks like the road up to Mineral King closes late October through late May. You can find out more and get a weather forecast on this page of the NPS website: https://www.nps.gov/seki/planyourvisit/weather.htm
Hope that helps!
By Thanksgiving, the road into Mineral King is usually lock-gated closed. Also, with much shorter daylight hours, you’ll be restricted in how far you can hike during the day.
However, there are lower-elevation hikes in the general area. Two I’d suggest would be up the Middle Fork of the Kaweah starting at Hospital Rock, and up the South Fork of the Kaweah. Depending on weather conditions, a hike along the initial portion of the High Sierra Trail starting at Crescent Meadow, or a hike to Pear Lake starting near Lodgepole can be good too. Don’t do either of those last two hikes that time of year if winter storms are forecast. Enjoy!
Thanks for those tips, Bryan!
Thank you, I very much enjoyed your post. We are doing the 30 miler in late June this year. We’re all very excited! Last year was the Miter just south of Whitney. That was spectacular, caught so many trout we had to haul half our food home.
Hi Brady, thanks for reading! Sounds like you had a great time last year & are gearing up for another adventure. Enjoy!
Would it be doable to hike the Mineral King Loop you wrote about in 5 days (4 nights), if we were physically prepared/trained?
Hi Tamlyn, it’s doable but you would need to be prepared for long, tiring days with significant elevation gain and loss. We’d recommend arriving at Mineral King and camping at the campground there the day before so you can pick up your permits a day ahead and hit the trail early on your first day. If you pick up your permit the morning of your hike you might find a long line of other hikers (like we did) which will delay your start. Enjoy your trip!
Hello! For any future hikers using this as a guide, camping is no longer allowed at Columbine Lake. The rangers said that there isn’t enough soil for a proper cat hole and that they’ve closed it for the forseeable future because it has been “loved to death”. As alternatives, there are a couple spots in the Lost Canyon before the switchbacks and several at Monarch Lakes.
Thanks for letting us know of this change! We’ve added this info in twice in our post so people can plan accordingly. Thanks for the alternate campsite recs too – hope you had a great trip!
The detail and effort you put into documenting your trips makes me feel way more confident going into a BP trip with our group. We plan several of our own trips each year, but copying your posted adventures has taken us to some fantastic places with the major advantage of a tried and true plan. Paria canyon, Catalina island and lost coast to name a few were well done and gave us experiences of a lifetime. Thanks for all the work!!!
Hey John – Thanks so much for letting me know this. It’s so great to hear when people use my trip guides and have successful adventures. Where to next?
Love this post! I grew up in Visalia yet never made this trek. Do you have a link or a plan for doing the shorter version you mention?
We’re doing this exact trip starting July 15. Thanks for your detailed info and insights. Your article is very helpful and we should be well prepared because of it. The info on the campsites was particularly appreciated, it’s hard to get that from a topo.
Happy trails.
Thanks for the thorough trip description! My sons and I are experienced backpackers and have considered this area for several years, but I’m not fond of heights and don’t think I’d like the drop offs at Hamilton Gorge from the videos I’ve seen. How long is that section and is there a way to avoid it?
Hi Greg – That section can be hiked in 1-2 hours. There is no way to avoid it on this loop. However, the trail is never too narrow or sketchy in any way.Hope that helps and hope you do the trip!
This may be a crazy question but, Ive slept in my hammock the past dozen or so trips to Wind River Range, Wyoming. So crazy comfortable it’s gonna be difficult to give it up. In your opinion, would this trail be hammock friendly?
I think so, but you wouldn’t be able to stay at all of the same campsites I did. Sawtooth Lake had no trees.