Ultimate Guide to Taking Great Hiking Photos: Outdoor Photography 101
Improve your outdoor photography skills with beginner-friendly tips on how to take good hiking photos from composition to equipment & more
Love outdoor photography? Looking for tips on how to take good hiking photos? You’ve come to the right place! As someone who loves to get outside and explore hiking trails, I also love capturing hiking photos to share with friends, family, and the Bearfoot Theory community.
However, I know that during a long day of hiking, many people decide that getting their camera out poses too much of a challenge, the light isn’t good anyway, and there are a bunch of other people in the way ruining their perfect shot.
Those people walk away with no memories captured as images and often wish they had mementos of their adventures.
After years of blogging and taking photos of my hiking adventures, I’ve learned a thing or two about best practices for taking great hiking shots.
In this post, I share my best tips and detailed information on how to take good outdoor photos so you can always look back on fantastic memories of your days out on the trail.
This post may contain affiliate links.
The Basics of hiking photography
If you want to take great hiking photos, you’ll need to learn the basics of how your camera works and what makes a good photograph.
1. Understand your camera
Understanding the basics of your camera as well as basic camera settings will allow you to move away from shooting in auto mode and will give you more control over your photos.
There are three factors that affect how a photo comes out: shutter speed, aperture (or f-stop), and ISO. If you can get a handle on what each of these settings does, you’ll be more able to create the type of image you see in your mind.
It can be a bit tough to get these three settings to work in unison to achieve the image in your mind, but the more you practice the more it will become second nature and you will grasp a total understanding of what each setting does.
You should also familiarize yourself with your camera’s different modes, such as landscape, portrait, and macro. However, while auto-modes can work wonders, learning manual settings can offer greater flexibility.
Tips for Taking Hiking Photos When Shooting in Manual
If you’re trying to learn how to gain better knowledge and control of your camera, shooting in manual mode is a great way to practice.
- Choose a shutter speed fast enough that the image is not blurry. If your hiking subject is blurry in your photos, your shutter speed could be too slow (meaning your shutter is open too long). As a rule of thumb, if you are shooting handheld and want a crisp photo with no movement, you want your shutter speed to be faster than 1/30 of a second.
– - Next, set your aperture or f-stop. If you would like your subject in focus and the background out of focus, use a wide-open aperture, such as f2.8 (depending on your lens). If you would like as much of the image as possible to be in focus (both the foreground and the background), choose a smaller aperture (higher f-stop number), like f8 or higher.
– - And finally, set your ISO, which you generally want to set to the lowest number possible based on your aperture and shutter speed settings.
2. Rule of thirds
Imagine breaking an image down into thirds both horizontally and vertically, so it’s split into nine parts. The rule of thirds suggests that subjects or points of interest should be placed along these lines or at their intersections.
This technique often results in more balanced and engaging photos, guiding the viewer’s eye across the frame.

3. Depth of field
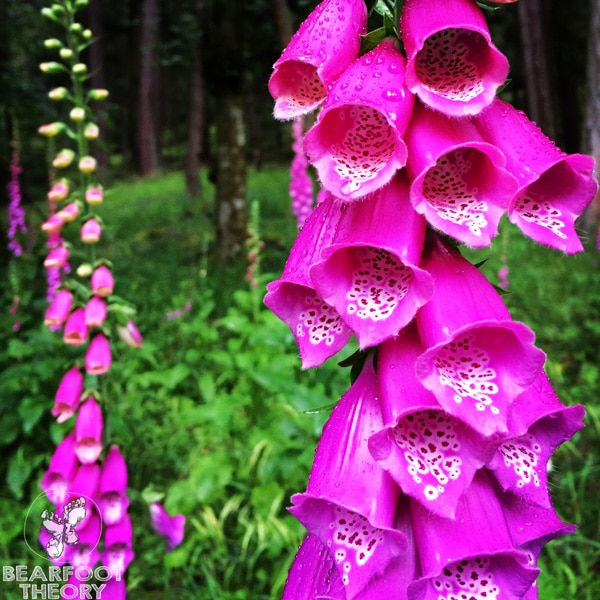
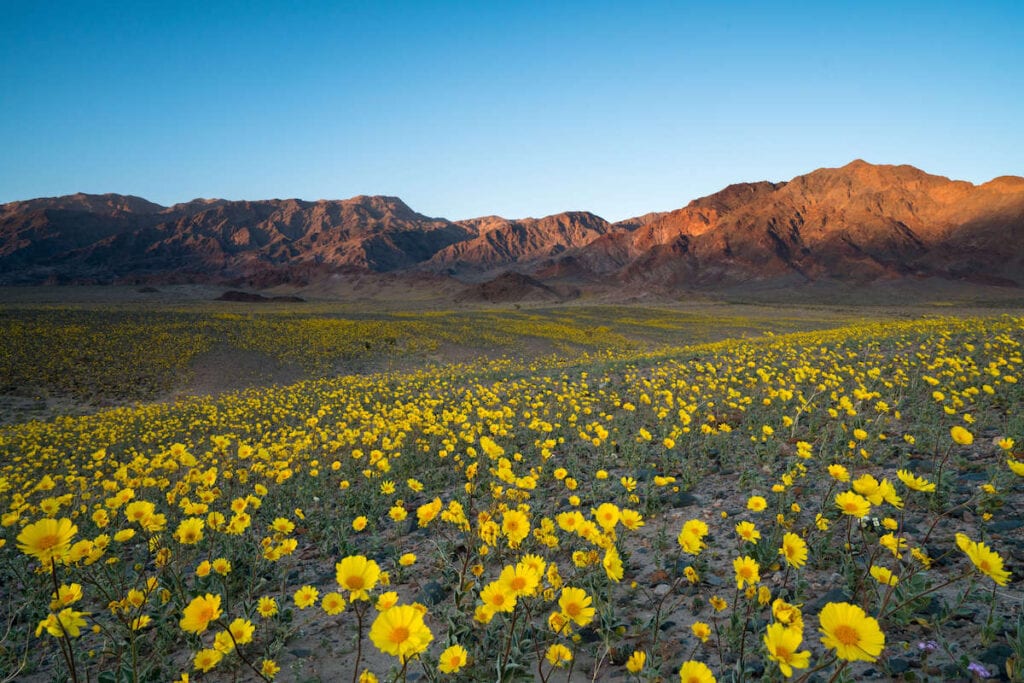
Depth of field (DoF) refers to the range within a photo that appears sharp. A shallow DoF can be used to isolate a subject (like a wildflower or hiker) from the background, making it stand out. A deeper DoF keeps more of the scene (like an expansive landscape) in focus.
The aperture (f-stop) controls DoF. Lower numbers (e.g., f/2.8) give a shallow DoF, while higher numbers (e.g., f/16) provide a deeper one.

Shallow DoF 
Deep DoF
4. Mastering lighting
You’ve probably heard the importance of light when it comes to photography. There are different types of light and each type will greatly affect your hiking photography.
5. Experimenting with perspective
Changing your viewpoint can drastically alter the feel and look of a photo. Try crouching low for a ground-level shot or climbing higher for a bird’s-eye view.
You might also want to think about the foreground, middle ground, and background. Incorporating elements in each can add depth and dimension to your images.
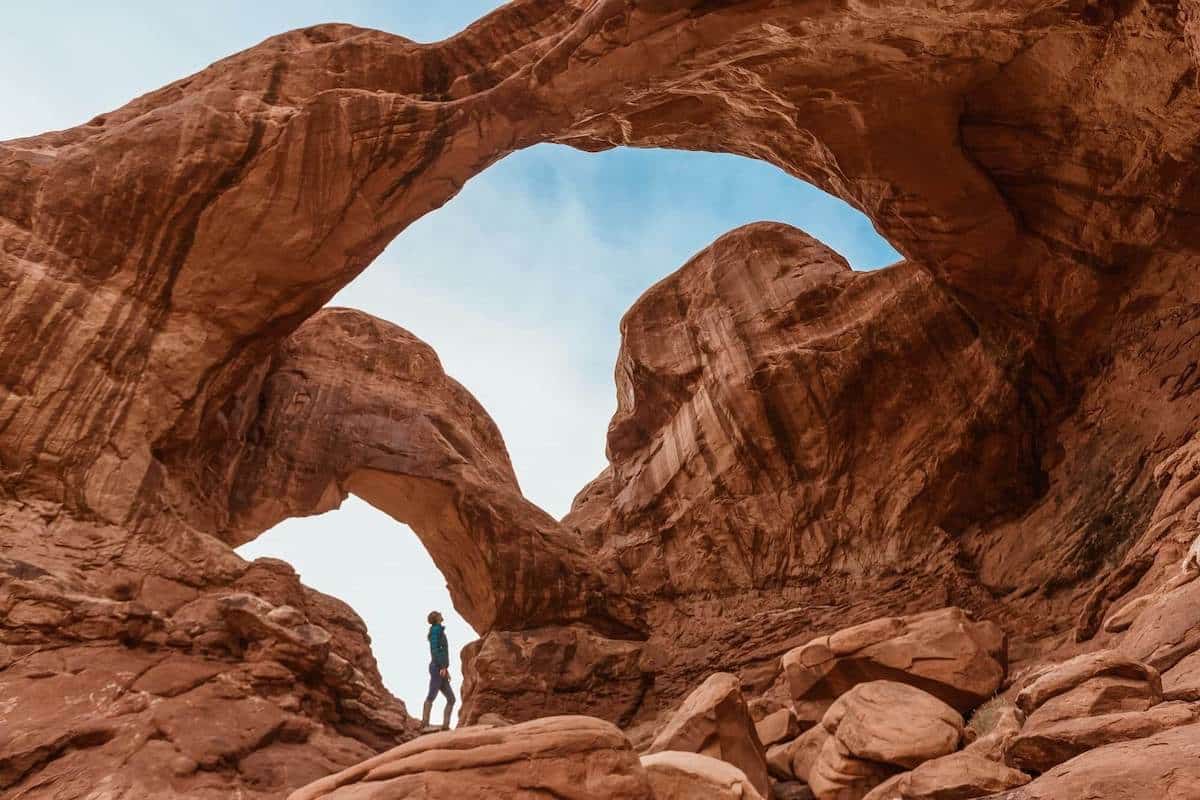
6. Using color
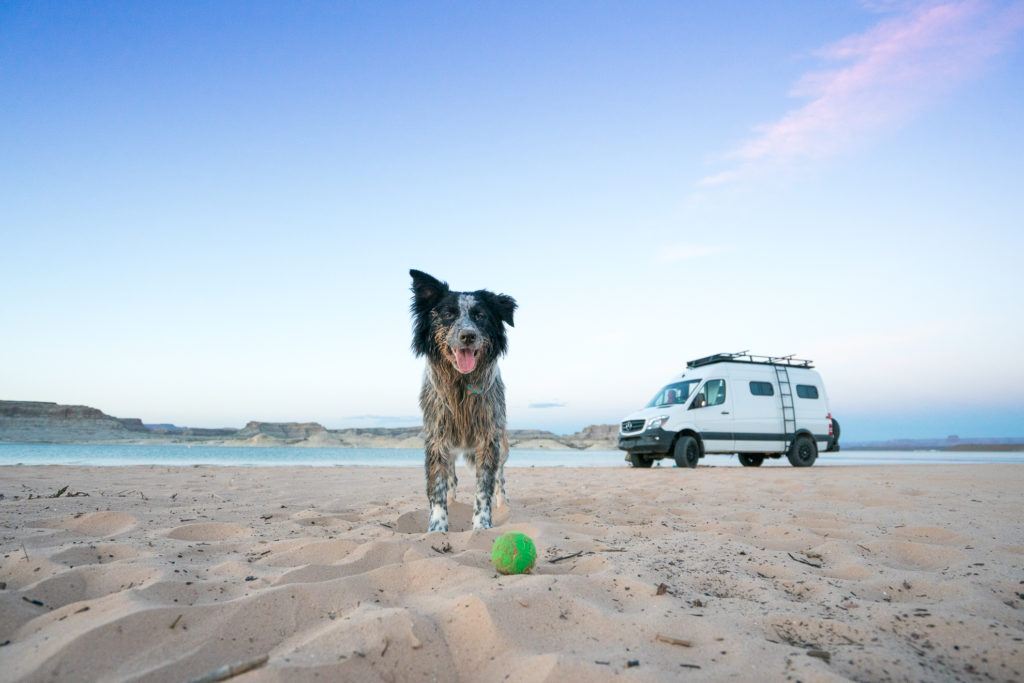
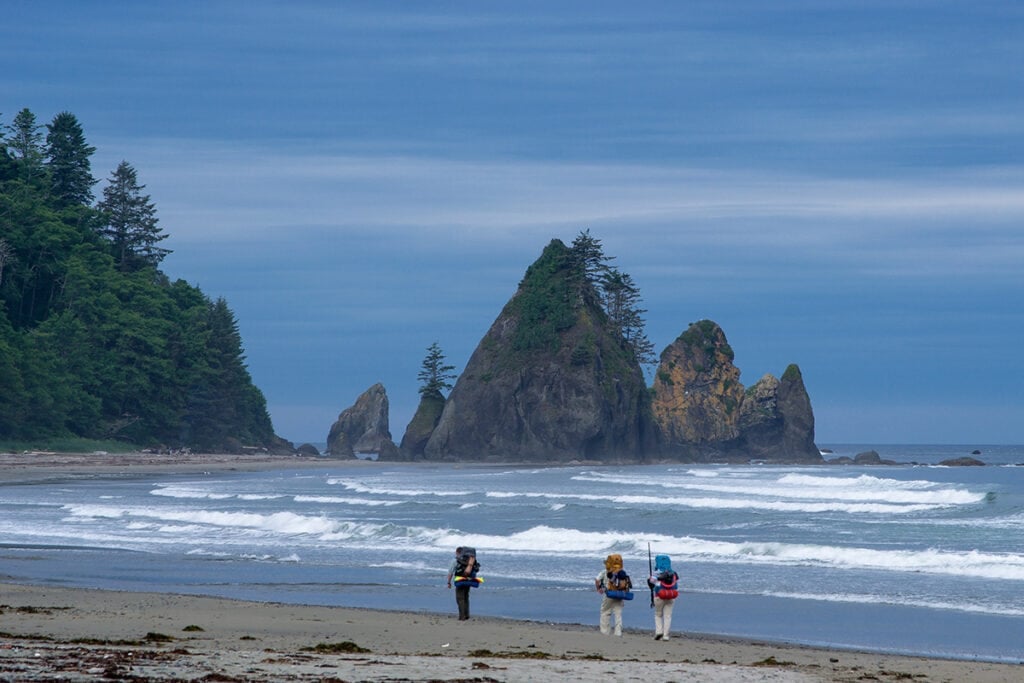
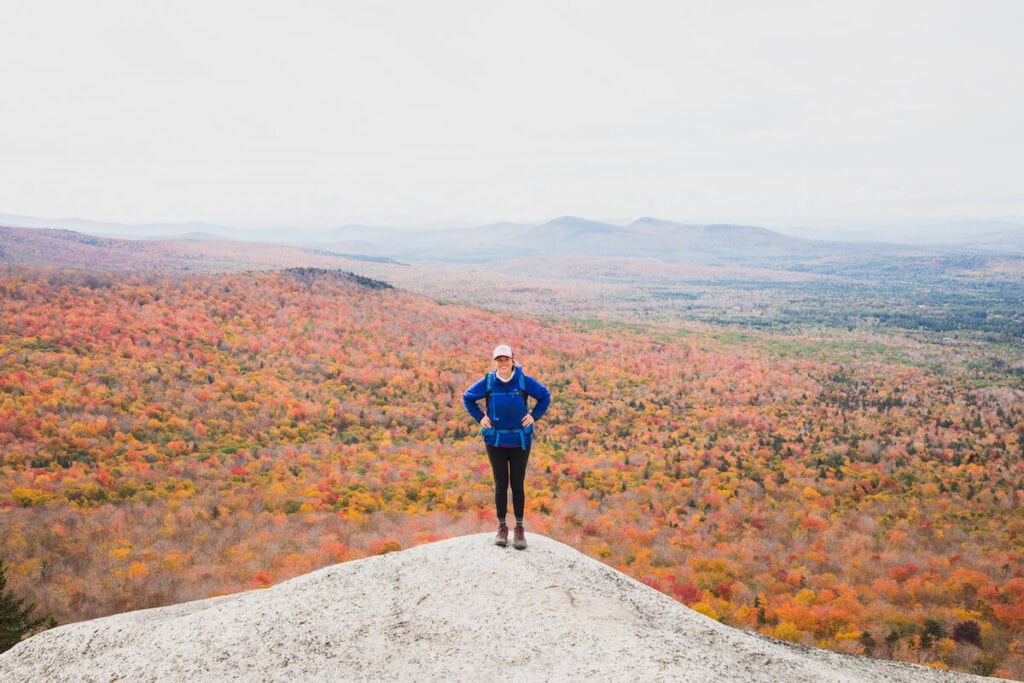
You want your hiking subjects to pop out of the scene, so tell your hiking buddies to wear bright colors.
You can also think about where you are hiking and if possible frame your subject in colors that complement the background.
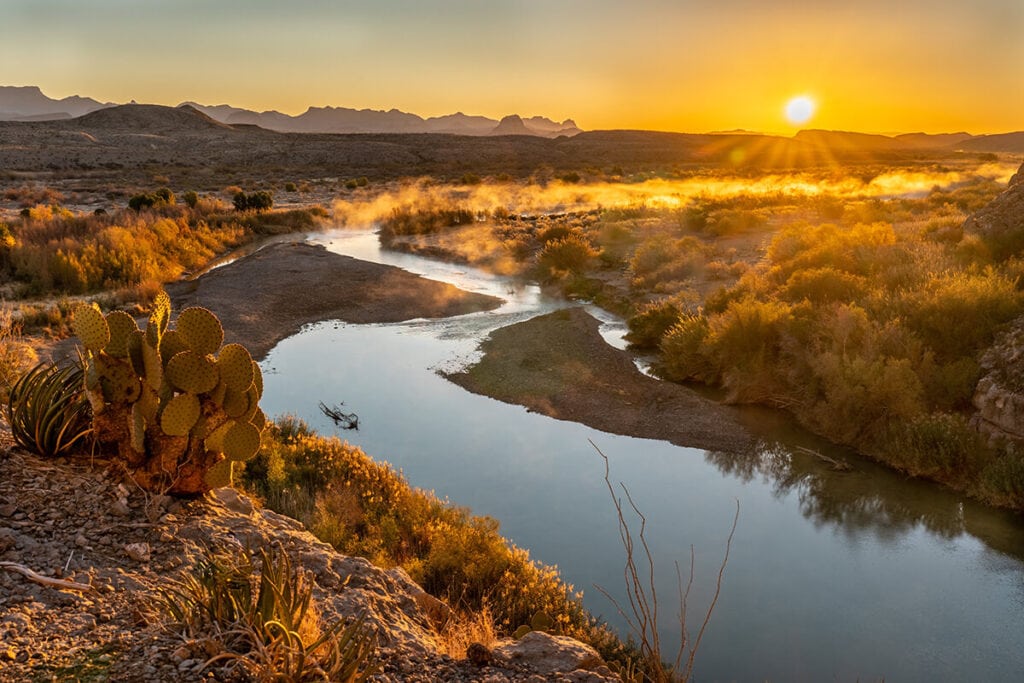
For example, if you are hiking around a blue glacial lake have your subject wear red, and if you are hiking through the red rock desert have your subject wear blue.

7. Telling the story
Going on a 3-day backcountry adventure? Make sure you capture all the styles of shots that effectively tell a story. That includes detail shots, wide landscapes, and hero or action shots.
Detail shots might include something like close-ups of setting up the tent. The wide landscape shots will be your friends at that gorgeous viewpoint, and the action or hero shot can be an emotional portrait of the hiking uphill struggle or your friend’s jubilant reaction to making it to the camp spot for the evening.
Going on a smaller day hike? You can tell that story in a slightly different way. Show packing your bags with headlamps on before sunrise, get the shot of hiking along as the sun rises, and of course the obligatory viewpoint or summit shot.
Don’t forget to capture the small things, too; animals on the trail, snack breaks, and filtering water all make for great detail shots and pieces to fill in the story puzzle.
8. The power of patience
Nature is unpredictable. Sometimes, waiting for the right moment — be it the sun peeking from behind clouds, wildlife appearing, or wind rustling through trees — can make all the difference in capturing a magical shot.
9. Practice makes perfect
The more you shoot, the better you’ll get. Every hiking trail offers countless opportunities to experiment with these basic principles.
Review your shots, understand what works and what doesn’t, and continually refine your technique.
Save this post!
Enter your email & I'll send this post to your inbox! You'll also receive my weekly newsletter full of helpful advice for planning your adventures.
Choosing the right gear
Selecting the right photography gear for hiking can mean the difference between an enjoyable experience capturing stunning landscapes and a frustrating one burdened with inappropriate equipment.
Considering the unique challenges of hiking, such as changing weather conditions, terrain variability, and the need to be mobile, here’s a comprehensive guide to ensure you’re well-prepared:
1. Type of camera
Cameras come in all shapes and sizes and each type of camera for outdoor photography will have its pros and cons.
Where to shop
2. Lenses
Many photographers will argue that lens choice is more important than the camera body if you have a DSLR or mirrorless camera.
Depending on how you want your photo to look, there are different lenses that will accomplish different things.
>> Shop camera lenses at:
3. Tripods
Tripods provide photographers with stability, ensuring sharp images and the ability to capture long exposures without camera shake.
You probably won’t want to bring a tripod on every hike, but they are good for lowlight and wildlife photography.
Here are a few types of tripods to consider:
>> Shop camera tripods at:
4. Filters
Filters modify the light entering the lens, allowing photographers to enhance colors, reduce glare, manage exposure, and achieve specific creative effects in their images.
Filters require a more advanced understanding of photography, but if you’re eager to learn, here are a few filters to consider for hiking:
>> Shop camera filters at:
5. Camera Bags and Protection
Camera gear isn’t cheap, so you’ll want to make sure it’s well-protected when you head out on your hikes to prevent anything from getting damaged. You also want to make sure you’re comfortable hiking on the trail with your gear.
Here are a few ways to protect your camera gear out on the trails:
>> Shop camera bags at:
6. Weatherproofing
If you know you’ll be hiking and shooting in wet conditions, take extra precautions to protect your camera equipment from the rain.
7. Batteries and Storage
If you’ve ever run out of batteries in your camera or storage on your disc, you know how much of a bummer that is, especially if the best part of the hike is yet to come.
Don’t let that happen to you by packing extra batteries and a spare card.
8. Miscellaneous Accessories
There’s no shortage of camera gear and accessories, but we covered the most important ones above.
Here are two more items you might want to consider taking with you on hikes:
When choosing camera gear for your hikes, it’s essential to strike a balance between functionality and weight.
The best setup is the one tailored to your specific needs, ensuring you’re equipped to capture the beauty of the hike without being burdened by unnecessary gear.
Using natural lighting to your advantage
Natural light, with its varying intensities and colors, plays a pivotal role in shaping the mood, texture, and depth of photographs.
Embracing natural light requires patience, observation, and adaptability. By understanding its nuances and being ready to adjust your approach based on the conditions, though, you can transform ordinary scenes into extraordinary photographs.
Here’s how you can make the most of different natural light situations on hikes:
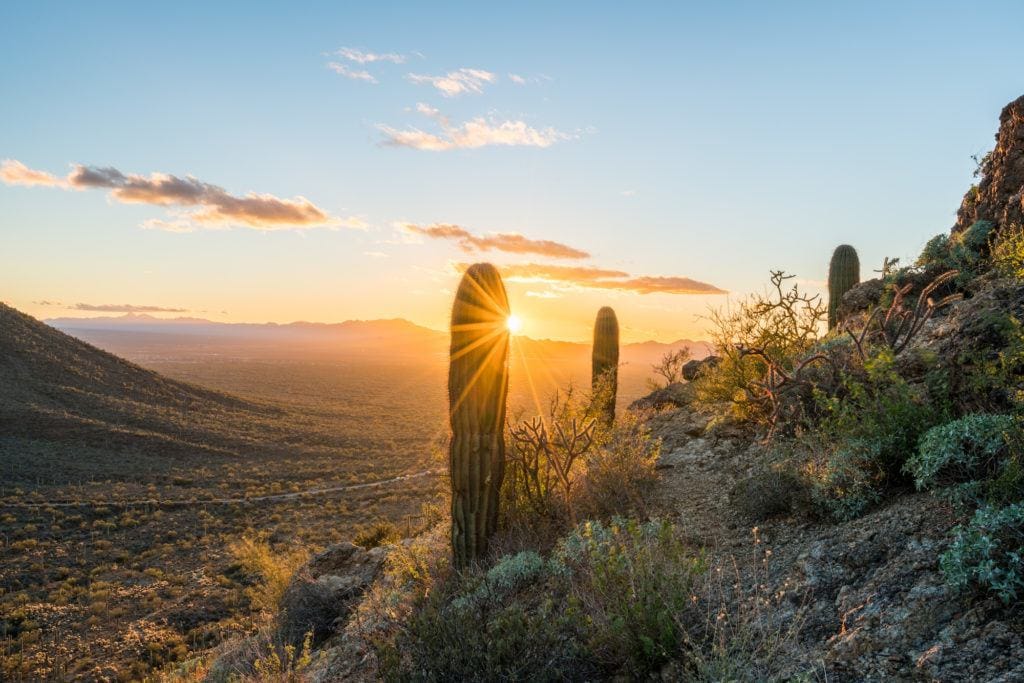
Golden Hour Magic
Occurring shortly after sunrise and just before sunset, the golden hour bathes landscapes in a warm, golden hue.
This soft, diffused light minimizes harsh shadows and highlights, giving photos a dreamy, ethereal quality.
It’s an ideal time for:
By getting up early and heading back out just before sunset, you’ll not only get to capture that beautiful golden hour light, but you’ll also see way fewer people along the trail.
Most people are asleep when the sun rises and eating dinner when the sun sets, so if you adjust your schedule a little bit you can enjoy beautiful spots without the crowds.
Read next: Want to get away from the crowds? Read our tips for visiting overcrowded National Parks.
Harnessing the Blue Hour
Just before sunrise and right after sunset, the sky adopts a deep blue shade.
This lighting is perfect for:
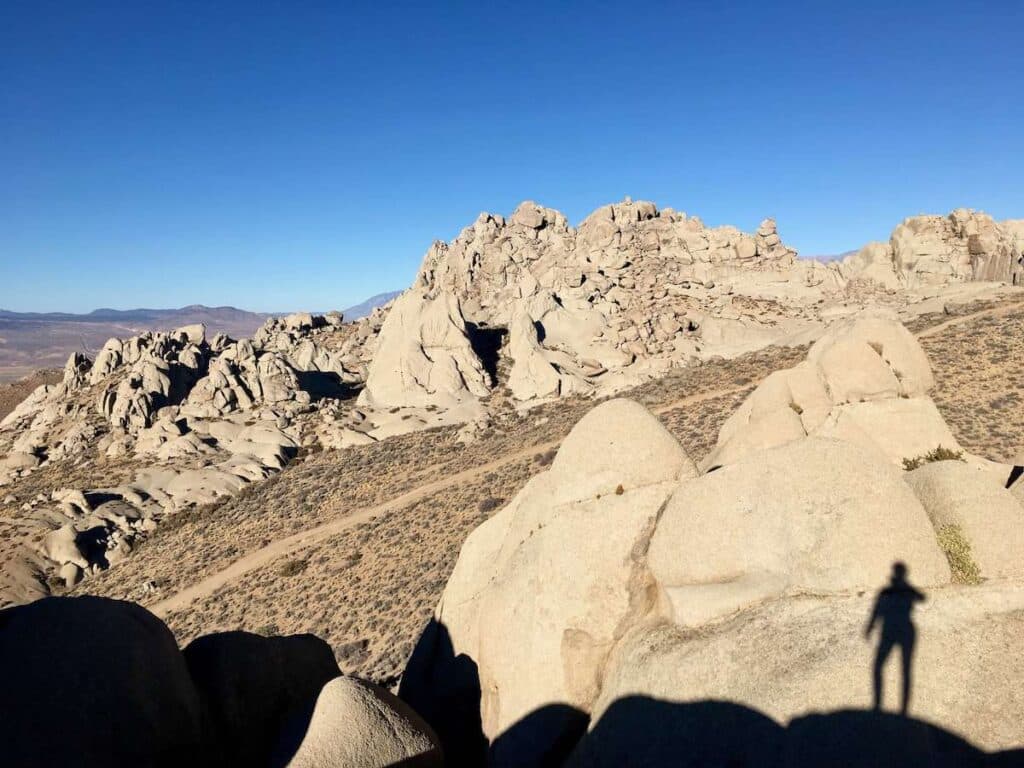
Midday Challenges & Opportunities
The sun at its zenith often results in harsh, contrasting shadows and overexposed highlights.
While photographing in this light is challenging, you can use it to your advantage by:
Clouds as Natural Diffusers
Overcast conditions scatter sunlight, producing soft, even lighting. This diffused light is great for:
Manipulating Direction
Where you stand in relation to light will have a profound effect on the outcome of the photograph:
Using Reflectors
Even in natural settings, using a reflector can bounce light onto shadowed areas of a subject, balancing exposure and illuminating details.
This is particularly useful in portrait photography.
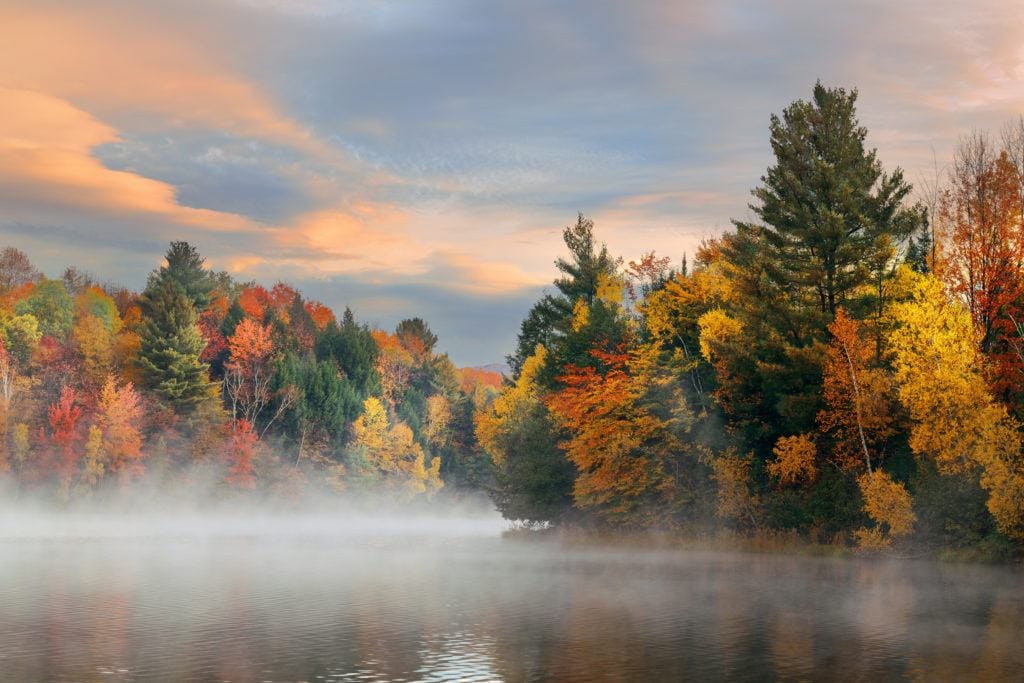
Capturing Atmospheric Phenomena
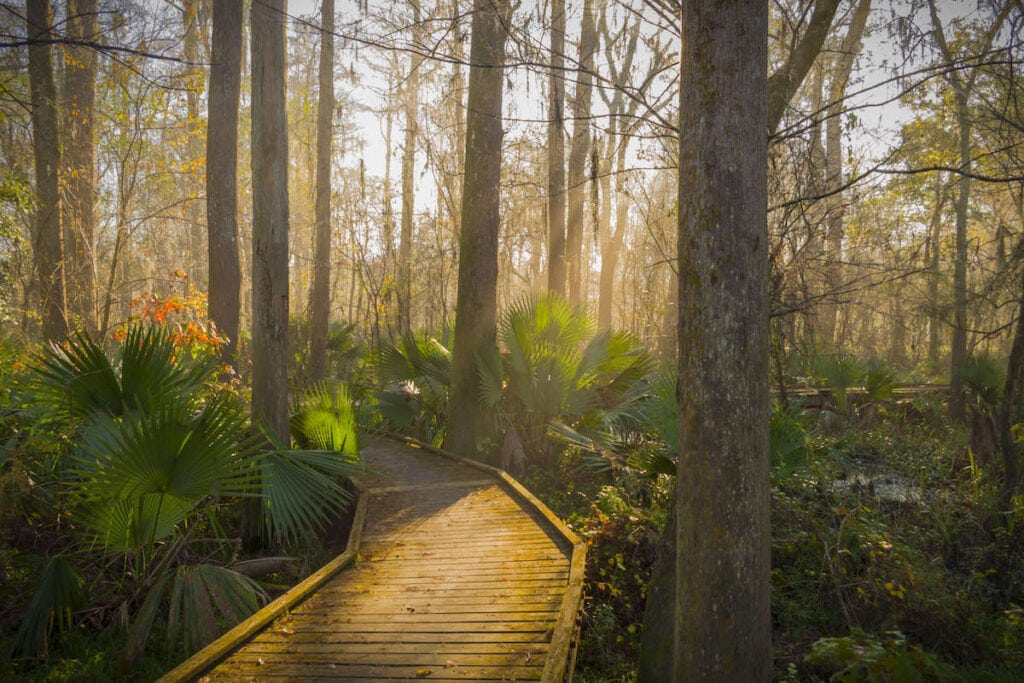
Embrace elements like mist, fog, and rays of light filtering through trees or clouds. They add layers, mood, and a sense of depth to photos.
Understanding Color Temperature
The color of natural light changes throughout the day. Dawn might offer cool, bluish tones, midday brings neutral to slightly warm hues, while sunset often provides a warm, golden glow.
By recognizing these shifts, photographers can anticipate the mood their photos will convey.
Framing and composition
In photography, framing and composition are important elements that guide the viewer’s eyes and emphasize the subject, creating a balance between the various components in an image.
Proper framing and composition can turn a simple scene into a compelling story.
Let’s dive deeper into the techniques and considerations:
Rule of Thirds
Imagine dividing your image with two horizontal and two vertical lines, creating a 3×3 grid.
Positioning your subject or points of interest at the intersections of these lines can lead to a more balanced and visually interesting photo.
Leading Lines
These are lines within an image that guide the viewer’s eye toward a focal point. It could be a road, a river, train tracks, or even patterns in the sand.
Leading lines create depth and dimension, drawing the viewer deeper into the image.
Symmetry and Patterns
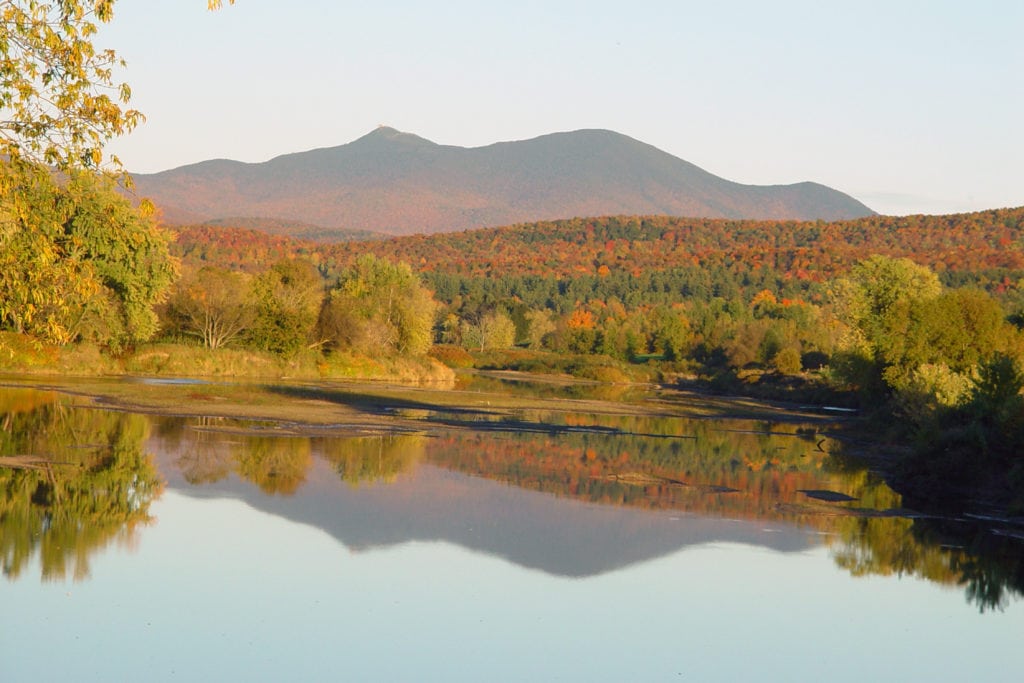
Symmetry provides a sense of harmony and proportion. Reflective water, architectural structures, or even shadows can provide opportunities for symmetric compositions.
Patterns, whether natural or man-made, create visual rhythm. Breaking a pattern can emphasize the subject and add intrigue.
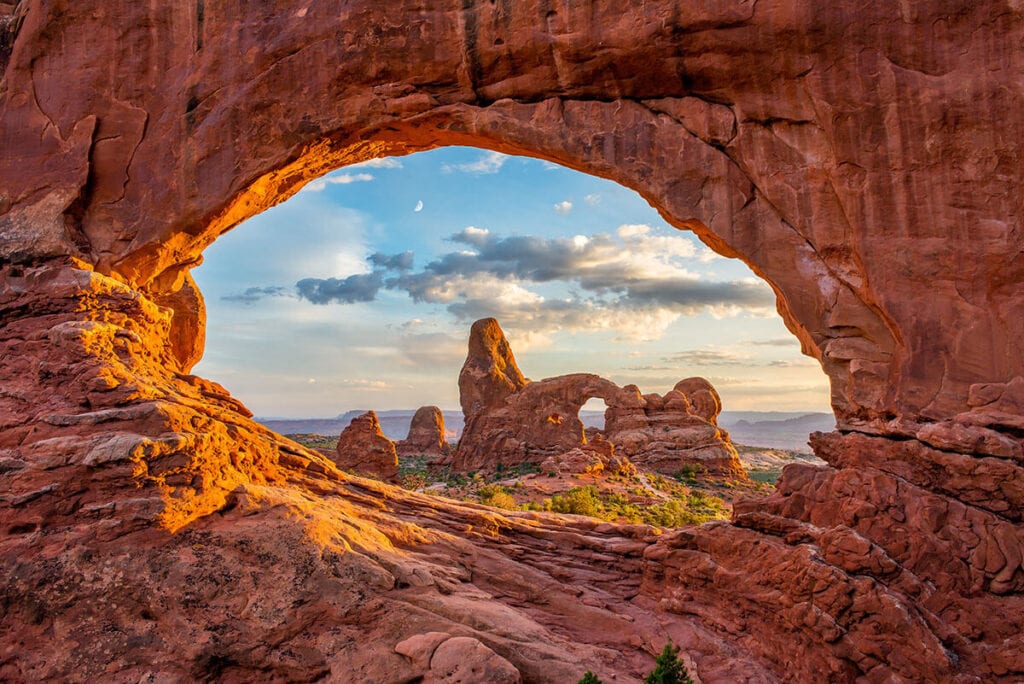
Framing Within a Frame
This involves using elements within the scene (like archways, trees, and windows) to frame the main subject, adding depth and context.
This technique can guide the viewer’s focus directly to the primary subject while providing a sense of location.
Rule of Space
If the subject is moving or looking in a certain direction, leave space in front of it. This gives the subject room to “move” or “look” into, creating a more dynamic composition.
Foreground Interest
Incorporating interesting elements in the foreground can add depth to a scene, especially in landscapes.
This helps create a layered effect, guiding the eye from the front to the back of the image.
Fill the Frame
Sometimes, getting close and filling the frame with your subject can lead to powerful images. This technique eliminates distractions and emphasizes details and textures.
Depth
Using elements in the foreground, midground, and background can give a three-dimensional feel to a two-dimensional image. This layering effect makes viewers feel like they can “step into” the scene.
Isolation and Negative Space
When taking hiking photos, the person or subject you are photographing can easily get lost in the background noise of the photo.
Place them over a solid-colored background or in an empty space in the shot instead of over a busy backdrop.
This way they really pop off the photo and draw your eye around the image accordingly.
Perspective and Angle
Changing your shooting perspective (e.g., getting low to the ground or climbing higher) can dramatically alter the feel of a photo.
Different angles can make subjects appear larger, smaller, more dominant, or more submissive.
Balance and Weight
Elements in a photo carry visual “weight.” Balancing these elements (like placing a smaller subject opposite a larger one) can create equilibrium in an image.
Conversely, intentional imbalance can add tension and interest.
Editing and post-processing
Post-processing, while powerful, should be approached with intention. The goal isn’t just to modify, but to enhance while still staying true to the original photograph.
Editing and post-processing is a huge topic, but here are the basics to get you started:
Raw vs. JPEG Processing
Raw files contain all the data from the camera sensor, offering greater flexibility in editing. Adjustments to exposure, white balance, and more can be made without degrading image quality.
JPEG files, on the other hand, are compressed files with certain camera settings baked in. While easier to share, they have less flexibility in post-processing than raw files.
You’ll need to decide before you take your photos whether you want to shoot in raw or JPEG format.
Exposure Adjustments
Adjusting the exposure can brighten an underexposed image or tone down an overexposed shot.
Highlights and shadows sliders can also help recover details in bright or dark areas.
White Balance and Color Correction
White balance ensures colors are represented accurately. Adjusting it can remove unwanted color casts or introduce creative tones.
Color correction tools can enhance or mute specific colors in the image.
Cropping and Composition
Cropping allows photographers to eliminate distractions, improve composition, or focus on specific details.
Composition tools like grids or a golden ratio overlay can aid in achieving the desired framing.
Sharpening and Noise Reduction
Sharpening enhances the details and edges in an image while noise reduction tools smoothen out grain or digital noise, especially in images taken with high ISO settings.
Retouching and Healing
Tools like the clone stamp, healing brush, or spot removal can be used to correct blemishes, remove unwanted objects, or fix imperfections.
Tonal Adjustments
The levels and curves tools allow for precise control over the tonal range, enhancing contrast and adjusting the brightness and darkness of specific tones.
Color Grading
Beyond basic color correction, color grading is about adding a mood or aesthetic to the image.
By manipulating colors, shadows, and highlights, photographers can convey different emotions or styles.
Filters and Effects
From vintage to cinematic looks, filters and presets provide pre-configured settings to achieve certain aesthetics.
While they offer a quick solution, understanding the underlying adjustments helps in customizing them effectively.
Local Adjustments
Tools like the graduated filter, radial filter, or adjustment brush in software like Lightroom allow for editing specific parts of an image without affecting the whole.
Layering and Blending
In programs like Photoshop, images or adjustments can be layered, allowing for complex edits, composites, or blends. Layer masks enable precise control over where effects are applied.
Safety and ethics in hiking photography
When venturing into nature with the intent to capture its beauty, photographers must prioritize both safety and ethical considerations.
Prioritize Personal Safety
A great photo isn’t worth it if you’re risking your own personal safety. Here are a few reminders on how to stay safe while hiking:
Respect Wildlife
Rule number 1 of outdoor photography is to respect wildlife. ΩNot only is this important for your own personal safety, but also the safety and well-being of the animals.
Read next: Stay safe when photographing wildlife with our post on Wildlife Safety Tips & How to Prevent Dangerous Encounters.
Tread Lightly on the Environment
Follow the Leave No Trace Principles when hiking and photographing. This includes:
Ethical Considerations
Not everyone or everything wants or should be photographed. Be considerate when photographing certain subjects and follow these guidelines:
READ NEXT
Looking for more hiking and outdoor 101 tips? Check out these related blog posts:
What questions do you have about how to take better hiking photos? What outdoor photography techniques have you found work for you? Let us know in the comments below!

I get these posts on Flipboard. “How to Take Great (fill in the blank) Photos? I say, don’t give taking great photos another thought: if you enjoy hiking, if you like dragging a camera with you do so. Just don’t forget to take out the camera and turn it on. The shots will take care of themselves. If you go to Arches National Park, or Zion, or Sedona, AZ. You’d be surprised at how fantastic your images are. You can shoot them out a coffee shop window. On the other hand,great photography takes years to develop. Go to Asher Kelman’s Open Photography Forum and see how high the bar can be set. It involves study, practice, purpose, theme, composition, skill, an aesthetic. Plus talent. But it starts with just taking photos. Go for it.
I love how in depth this post was! Thank you so much for this! I’m a newbie at all things camera so this was super helpful!
One thing I was curious about. Once you’re done with your adventures, how do you store your gear? I moved to Minnesota recently where it gets super damp and moist. Up until recently, I kept my camera and lenses in my camera bag with handful of silica packets but clearly, that didn’t cut it when it’s super humid so I bought an “air tight” plastic container box, put all of my gear in there with silica packets. I’ve also heard that putting newspaper in works? Wandering how you would keep your camera gear in such weather….
Thank you!
Hi Rebecca – I’ve only ever needed to store my gear in a normal camera bag, but I live in Utah where the climate is really dry. You might consider something like a Pelican case. These are air tight, water tight cases made for storing camera gear.
These are great tips! Any suggestions on a place to print out the photos?
I haven’t printed out my photos in a long time, but I’d find an online service or a local photography store over going somewhere generic like walgreens.