Aluminess Review: Sprinter Van Roof Rack & Storage Accessories
Aluminess makes exterior accessories and storage solutions for Sprinter Vans. This post has a detailed Aluminess review with pros and cons & a video tour of the Aluminess gear I installed on my Sprinter Van.
When I was designing my Sprinter van, I wanted an open layout that would allow me to walk all the way down the aisle from the driver’s seat to the back door of the van. My Sprinter Van floor plan is great for creating a livable workspace. However, with this open floor plan, I’ve sacrificed some of the storage space that comes with more traditional builds, like the “garage” you see under platform-bed layouts. My 144″ wheelbase Sprinter van had plenty of room inside for basics like food, clothing, and bedding, but my Sprinter Van couldn’t really accommodate any of the bigger toys and gear that you might want when you are on the road for extended periods of time. I wanted the ability to bring a stand-up paddle board or kayak with me, as well as a camp table, a portable grill, and other things to make camp and road tripping a little more exciting. I also needed a place to put my spare tire since I used that space underneath the van for my heater.
While browsing adventure-mobiles on Instagram, I kept seeing beefy looking roof racks and boxes made by a company called Aluminess. After learning more about Aluminess and chatting with other Sprinter owners who have their gear, I decided to have Aluminess outfit the exterior of my Sprinter van with a custom Aluminess roof rack, side ladder, and swing arm rear bumper with a storage box and spare tire rack. In this Aluminess review, I share all of my thoughts on my new Aluminess gear along with pros and cons of each piece, so you can decide if it’s the right option for you.
This post may contain affiliate links.
Aluminess YouTube Video
All of Aluminess’s products are made in the US, right in their factory located just outside San Diego, and everything is welded out of aluminum and then powder coated to create the nice black finish. Aluminum is a good option for van accessories because despite being strong and durable, it is a lightweight material and doesn’t add a whole lot of weight to your van. This YouTube video walks through each Aluminess piece on my Sprinter Van in detail:.

Save this post!
Enter your email & I'll send this post to your inbox! You'll also receive my weekly newsletter full of helpful advice for planning your adventures.
Aluminess Sprinter Roof Rack
All of Aluminess’s roof racks are custom, and the process begins with you measuring out your roof. They make racks for Sprinters, Ford Transits, Sportsmobiles, and other vehicles. When you are designing your Aluminess roof rack system, you’ll need to tell them if you have a roof vent, AC unit, or solar panels, along with the exact dimensions and where each component is located. You also tell them what you want to use the rack for and other items you might want to store up there, including whether or not you want a roof box. When they are welding your rack, they will make cut-outs for all of these things you already have on your roof, and depending on what else you might want to store up on your roof, they can recommend any cross bars and additional mounts that you might want added to your rack system.
I worked with Kenny on the sales team throughout the whole process of designing my rack, and he was extremely helpful (and patient) in answering all of my questions. I wasn’t 100% sure what I’d be storing up there, and from my initial call until the final OK, he spent hours on the phone walking me through my options.
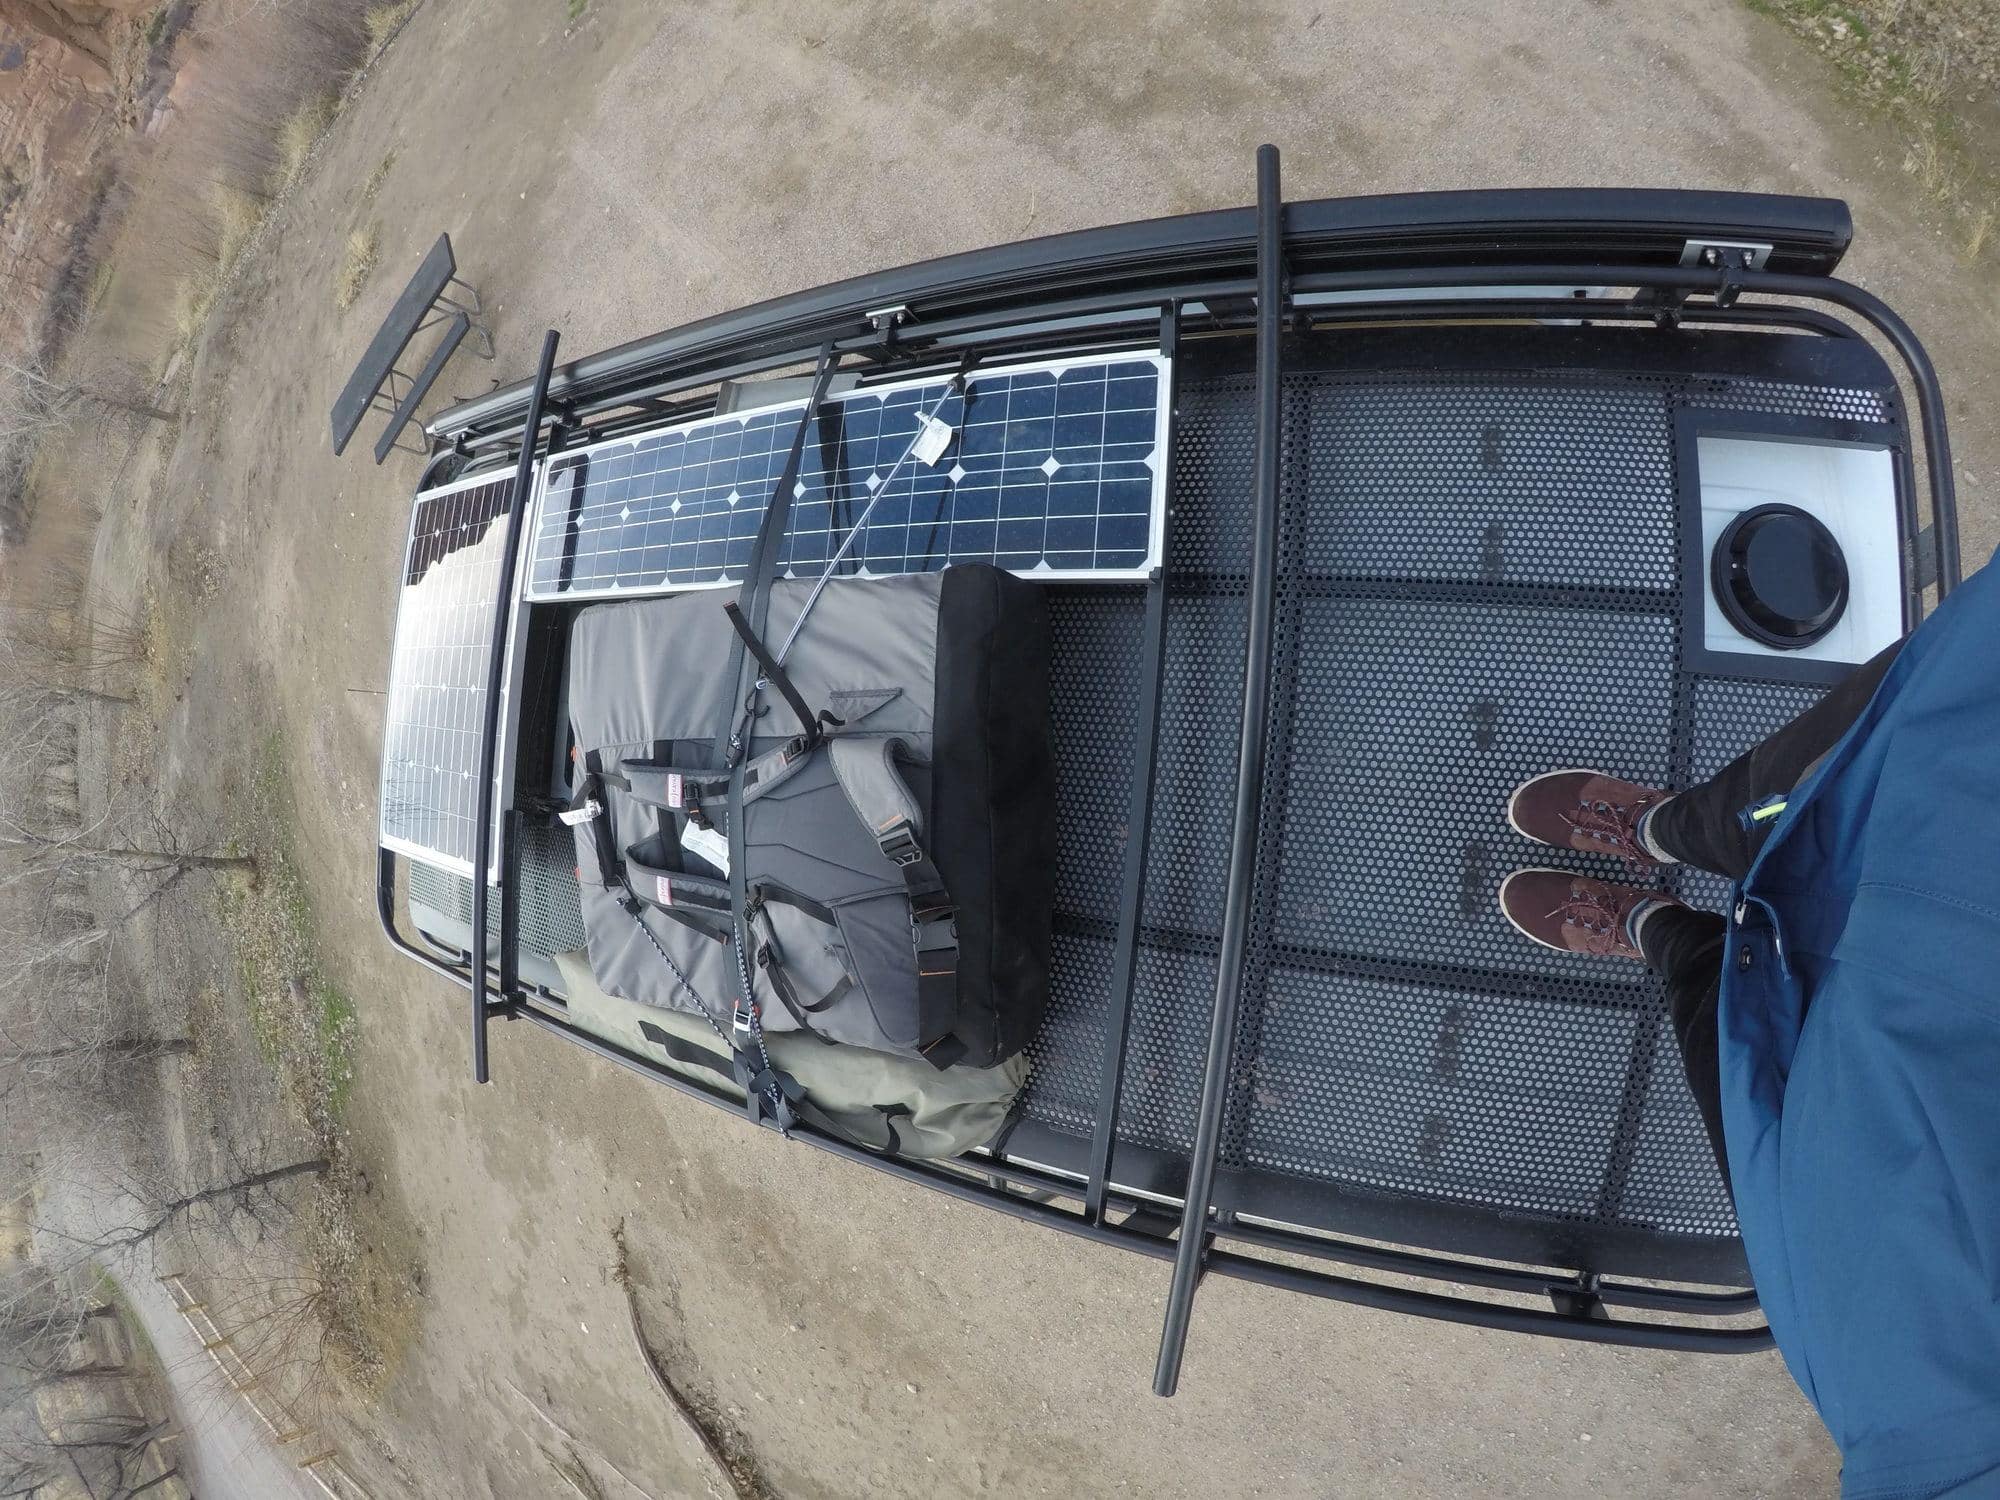
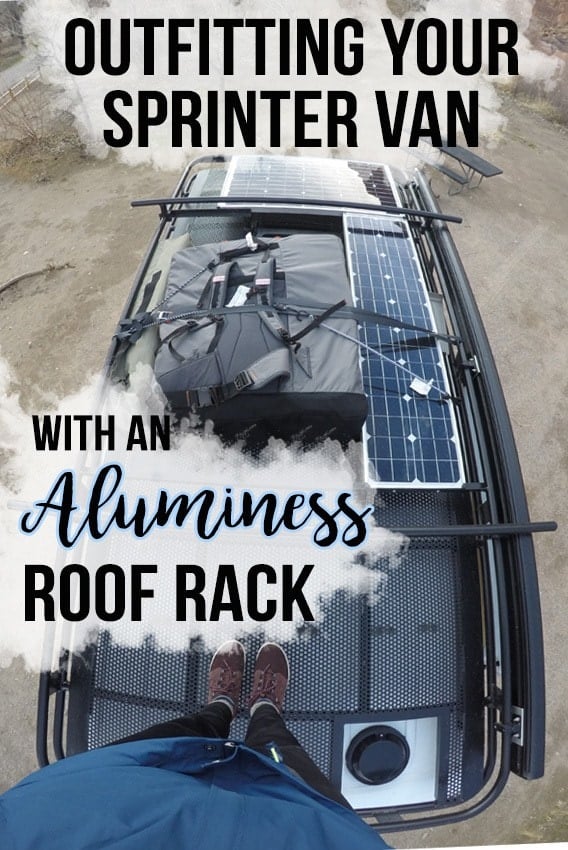
When designing your Aluminess Sprinter roof rack, you also have to choose a floor type, and they offer several different options. I chose the perforated aluminum, which is basically a solid sheet of aluminum with holes in it to make it lighter. Because this type of floor is semi-solid, it provides both storage and a rooftop deck. It doesn’t have as many tie-down options as some of the other floor types, but it is easier to walk on, more comfortable for sitting, and can even use it to easily set up my tripod. Being able to hang out on the roof was a nice bonus, and so far, I’m really happy with this choice. My entire roof rack weights about 125 pounds.

Another really cool thing about the Aluminess roof racks is that you can mount solar panels directly to the rack avoiding the need to drill a bunch of holes in your roof. If you’ve watched any of my YouTube videos, I talk about the fact that my builder drilled 30 large holes in my roof to mount my original solar panels to the roof (don’t do this!). Along with all of the holes, the bigger problem was that the solar panels he chose were so large in dimensions they extended over the rails making it impossible for me to install a roof rack (don’t do this either!). Prior to getting my Aluminess rack installed, I had to take the 2 old panels off and seal all of the holes. Then on my install date at the Aluminess factory, I brought my 2 new Zamp solar panels with me, and Aluminess mounted them directly on the rack.
The only thing I’d consider changing is how we mounted the solar panels. I was given the option to have them flush with the floor or to have them raised near the top of the rack. Raised would allow me to store narrow things, like skis and poles, underneath the panels in case I ran out of room up there. The problem with this is I believe it’s causing some additional wind resistance. It’s noisier in my van and since outfitting my van’s exterior, my gas mileage has gone down by about 2-3 mpg. I’m not sure if the panels were recessed if it would make a difference, but I wish this is something I would have considered before finalizing my plan.
Aluminess Rear Bumper Swing Arms with Spare Tire Rack & Deluxe Storage Box
When I installed my air and water heater a few months ago, I didn’t have anywhere to put it, so I mounted it below the van in the spare tire spot. This meant I needed to find a new place to put my spare tire. Originally I thought I could put it on the roof, after some conversations with my (much smarter) dad and attempting to pick up the spare tire, I realized this was not a good idea. With that out of the question, the rear door remained my only logical option. In order to mount the spare tire on the back door, Aluminess makes a rear bumper to replace the factory bumper. On that new bumper, you can install a set of swing arms with whatever accessories you want. The advantage of the swing arms is that when you want to open the rear doors, you just swing the accessories out to the side and you can use your rear doors like normal.
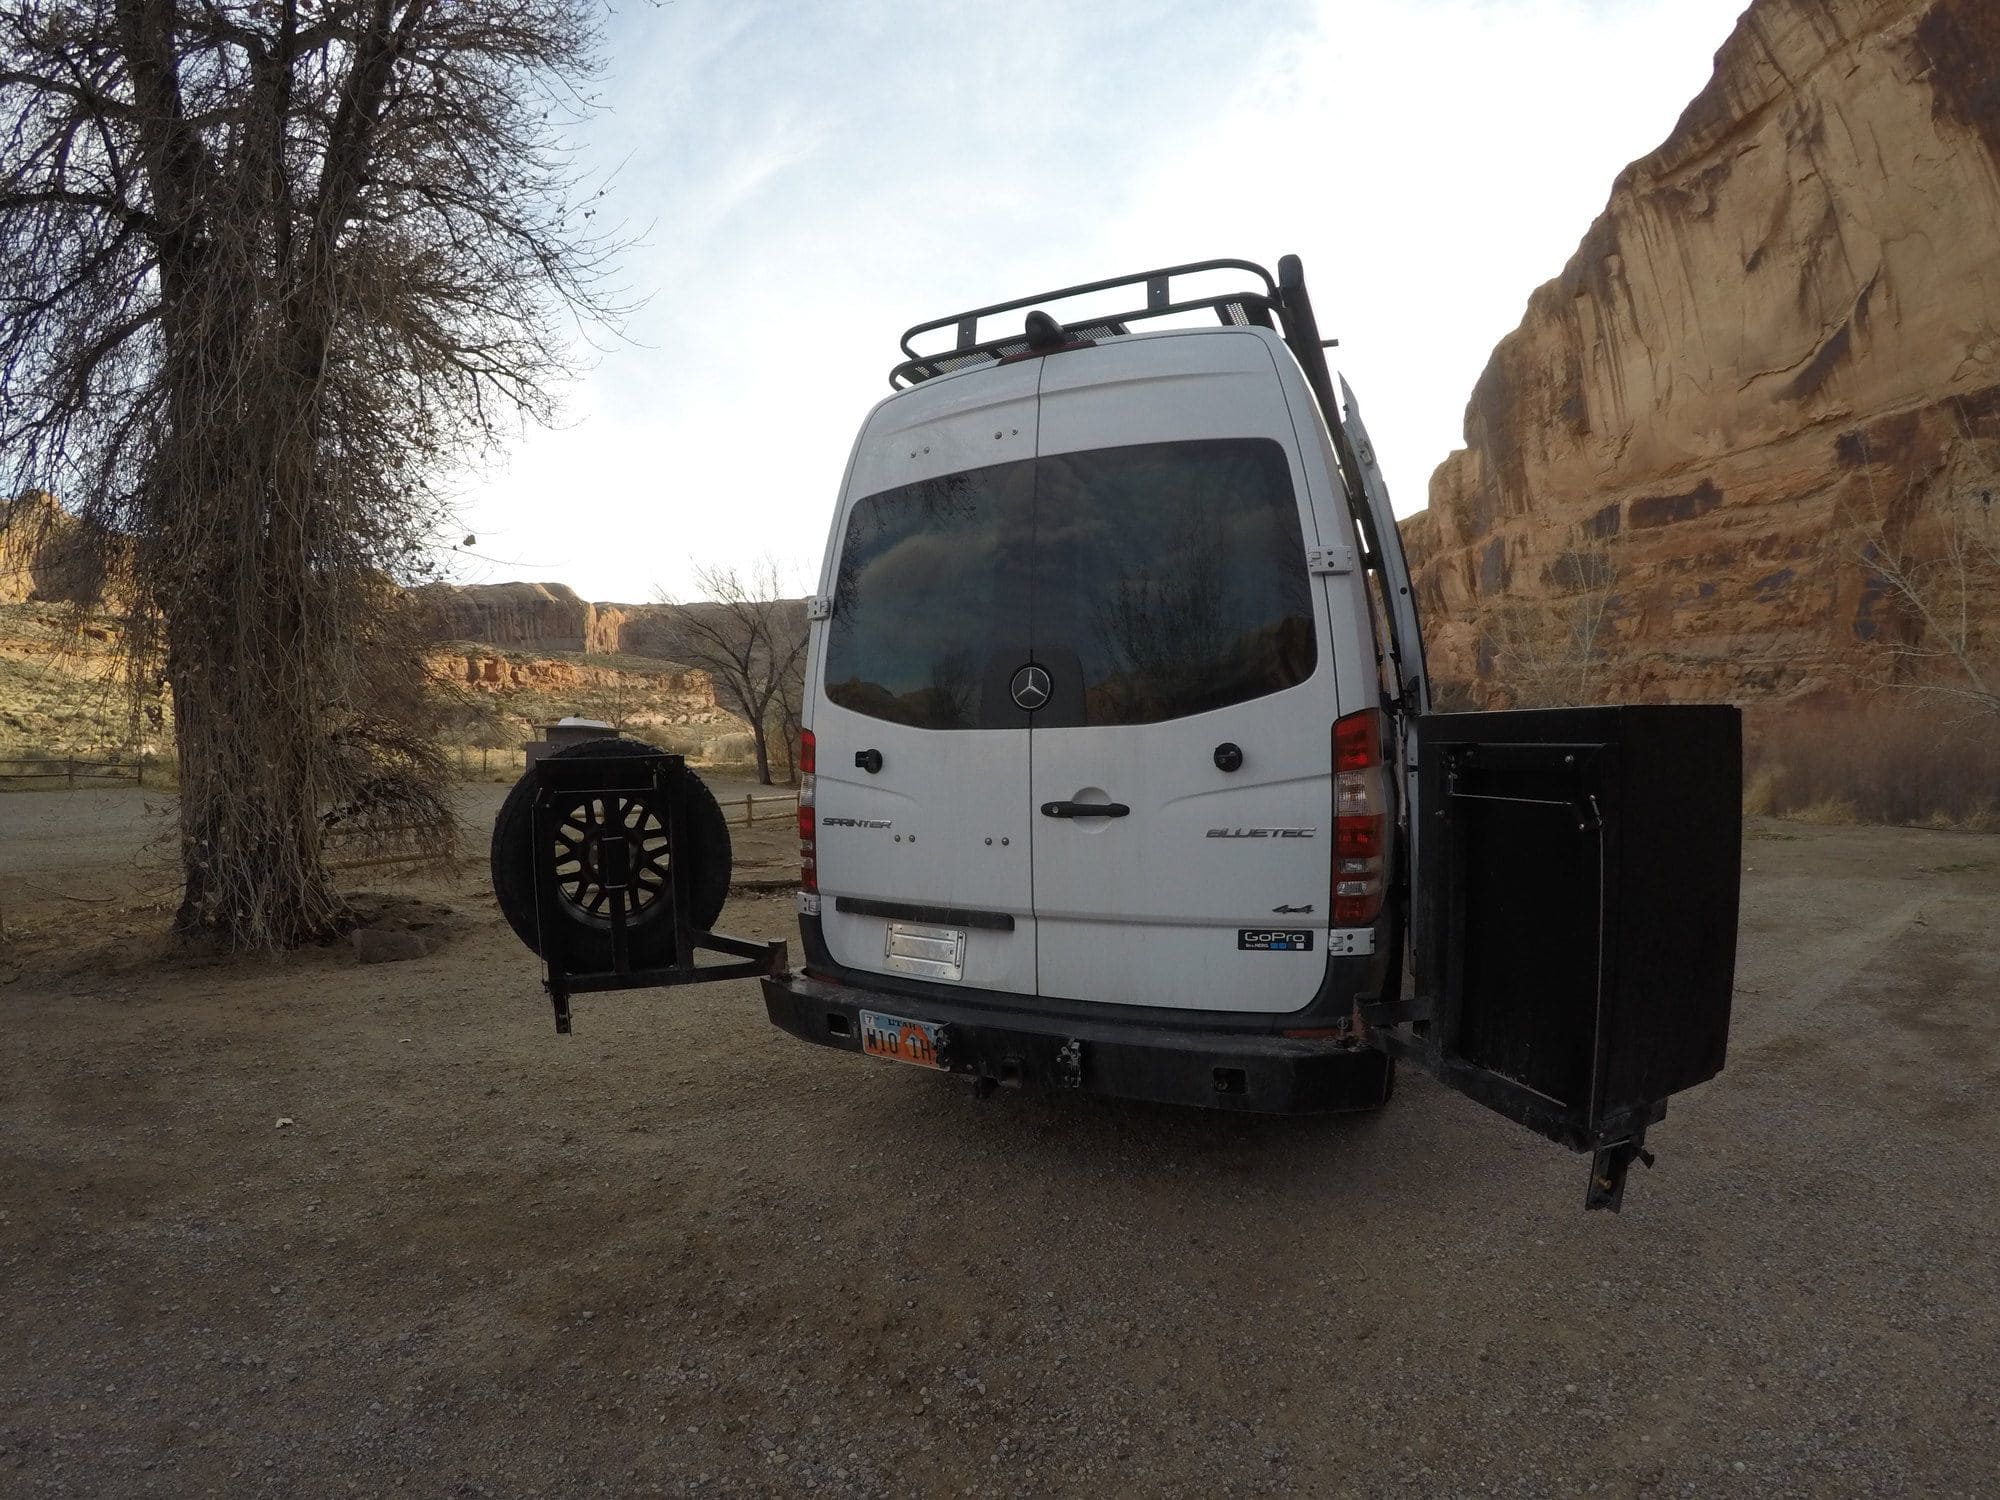
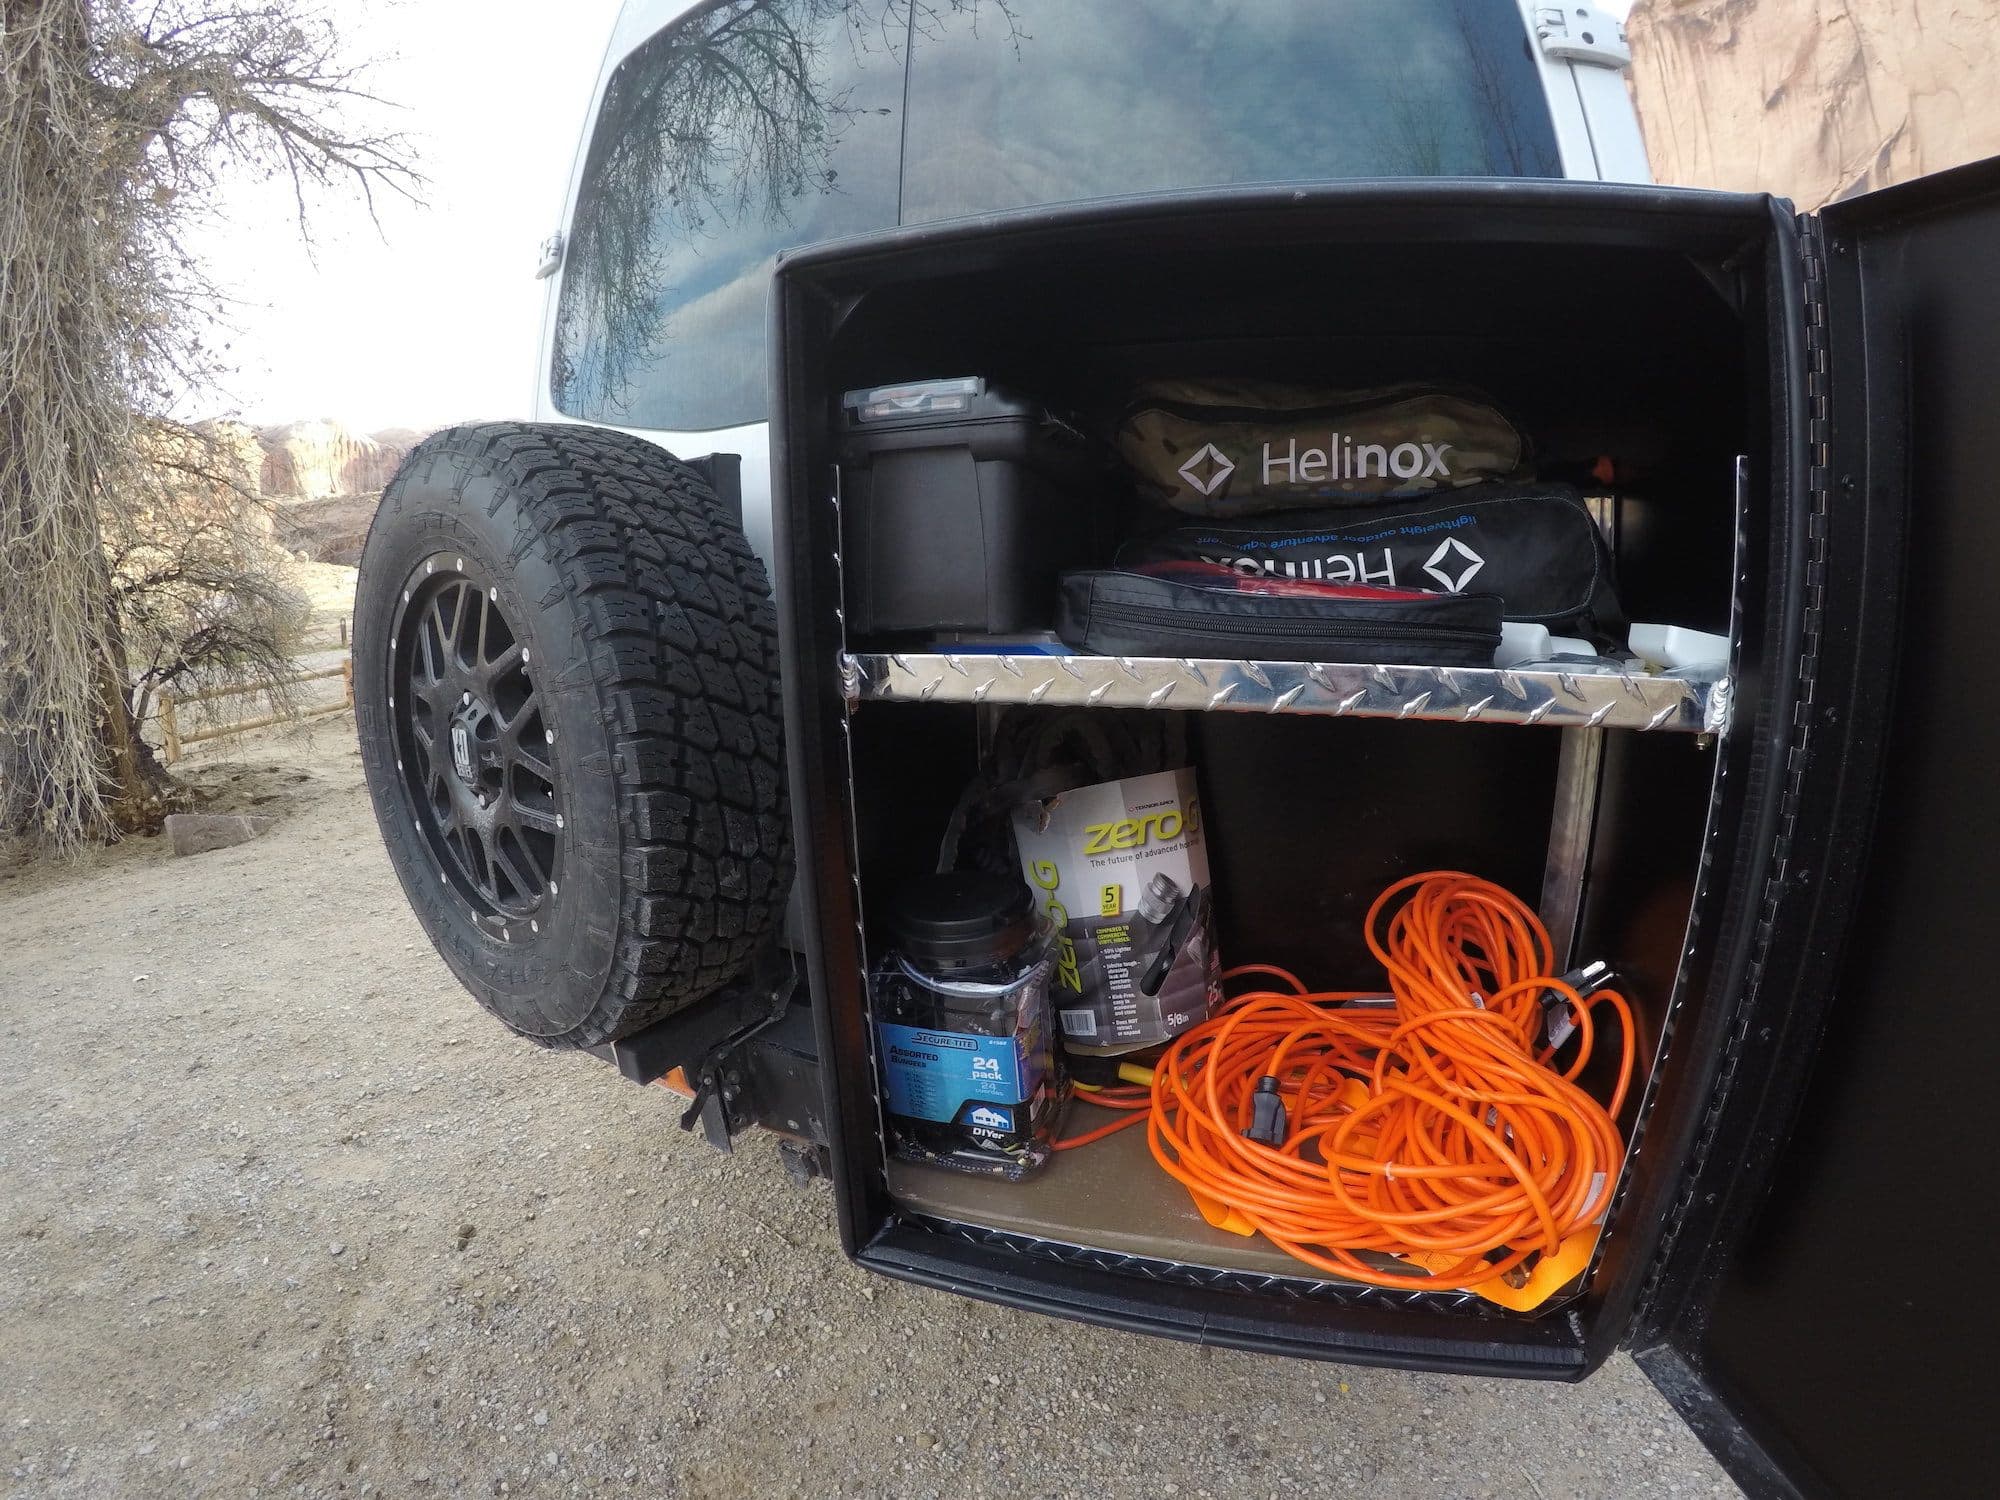
I chose to have my spare tire mounted on the driver’s rear door, and one of their deluxe storage boxes installed on the passenger rear door. The deluxe storage box is the bigger of the two storage boxes Aluminess makes and is big enough to store all of the essentials that I need quick access to – like an extension cord, hose, tool box, camp chairs, bungee cords, wood, etc. The box is also big enough to store a small portable grill and any extra fluids I might need to carry for my Sprinter. This box has freed up a lot of room in the van by allowing me to store things I use outside, outside. The box and spare tire rack do add some length to the van. My van has the factory backup camera, and when I look at that, it’s still very clear how much room I have when I’m backing up.
The spare tire rack also makes it easier in the case that I ever have to swap out my tire, since getting it out from its original mounting position under the van is not easy.
When the swing arms are open, there is a pin that you use to make sure the box and spare tire rack are locked into place and can’t be pushed around by wind.
My only gripe about the swing arms is that they can been a little bit tough to open when dust and grit gets in the levers. Another thing to be aware of is that with the swing arms you can’t fully open your doors all the way around to meet the side of your van. The furthest they will open with the swing arms in 90 degrees.
Aluminess Sprinter Van Ladder
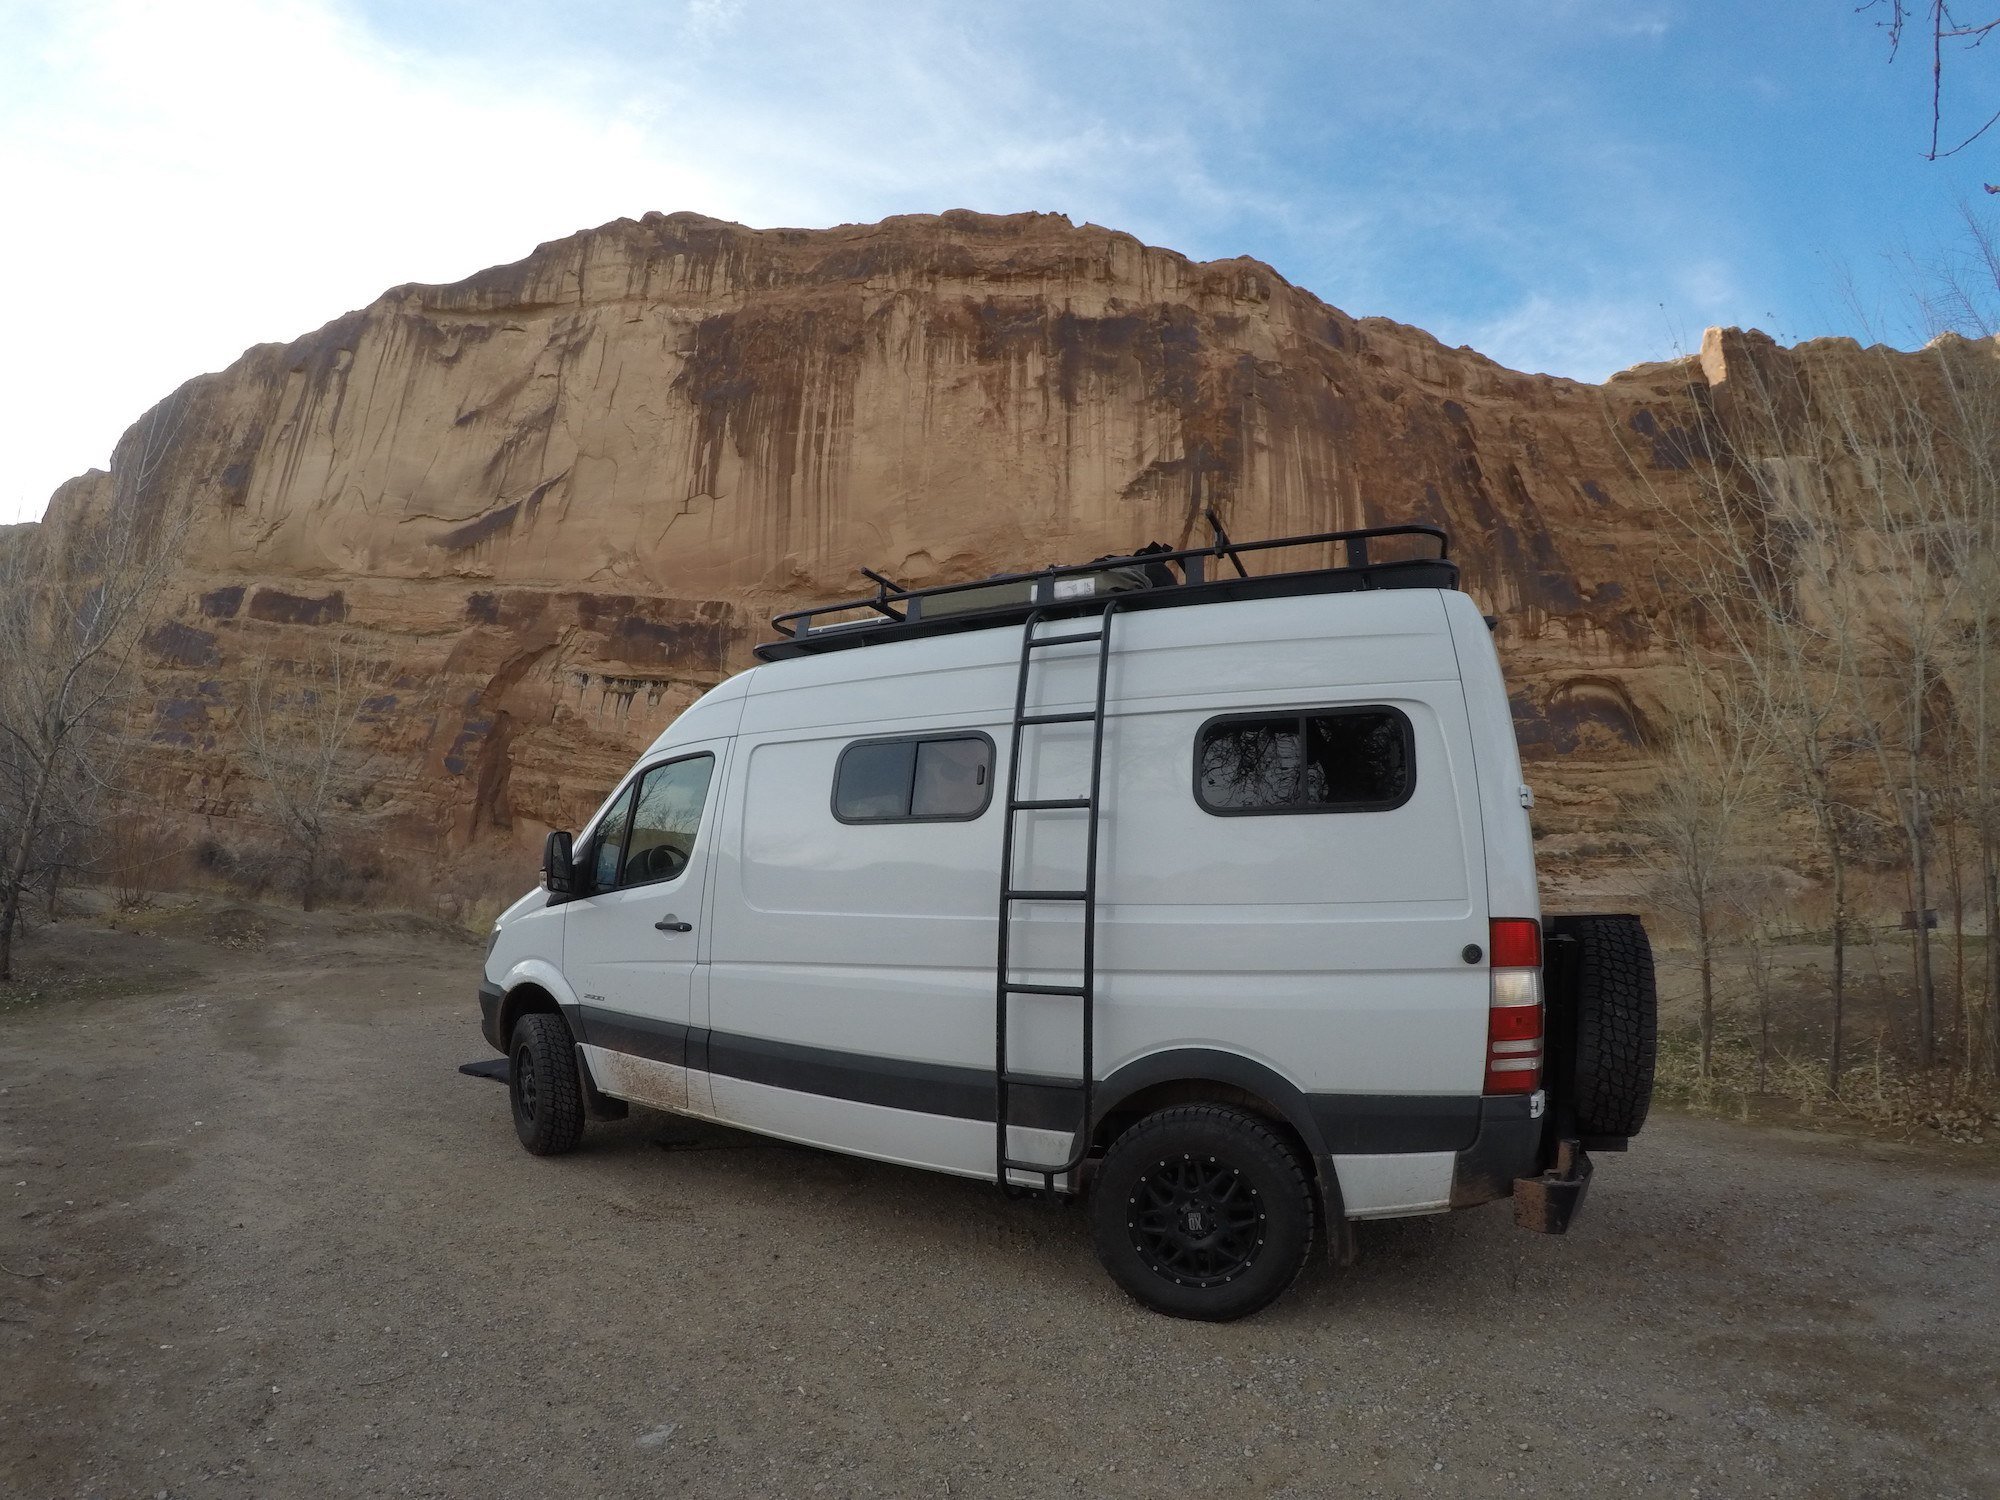
If you want to be able to access the roof rack you’ll need a ladder. Originally, my conversion company installed a ladder on the rear door, but every time I climbed it, I felt the door indenting. I’m not sure if it was poor installation, a crappy ladder, or if the rear door just wasn’t strong enough, but seemed like it needed fixing. So I removed the ladder on the back for that reason, as well as to make room for the spare tire on the rear bumper. Aluminess typically installs their ladders on the driver’s side. It’s a low profile ladder and hooks right into the rail, which means you can have a ladder even if you don’t want to install a full roof rack.
The ladder curves at the top and is easy to get your legs up and over. The only change I’ve made to my ladder is I put some grip tape on each step, which Kenny recommended. In wet conditions or with muddy shoes, it seemed like the ladder could get really slippery, and the grip tape helps provide more solid footing as you are making your way up and down.
For More Information on Aluminess
Overall I’m very happy with the additional storage that the Aluminess rack and storage box have provided in my Sprinter Van. As I mentioned, the only downside I’ve experienced is a decrease in my gas efficiency. That’s been a bummer, and I may consider remounting the solar panels so they are more flush with the rack this summer. I’ll also say that Aluminess gear is pricey. If you are a new Sprinter owner, I recommend that before you make the investment, use your van for a while to see what you really need/want to have with you on the road. That will help you determine whether or not the expense is worth it.
For more information on Aluminess, visit their website. If you have questions about my Aluminess system or need recommendations for outfitting your Sprinter Van, leave a comment below!
GOT QUESTIONS ABOUT SPRINTER VAN LIFE OR ALUMINESS GEAR? LEAVE A COMMENT BELOW.

Nice review. Helpful!
Cool add on’s!
Thanks for posting this…have been looking for a way to haul 2 kayaks – think Aluminess fits my needs!
Worthy addition to your Sprinter! As far as the increased drag hurting your fuel economy, rather than re-mount your solar panels and lose your space underneath them, consider a deflector of some sort at the front edge of your roof rack to deflect the air up and over your rack. You commonly see these on Yakima and Thule racks:
https://www.google.com/search?q=roof+rack+air+deflector&rls=com.microsoft:en-US:IE-Address&source=lnms&tbm=isch&sa=X&ved=0ahUKEwjWiqeY3YjTAhWCgFQKHQ5RCFsQ_AUICSgC&biw=1117&bih=846#spf=1
I’m sure Aluminess can fab one up, or an aftermarket one fitted quite nicely. Might not return your mileage to pre-rack values, but it will probably be better enough to make it worth doing.
I’m not clear on why you need a deflector. You want air under the solar panels for cooling, whether driving or parked, so why stop/deflect it?
the ladder on the side is a mistake. re-mount on the back , and pick up 2 mpg
This looks great! Do you have any photos of the awning in action? I’d love to see how it looks, and I’m also very curious about how it’s supported.
The awning is supported by two metal legs that extend to the ground. Now that I’ve had a chance to use it, I like the awning alot!
Hi there, looks great. Would it be possible to get a couple details on your awning setup?
Hey Zach, the awning on Kristen’s van is a Fiama and she likes it.
Can you provide the Fiamma model number. I’m interested to see it in more detail.
Can you provide the Fiamma model number? I’m interested in viewing it more closely.
Hey, thinking about a sprinter purchase and like the tire wheel combo you have. What tire and wheel is that, what size, and do they fit without issue? Have you ever looked into going a bit bigger? Thanks
How long did assembly of the roof rack take?
Aluminess installed it. It took 1 day but they have a waitlist so definitely reach out ASAP. I believe you can install it yourself but I imagine it’s not the easiest task.
Nice. One question: where do you store your e-bikes?
What did you use for your walls? Where did you buy them,or who made them.
Best Regards,
Keith
Such a great article you had posted, Kristen.i was searching to buy a roof rack for some days. Here i got this. All the product looks good.will you please suggest me, which one will be good to use from your choice? Thanks in advance.. 🙂