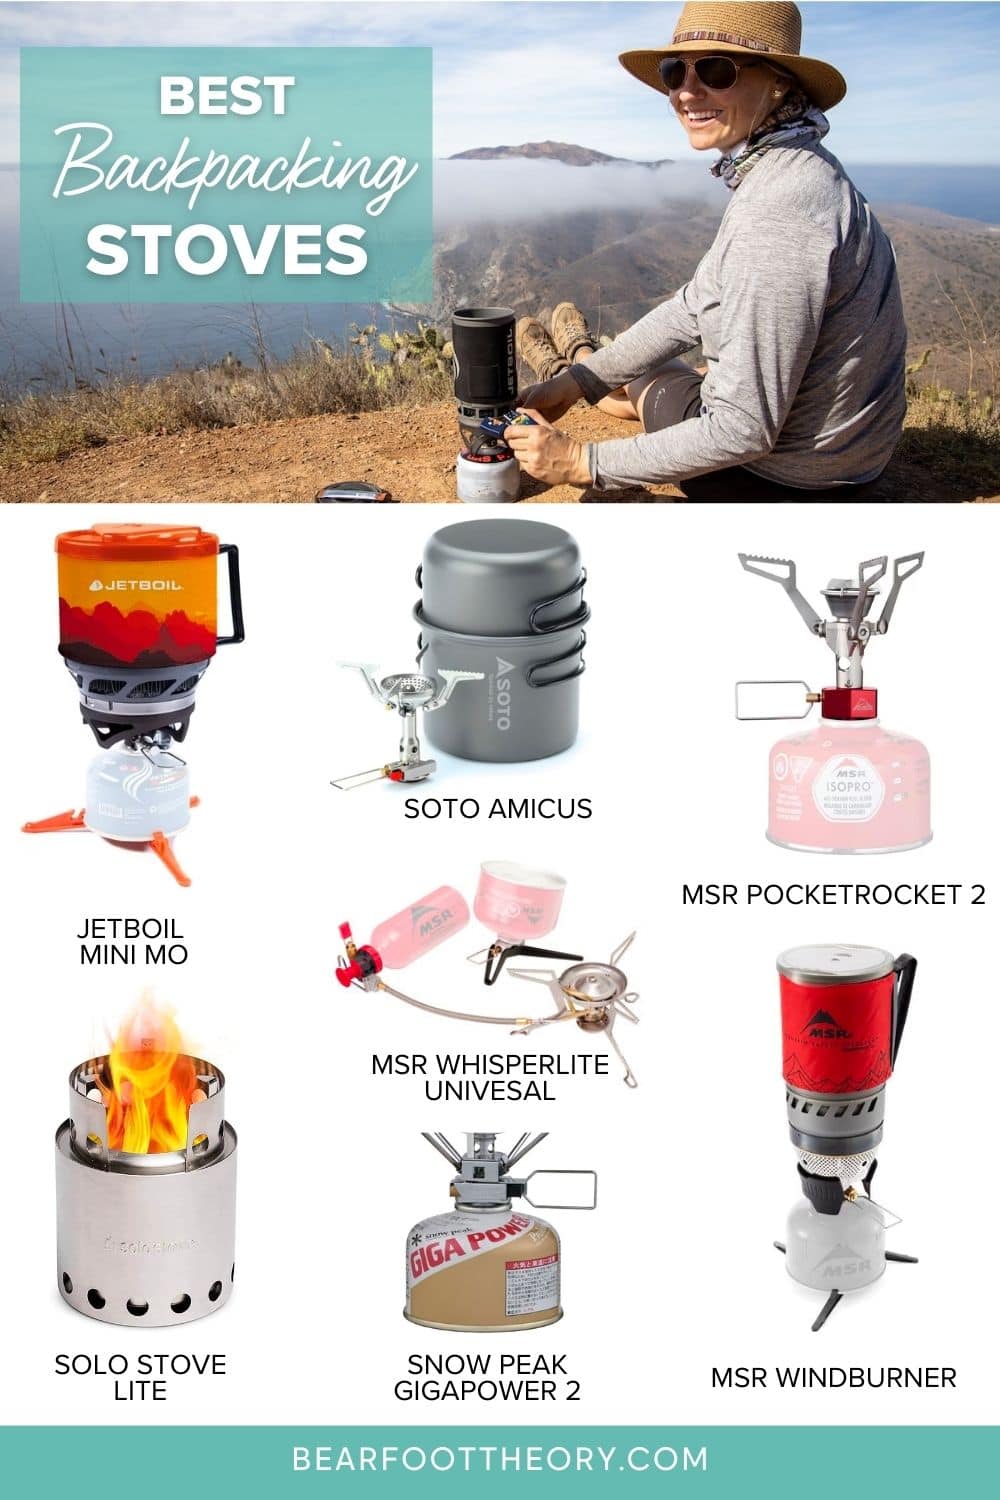
Best Backpacking Stoves of 2024
Check out the best lightweight backpacking stoves and learn the pros and cons of canister, liquid fuel, and alternative fuel options.
A good, lightweight backpacking stove is an essential piece of gear for any backpacking trip. After a long day on the trail, there’s nothing like chowing down on a hot meal. Plus, a warm cup of coffee or tea is the best way to start the day on chilly camp mornings.
While some people can live off bars and prepackaged ready-to-eat meals on backpacking trips, that’s not us. We want to eat well when we’re backpacking and if you’re here, chances are you do too.
If you’re looking for the right backpacking stove for your backcountry camping and hiking adventures, we’ve got you covered with this roundup of the best backpacking stoves. We also share the differences in the types of backpacking stoves available from propane to gas and liquid fuel as well as important factors to consider when selecting a backpacking stove.
Best Backpacking Stoves At A Glance
- Best All-In-One Backpacking Stove: JetBoil MiniMo
- Most Lightweight Backpacking Stove: MSR PocketRocket 2
- Best Budget Canister Backpacking Stove: Snow Peak GigaPower 2.0
- Best Backpacking Stove for Windy Conditions: MSR WindBurner
- Best Budget All-In-One Stove & Cookset: Soto Amicus Stove Cookset Combo
- Best Liquid Fuel Backpacking Stove: MSR WhisperLite Universal
- Best Alternative-Fuel Backpacking Stove: Solo Stove Lite
JetBoil MiniMo Backpacking Stove
Best All-In-One Backpacking Stove
- Great for: people who want a full cook set, backpackers who mostly boil water for meals vs. cook DIY meals
- What we like: fast, easy, convenient, don’t have to buy a separate pot, good simmer control
- What we don’t like: a little bulky vs. other backpacking stove setups
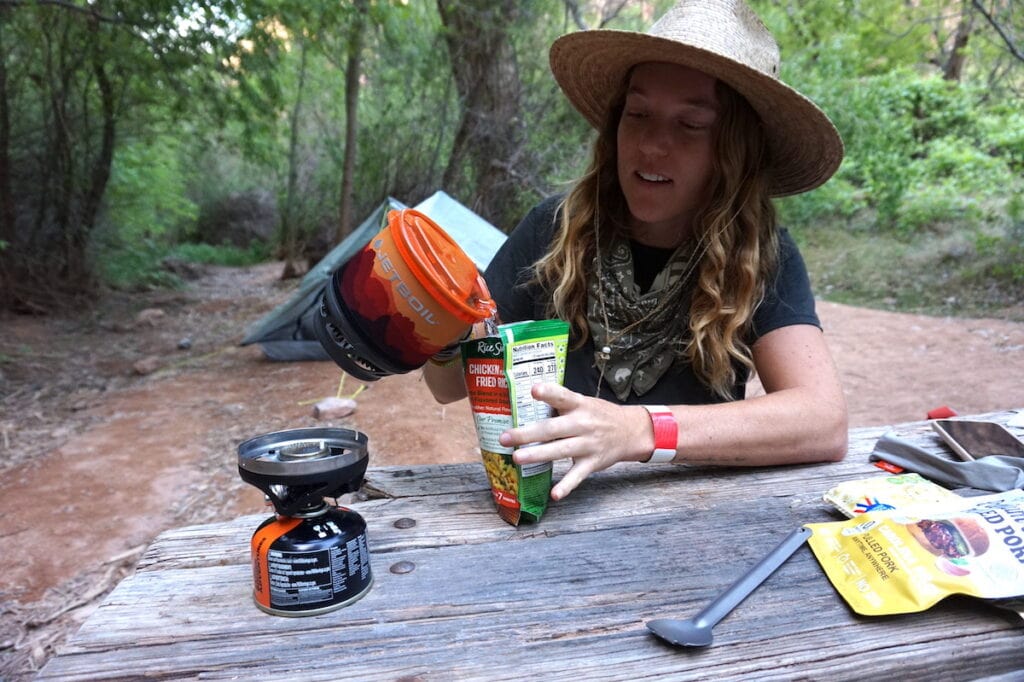
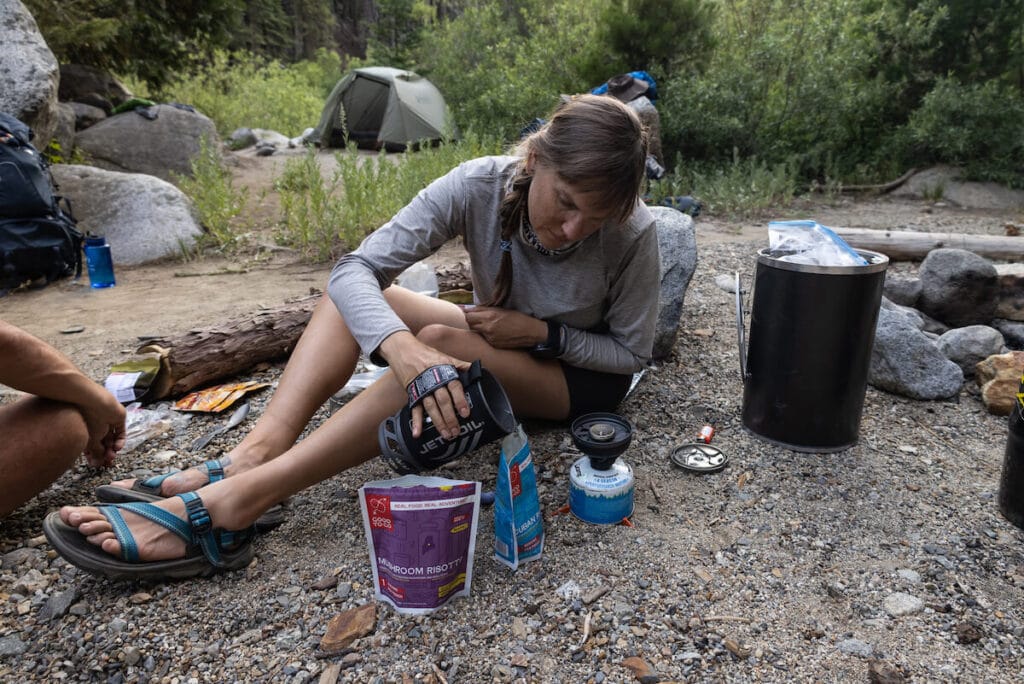
If you’ve spent any time backpacking, you’ve likely come across someone using a JetBoil to boil water for backpacking meals, coffee, and more. We’re big fans of JetBoil and our top choice for backpackers is the JetBoil MiniMo.
It comes with a paired cooking pot so you don’t have to worry about selecting a compatible cooking container. The MiniMo also has better simmer control than some of the other canister backpacking stoves, so you can boil water as well as make other simple meals without burning the bottom.
Another advantage of the MiniMo is its user-friendly design. The stove has a built-in piezo igniter, which makes it easy to start without the need for matches or a lighter. The stove’s pot is also designed with a convenient pour spout and a built-in strainer, making it easy to cook and serve meals with minimal mess.
BFT team member Courtney uses the MiniMo daily in her camper van to boil water for tea and also on backpacking trips. As a solo van lifer and camper, it’s the perfect size for one.
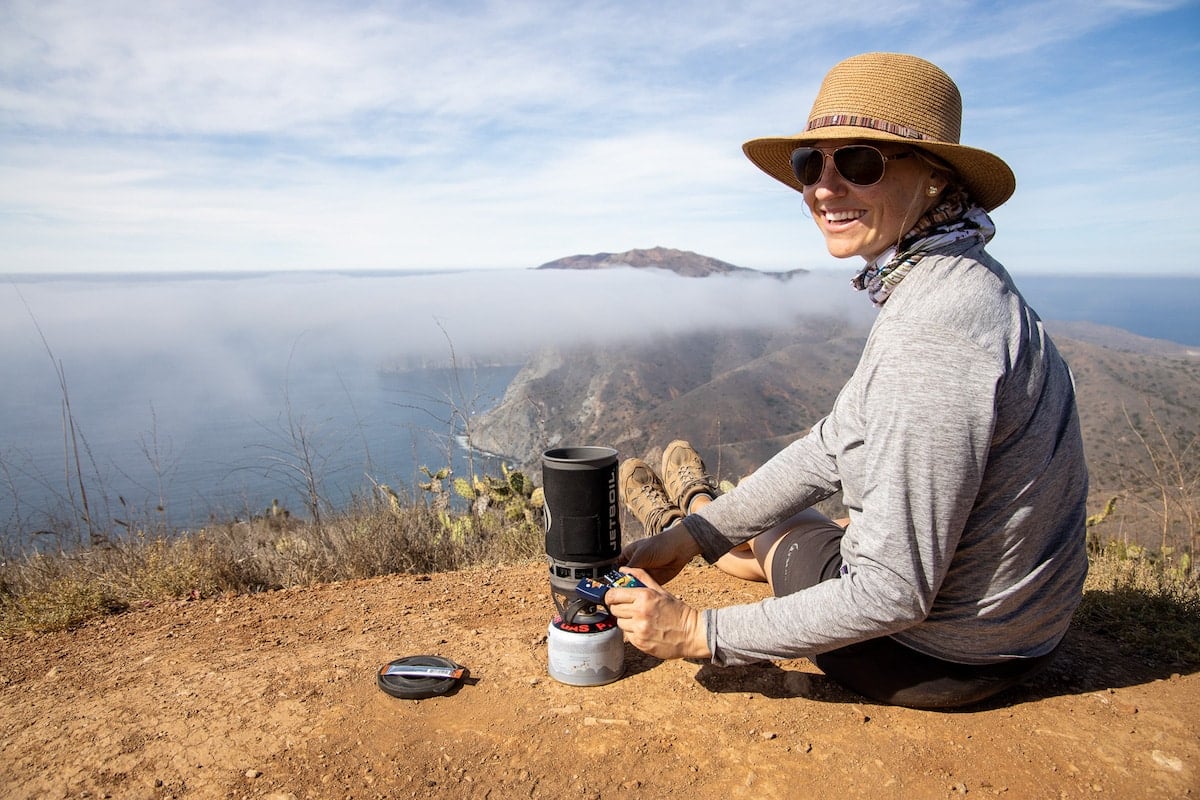
If you only need to boil water, the Jetboil Flash Cooking System (featured in the photo at the top of this blog post) is a more fuel-efficient option as it boils water a little quicker than the MiniMo. The Flash holds the same amount of water as the MiniMo and is slightly lighter but it’s also slightly bulkier and doesn’t have a simmer capability.
MSR PocketRocket 2
Most Lightweight Backpacking Stove
- Great for: ultralight backpacking
- What we like: very compact, durable, easy to setup & use
- What we don’t like: doesn’t perform well in windy conditions, need to purchase a separate pot
The MSR PocketRocket 2 is one of the most compact and easiest remote canister stoves to use on the market. Weighing in at just 2.6 ounces, it’s also one of the lightest backpacking stoves available, making it a popular choice for ultralight backpackers who are looking to minimize the weight of their gear.
Despite its small size, the PocketRocket 2 is incredibly efficient and can boil a liter of water in just 3.5 minutes. The stove also has precise flame control, allowing you to adjust the heat to cook your meals to perfection.
This version is a well-loved upgrade from the original PocketRocket and has been used by backpackers for many years. While it doesn’t include a full cook set, it pairs well with this GSI 2-person backpacking cookset and there is an all-in-one MSR PocketRocket 2 Mini Stove Kit available.
Snow Peak GigaPower 2.0 Backpacking Stove
Best Budget Canister Backpacking Stove
- Great for: lightweight backpacking
- What we like: auto ignition, easy to set up & use, durable
- What we don’t like: doesn’t perform well in windy conditions, need to purchase a separate pot
The Snow Peak GigaPower 2.0 Stove is an ultralight backpacking stove with a fully adjustable burner that can be used for simmering, not just boiling water for freeze-dried foods. It has a built-in Piezo igniter that sparks once the gas is turned on, which means you don’t need a lighter to start (although we always recommend bringing one along just in case).
What sets the GigaPower apart from the MSR PocketRocket is that the GigaPower has 4 foldable legs instead of the PocketRocket’s 3, which provides added stability and support for larger pots and pans. The GigaPower has also an auto-ignition button which means you don’t need to worry about digging out a lighter.
MSR WindBurner Backpacking Stove System
Best Backpacking Stove for Windy Conditions
- Great for: people who want a full cook set, backpackers who mostly boil water for meals vs. cook DIY meals, windy trips
- What we like: works well even in windy conditions, great fuel efficiency, don’t have to buy a separate pot
- What we don’t like: heaviest stove on our list, bulkier than other backpacking stove setups
The MSR WindBurner Backpacking Stove System is an excellent choice for backpacking because it is designed to provide maximum efficiency in windy conditions. The stove’s enclosed design shields the flame from the wind, allowing it to boil water quickly and efficiently, even in strong winds. This makes it ideal for backpackers who often find themselves cooking in exposed, windy locations.
Additionally, the WindBurner system includes a pot with a built-in heat exchanger that maximizes fuel efficiency and reduces boil time. The pot also has a secure locking mechanism that prevents spills and makes it easy to pack.
Soto Amicus Stove Cookset Combo
Best Budget All-In-One Stove & Cookset
- Great for: beginner backpackers, budget-conscious shoppers
- What we like: very light & compact, comes with cooking pot, durable set for a low price
- What we don’t like: pot could rust over time
The Soto Amicus Stove Cookset Combo is a compact and lightweight stove that is incredibly efficient, making it the perfect choice for extended backpacking trips where every ounce of weight matters. It’s easy to set up and use, and the flame control is incredibly precise, allowing you to cook your meals to perfection.
The included pots are also a great bonus, providing everything you need to cook and eat a hot meal on the trail. There is a small pot, which doubles as a cooking lid for the large pot, and everything nests together. Whether you’re a seasoned backpacker or just starting out, this is a great choice for anyone looking for a reliable and efficient budget backpacking stove.
MSR Whisper Lite Universal Backpacking Stove
Best Liquid Fuel Backpacking Stove
- Great for: backpacking trips that require flying (can fly with empty liquid fuel bottle)
- What we like: compatible with both canisters and liquid fuel, durable
- What we don’t like: one of the heavier backpacking stoves on our list
The MSR Whisper Lite Universal Backpacking Stove has been my go-to backpacking stove for years because it’s highly versatile and reliable. This stove can burn a wide range of fuels, including canister or liquid, making it a great choice for trips where you need to fly to your destination since you can’t fly with propane canisters. It’s one of the best backpacking stoves for extended trips where fuel resupply may be difficult as well.
This stove has to be primed before each use which requires a few steps, but it’s pretty simple once you get the hang of it, and the flame can be turned down to a simmer so it’s great for cooking a variety of meals, not just for boiling water to rehydrate prepared backpacking food like integrated canister stoves.
Solo Stove Lite Backpacking Stove
Best Alternative-Fuel Backpacking Stove
- Great for: ultralight backpacking (no fuel canisters required), eco-friendly backpacking
- What we like: don’t need to carry fuel, can function as a windscreen/pot support for an alcohol stove
- What we don’t like: can be difficult to use wood as fuel, can’t use in backcountry areas with burn bans, can’t control flame, slow to boil water
With the Solo Stove Lite, you can burn either wood or use an alcohol burner attachment to burn denatured alcohol. The basic operation is you stick wood and twigs in the stove, the stove sucks air in from the bottom and it results in a flame.
This is a good option for people who want to cut weight – no need to worry about carrying fuel canisters, but it does have a slow boil time and requires you to gather sticks and kindling to get the flame going and keep it going. Another thing to keep in mind is that wood-burning stoves cannot be used when fire restrictions or burn bans are in effect.
Backpacking Stove Accessories
To complete your backpacking kitchen setup, you’ll need a pot (if you’re not using a Jetboil, MSR Windburner, or Soto Amicus) and a few other stove accessories. Here are some of our favorites:
MSR Ceramic Solo Pot
Shop at:
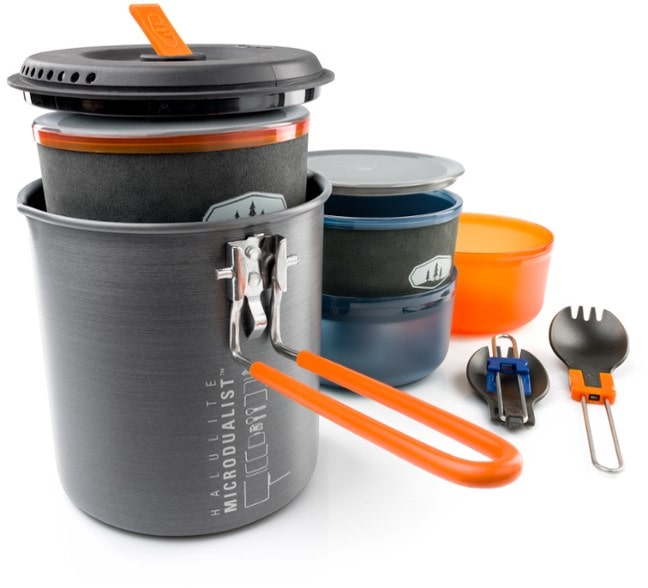
GSI Outdoors Halulite Microdualist II Cookset
Shop at:
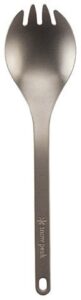
Snow Peak Titanium Spork
Shop at:
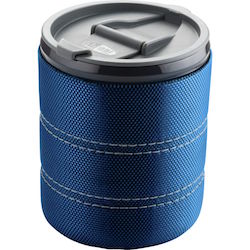
GSI Outdoors Infinity Backpacker Mug
Shop at:
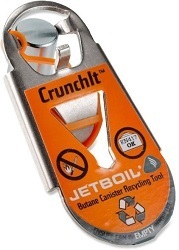
Jetboil Crunchit Recycling Tool
Shop at:
What Type of Backpacking Stove Is Right For You?
There are three main types of backpacking stove fuel: canister, liquid fuel, or alternative fuel (ex. wood). Below we break down the differences between these fuel types and the pros/cons of each.
Canister Backpacking Stoves
Canister stoves are the most popular backpacking stove because of their simple design, ease of use, and availability of fuel.
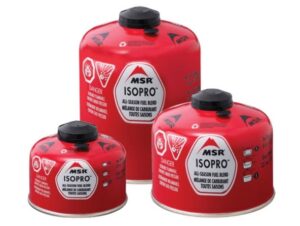
Canister stoves use closed fuel containers (called canisters) that contain pressurized isobutane and propane gases. There are two types of canister stoves, integrated canister stoves, and remote canister stoves.
Integrated canister stoves have a stove that screws directly into the canister fuel source and comes with a sealed cooking pot that pairs with it. Essentially, integrated canister stoves are a complete cooking system.
Remote canister stoves have a stove that has its own base with a fuel hose that connects to the canister. One advantage here is that you get to select your own cooking pot to use with the stove instead of having a cooking pot that pairs with the stove.
Canister stoves tend to be best for boiling water for lightweight, dehydrated backpacking meals and very simple cooking for 1-2 people.
Pros of Canister Backpacking Stoves:
- Canister stoves are easy to use and very efficient.
- The fuel canisters self-seal so you don’t need to worry about spilling fuel.
- These stoves require little maintenance.
- Canister stoves are generally smaller and more lightweight than other backpacking stoves.
Cons of Canister Backpacking Stoves:
- Fuel canisters can be expensive and it can also be difficult to know how much fuel you have left in your canister.
- Empty canisters should be disposed of properly – you will most likely need to collect and return them to a location for appropriate disposal/recycling. In some cases, canisters are difficult to recycle or can’t be recycled which can be wasteful.
- You can’t fly with fuel canisters so if traveling with a canister stove you’ll always need to identify locations that sell fuel canisters at your destination.
- Being small, these stoves often can’t accommodate a large pot.
- In wind, the flame can easily go out. You should NEVER use a windscreen around a canister stove because it can trap heat which could cause the canister to explode.
Helpful Tips on Canisters Backpacking Stoves
It can difficult to know how much gas is left in a canister. Here are two helpful tricks:
- While at home, you can use a kitchen scale to weigh your canister. This will show you how much is left compared to the original weight of the canister that is marked on the container.
- While in the backcountry, you can place a canister in water. Empty canisters will float higher than full canisters which will sink a bit. This is helpful if you’re unsure just how much you have left while on your trip. If you do this at home BEFORE leaving for the backcountry you can mark an initial water level line on the container. While on your trip you can then put the canister in water to see how much you’ve used.
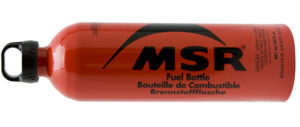
Liquid Fuel Backpacking Stoves
Liquid fuel backpacking stoves use white gas, kerosene, diesel or automotive gas instead of pressurized isobutane and propane gases. The liquid fuel canister generally connects to the stove via a hose.
Liquid stoves offer more flexibility for cooking DIY backpacking meals and for larger groups.
They’re also good for international backpacking trips or any outdoor adventures where you’re getting on a plane since you can fly with the canister empty and fill it at your destination.
Pros of Liquid Fuel Backpacking Stoves
- It’s easy to see how much fuel you have left because you can unscrew the top and look in the fuel container.
- You can refill a single bottle of fuel rather than having to dispose of/recycle used canisters and purchase new ones.
- These stoves perform well even at high elevations and in cold temperatures.
- Since these stoves are versatile and can accommodate a variety of liquid fuels, it can be easier to find usable fuel anywhere in the world.
Cons of Liquid Fuel Backpacking Stoves
- Liquid fuel stoves require more knowledge to use. You have to prime the stove by heating the fuel line so the stove is able to convert liquid fuel into gas. It’s not difficult, but you will want to do it at home first before you go out into the backcountry.
- Routine maintenance and cleaning are required as well.
- There is potential for fuel spills since the fuel containers can be opened and re-filled.
- On average, liquid fuel stoves are heavier than canister stoves.
Alternative Fuel Backpacking Stoves
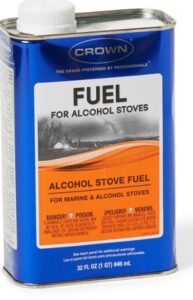
Alternative fuel stoves are continuing to evolve and in recent years seem to be getting more and more advanced. Common alternative fuel options include denatured alcohol and wood.
Pros for Denatured Alcohol Stoves
- Generally the most lightweight backpacking stove option you can find
- Denatured alcohol is very inexpensive and easy to find
- Easy to use and no maintenance is required
Cons for Denatured Alcohol Stoves
- Extra parts are critical, such as a windscreen
- Fuel spills are a possibility
- Denatured alcohol doesn’t burn as hot (in temperature) as canister fuel/white gas so it can take a significant amount of time and thus fuel for water to boil
- It’s very difficult to control the size of the flame, so it’s difficult to simmer rather than boil
Pros for Wood Burning Stoves
- Simple and lightweight – can save you on pack weight
- Some models can charge a mobile phone or other small gadget via a USB connection when burning twigs
Cons for Wood Burning Stoves
- Finding dry twigs and kindling in wet conditions can be difficult
- Use may be prohibited during a burn ban or in some places at high elevation
Factors to Consider When Choosing a Backpacking Stove
Weight
As with everything you put in your backpack, stove weight figures into that equation. You need to consider the stove weight, the fuel weight, and the weight of a pot if the backpacking stove you’re looking at doesn’t come with one. If you’re selecting a backpacking stove for a long thru-hike, you’ll want to be counting ounces as well as the space the stove and fuel will take up in your pack. If you’re just looking for a backpacking stove for an occasional 1-2 night backpacking trip, weight isn’t as big of a concern.
Efficiency
Efficiency, in our opinion, is the key factor to consider. It’s more important than weight because a more efficient stove means you’ll have to carry less fuel. Most nights in the backcountry, I need to boil water so knowing the amount of time and fuel a stove takes to bring water to a boil is vital so I can pack enough fuel.
Functionality at High Altitude & Cold Temperatures
It takes longer to boil water at higher elevations, so having a fast-boiling stove is more important if you plan to backpack at altitude. Also, some stoves, such as those that use canisters, can depressurize in cold weather making them difficult to use when temperatures drop. Various types of stoves can also be prohibited in some areas and/or when above a certain elevation. Keep these factors in mind when searching for a backpacking stove.
What About Going Backpacking Without a Stove?
If you’re just heading into the backcountry for one or two nights and don’t mind eating cold food and forgoing a hot cup of coffee in the morning, going without a backpacking stove won’t be too rough.
And, if you’re a beginner backpacker who just wants to test out the waters before committing to buying all the backpacking gear, a stove is an easy piece of gear to borrow from a friend or share with a campmate (be sure to plan ahead and ask about what fuel you need to bring!)
Wraps, sandwiches, and powdered hummus are doable for backpacking dinners, but ultimately having a nice hot meal after a full day of trekking is very satisfying. Plus, some hot tea at night before bed and a hot cup of coffee in the morning to start your day are musts on our wilderness itineraries. But it’s all a personal choice!
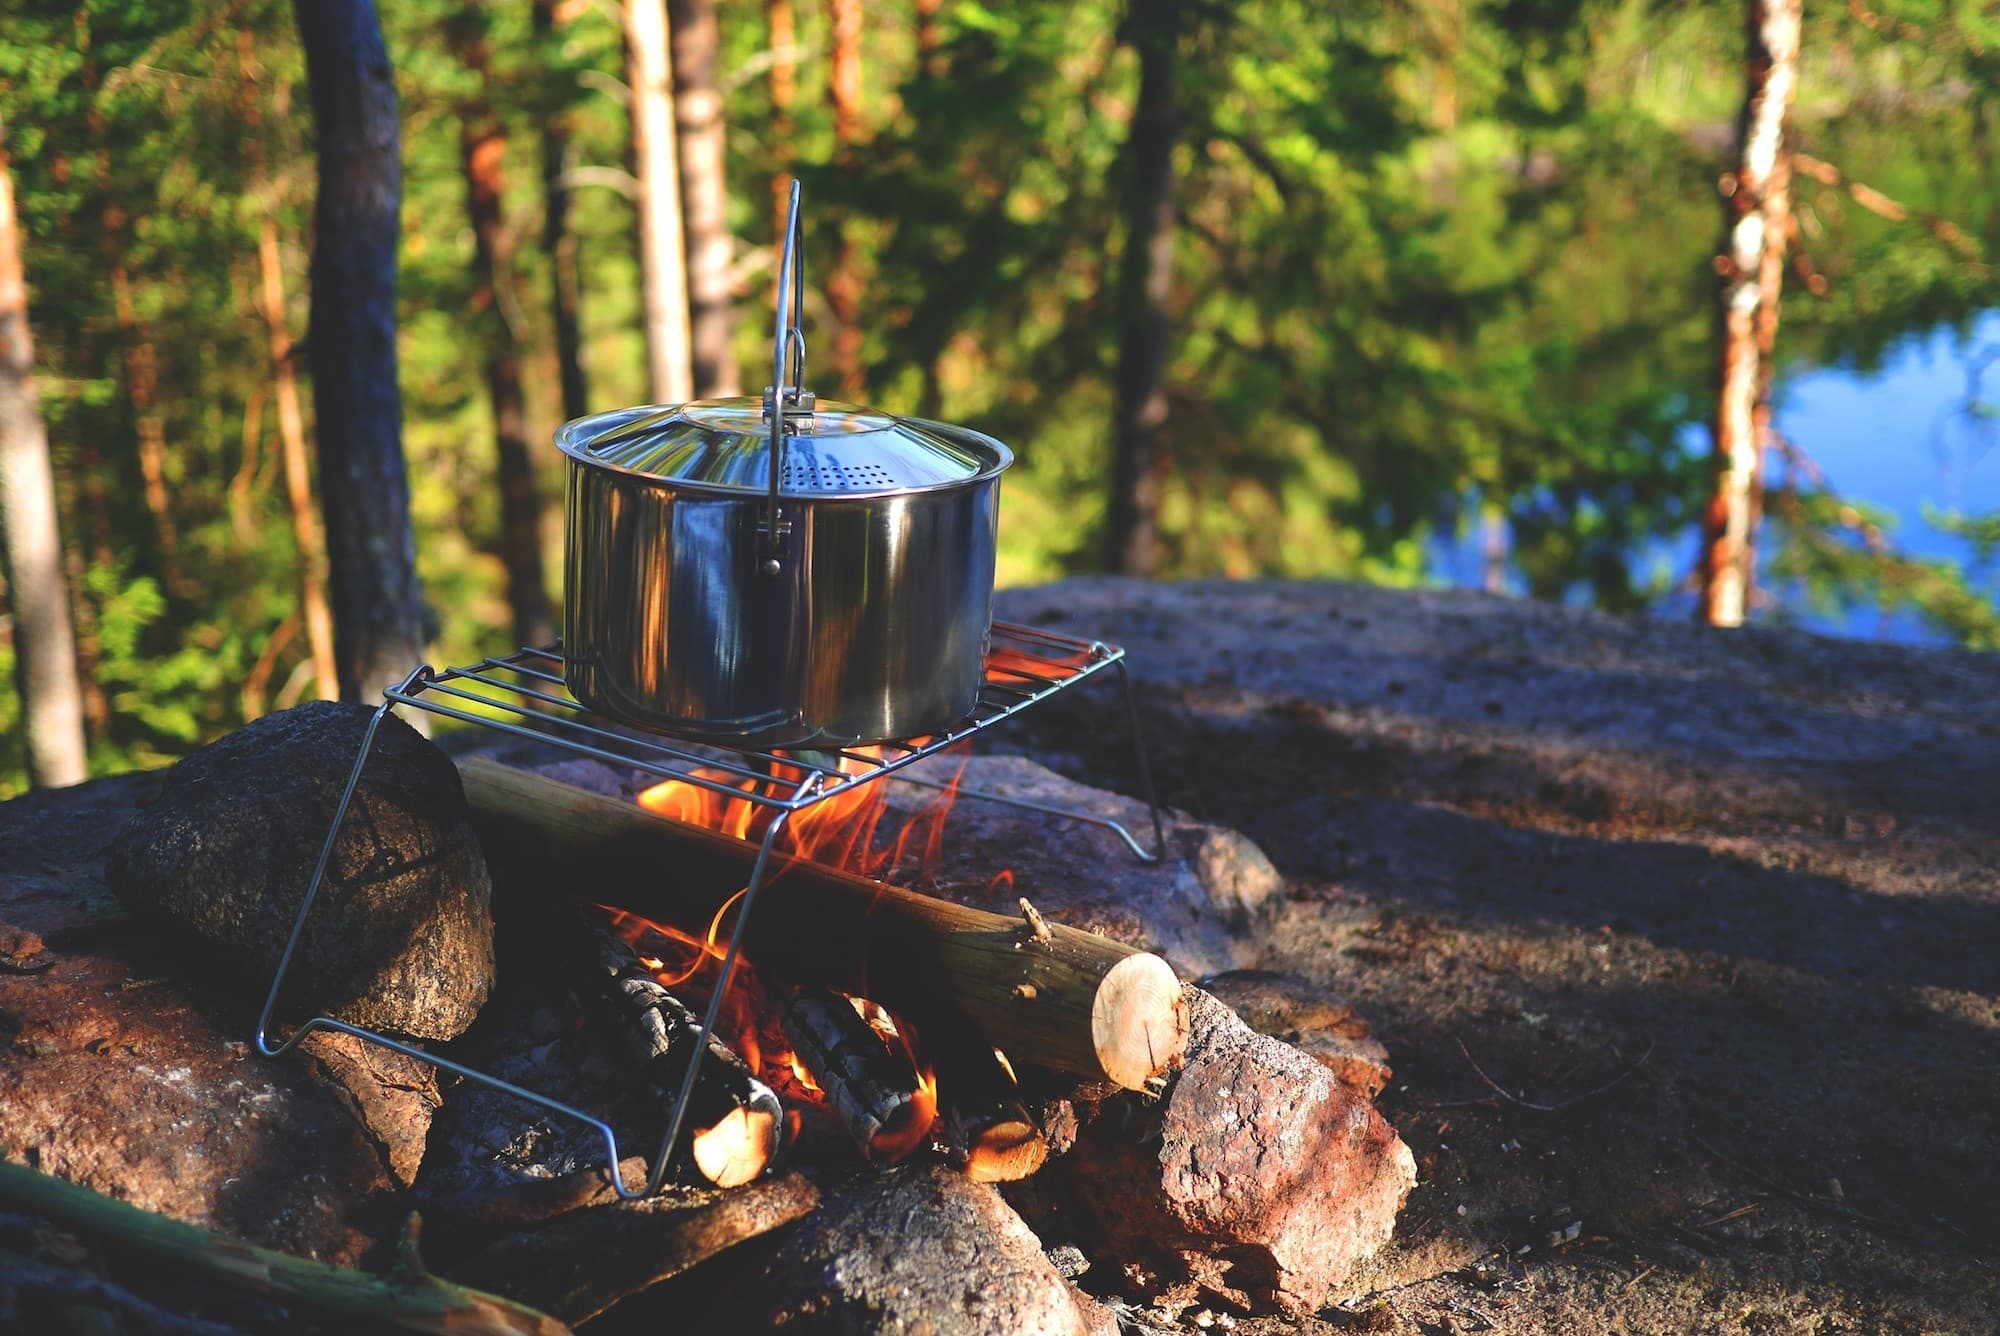
What About Cooking Over a Fire?
Cooking over a fire can be an option in areas that allow fires where fire risk is low. First, make sure the area you’re backpacking in allows fires. If you go backpacking in a fire-safe area and plan to cook this way, you’ll need a metal pot with a metal lid to keep ash out (make sure there are no plastic parts that could melt). Always look for existing backcountry campsites with fire rings, so you don’t create new scars, and remember to Leave No Trace.
Also, note that fire safety skills are extremely important here and we do not recommend cooking over a fire in dry areas, if the wind picks up, or if you are uncertain about your skills. If it ends up being windy or rainy during your trip, you may find yourself wishing you brought a backpacking stove along so keep that in mind.
READ NEXT
Looking to upgrade your backpacking gear closet? Check out our other backpacking gear round-ups:
What is your favorite backpacking stove? What tips do you have for cooking while backpacking?
Thanks for your advise. I’ve been looking for a new stove, my one has seen better days. I like the Pocket rocket 2.
Cheers!
How can people love nature and use canister stoves. The carbon footprint alone if recycling is terrible. Let along the cost game of buying more cylinders.
I learned to prime a stove when I was 6 years old. And I’ve never noticed 4 ounces. The difference between a caster stove and a fuel stove is less than the dump you take at the start of the hike.
Next thing you know we’ll have plastic tabs on tents for people who won’t learn a stopper knot.
Oh. Wait.
Remember when woodcraft was more than a debit card…
😀